Create Your First VM Instance
This tutorial guides you step by step through creating a Debian 13 VM with an additional data disk, a Cloud Init configuration, and a connection to the private Backbone network.
Objective
Create a Linux VM (Debian 13) in zone fr1-az01, pre-configured with an SSH key, with an additional 50 GB disk.
Prerequisites
- An active Cloud Temple tenant with access to the VM Instances service
- An SSH public key available
- A private Backbone or VPC network configured in your tenant
Step 1 — Open the creation wizard
From the Cloud Temple Console, navigate to Cloud Public > VM Instances.
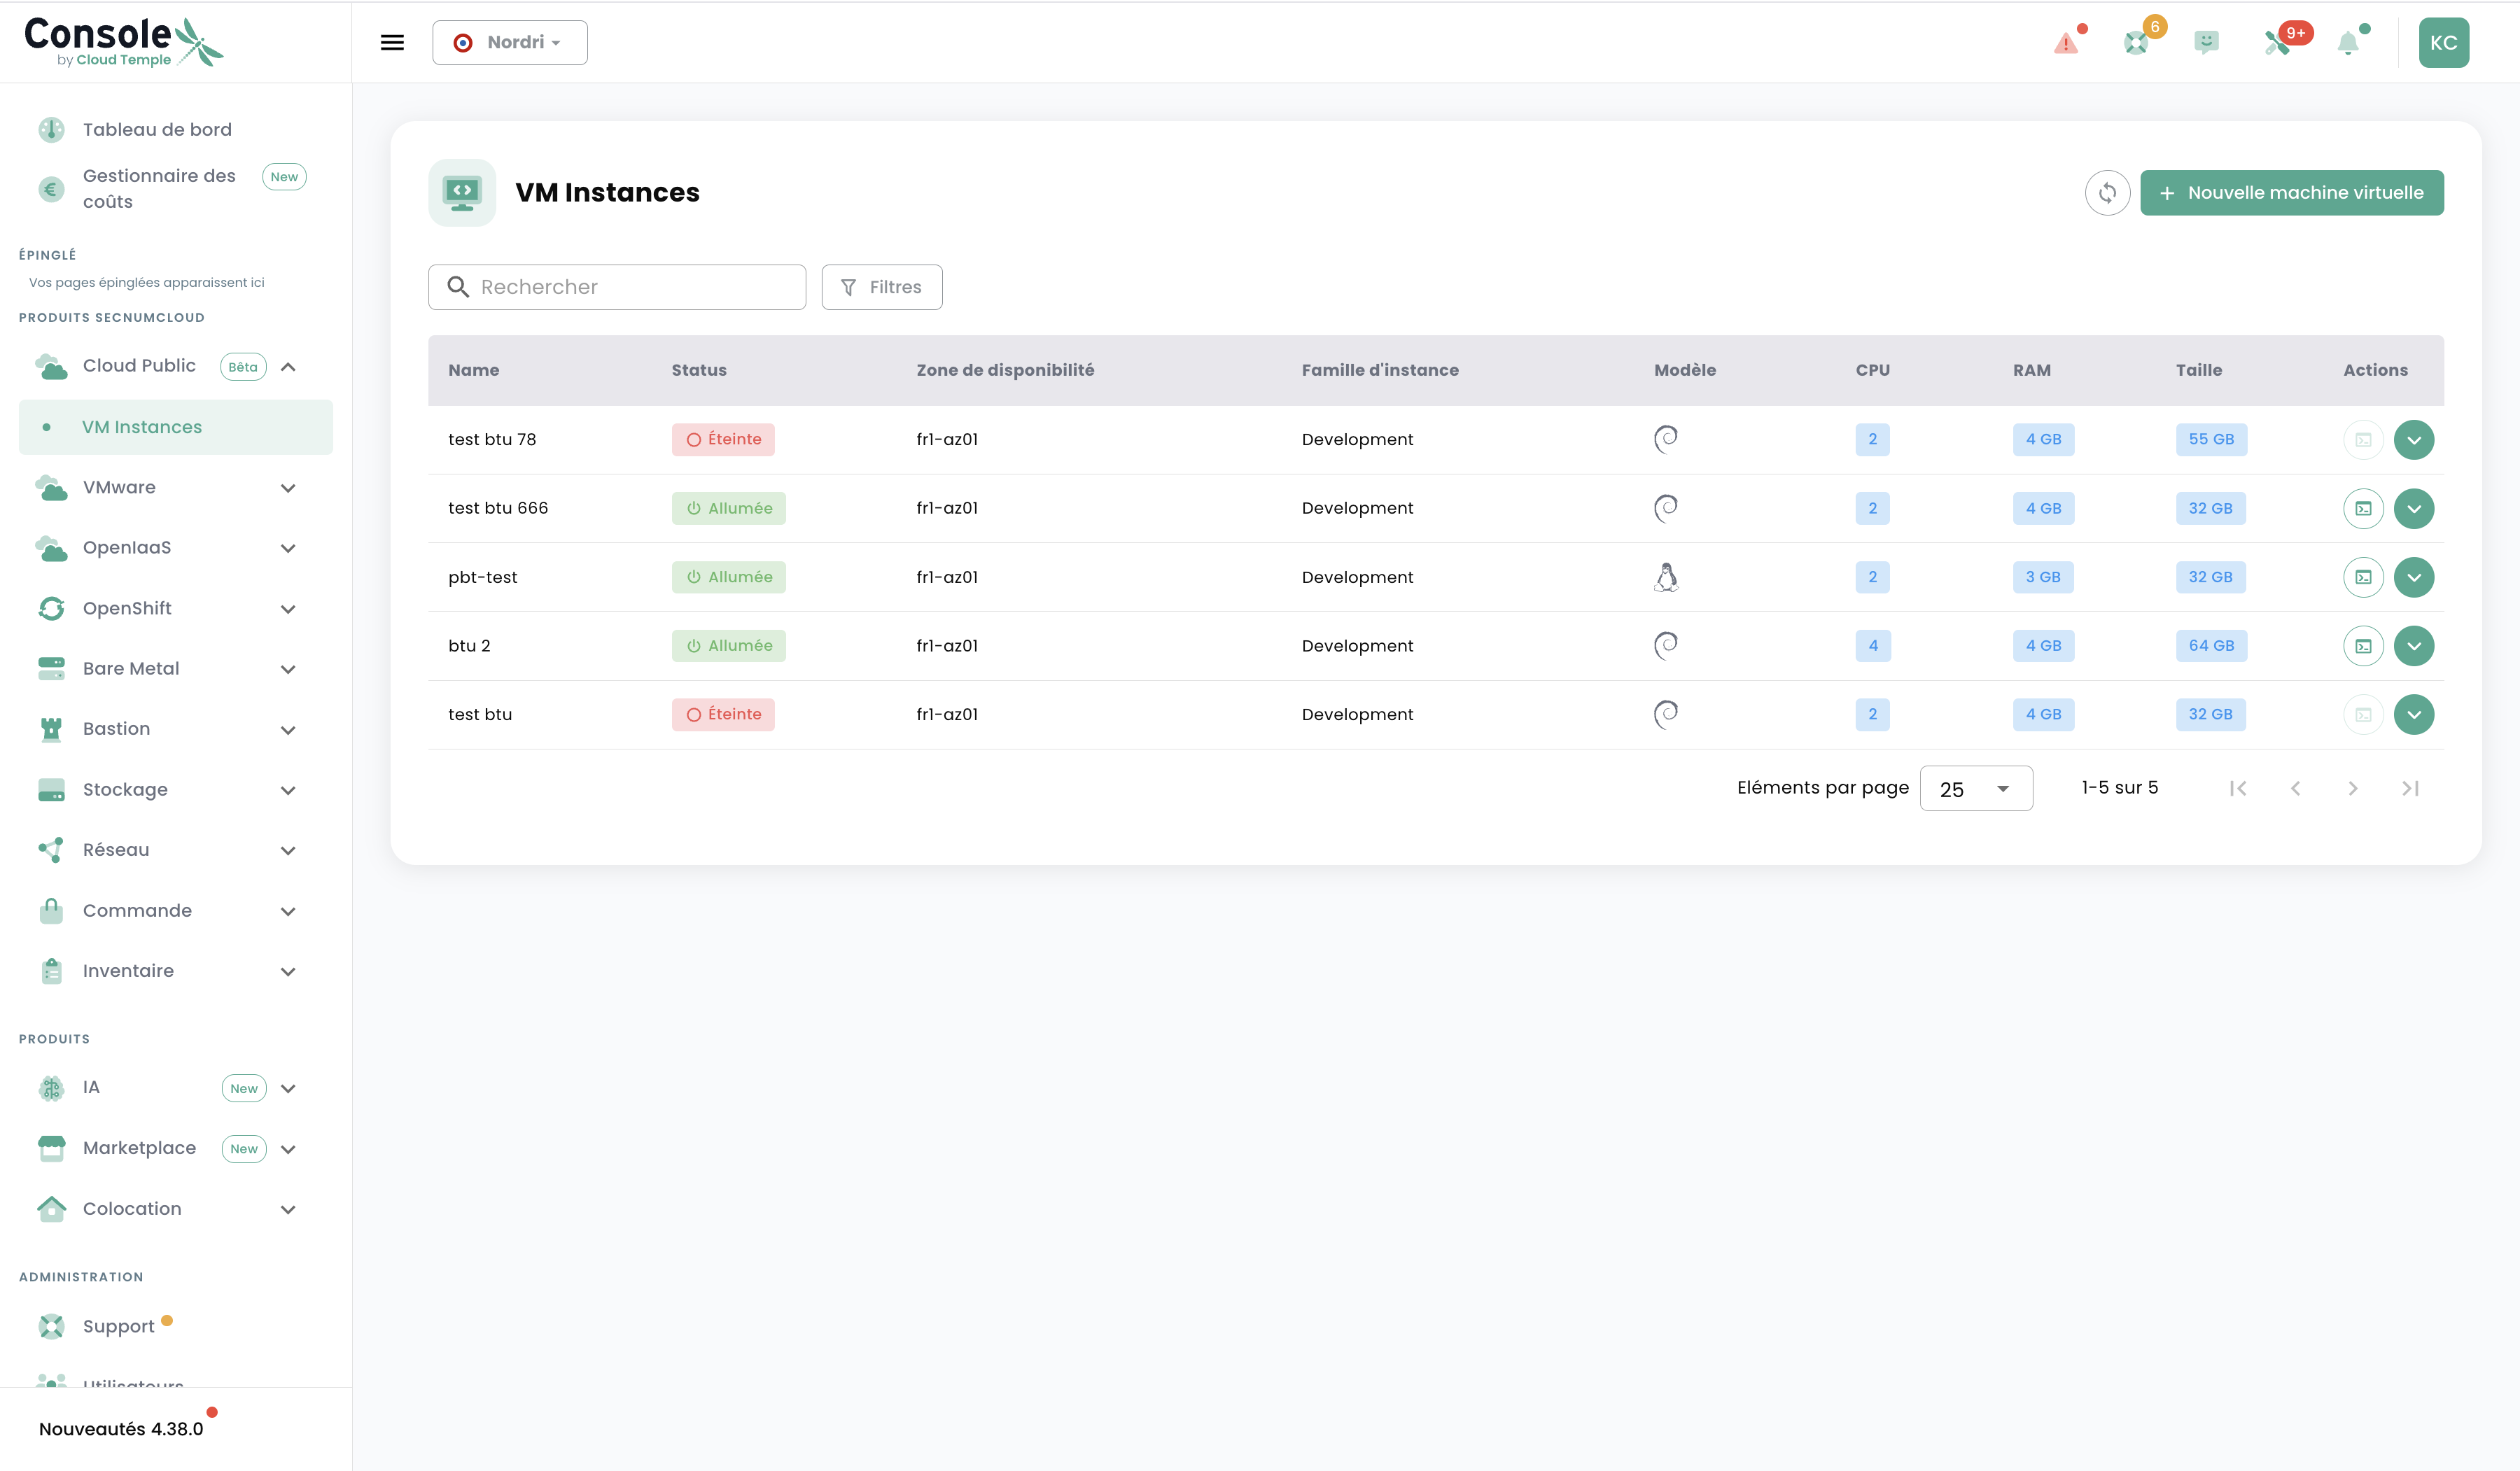
Click + New virtual machine to start the creation wizard.
Step 2 — Select the instance family
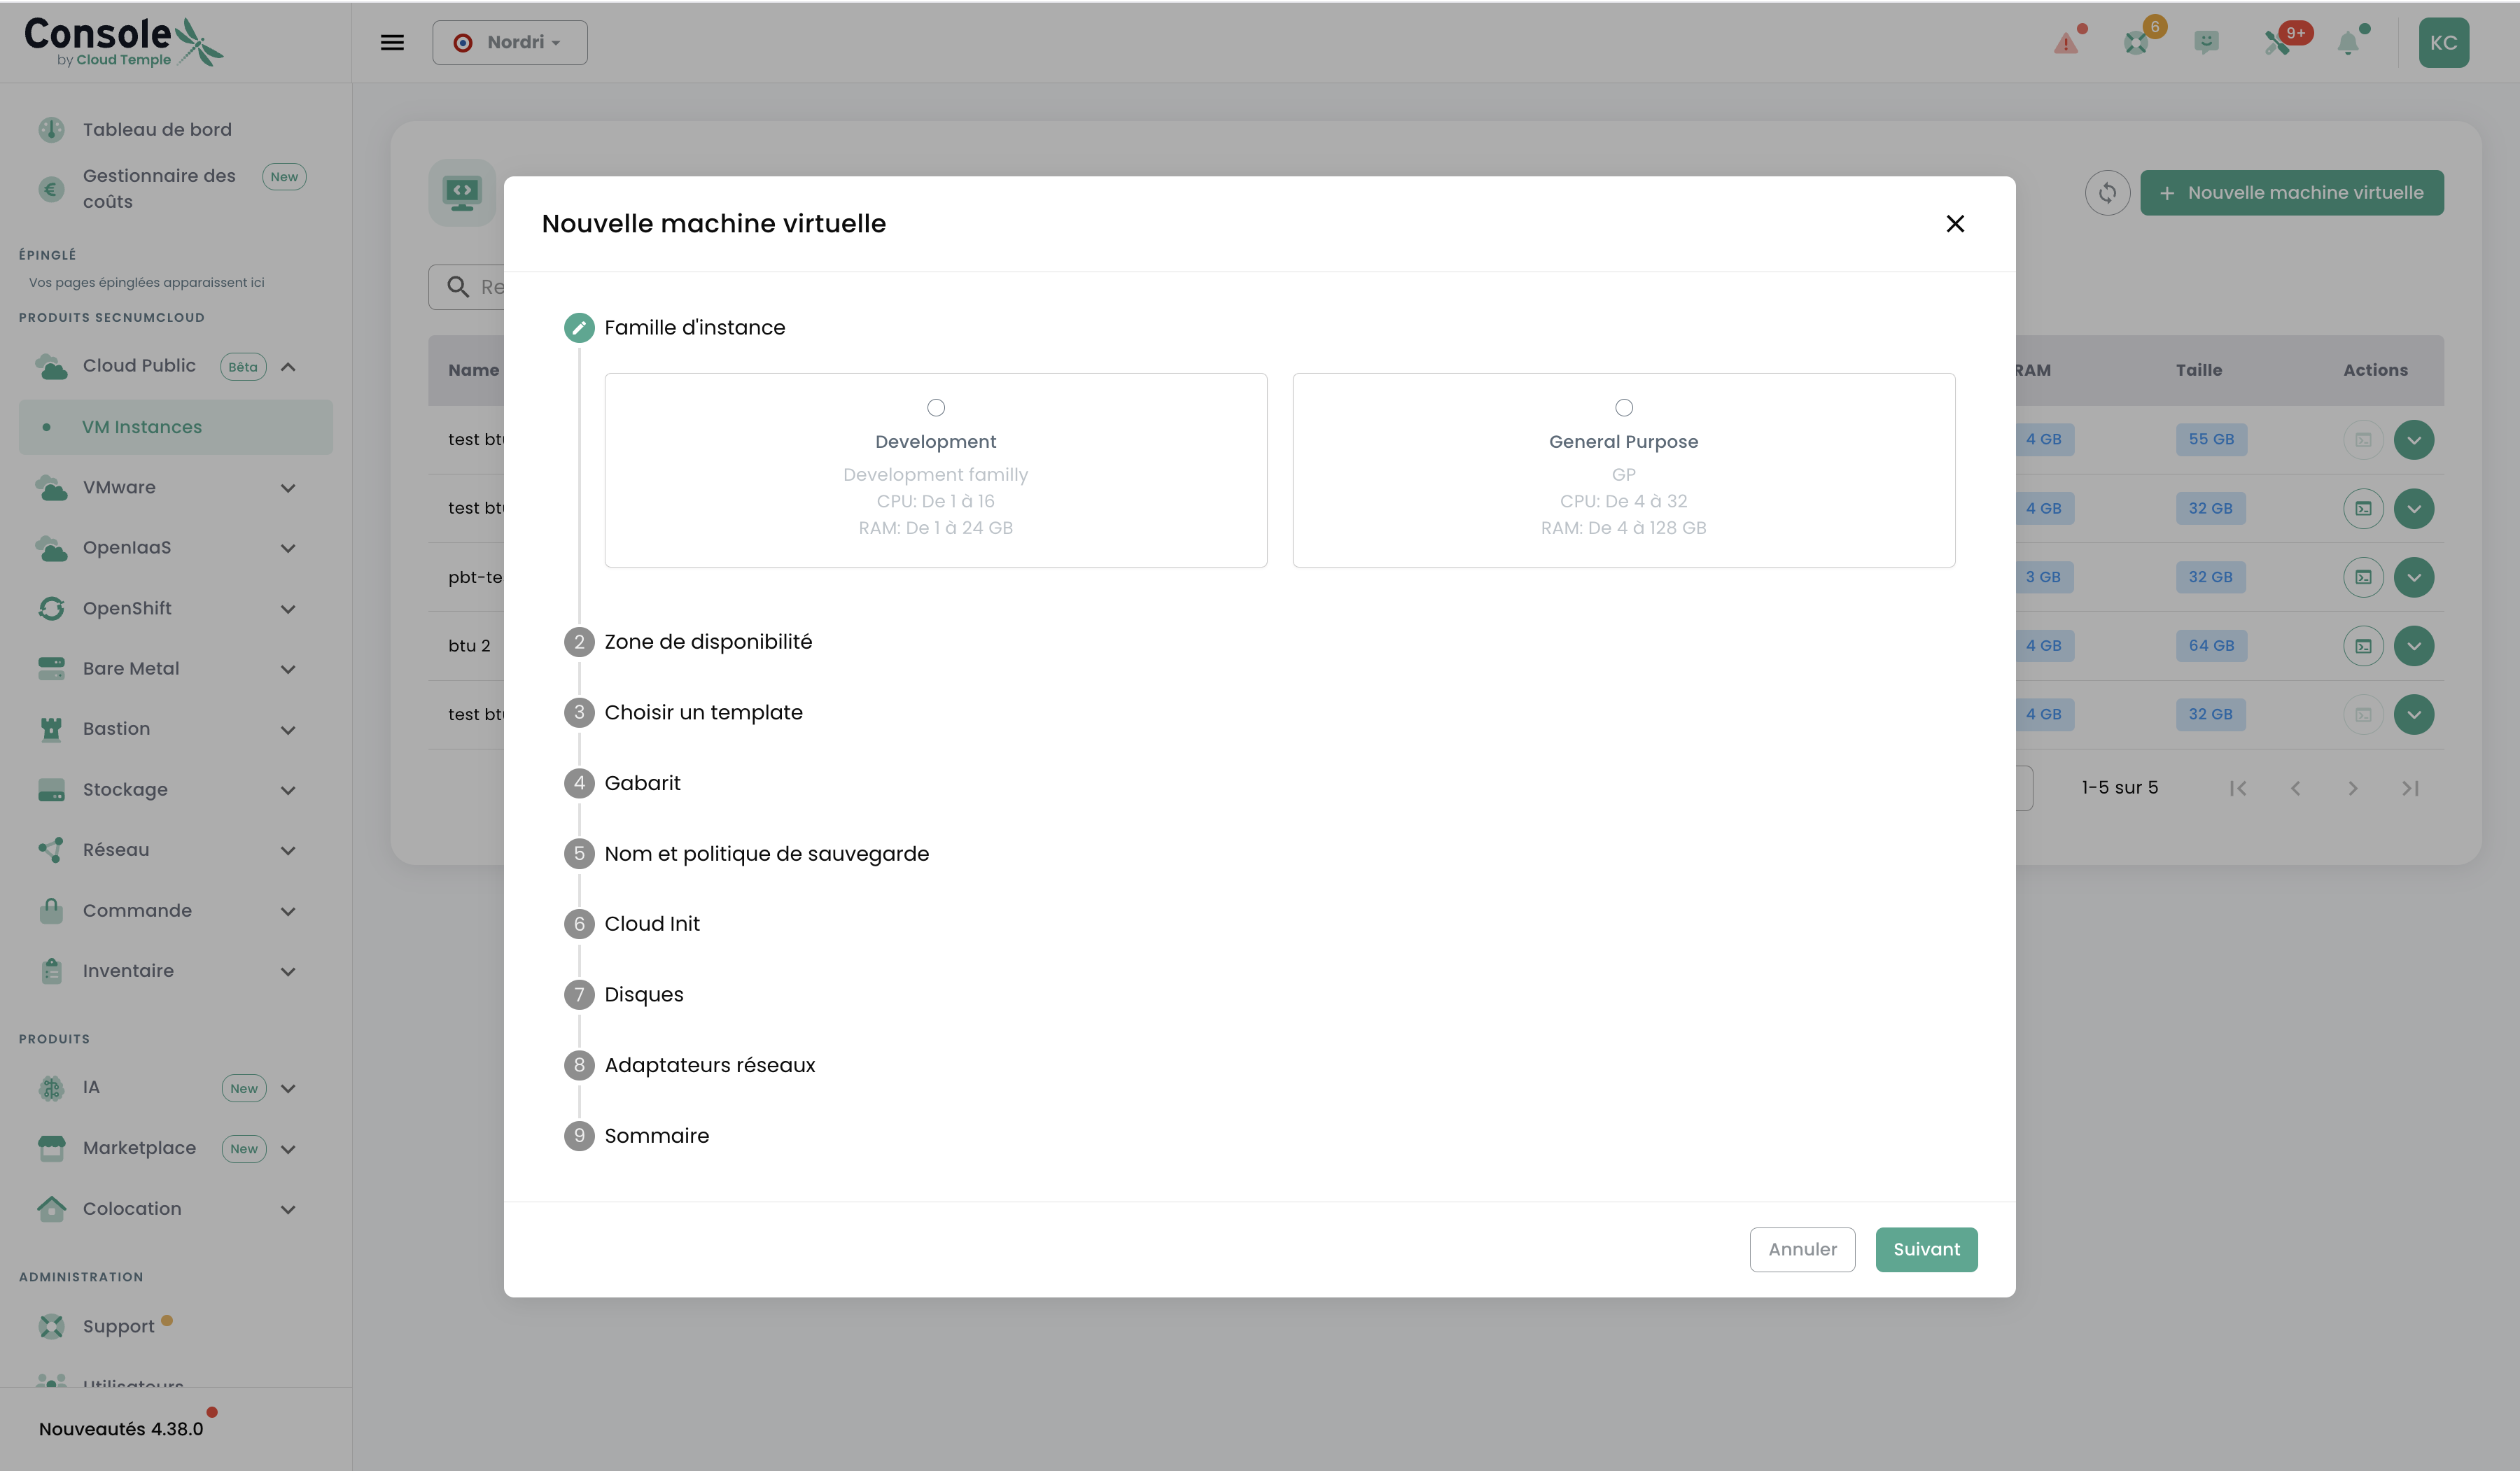
For this example, select Development — ideal for development and test environments with controlled costs. Click Next.
Step 3 — Choose the availability zone
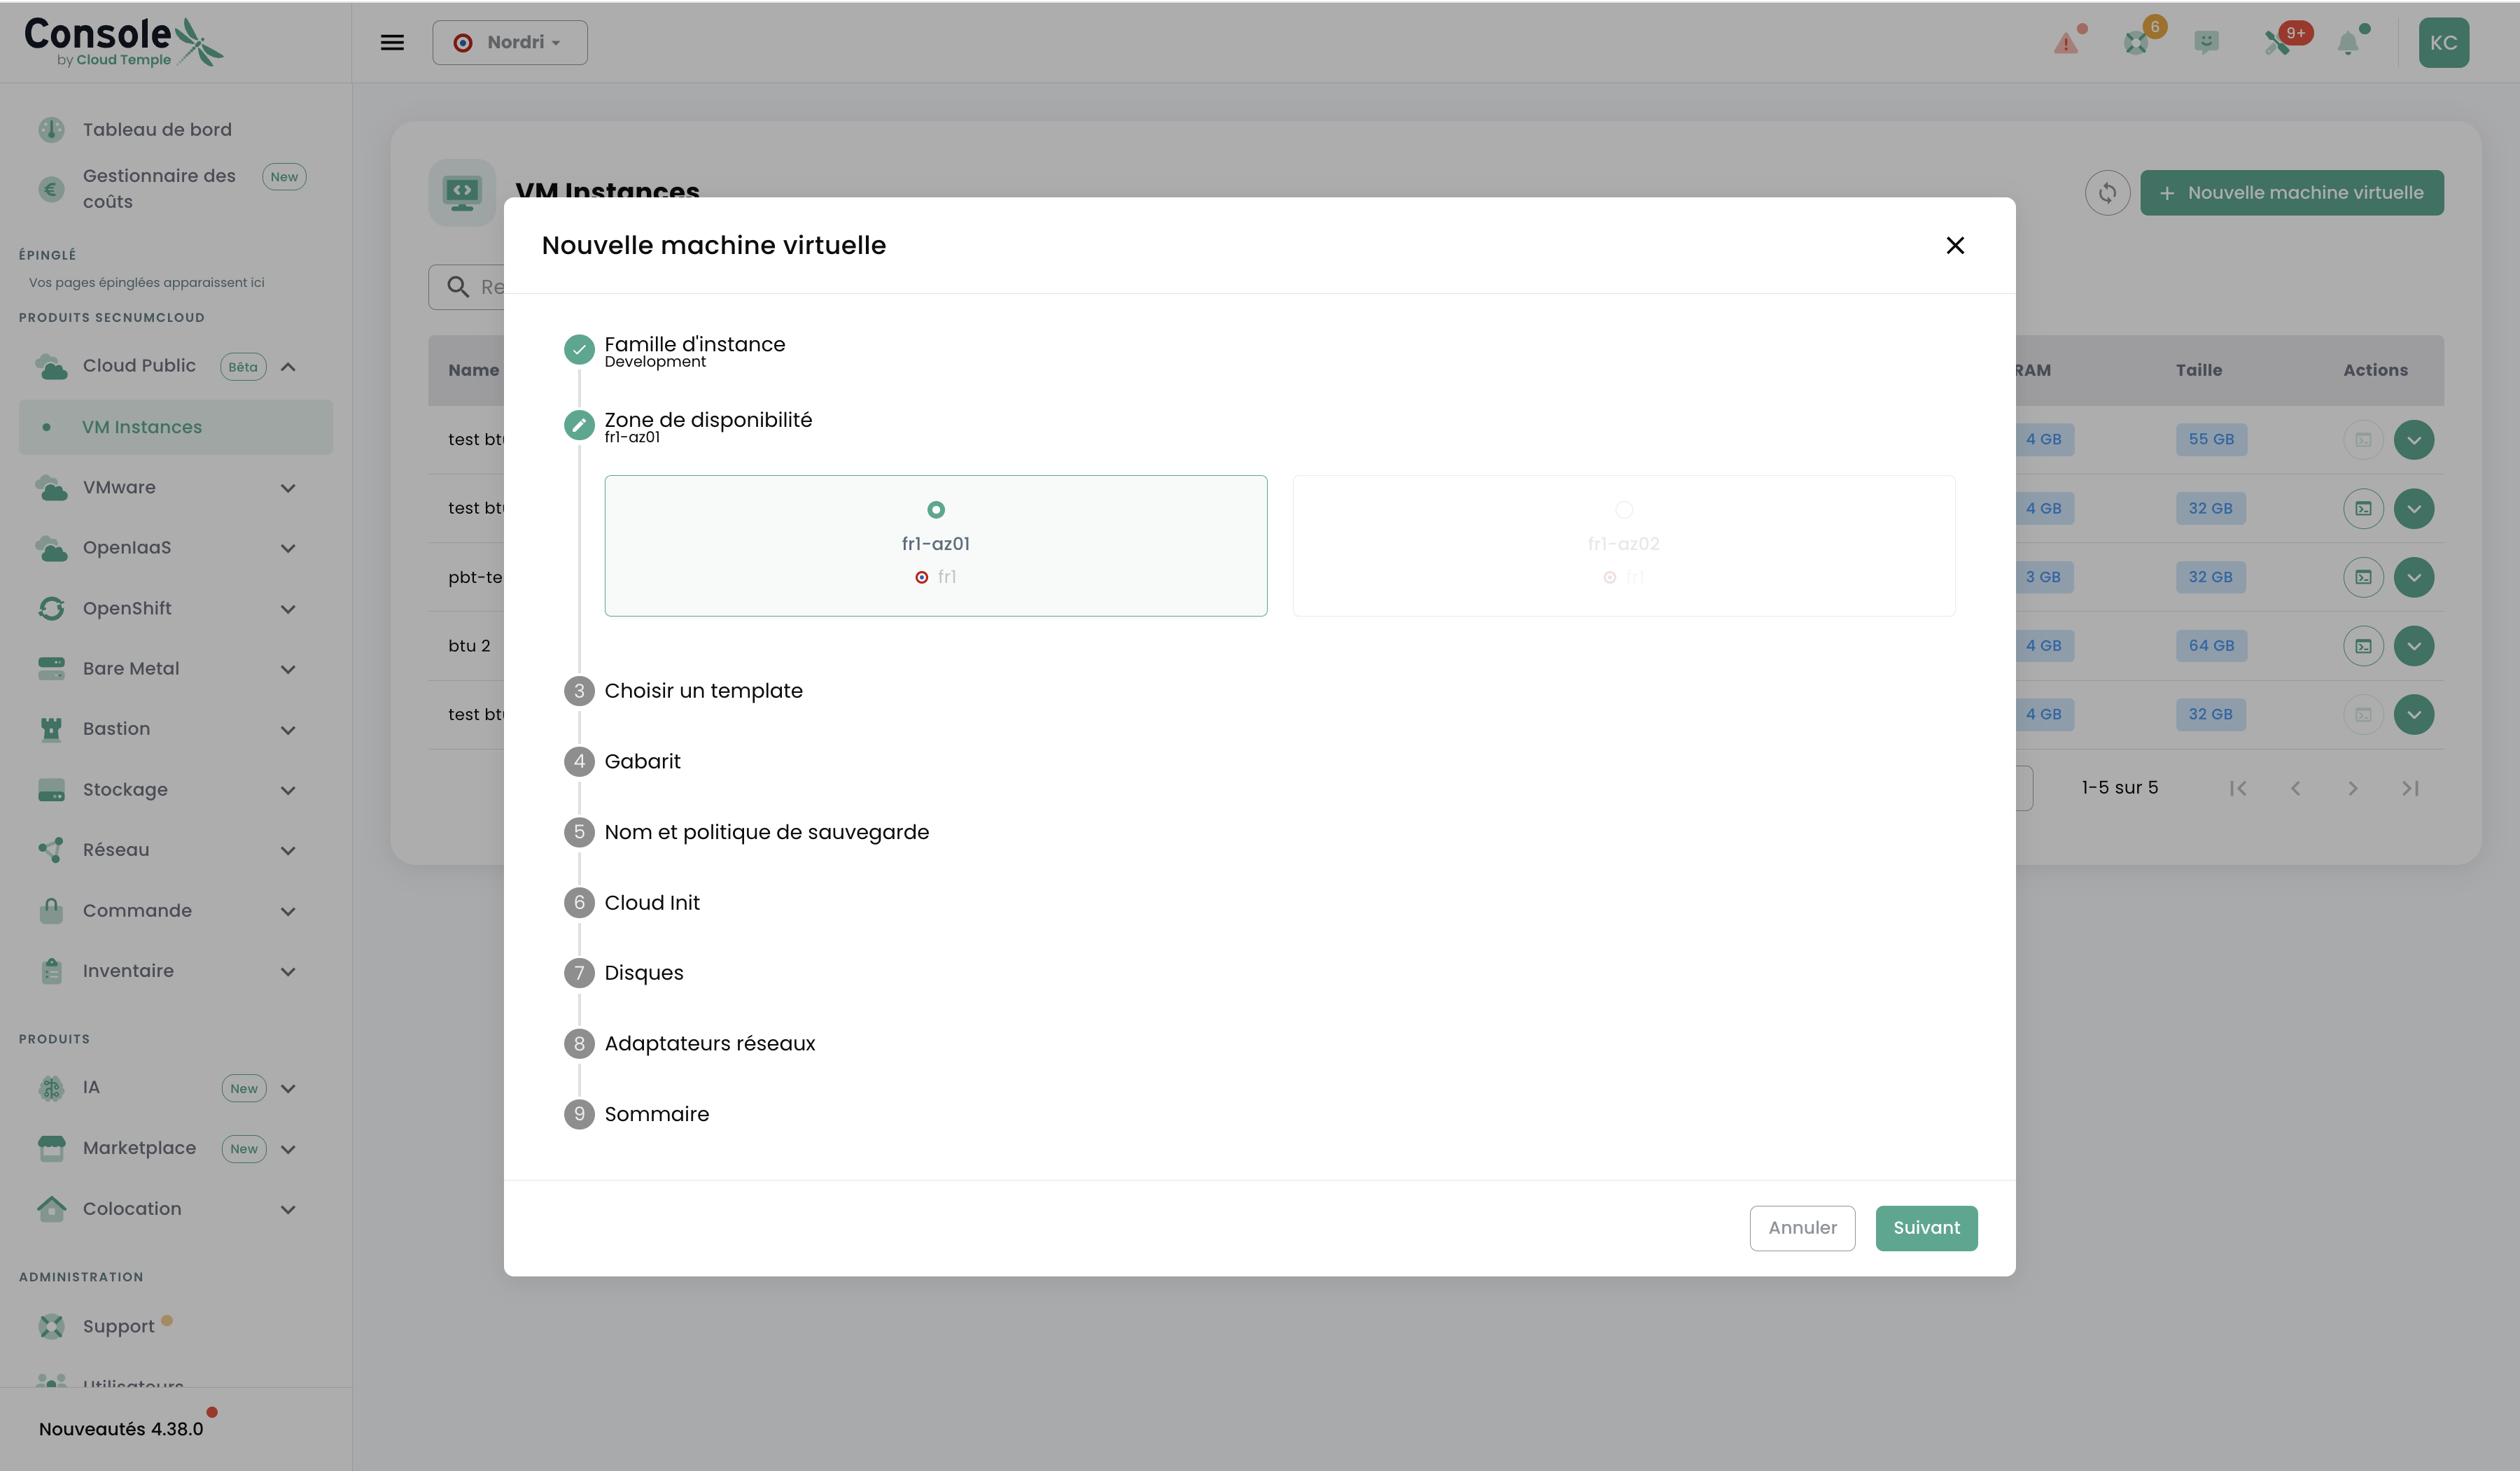
Select fr1-az01.
To maximise resilience, deploy multiple VMs across different availability zones (fr1-az01 and fr1-az02).
Click Next.
Step 4 — Choose the template
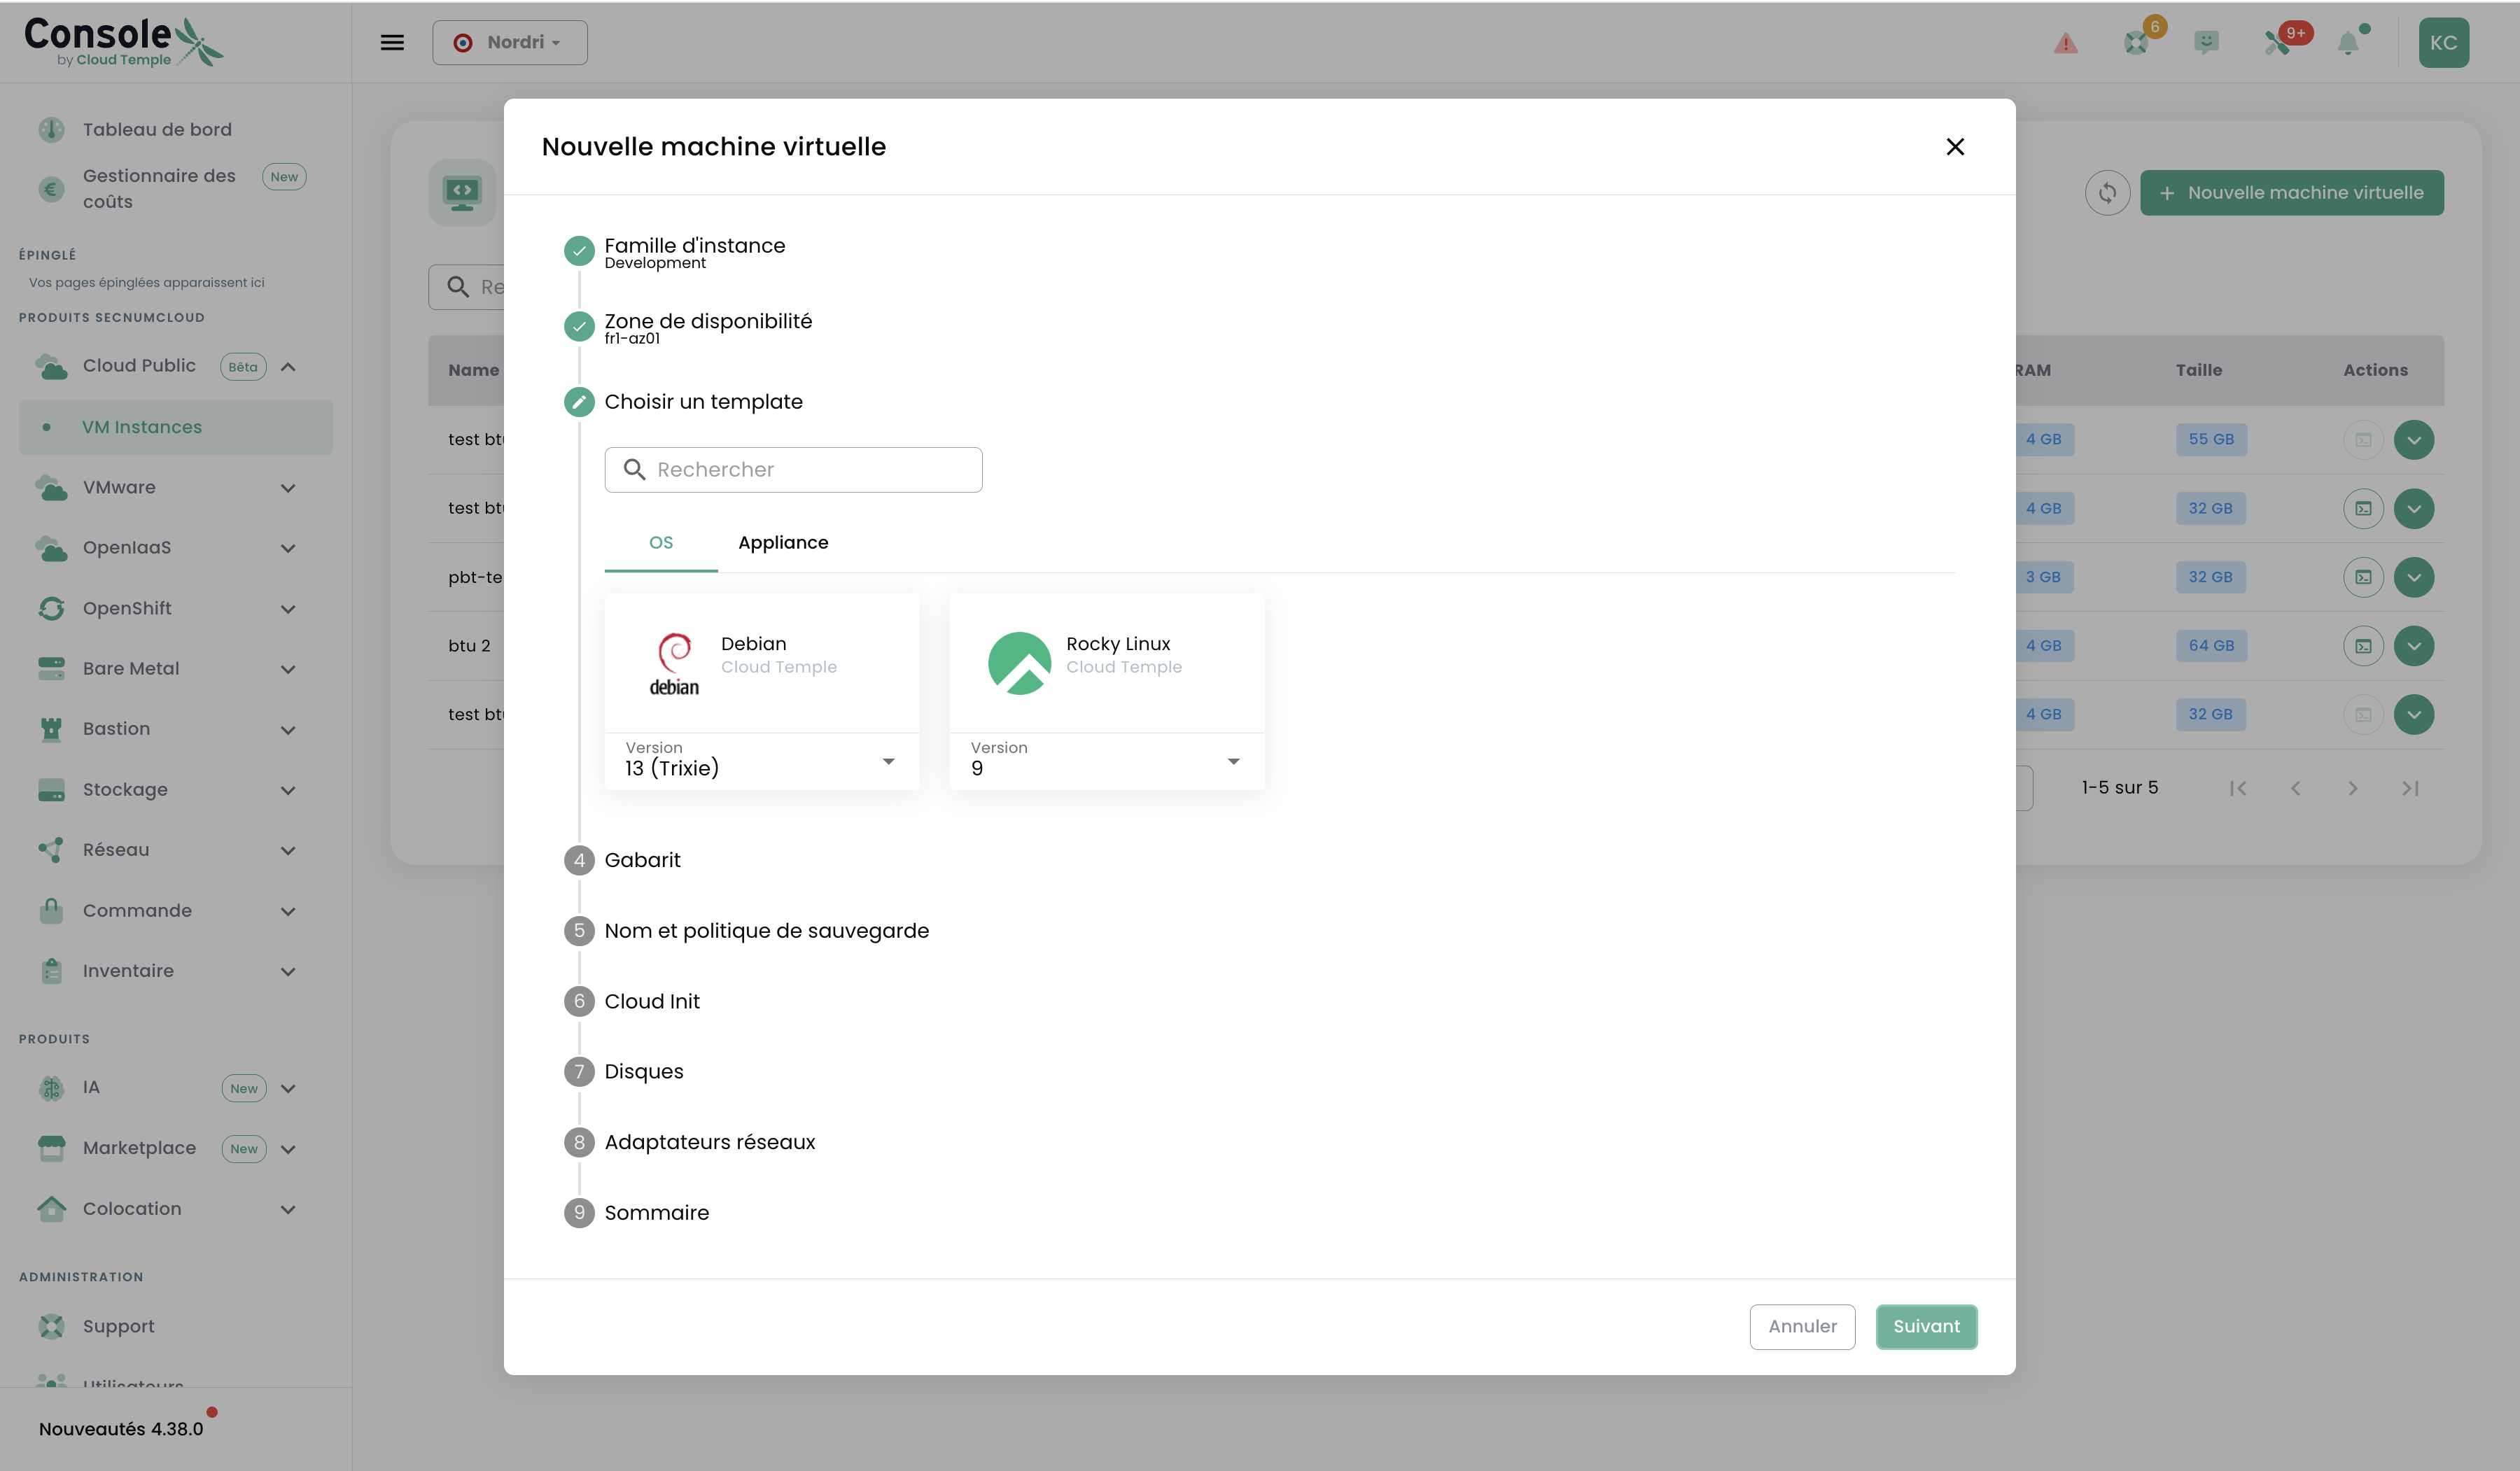
In the OS tab, select Debian and choose version 13 (Trixie) from the dropdown. Click Next.
Step 5 — Configure the flavor

Select the dev-2 flavor (2 vCPU / 8 GB RAM). Use Custom to freely enter vCPU and RAM if needed. Click Next.
Step 6 — Name the VM and configure backup
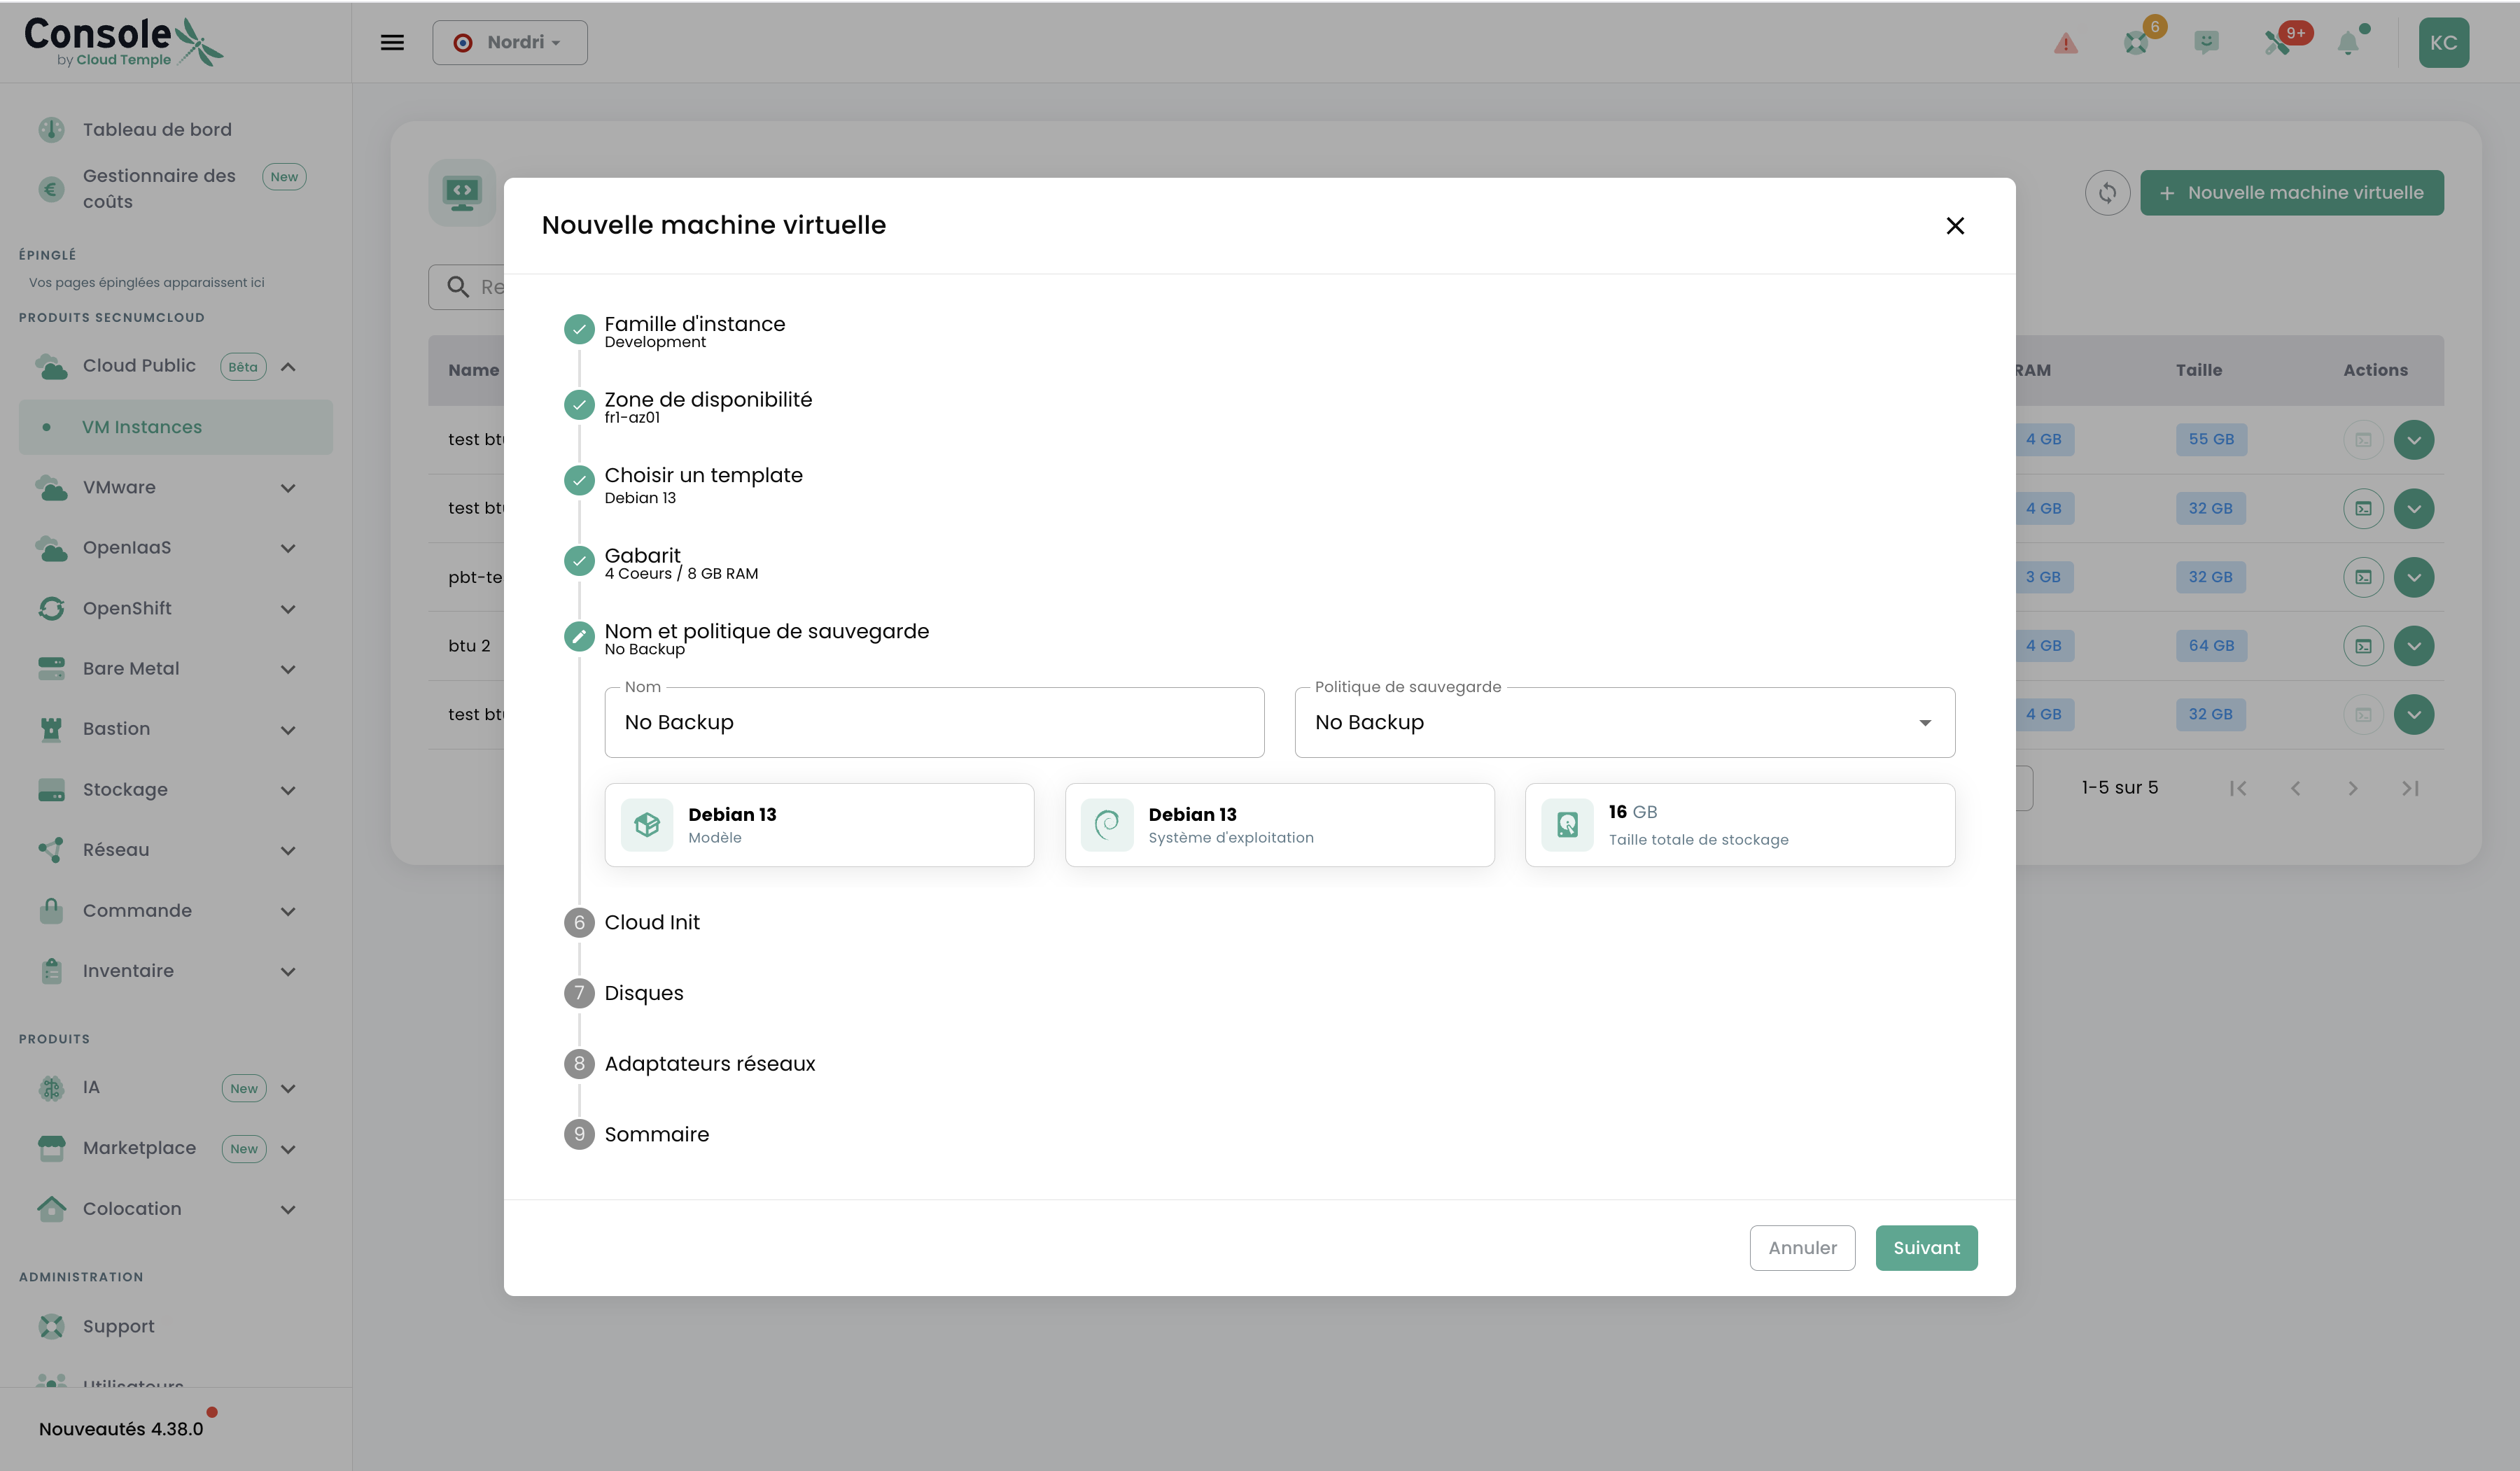
Enter a descriptive name, e.g. web-server-01. Leave No Backup for this tutorial. Click Next.
Step 7 — Configure Cloud Init
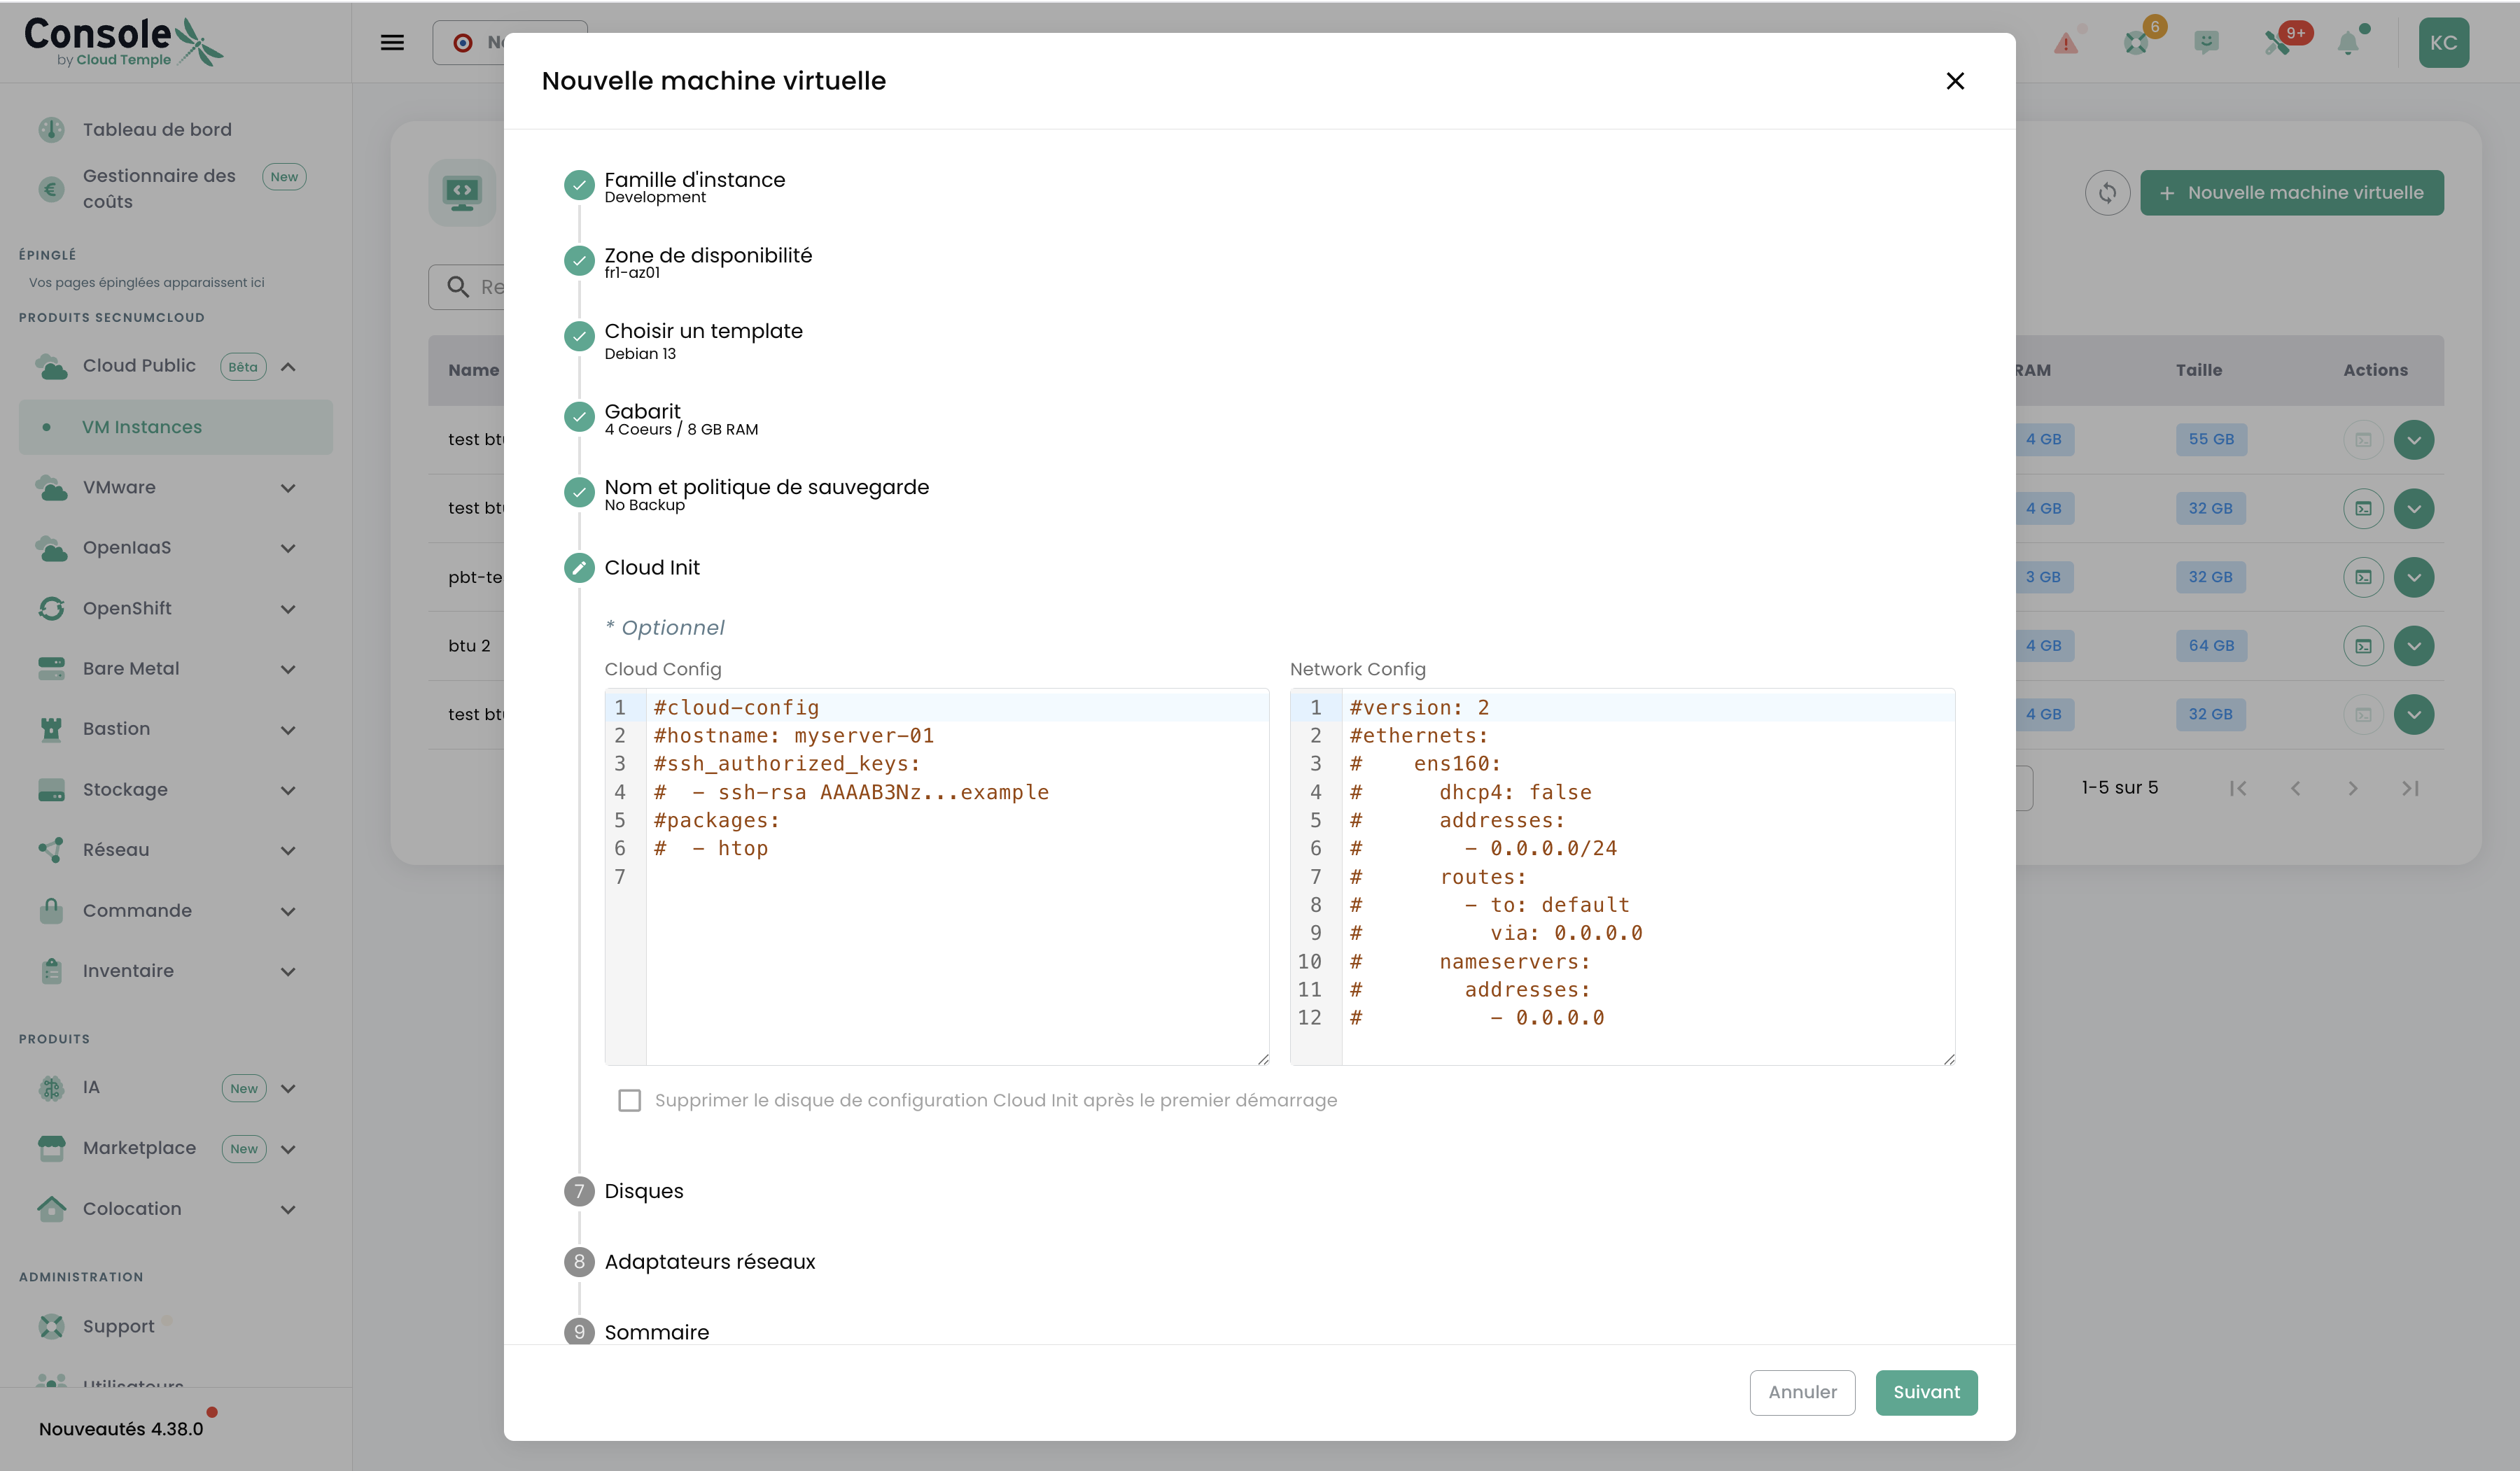
Enter the following in the Cloud Config editor:
#cloud-config
hostname: web-server-01
users:
  - name: admin
    groups: sudo
    shell: /bin/bash
    ssh_authorized_keys:
      - ssh-rsa AAAA...your_ssh_public_key
package_update: true
packages:
  - curl
  - vim
  - htop
For a static IP, fill in Network Config (Netplan format):
version: 2
ethernets:
  ens3:
    dhcp4: false
    addresses:
      - 192.168.1.10/24
    routes:
      - to: default
        via: 192.168.1.1
    nameservers:
      addresses:
        - 8.8.8.8
        - 1.1.1.1
Check Remove the Cloud Init configuration disk after first boot for improved security. Click Next.
Step 8 — Configure disks
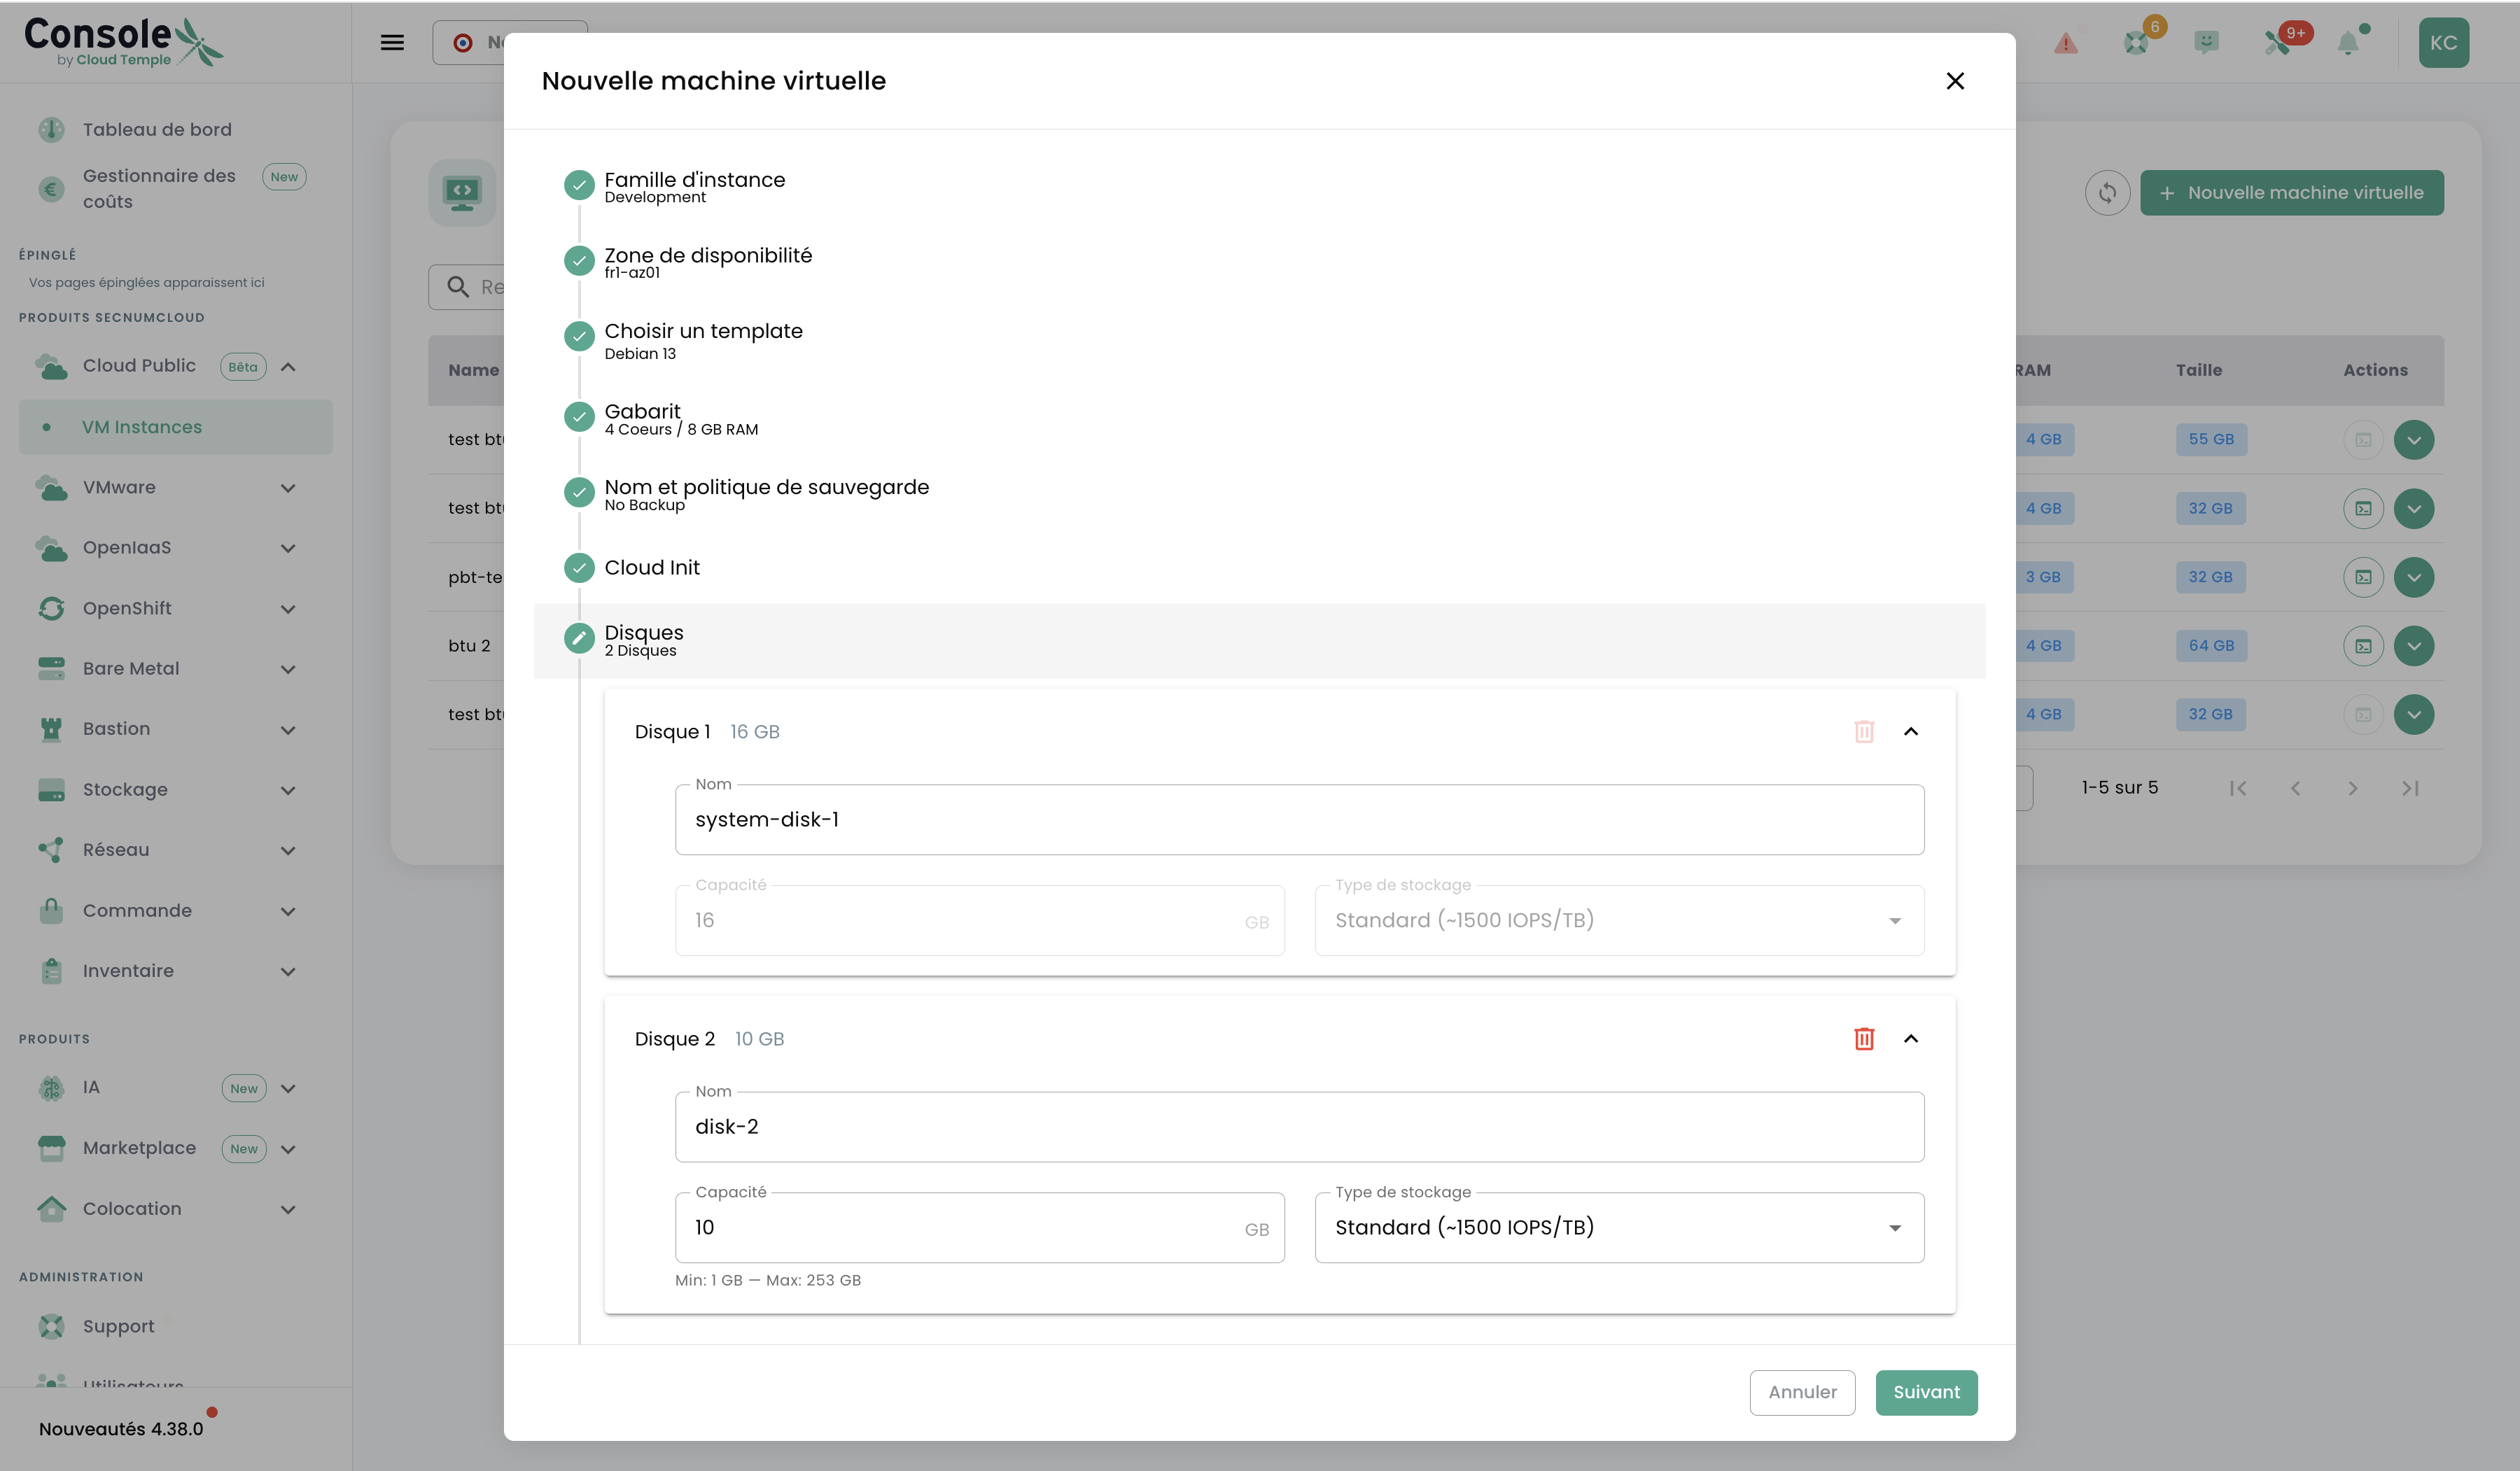
The system disk system-disk-1 is created automatically. Add a data disk:
- Name:
data-disk-1 - Capacity:
50GB - Storage type: Standard (~1,500 IOPS/TB)
Click Next.
Step 9 — Configure the network
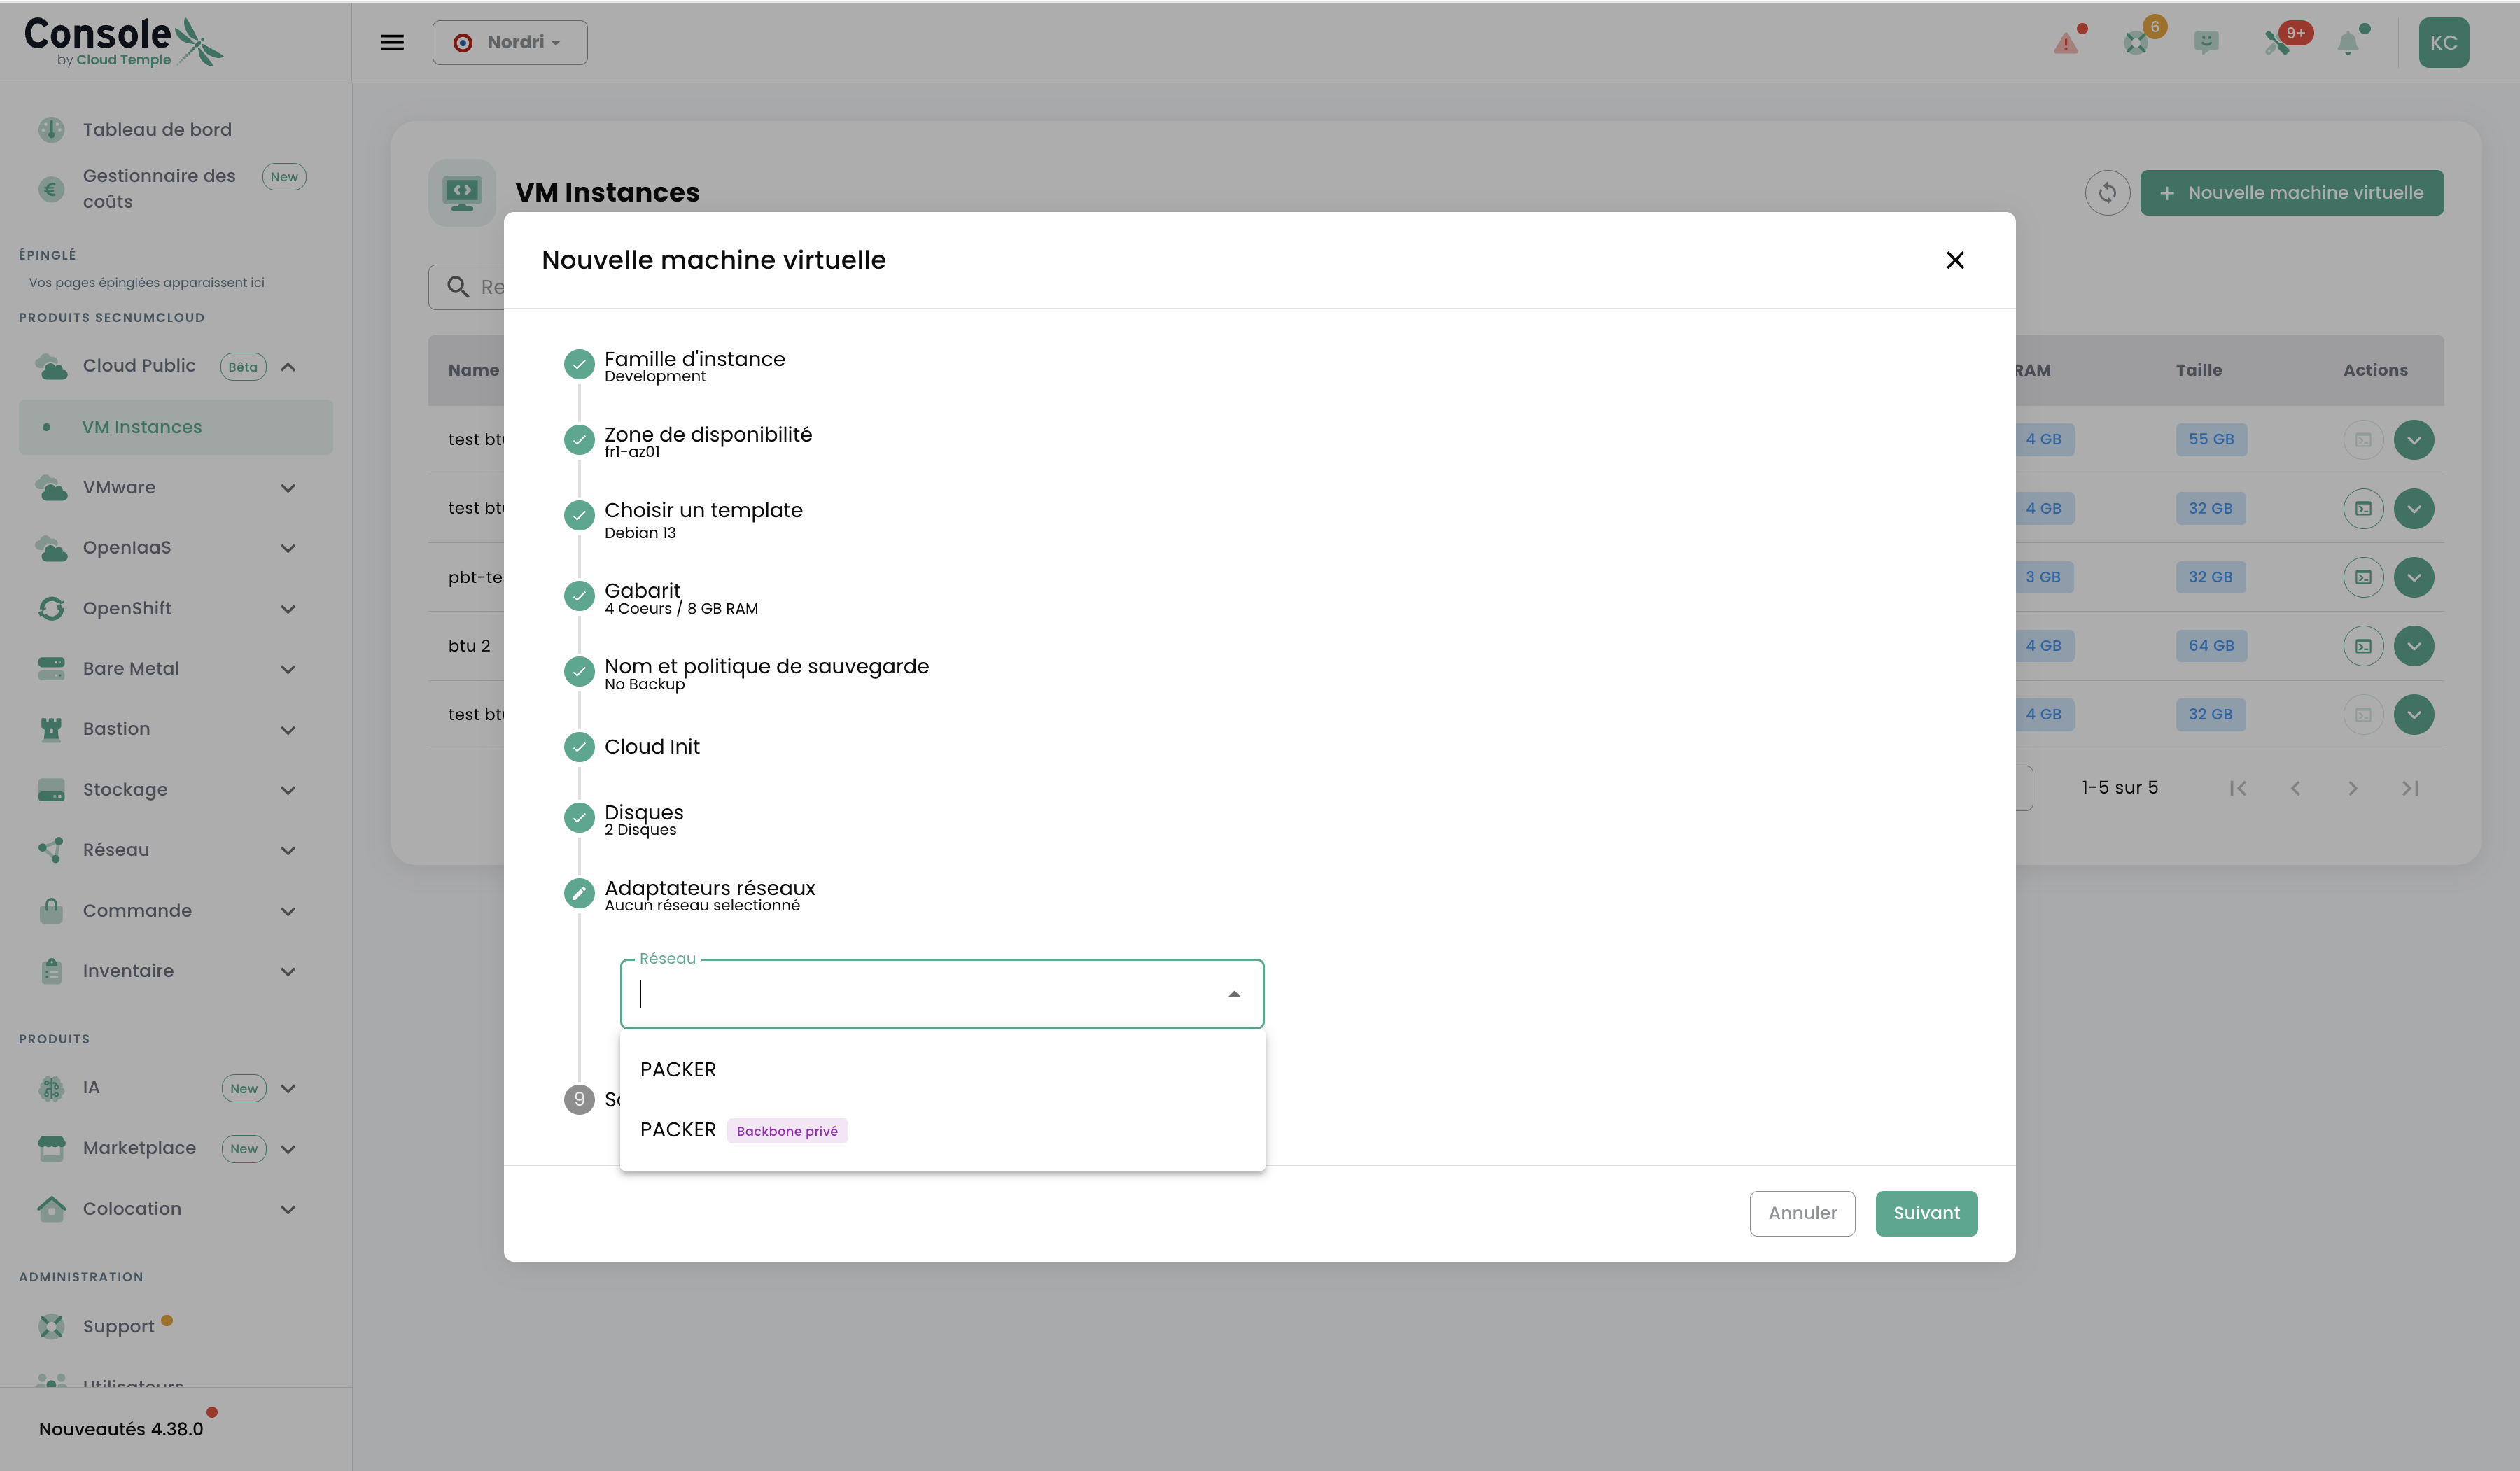
Select your network from the dropdown (e.g. PACKFR — private Backbone).
If using a VPC, you can assign a floating IP (public IP) to your VM after creation.
Click Next.
Step 10 — Review and create
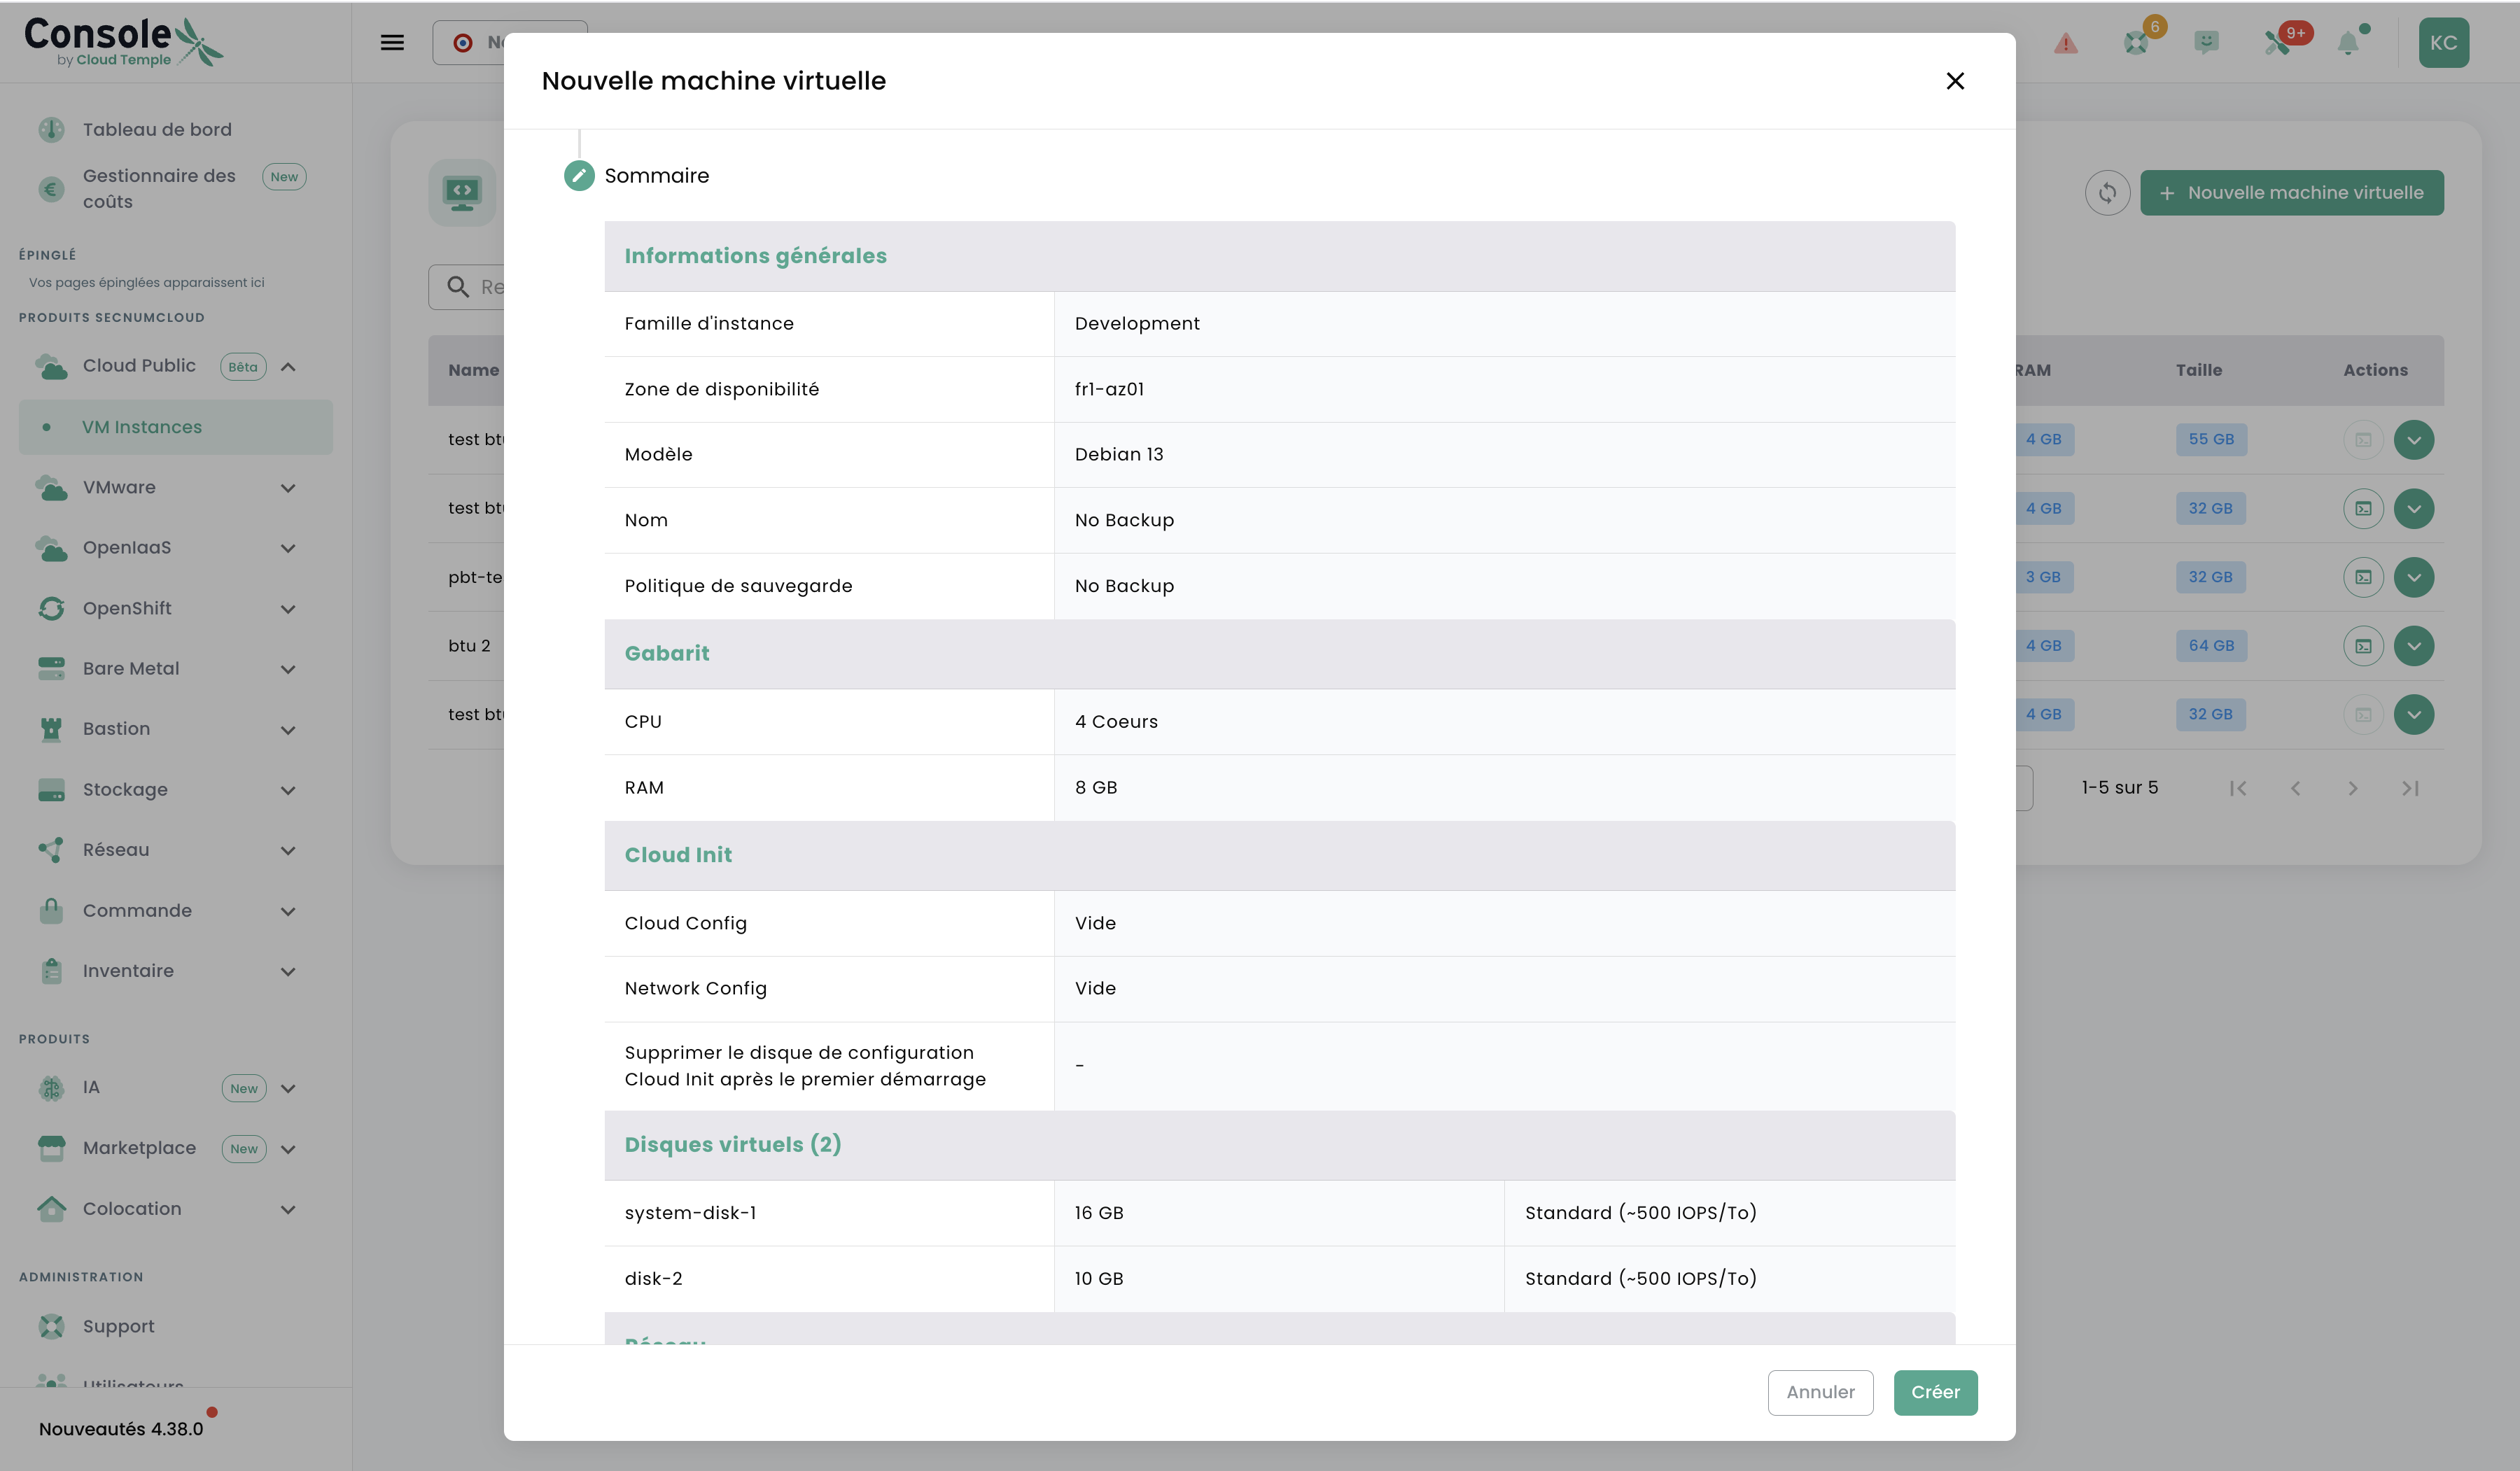
Review the summary:
| Parameter | Value |
|---|---|
| Instance family | Development |
| Availability zone | fr1-az01 |
| Model | Debian 13 |
| Flavor | 2 vCPU / 8 GB RAM |
| Backup policy | No Backup |
| Disks | system-disk-1 + data-disk-1 (50 GB) |
| Network | PACKFR (Private Backbone) |
Click Create. Your VM will appear in the list with status On within a few minutes.