Getting Started Guide
Prerequisites
Before you begin, make sure you have the following:
- An active Cloud Temple Tenant
- A minimum Standard Support subscription
- The necessary permissions in your Cloud Temple organization
Accessing the VM Instances Service
Log in to the Cloud Temple Console and navigate to Cloud Public > VM Instances from the main menu.
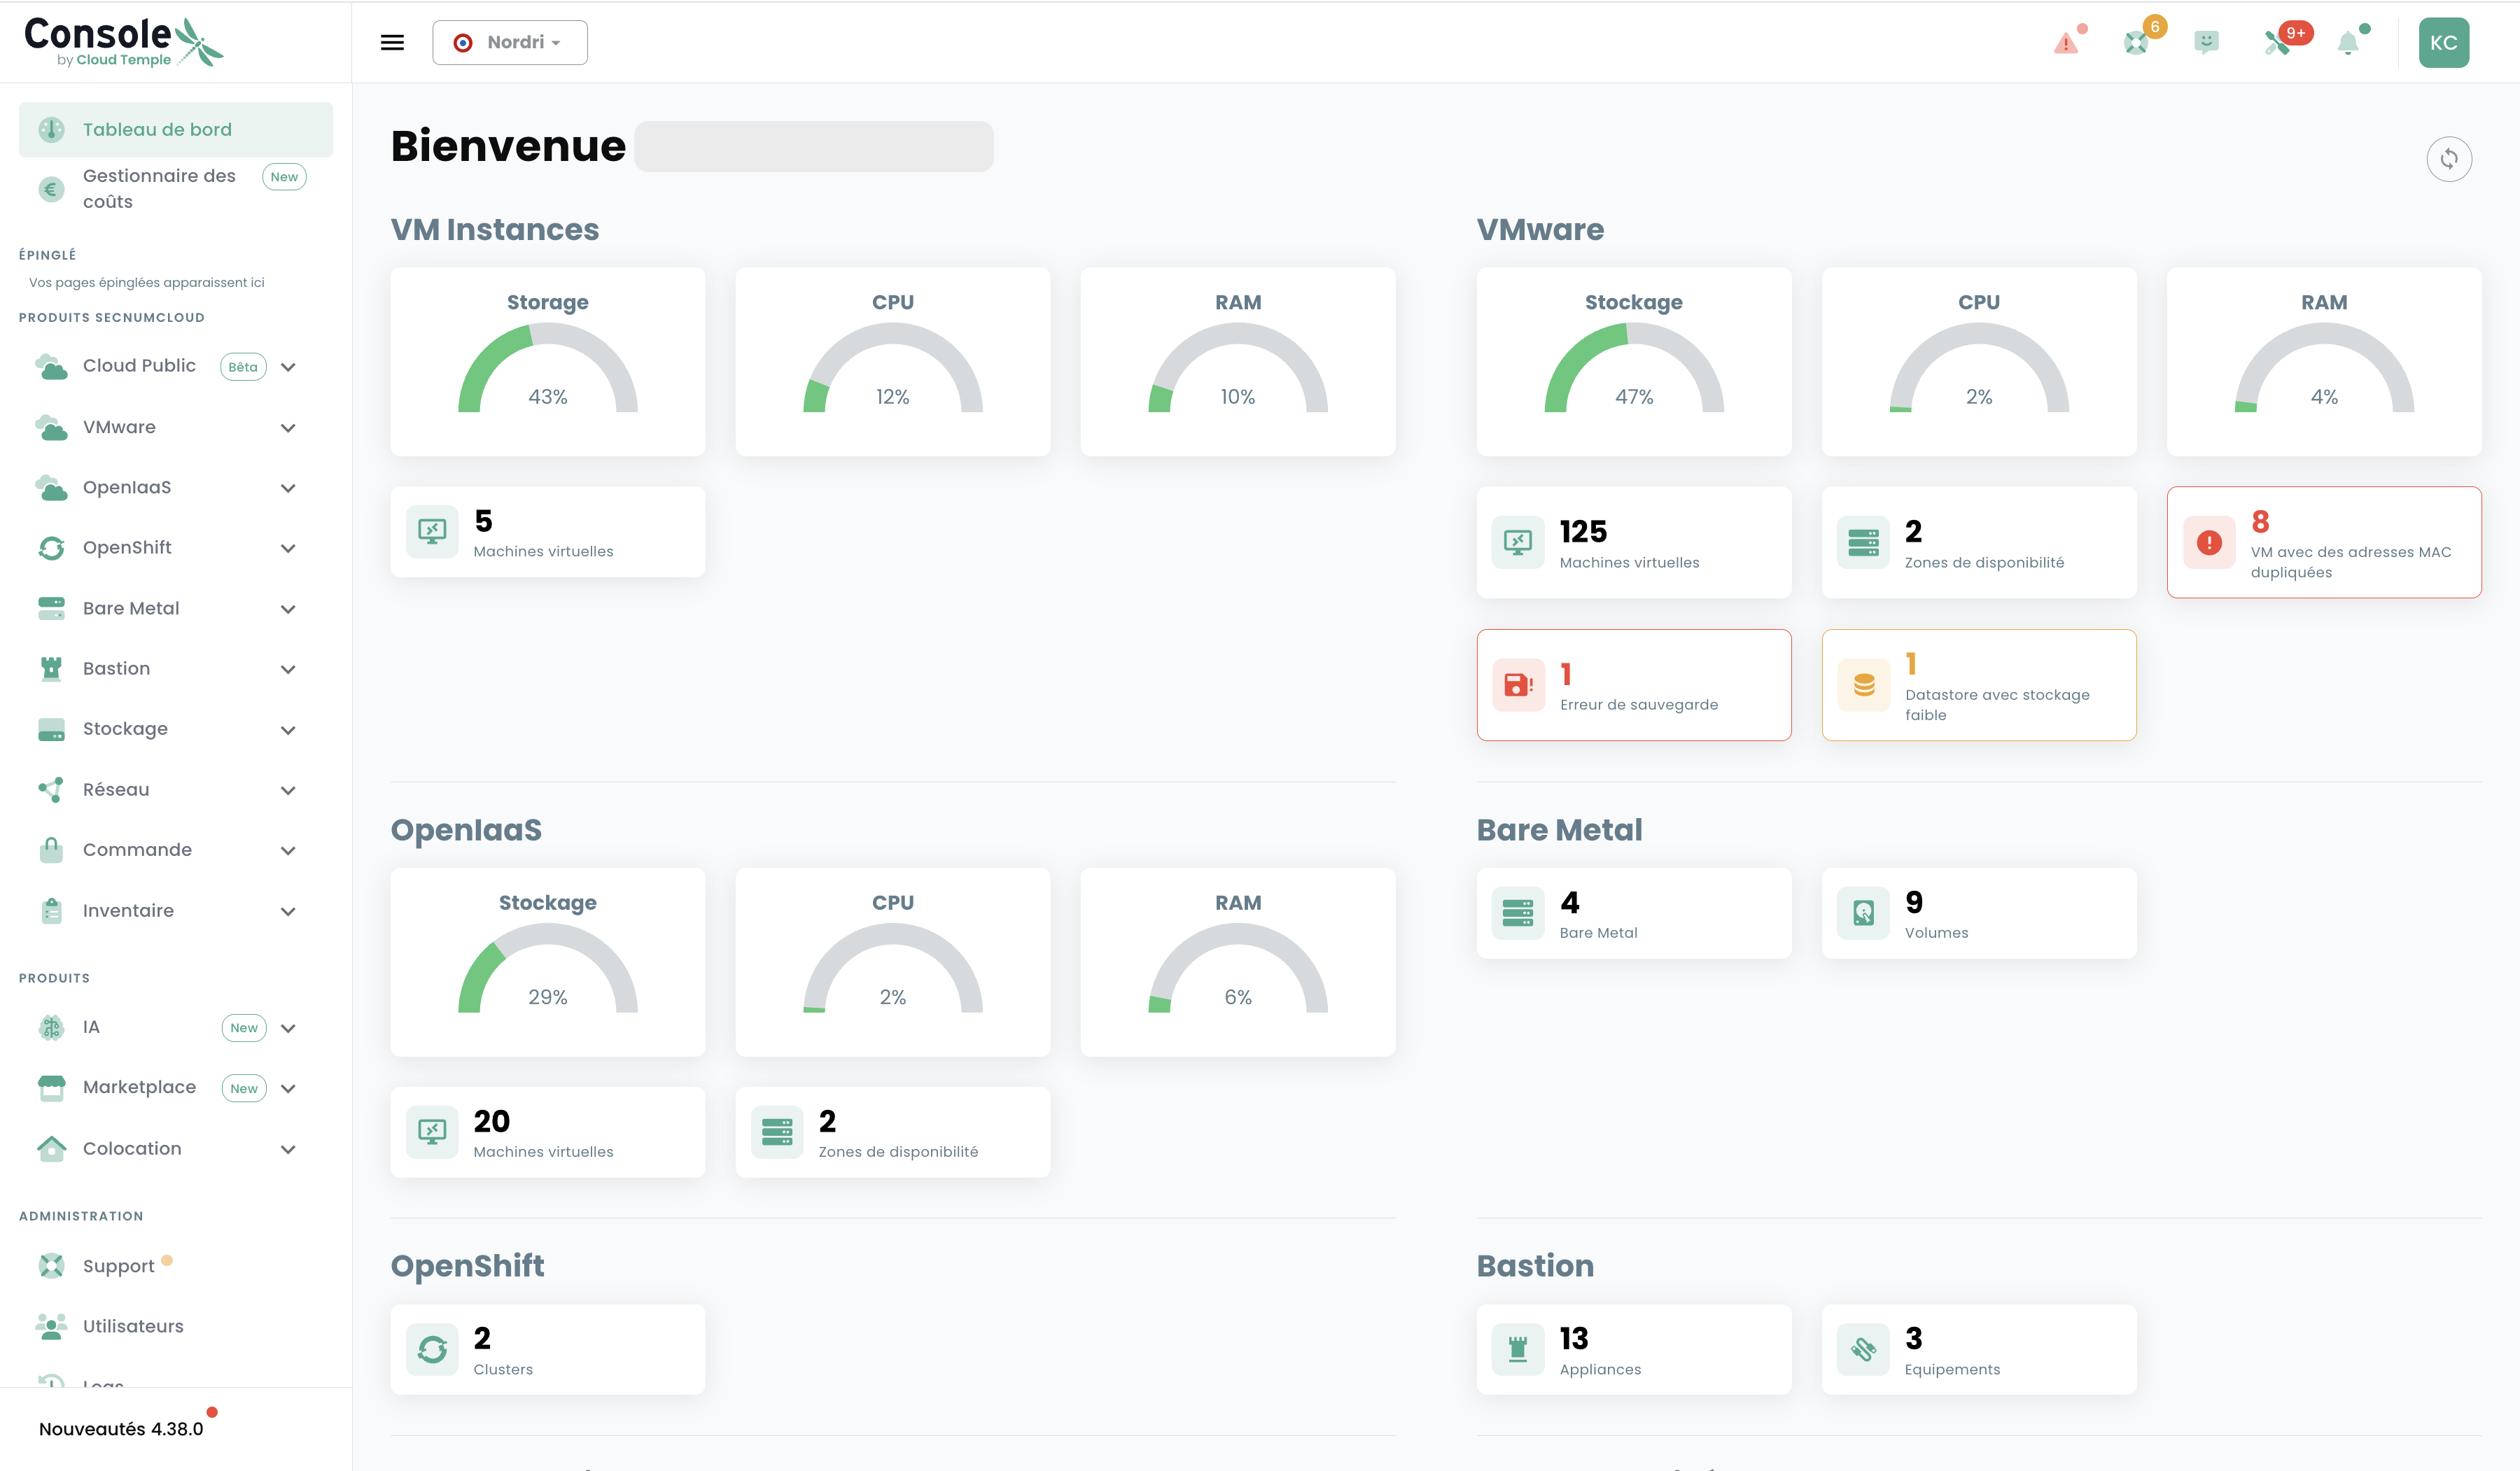
The dashboard gives you an overview of the VM Instances resources consumed (storage, CPU, RAM) as well as the number of active virtual machines.
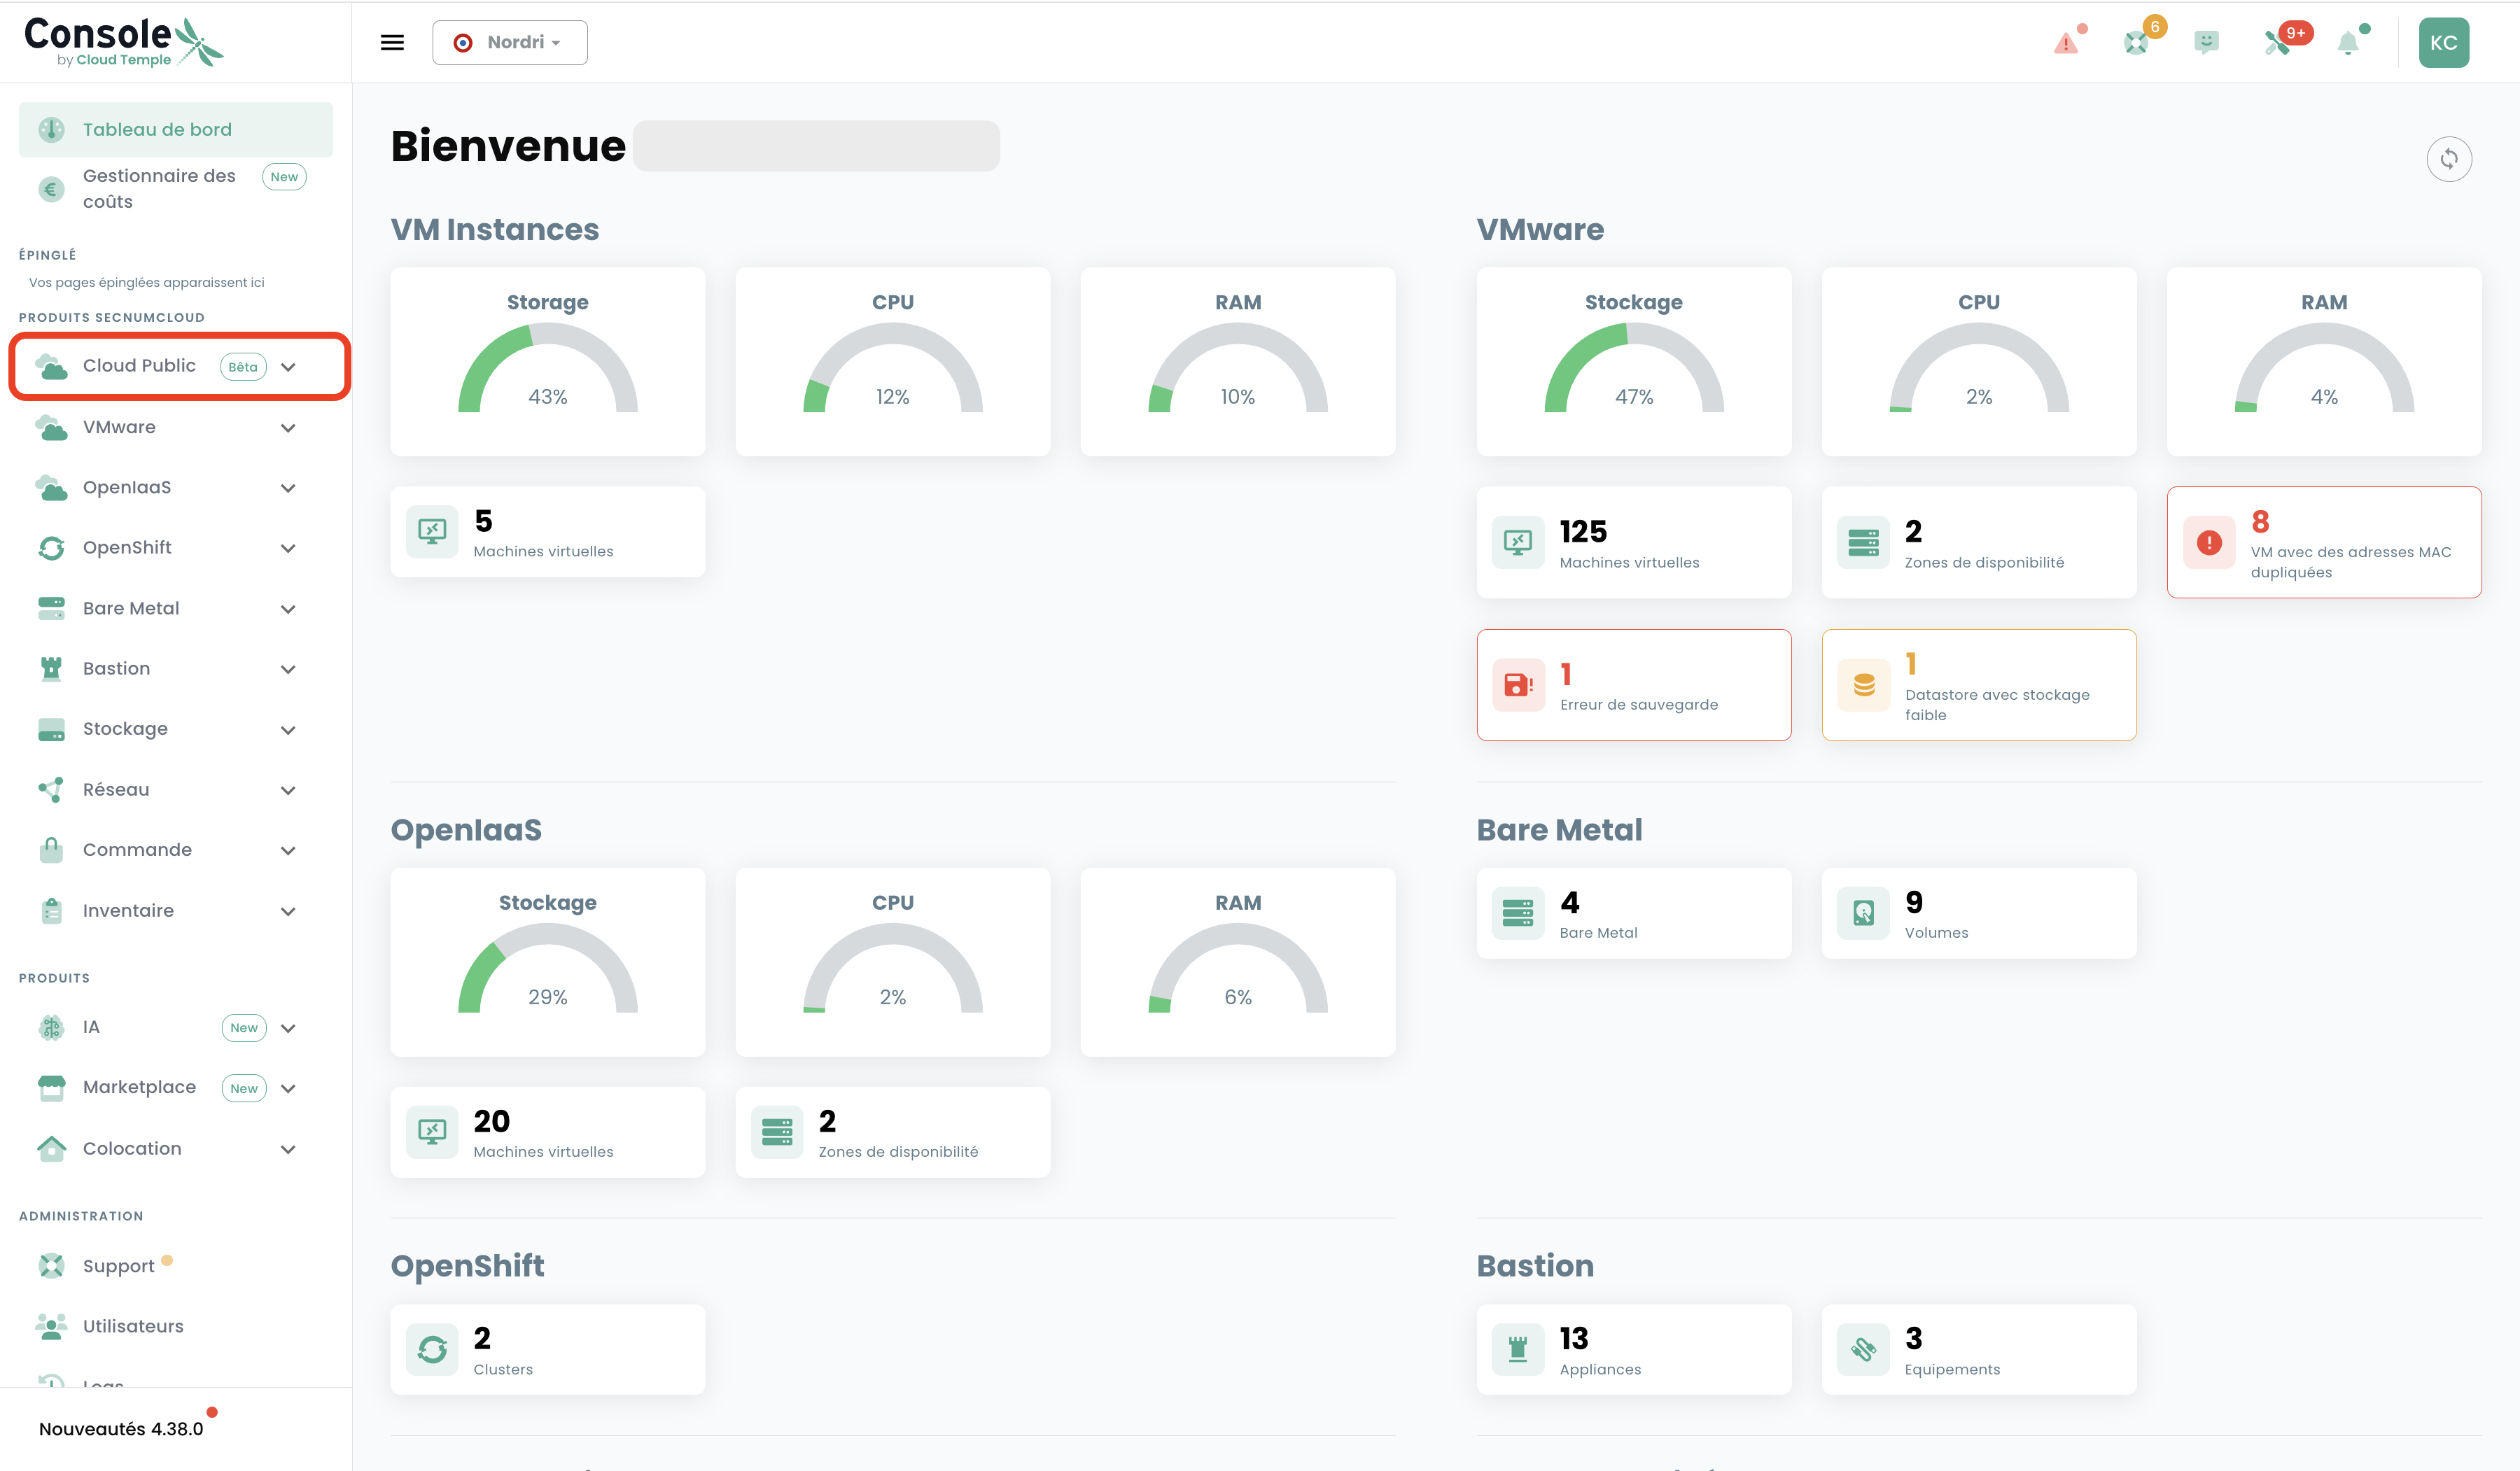
Click on Cloud Public in the left sidebar to expand the submenu, then select VM Instances.
You will land on the list of your VM Instances:
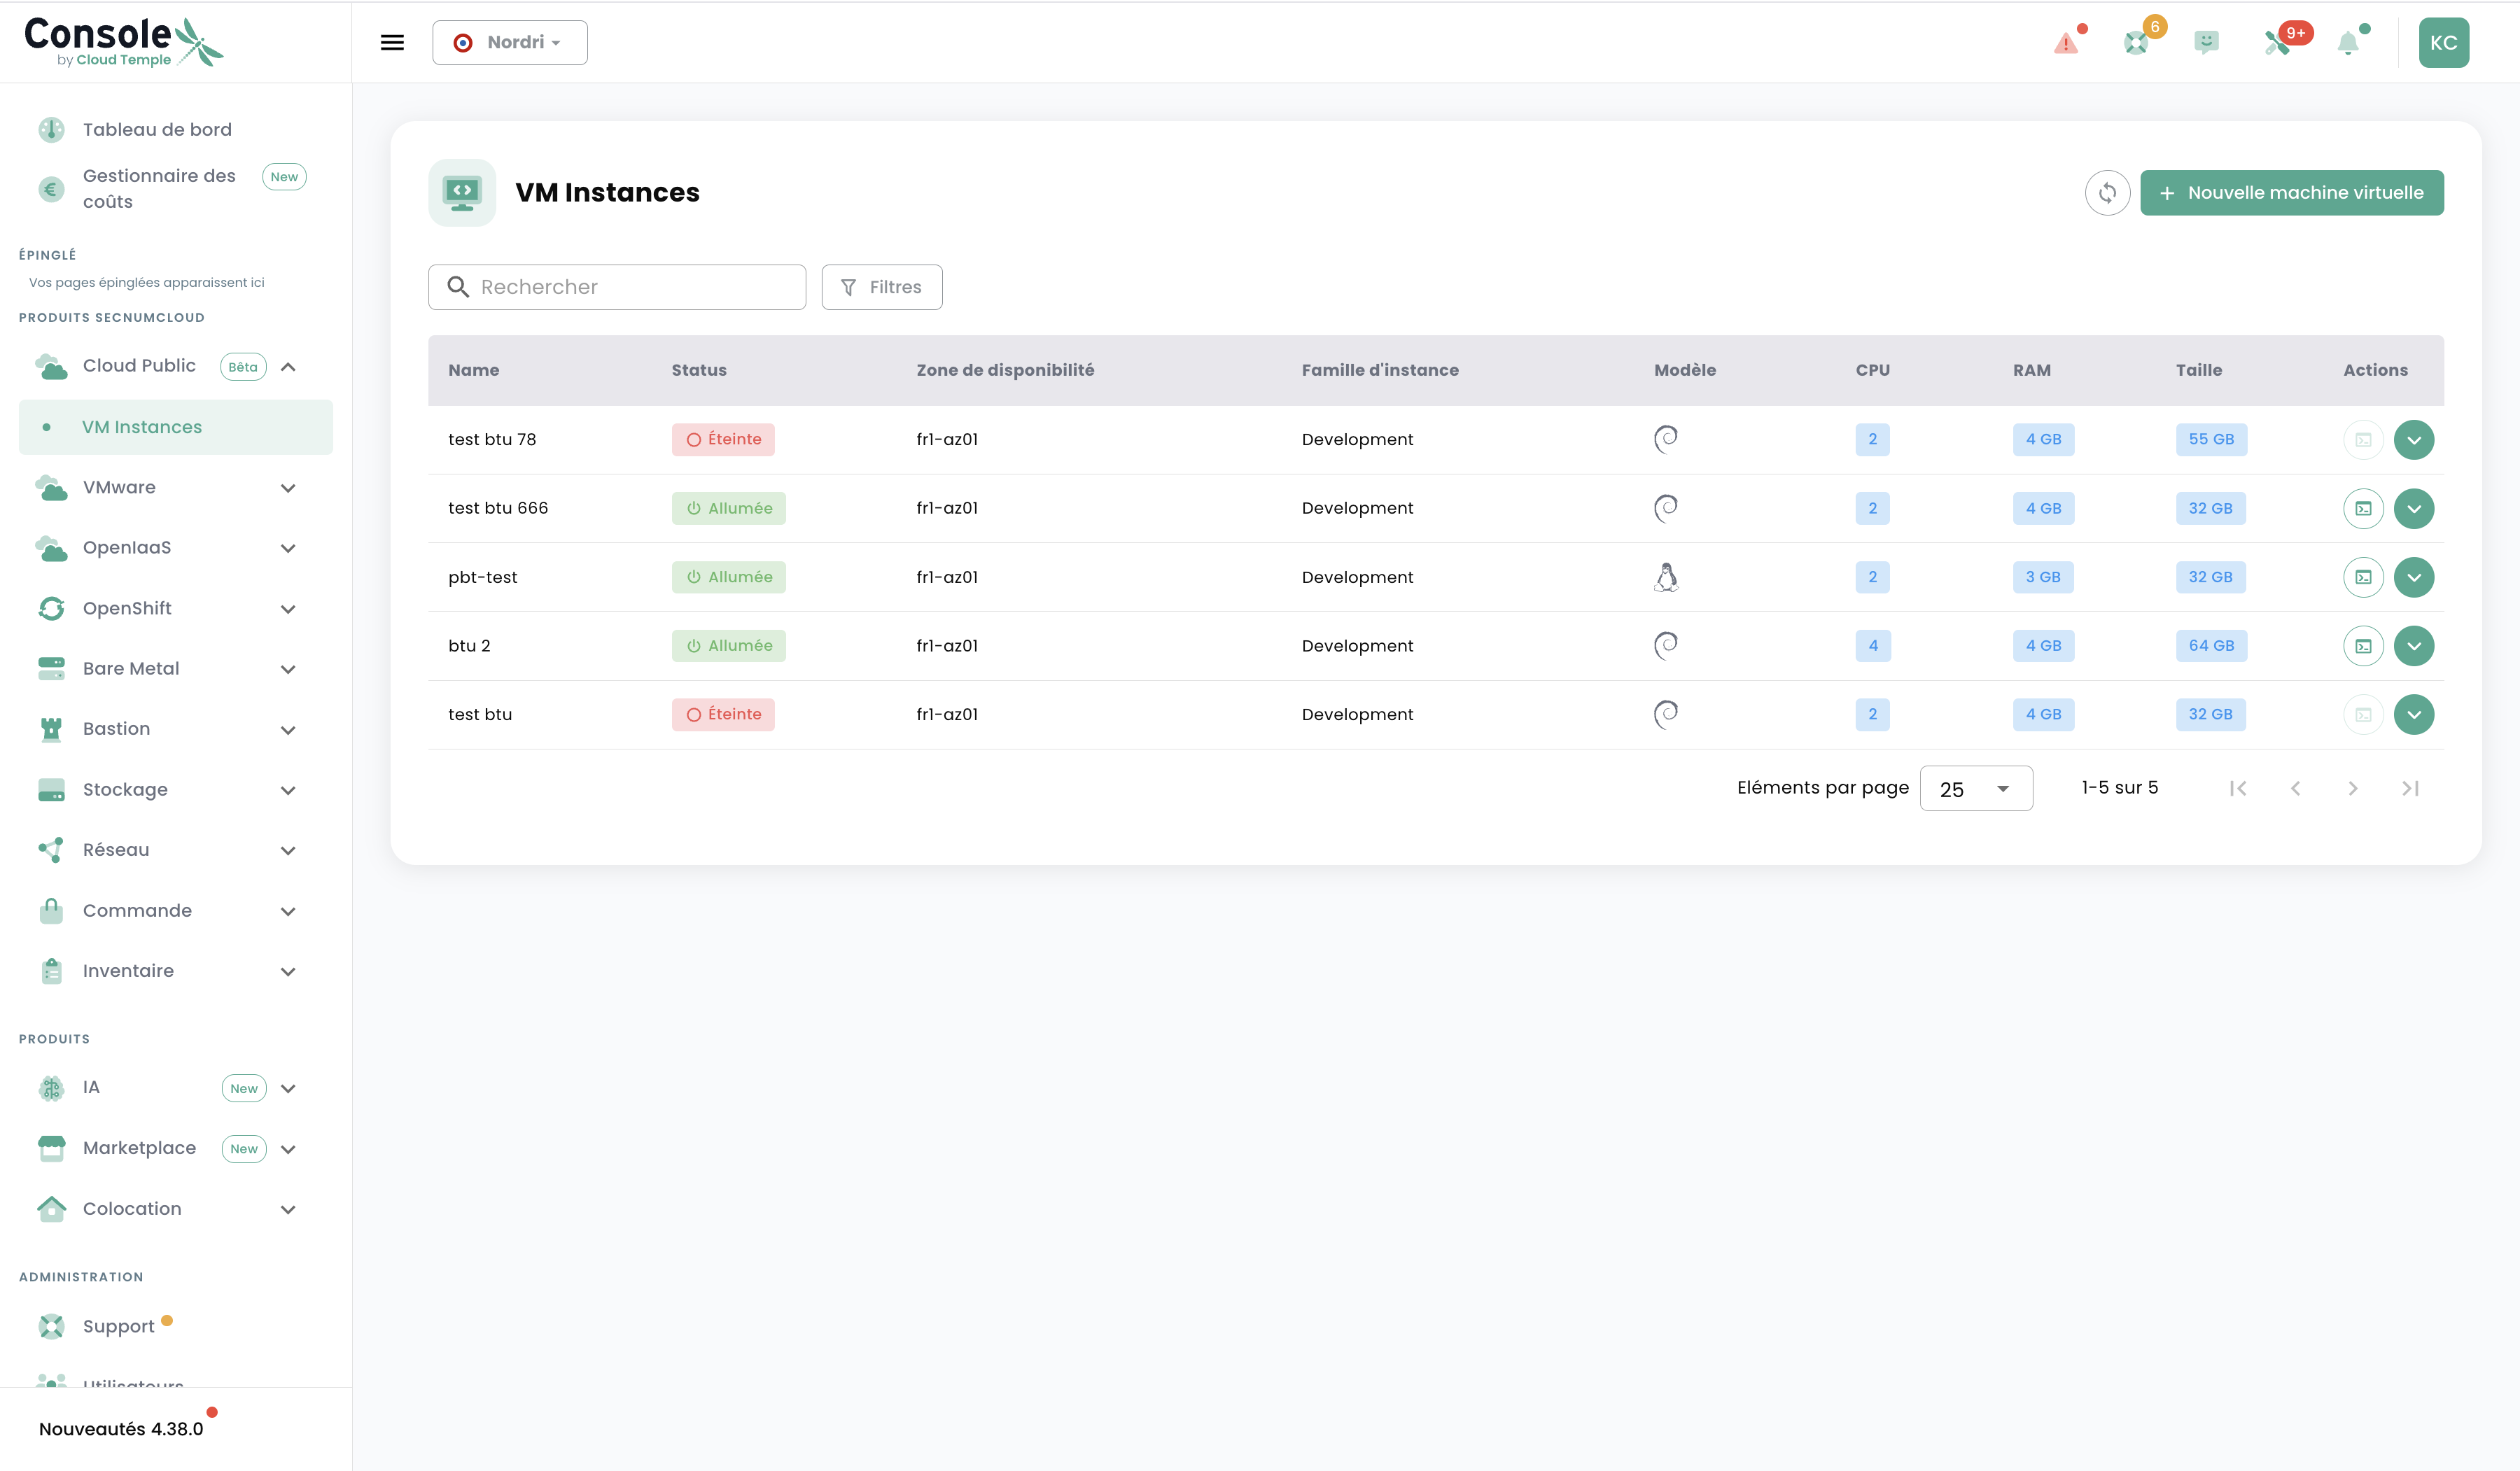
The table displays for each VM: its name, status (On / Off), availability zone, instance family, model, and allocated resources (CPU, RAM, Disk size).
Deploying a Virtual Machine
Click the + New virtual machine button at the top right to open the creation wizard. This wizard runs through 9 steps.
Step 1 — Instance Family
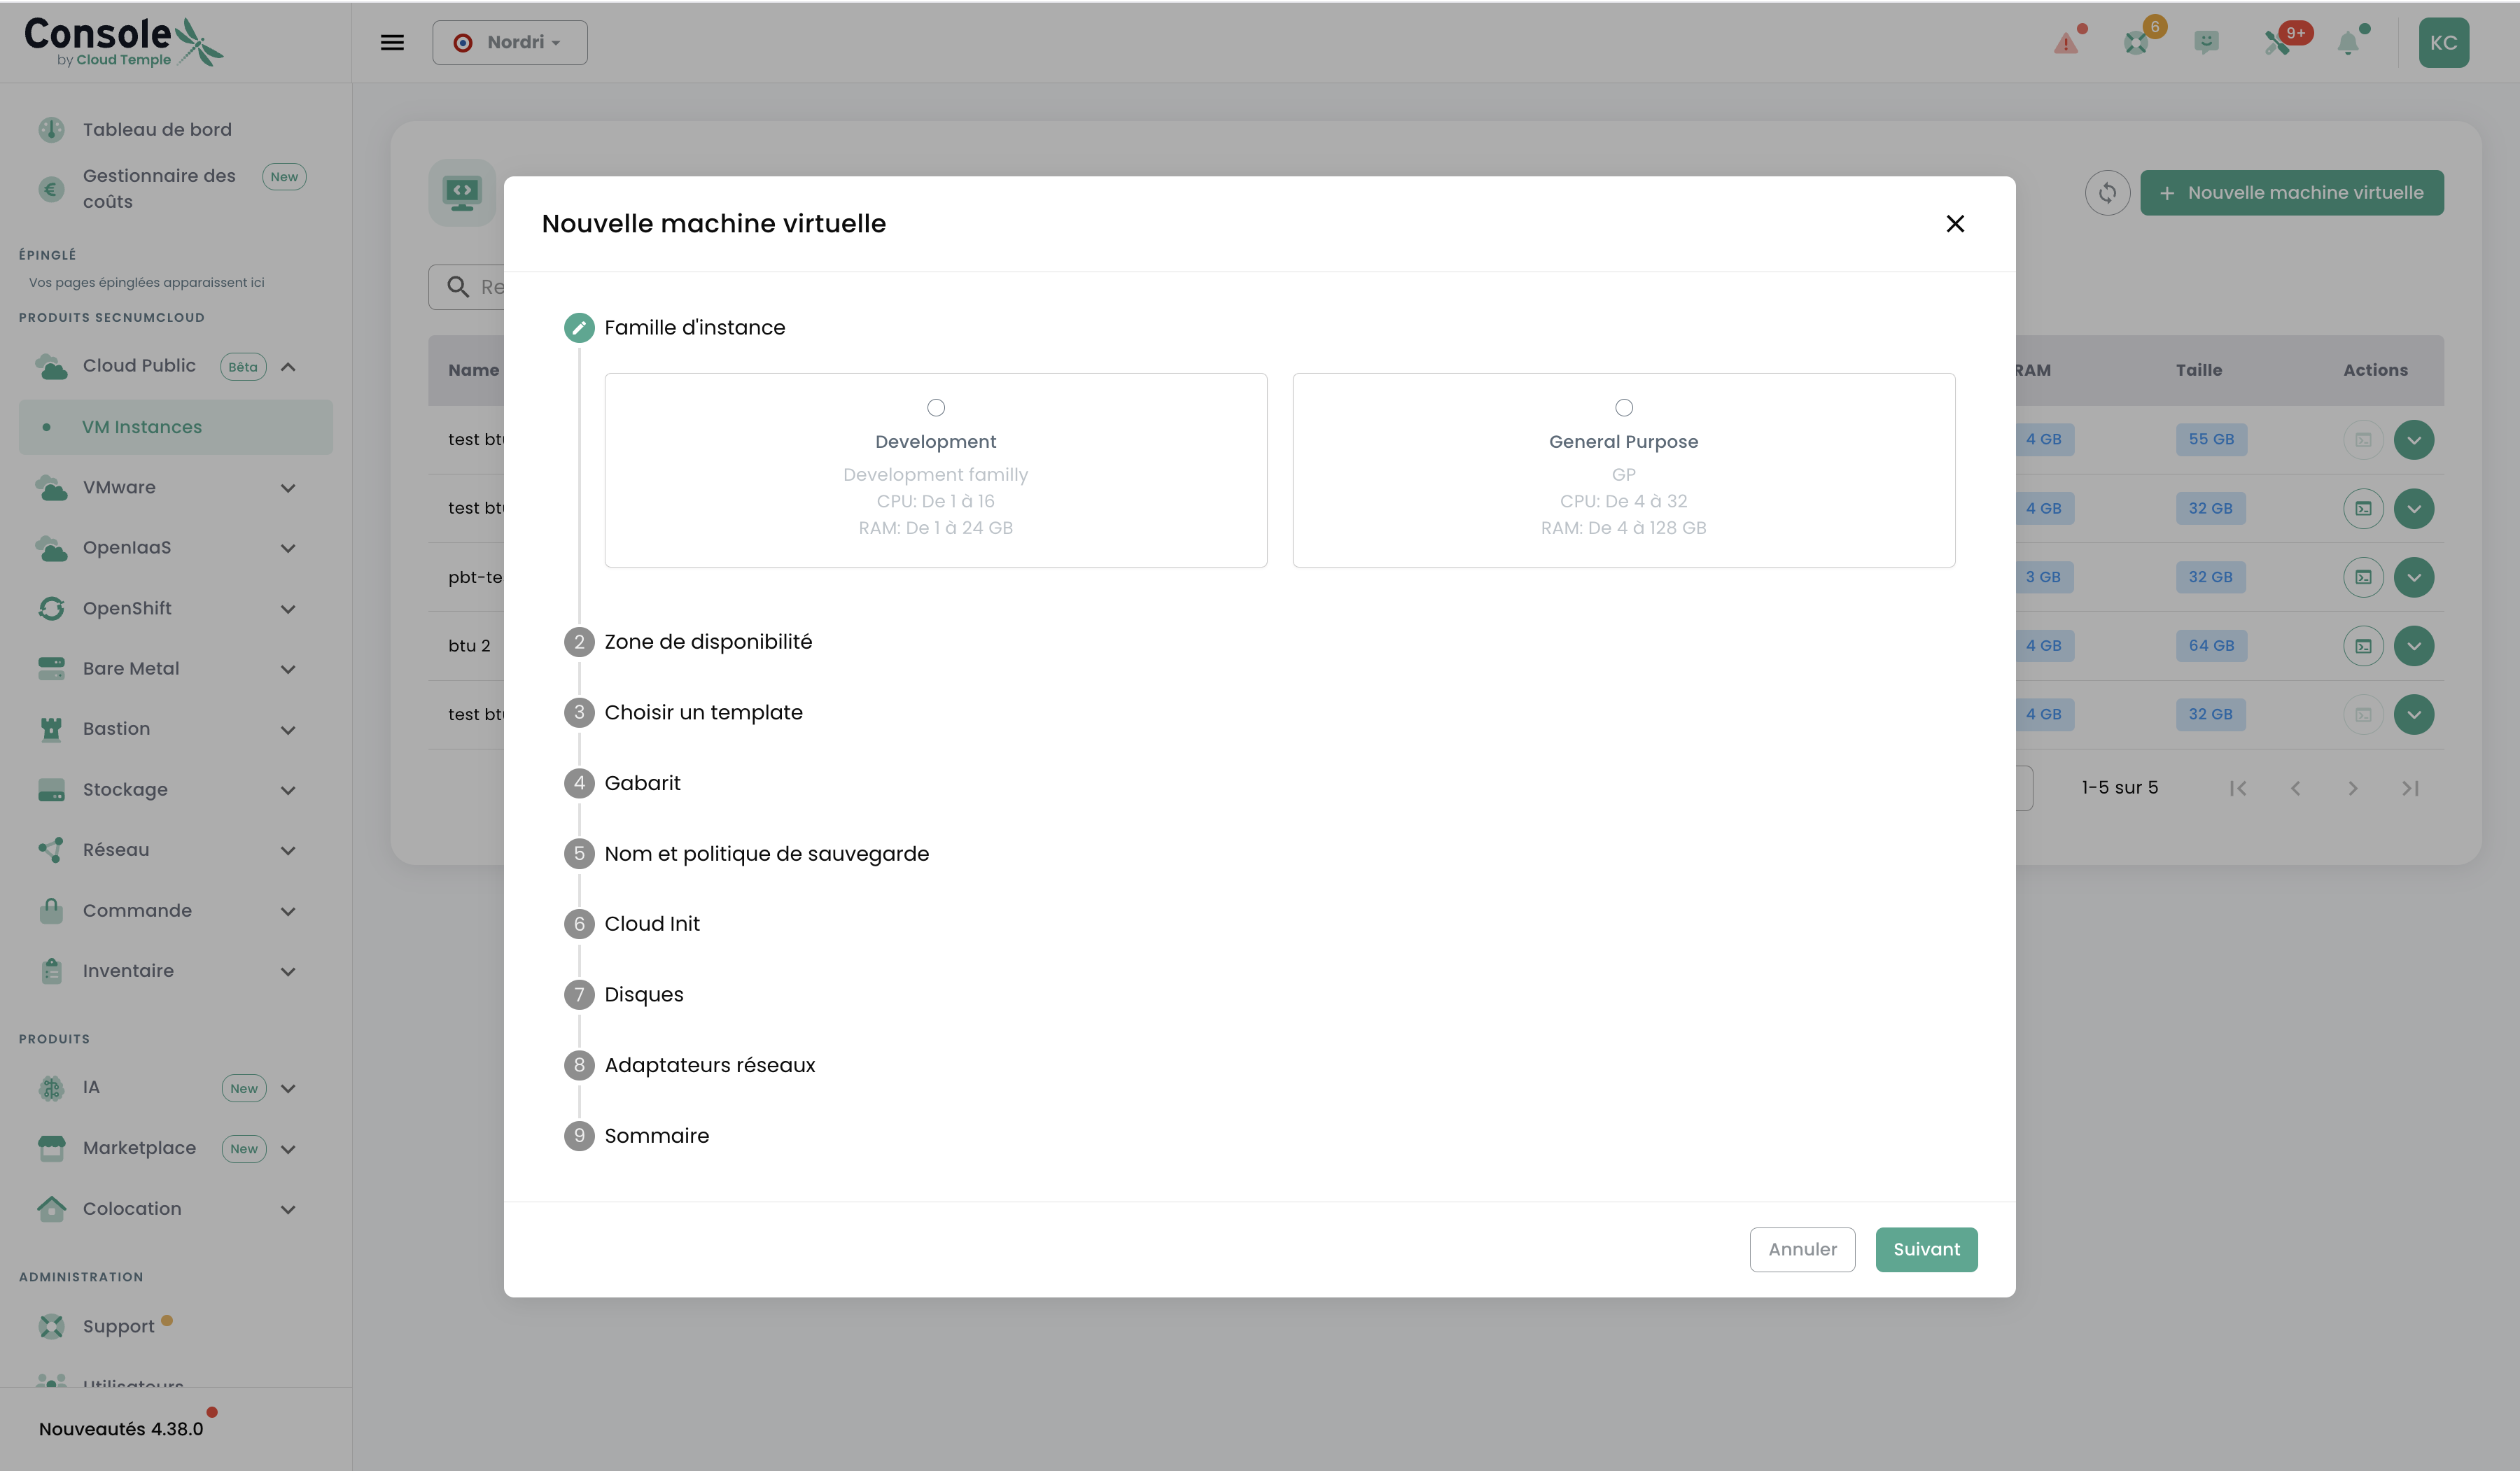
Choose the instance family suited to your workload:
| Family | Description | CPU |
|---|---|---|
| Development | Cost-optimised, for test and staging environments | Shared |
| General Purpose | Optimal vCPU/RAM balance for standard workloads | Shared |
The Performance family (dedicated vCPUs) is available via the custom flavor option.
Step 2 — Availability Zone
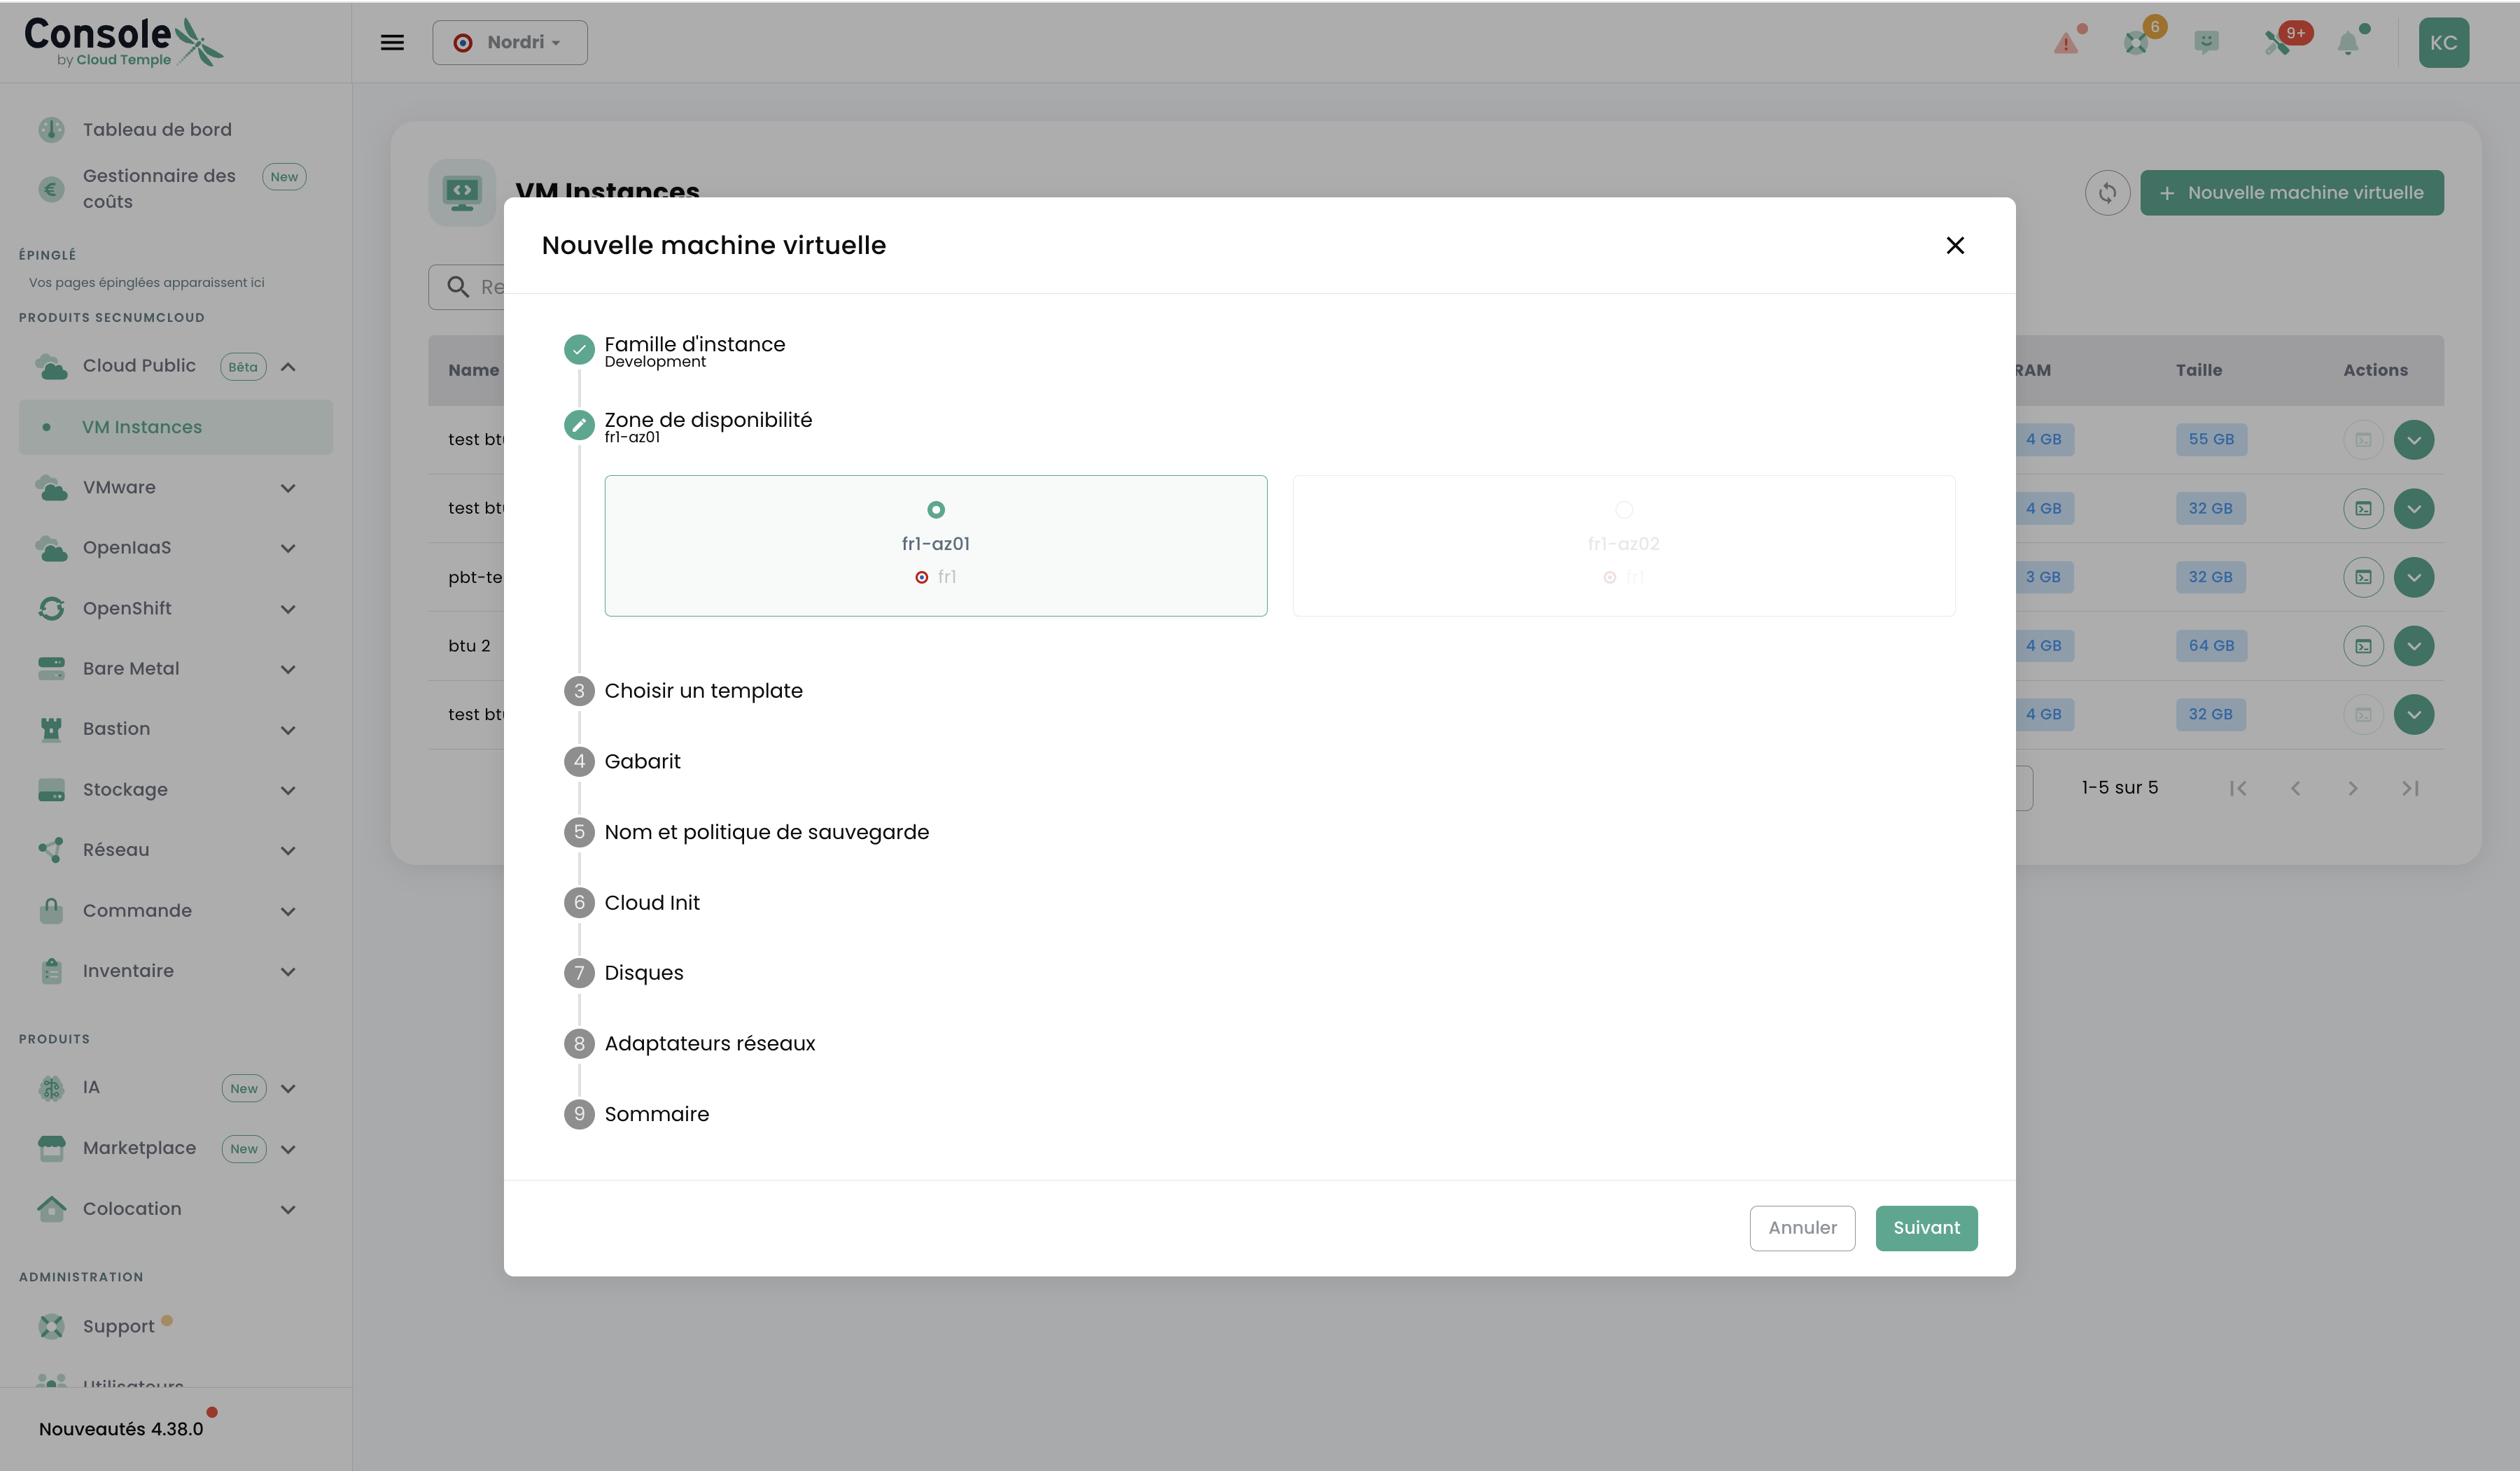
Select the availability zone (AZ) in which your VM will be hosted (e.g. fr1-az01).
Step 3 — Choose a Template
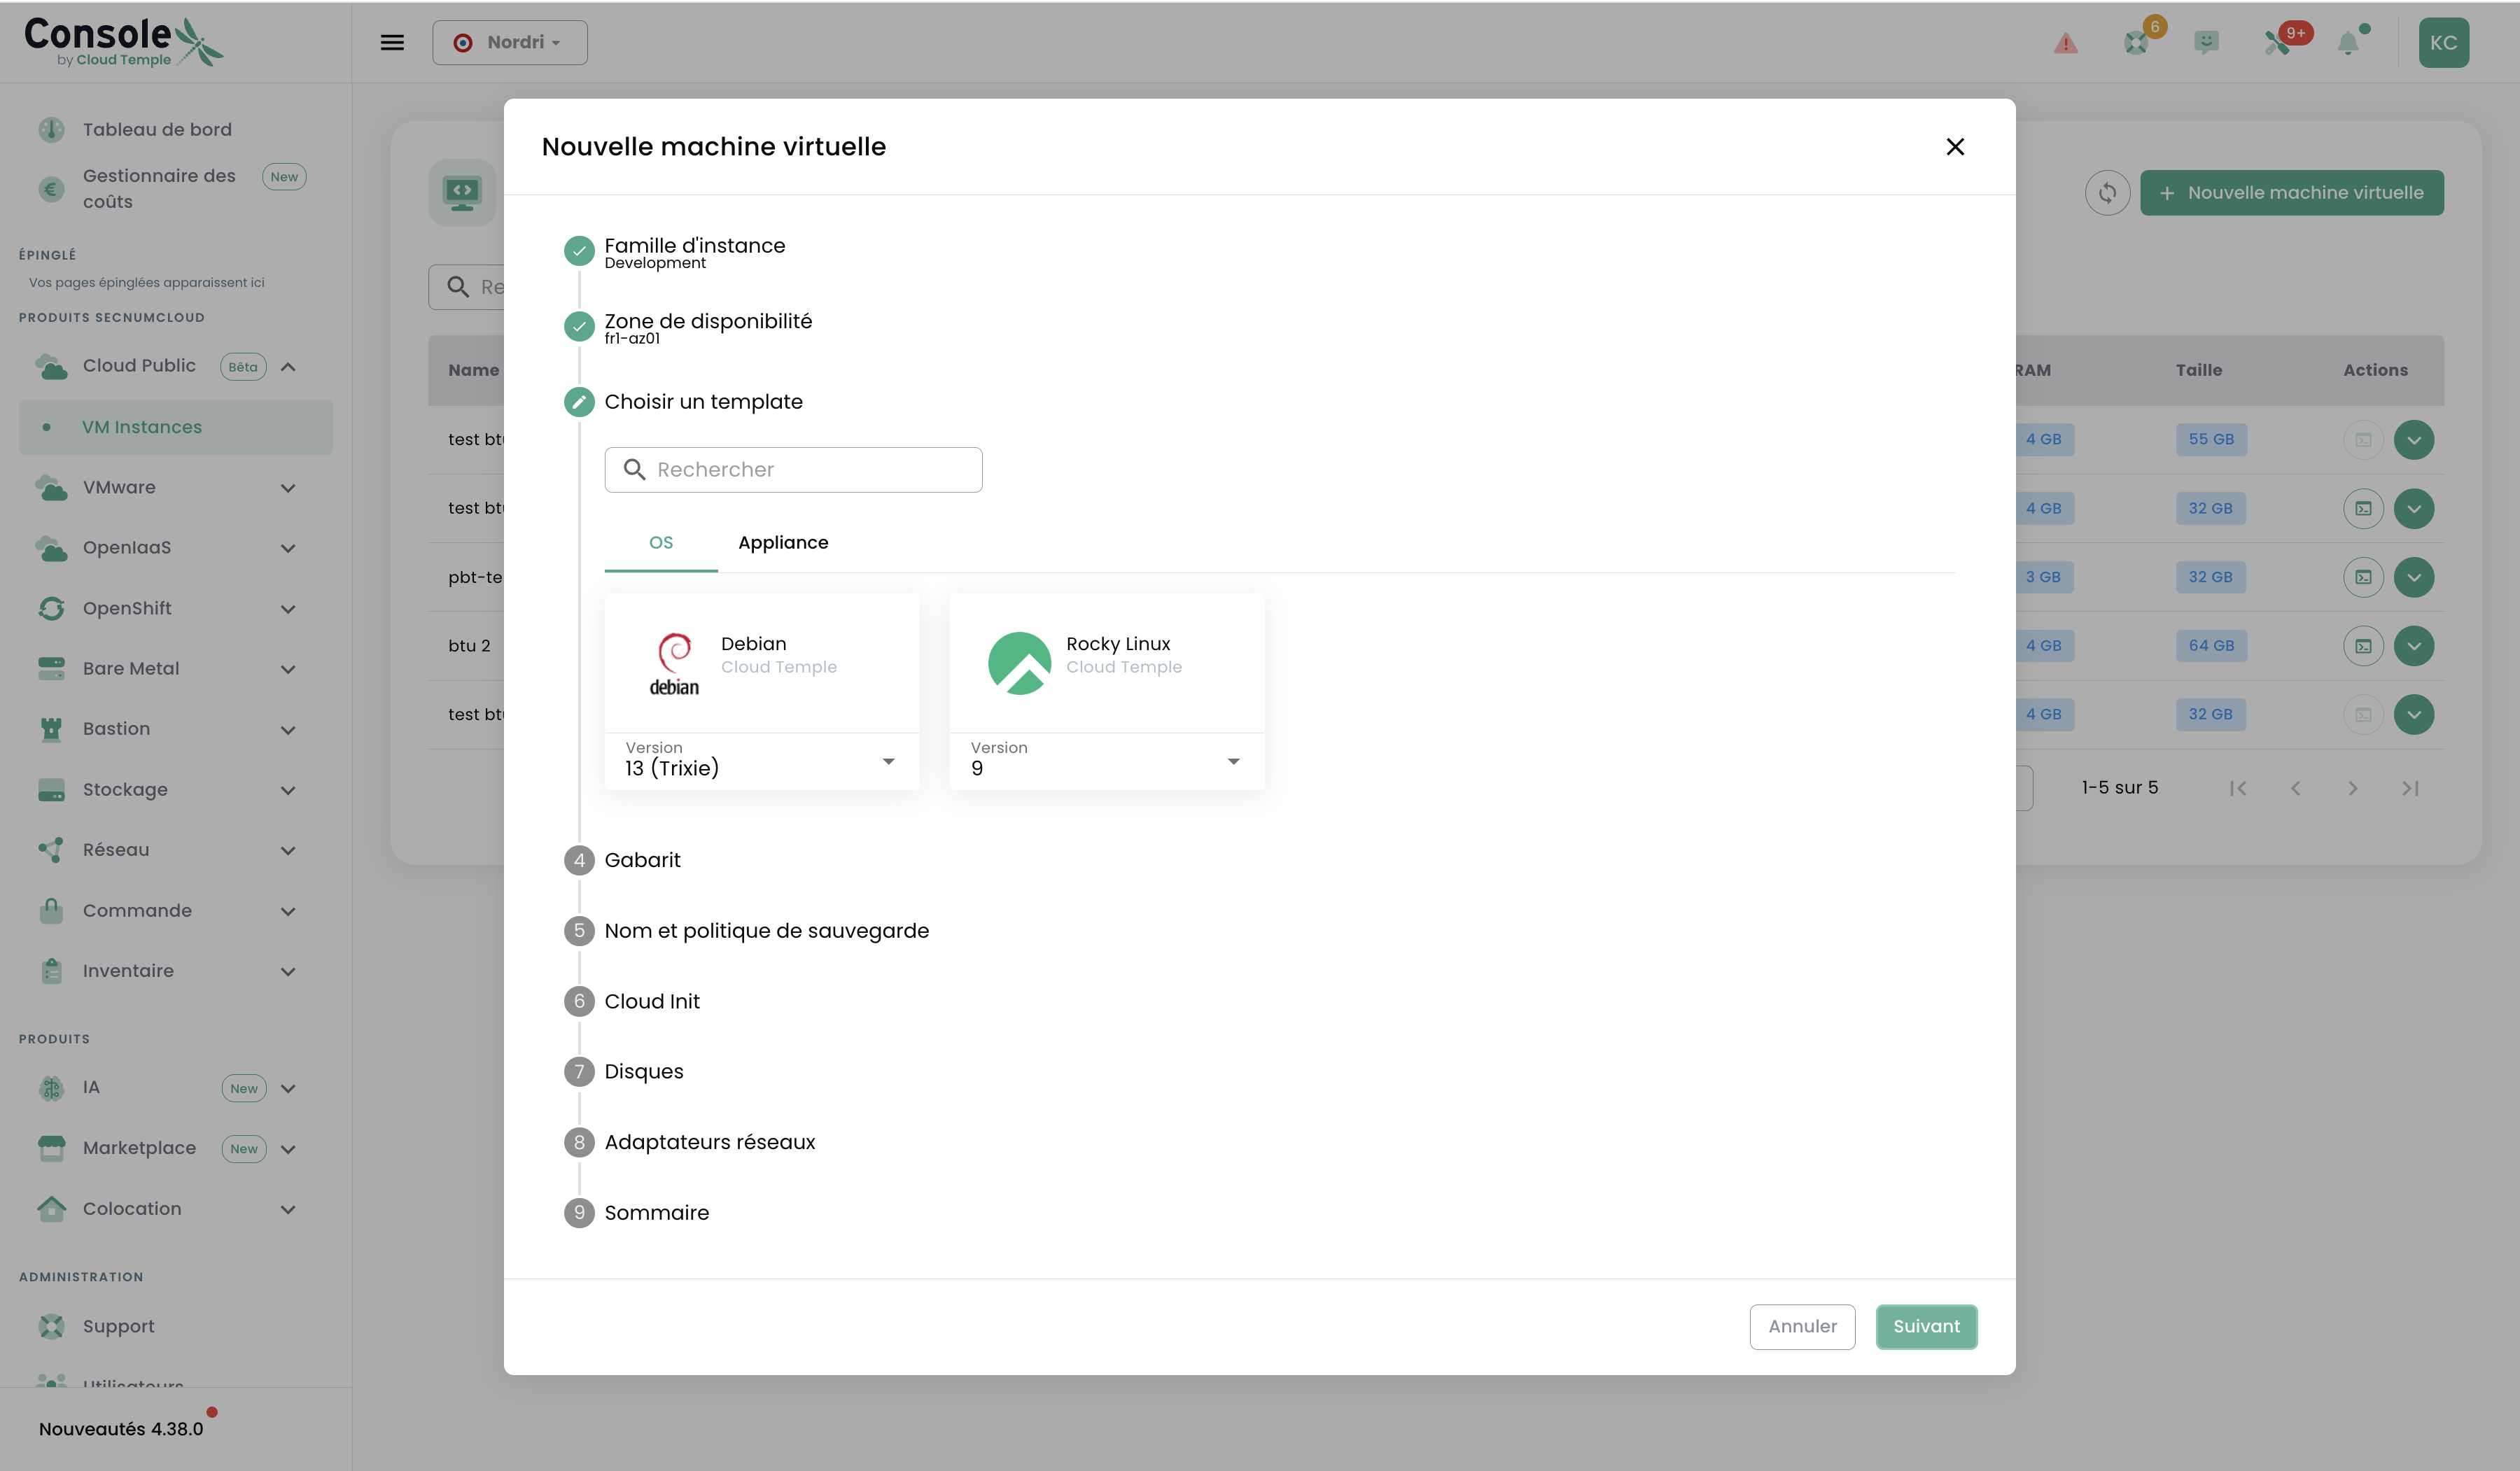
Browse the available image catalogue via the OS and Appliances tabs:
- Debian 13 (Trixie)
- Rocky Linux
- And other systems available in the Cloud Temple Marketplace
Select the desired operating system and choose the version from the associated dropdown.
Step 4 — Flavor

Choose a predefined flavor or create a Custom flavor:
dev-1: 1 vCPUdev-2: 2 vCPU / 8 GB RAM- Custom: freely enter the number of vCPUs and the amount of RAM
Step 5 — Name and Backup Policy
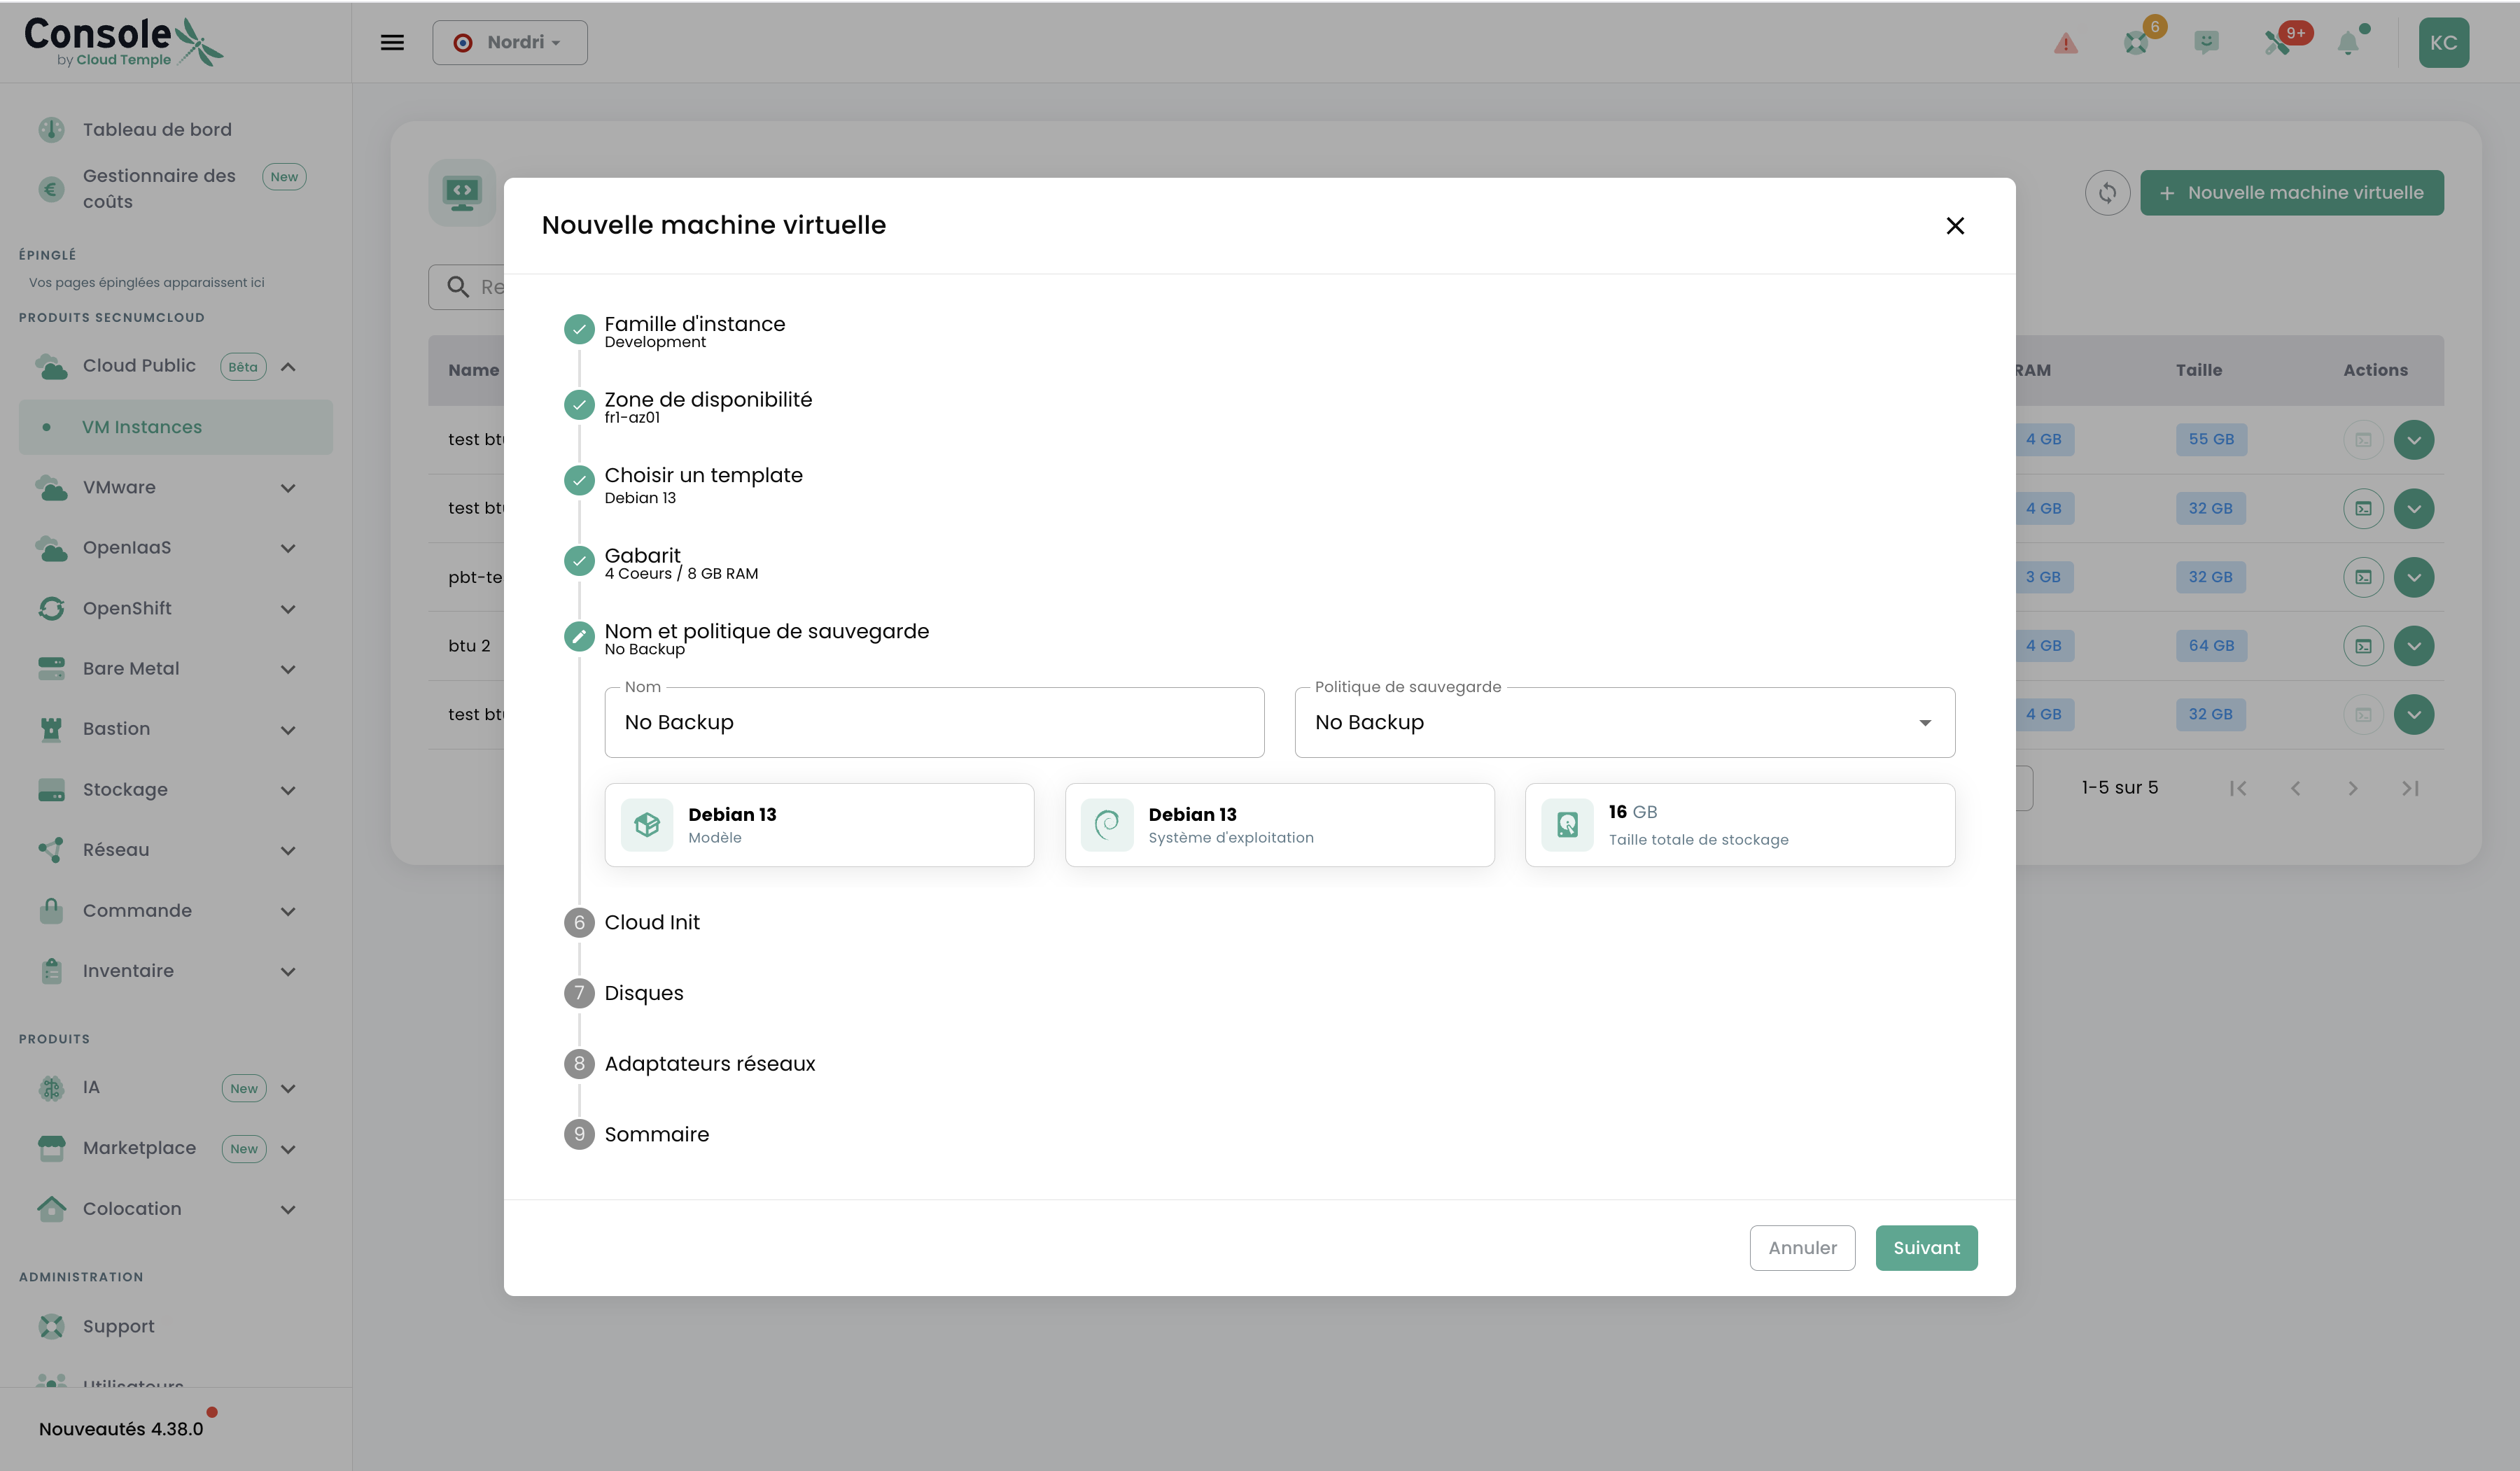
Fill in:
| Parameter | Description |
|---|---|
| Name | Unique name for your VM in the tenant |
| Backup policy | No Backup by default, or a retention policy if the backup option is subscribed |
Step 6 — Cloud Init
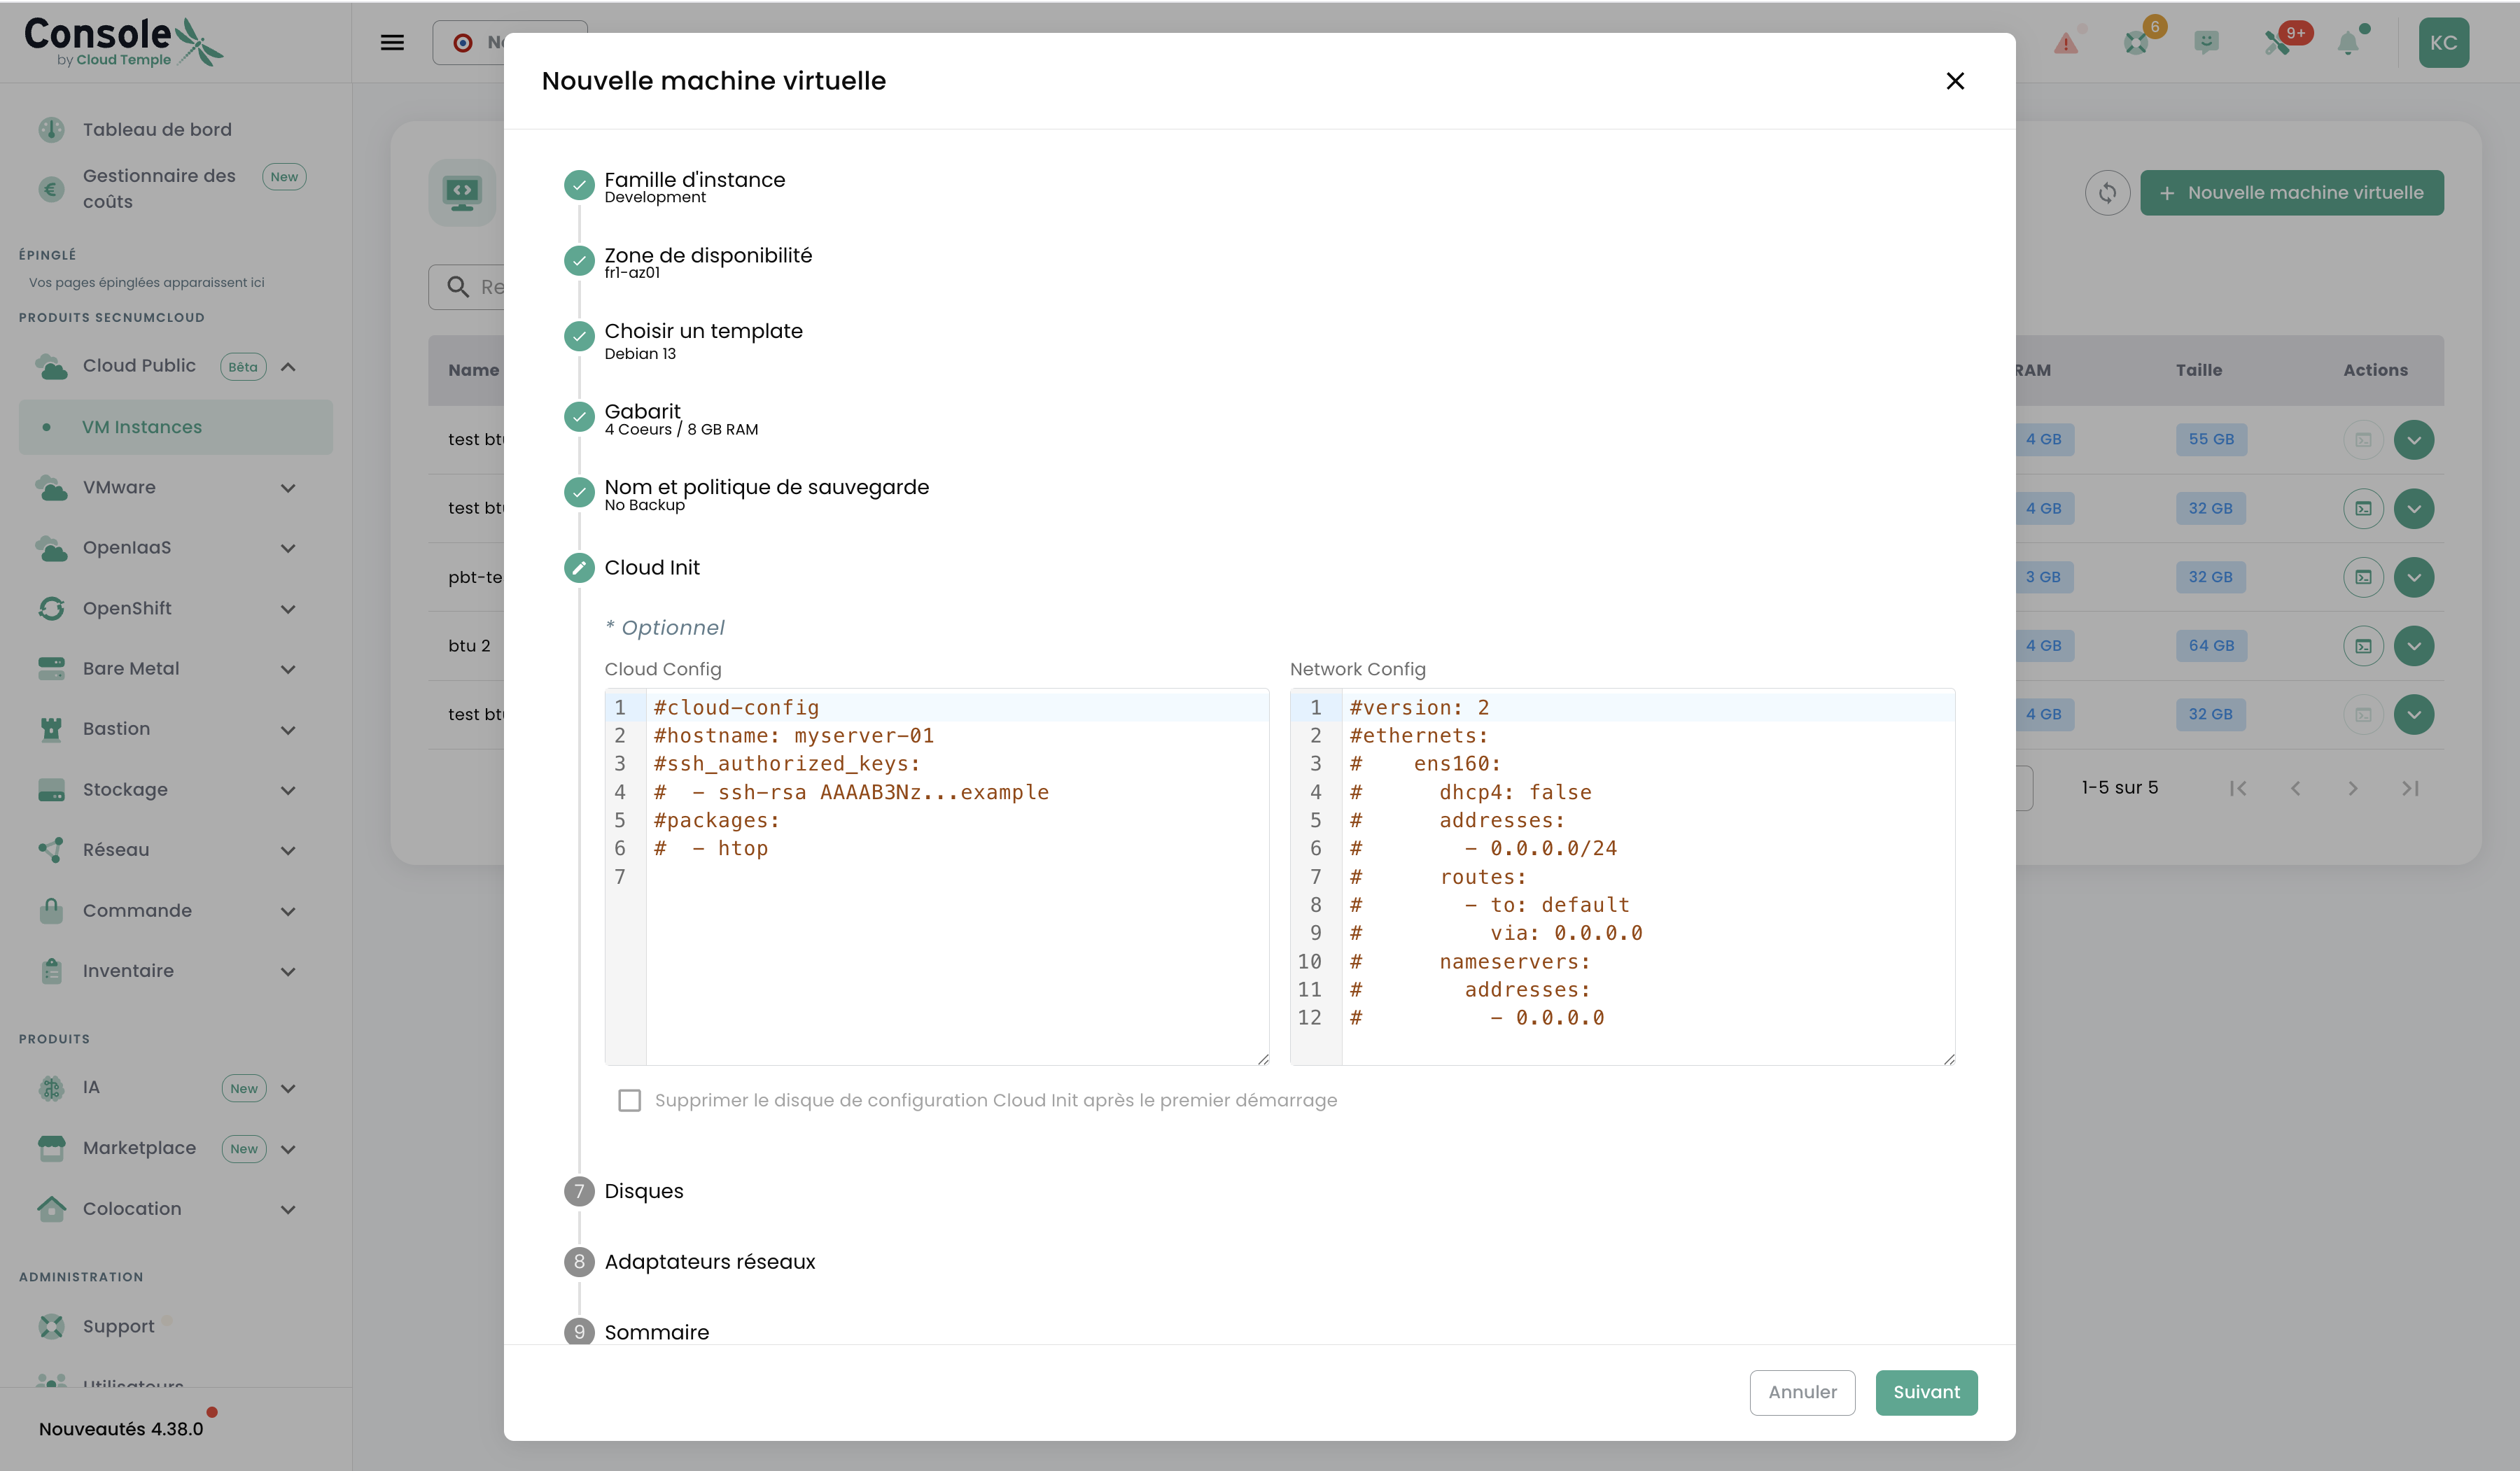
This step is optional. It allows you to pre-configure your VM at first boot via two editors:
- Cloud Config: SSH key injection, hostname configuration, package installation, etc.
- Network Config: static network configuration (Netplan format)
Step 7 — Disks
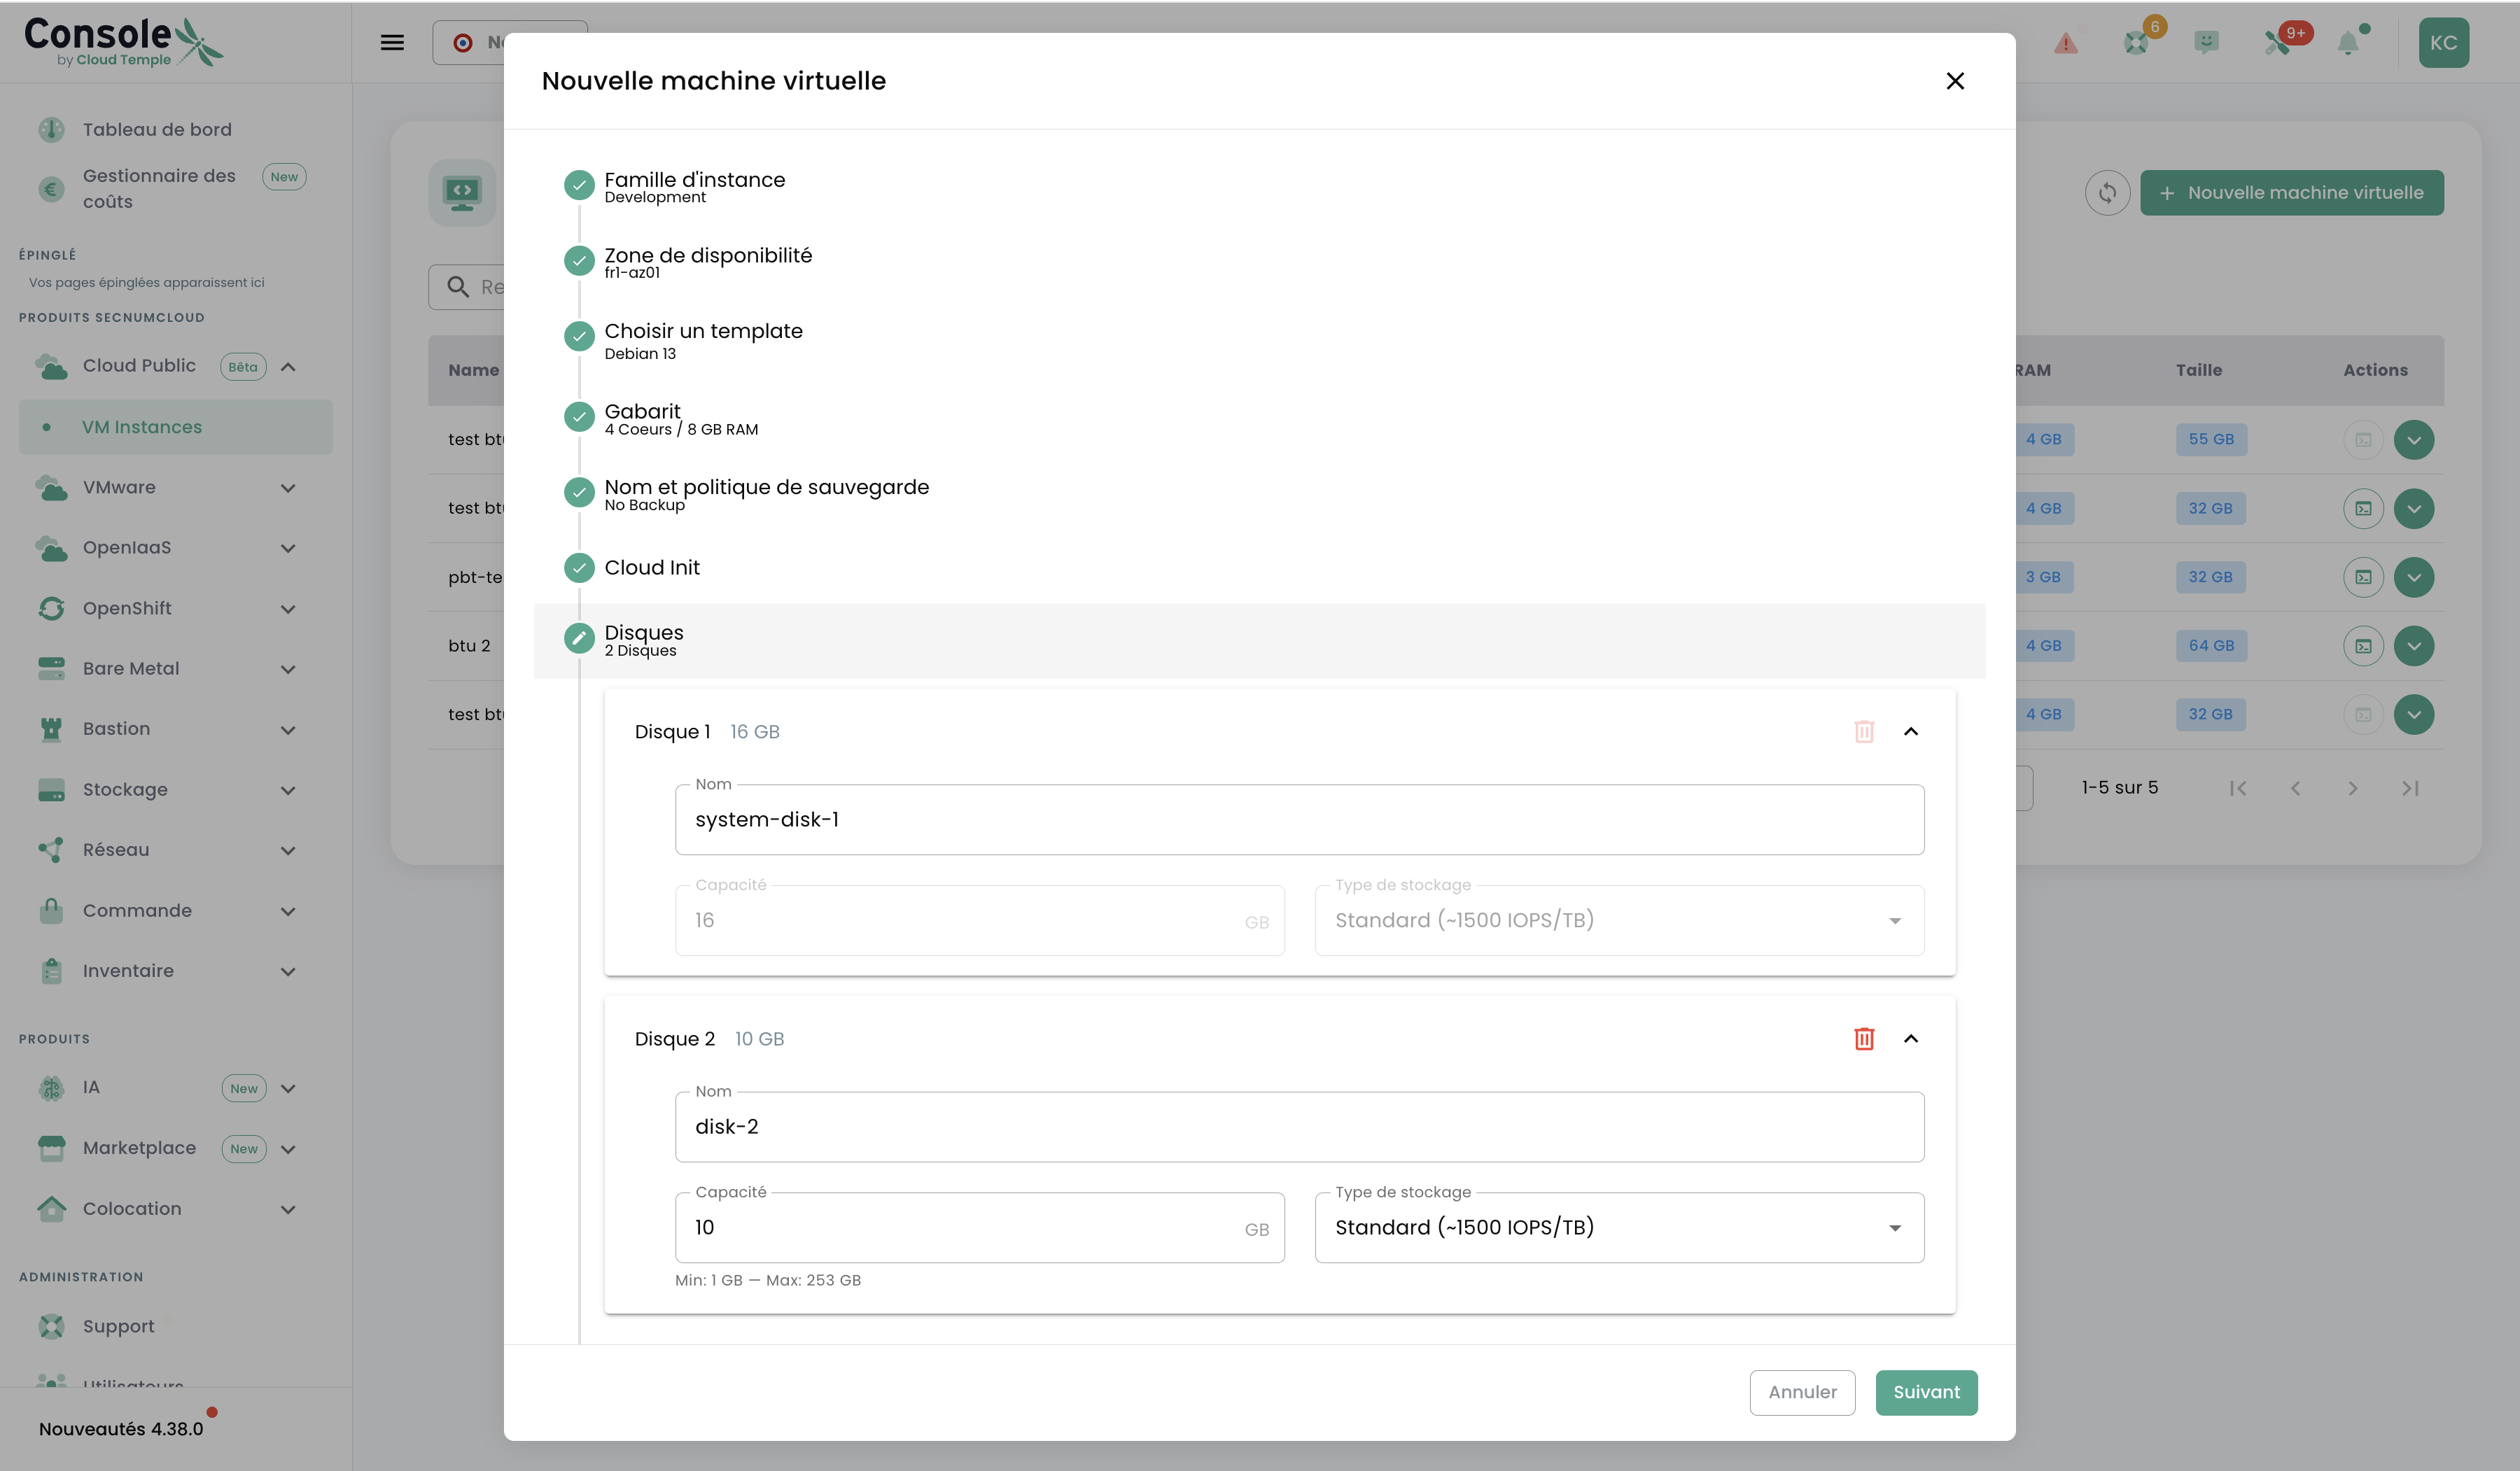
Configure the disk(s) for your VM. Two storage types are available:
| Type | IOPS |
|---|---|
| Standard | ~1,500 IOPS/TB |
| Enterprise | ~7,500 IOPS/TB |
Step 8 — Network Adapters
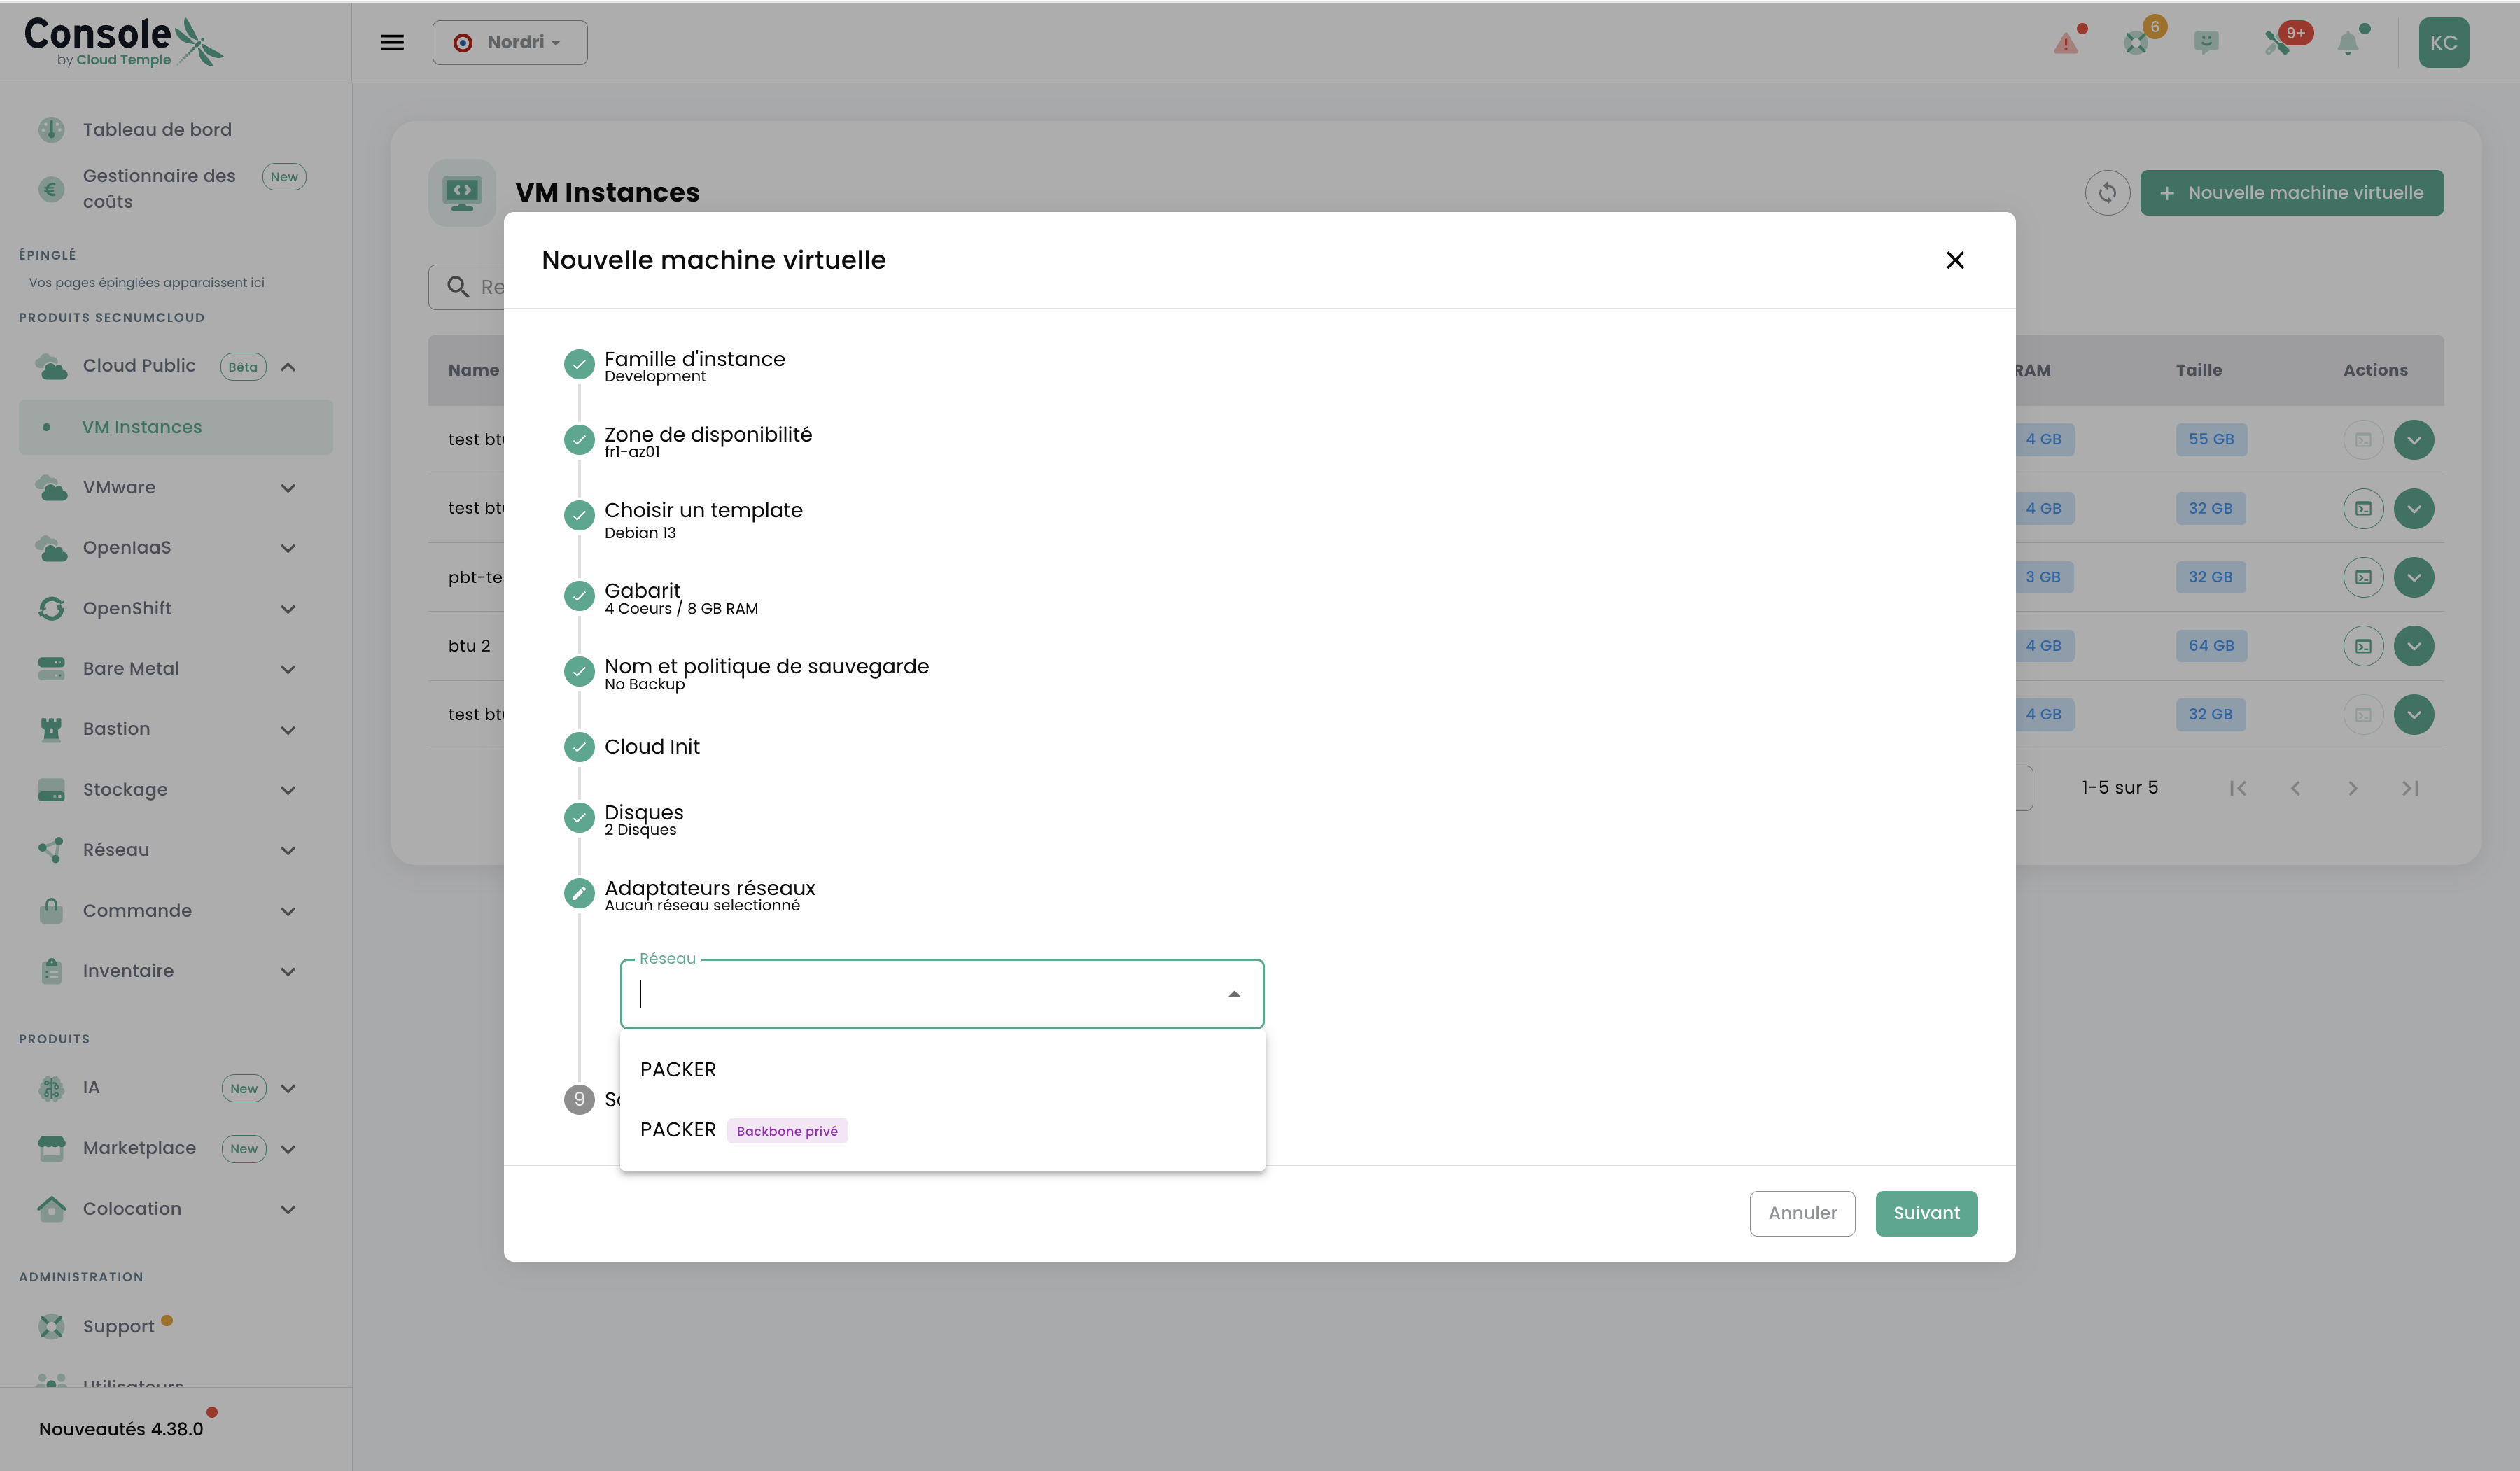
Associate your VM with a network:
- Private Backbone (e.g. PACKFR): shared private network with logical isolation
- VPC: fully dedicated private network with advanced segmentation
Step 9 — Summary
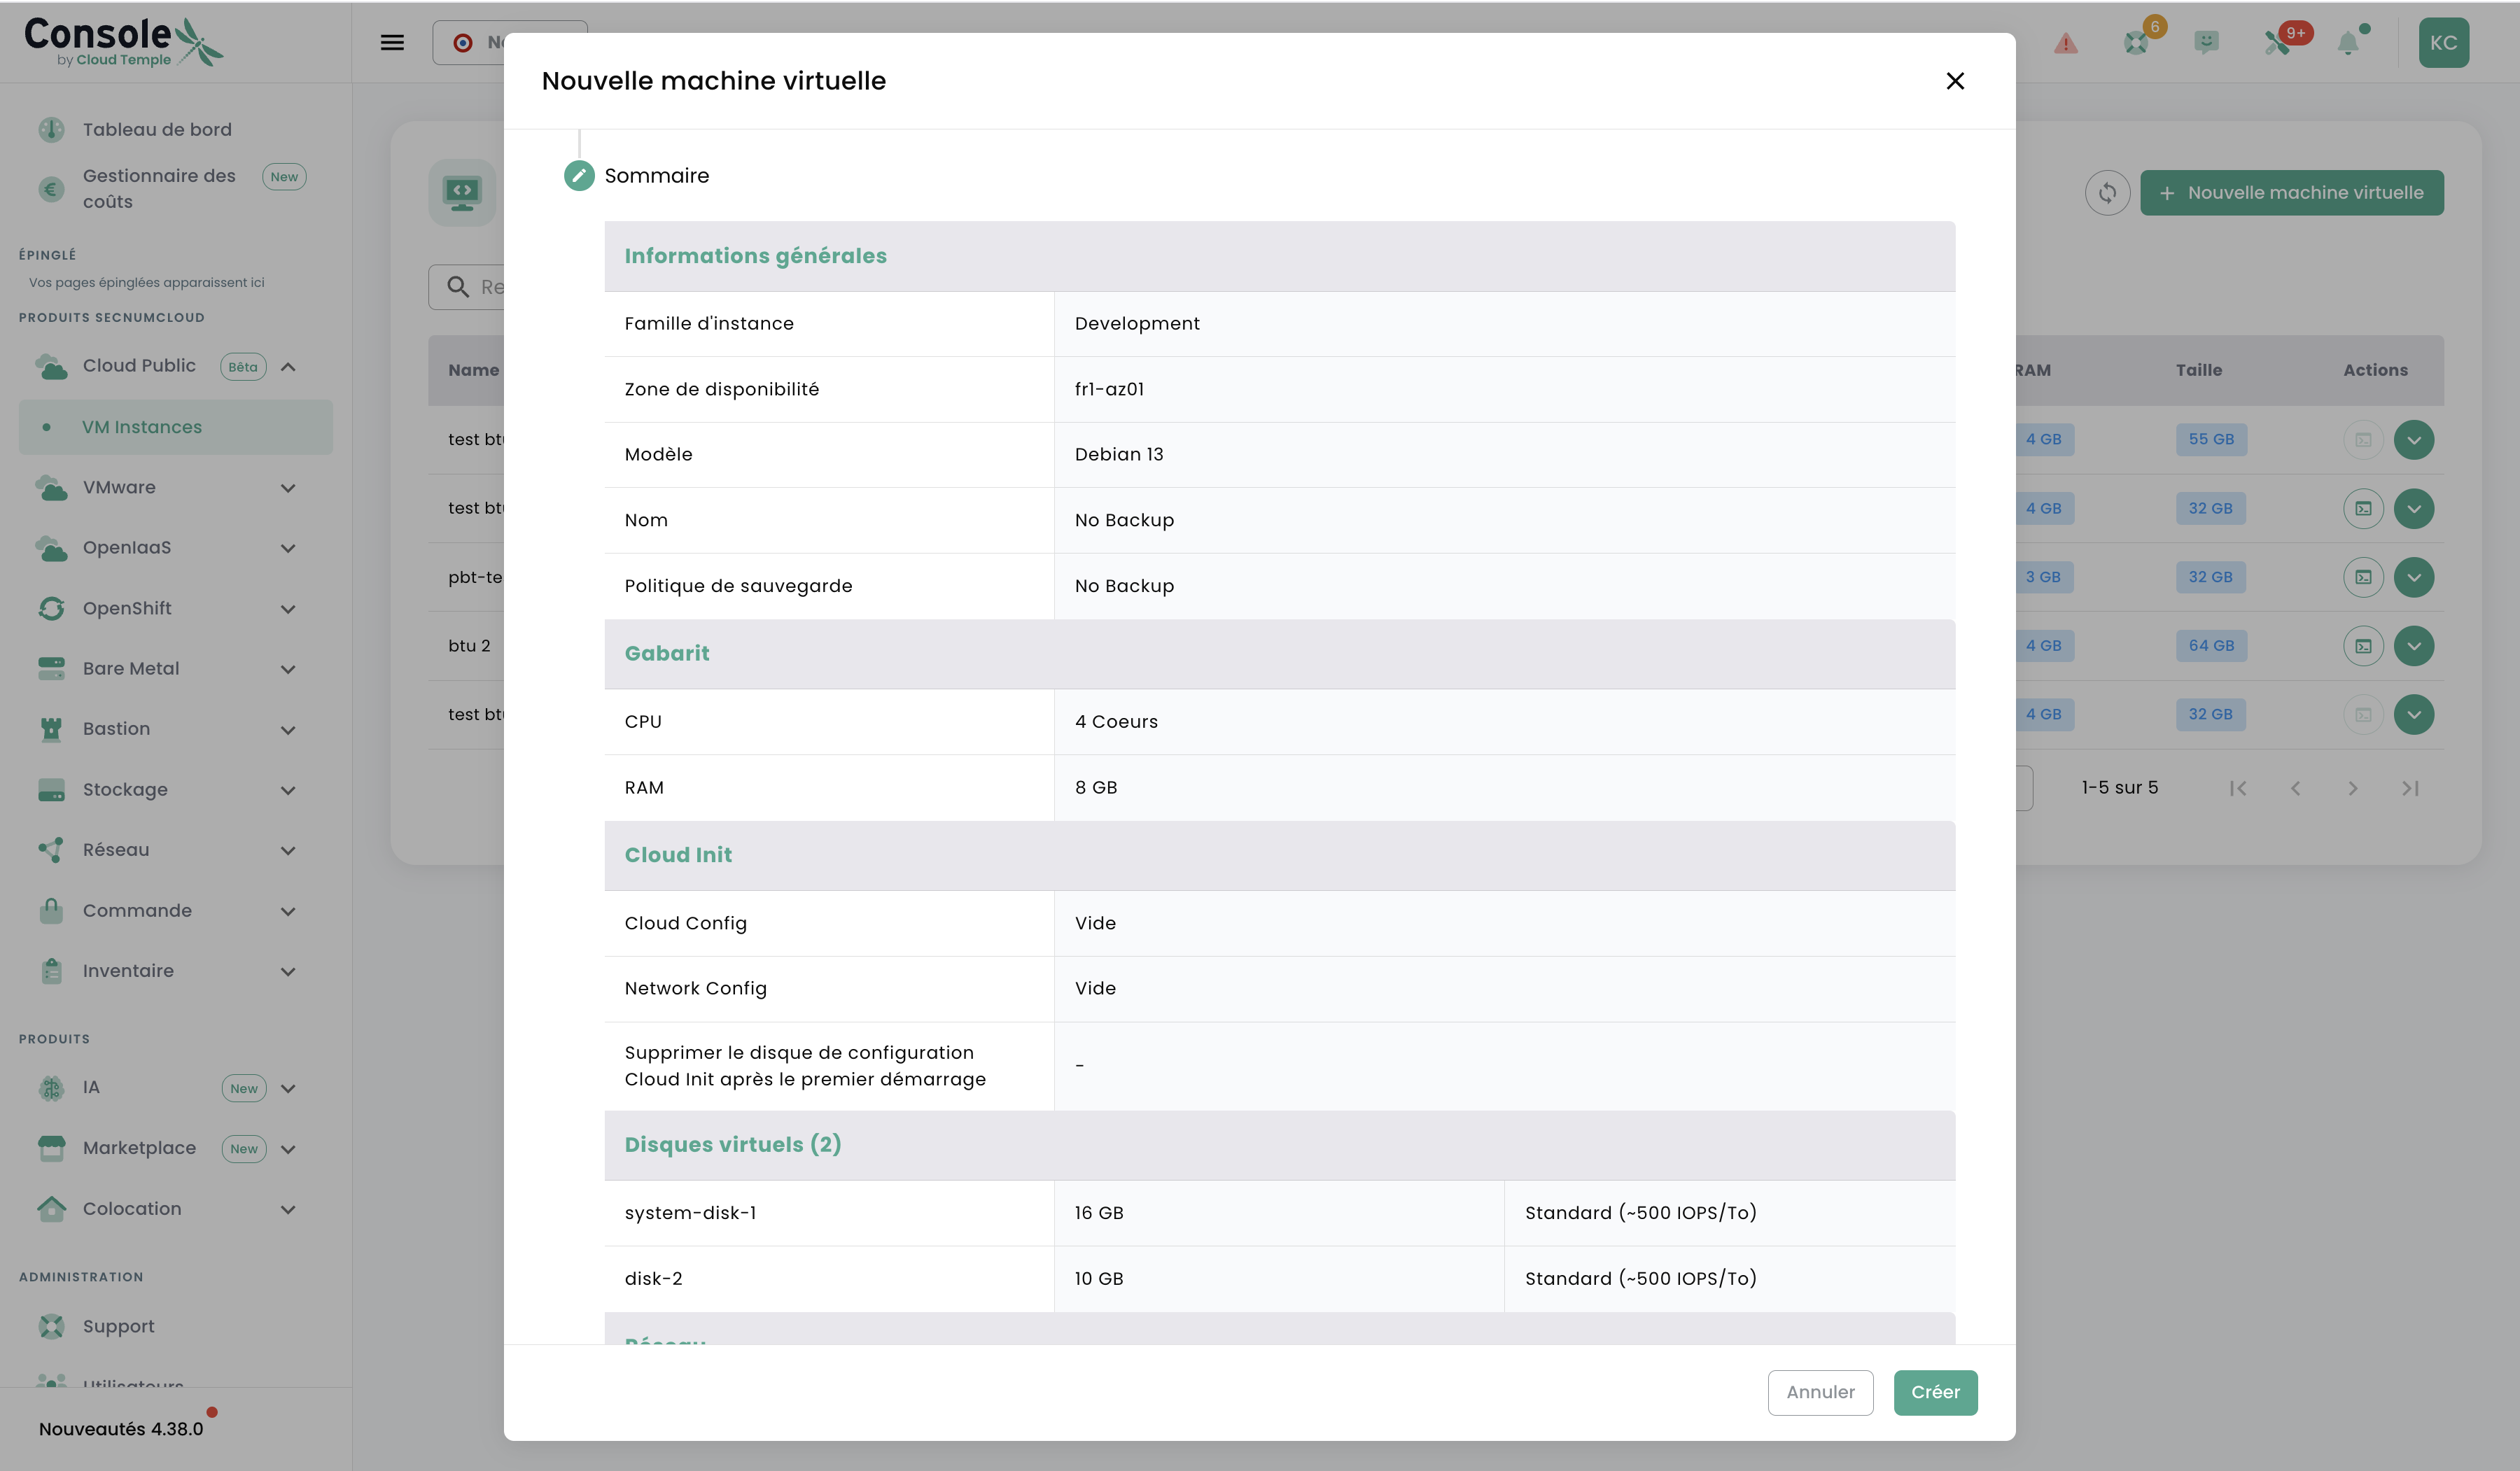
Review the full summary before launching provisioning and click Create.
Managing Your Virtual Machines
Click on a VM to open its detail panel. Four tabs are available:
Information Tab
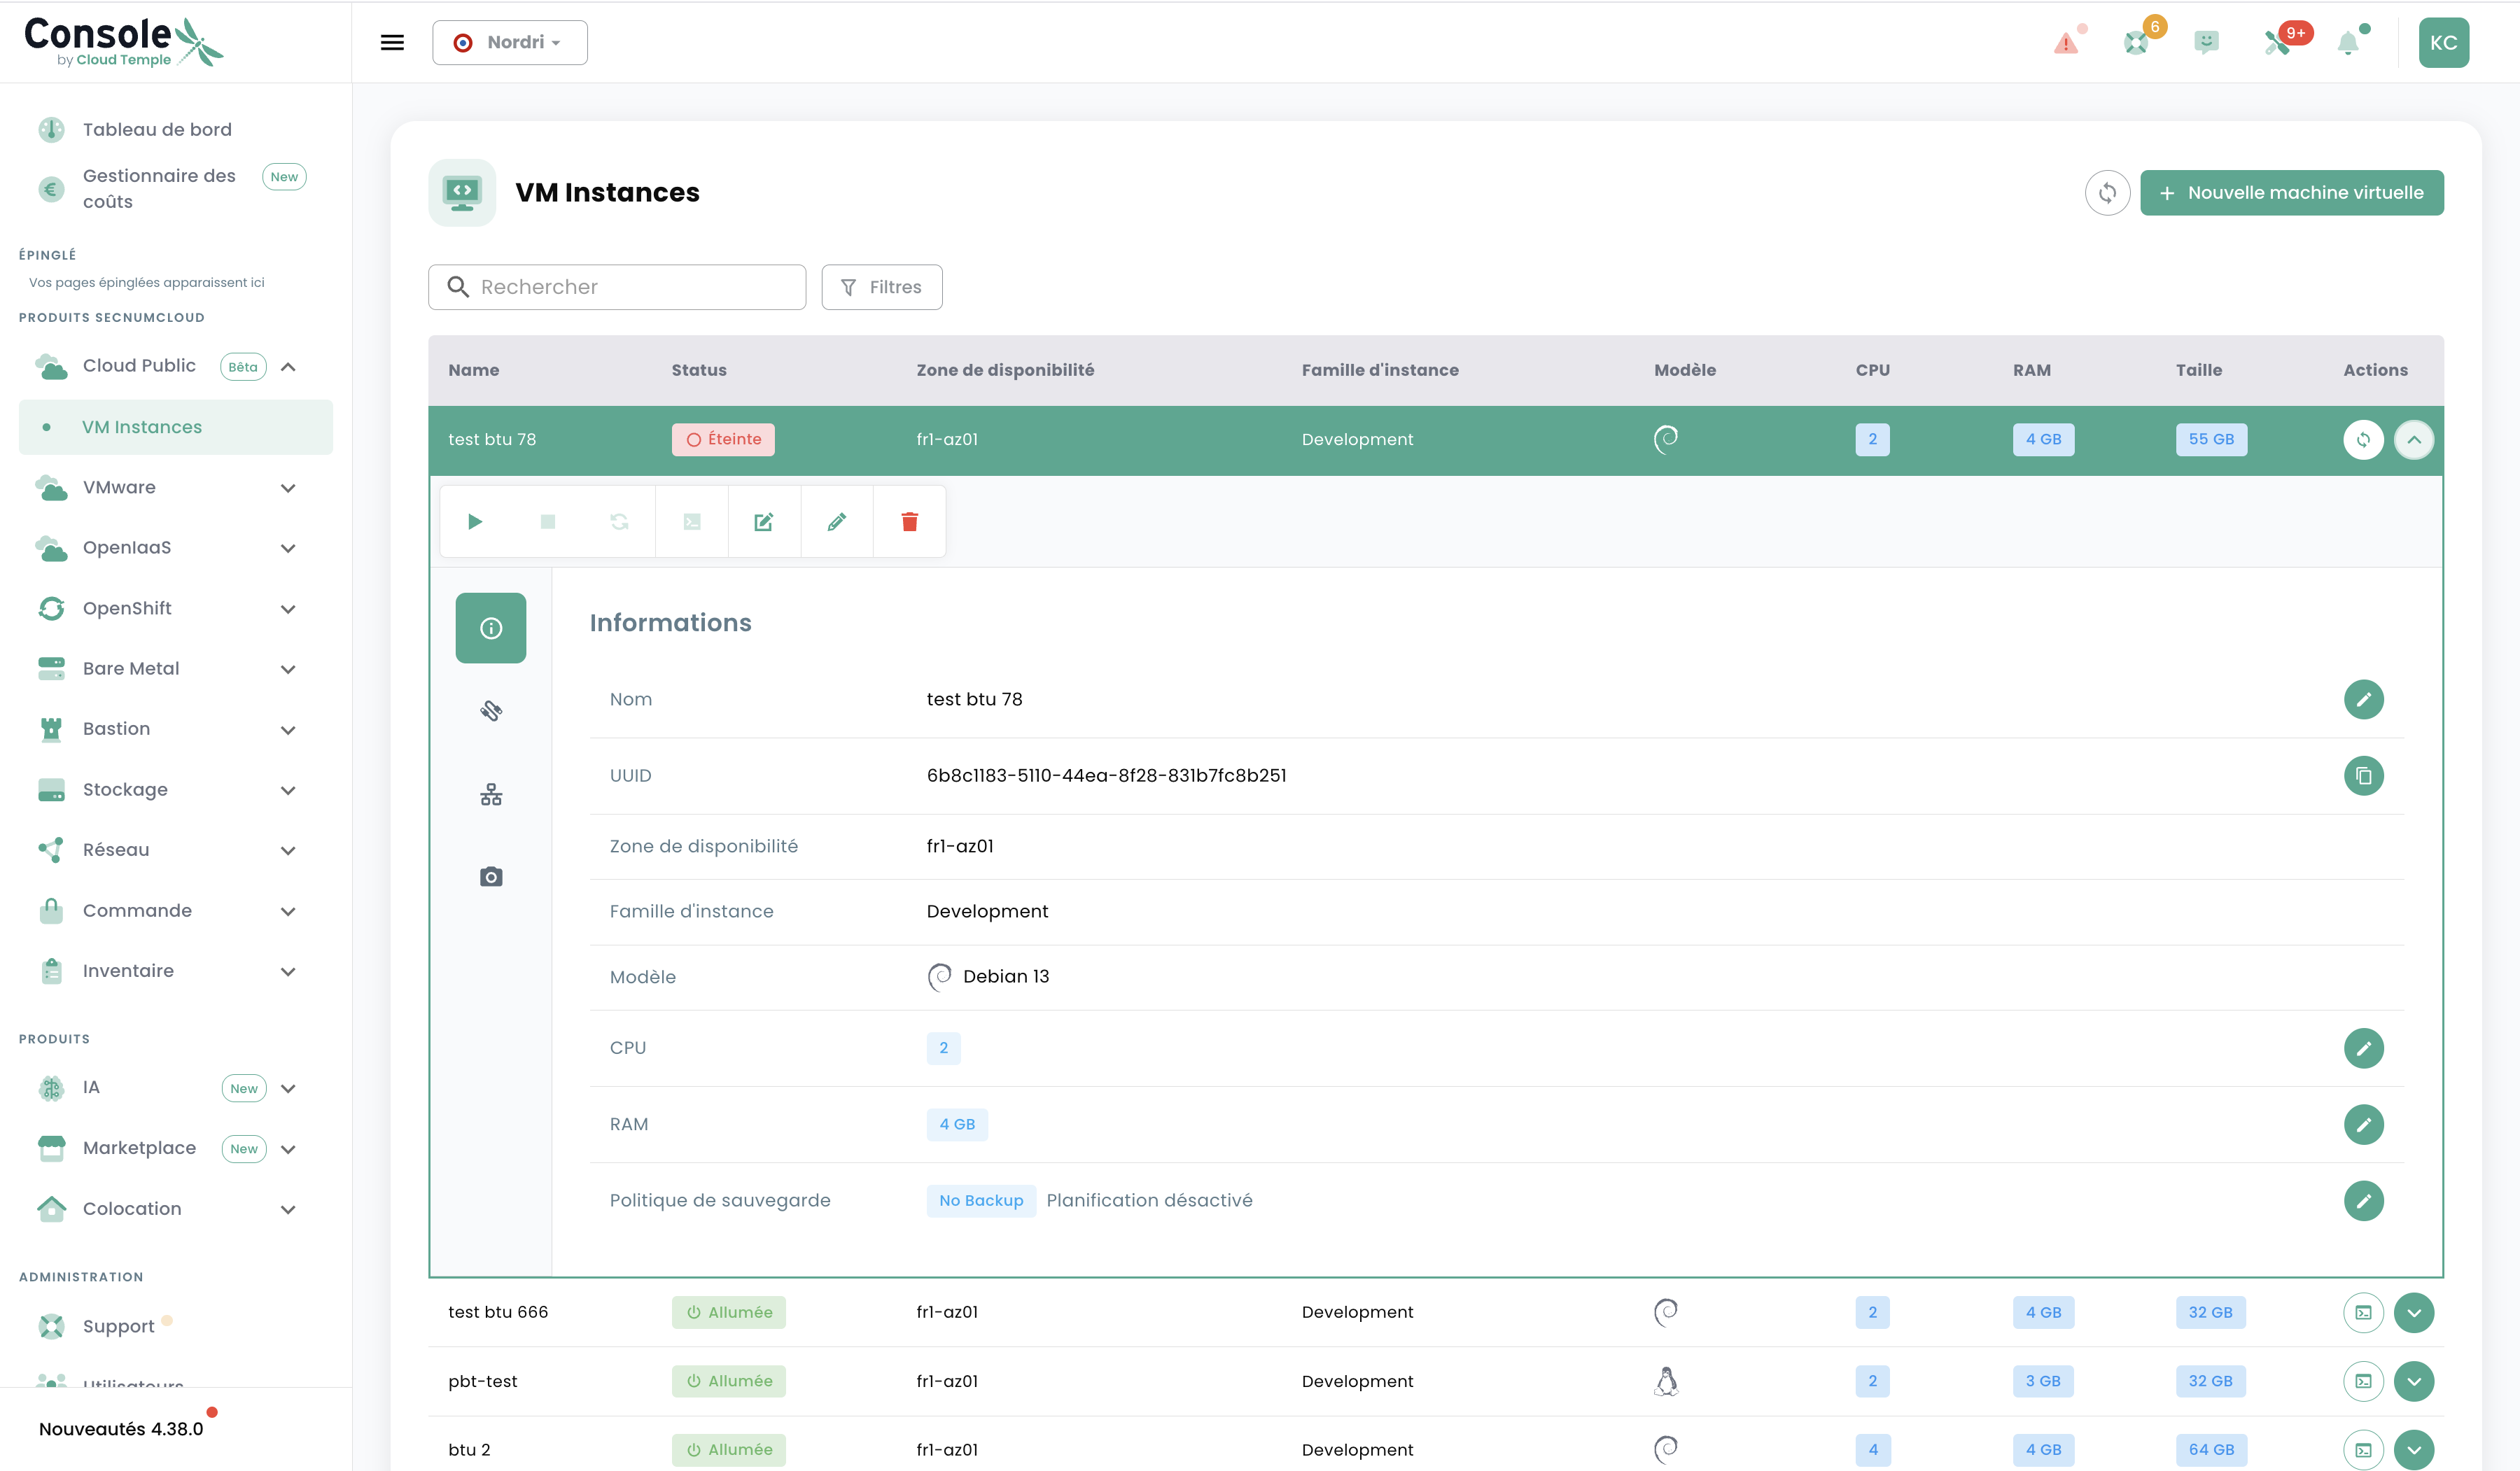
View and modify VM parameters: name, UUID, availability zone, instance family, OS model, CPU, RAM, and backup policy.
Disks Tab
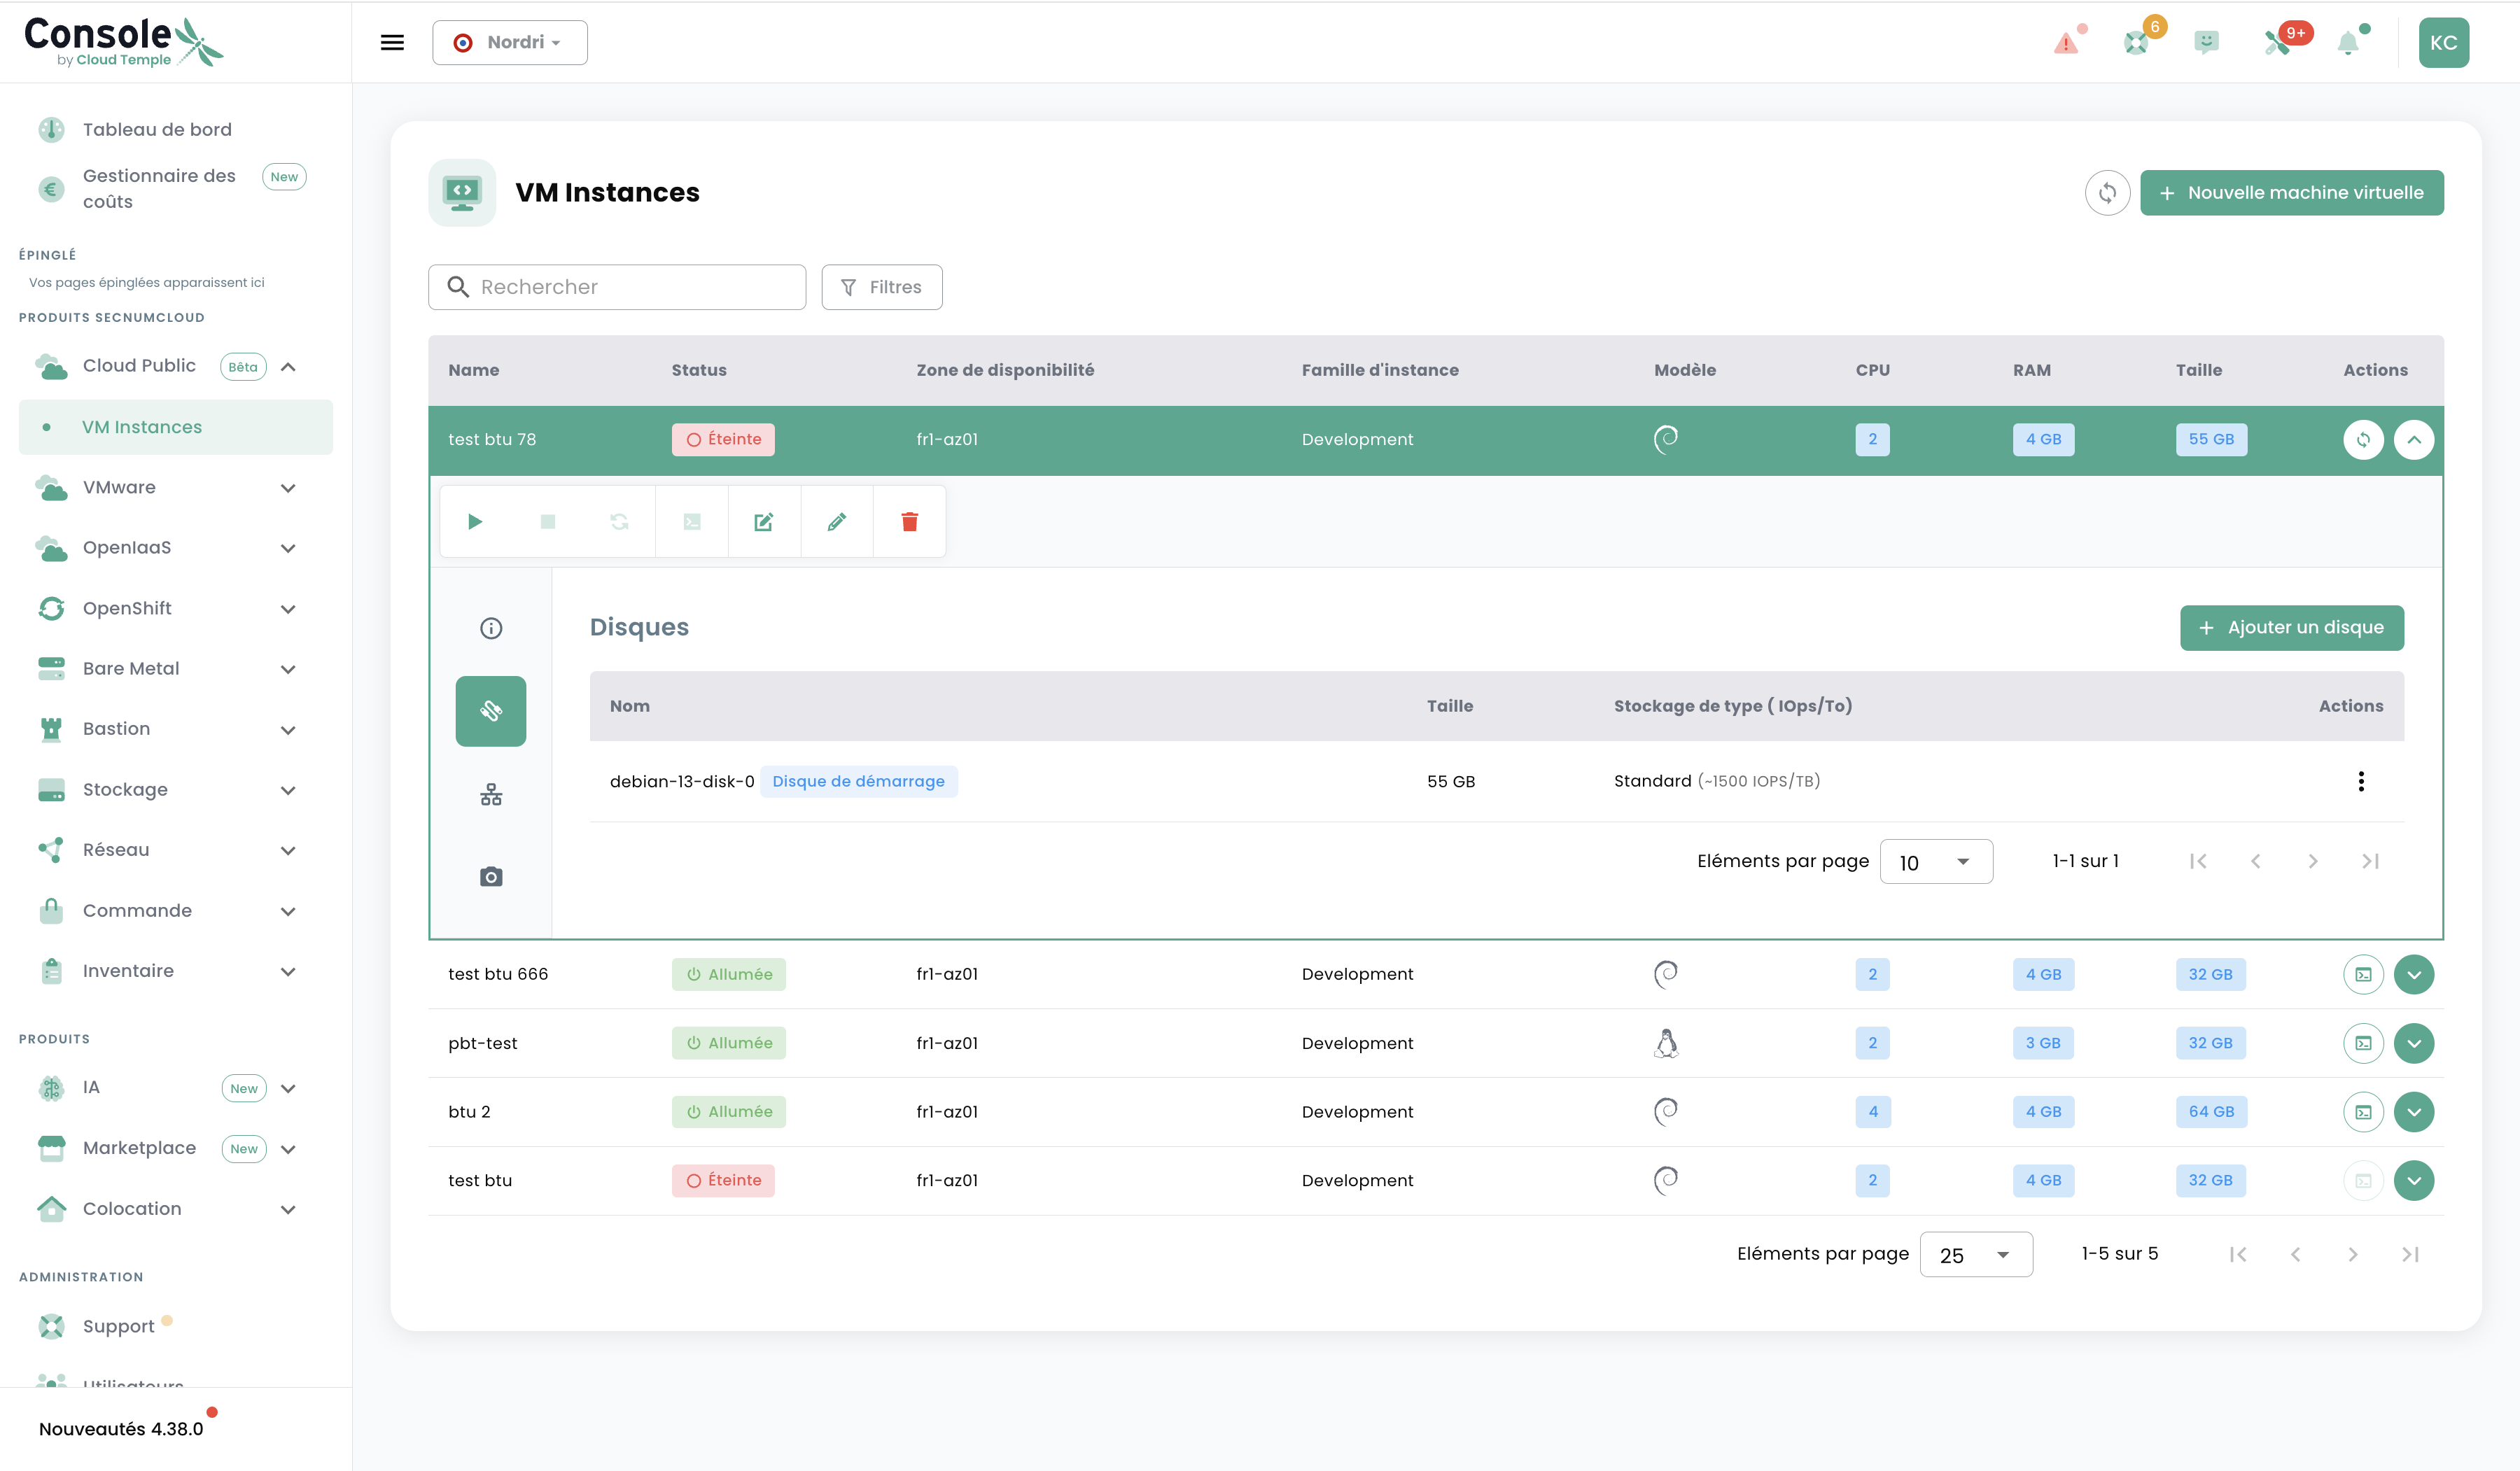
View attached disks and add additional volumes via the + Add a disk button.
Network Adapters Tab
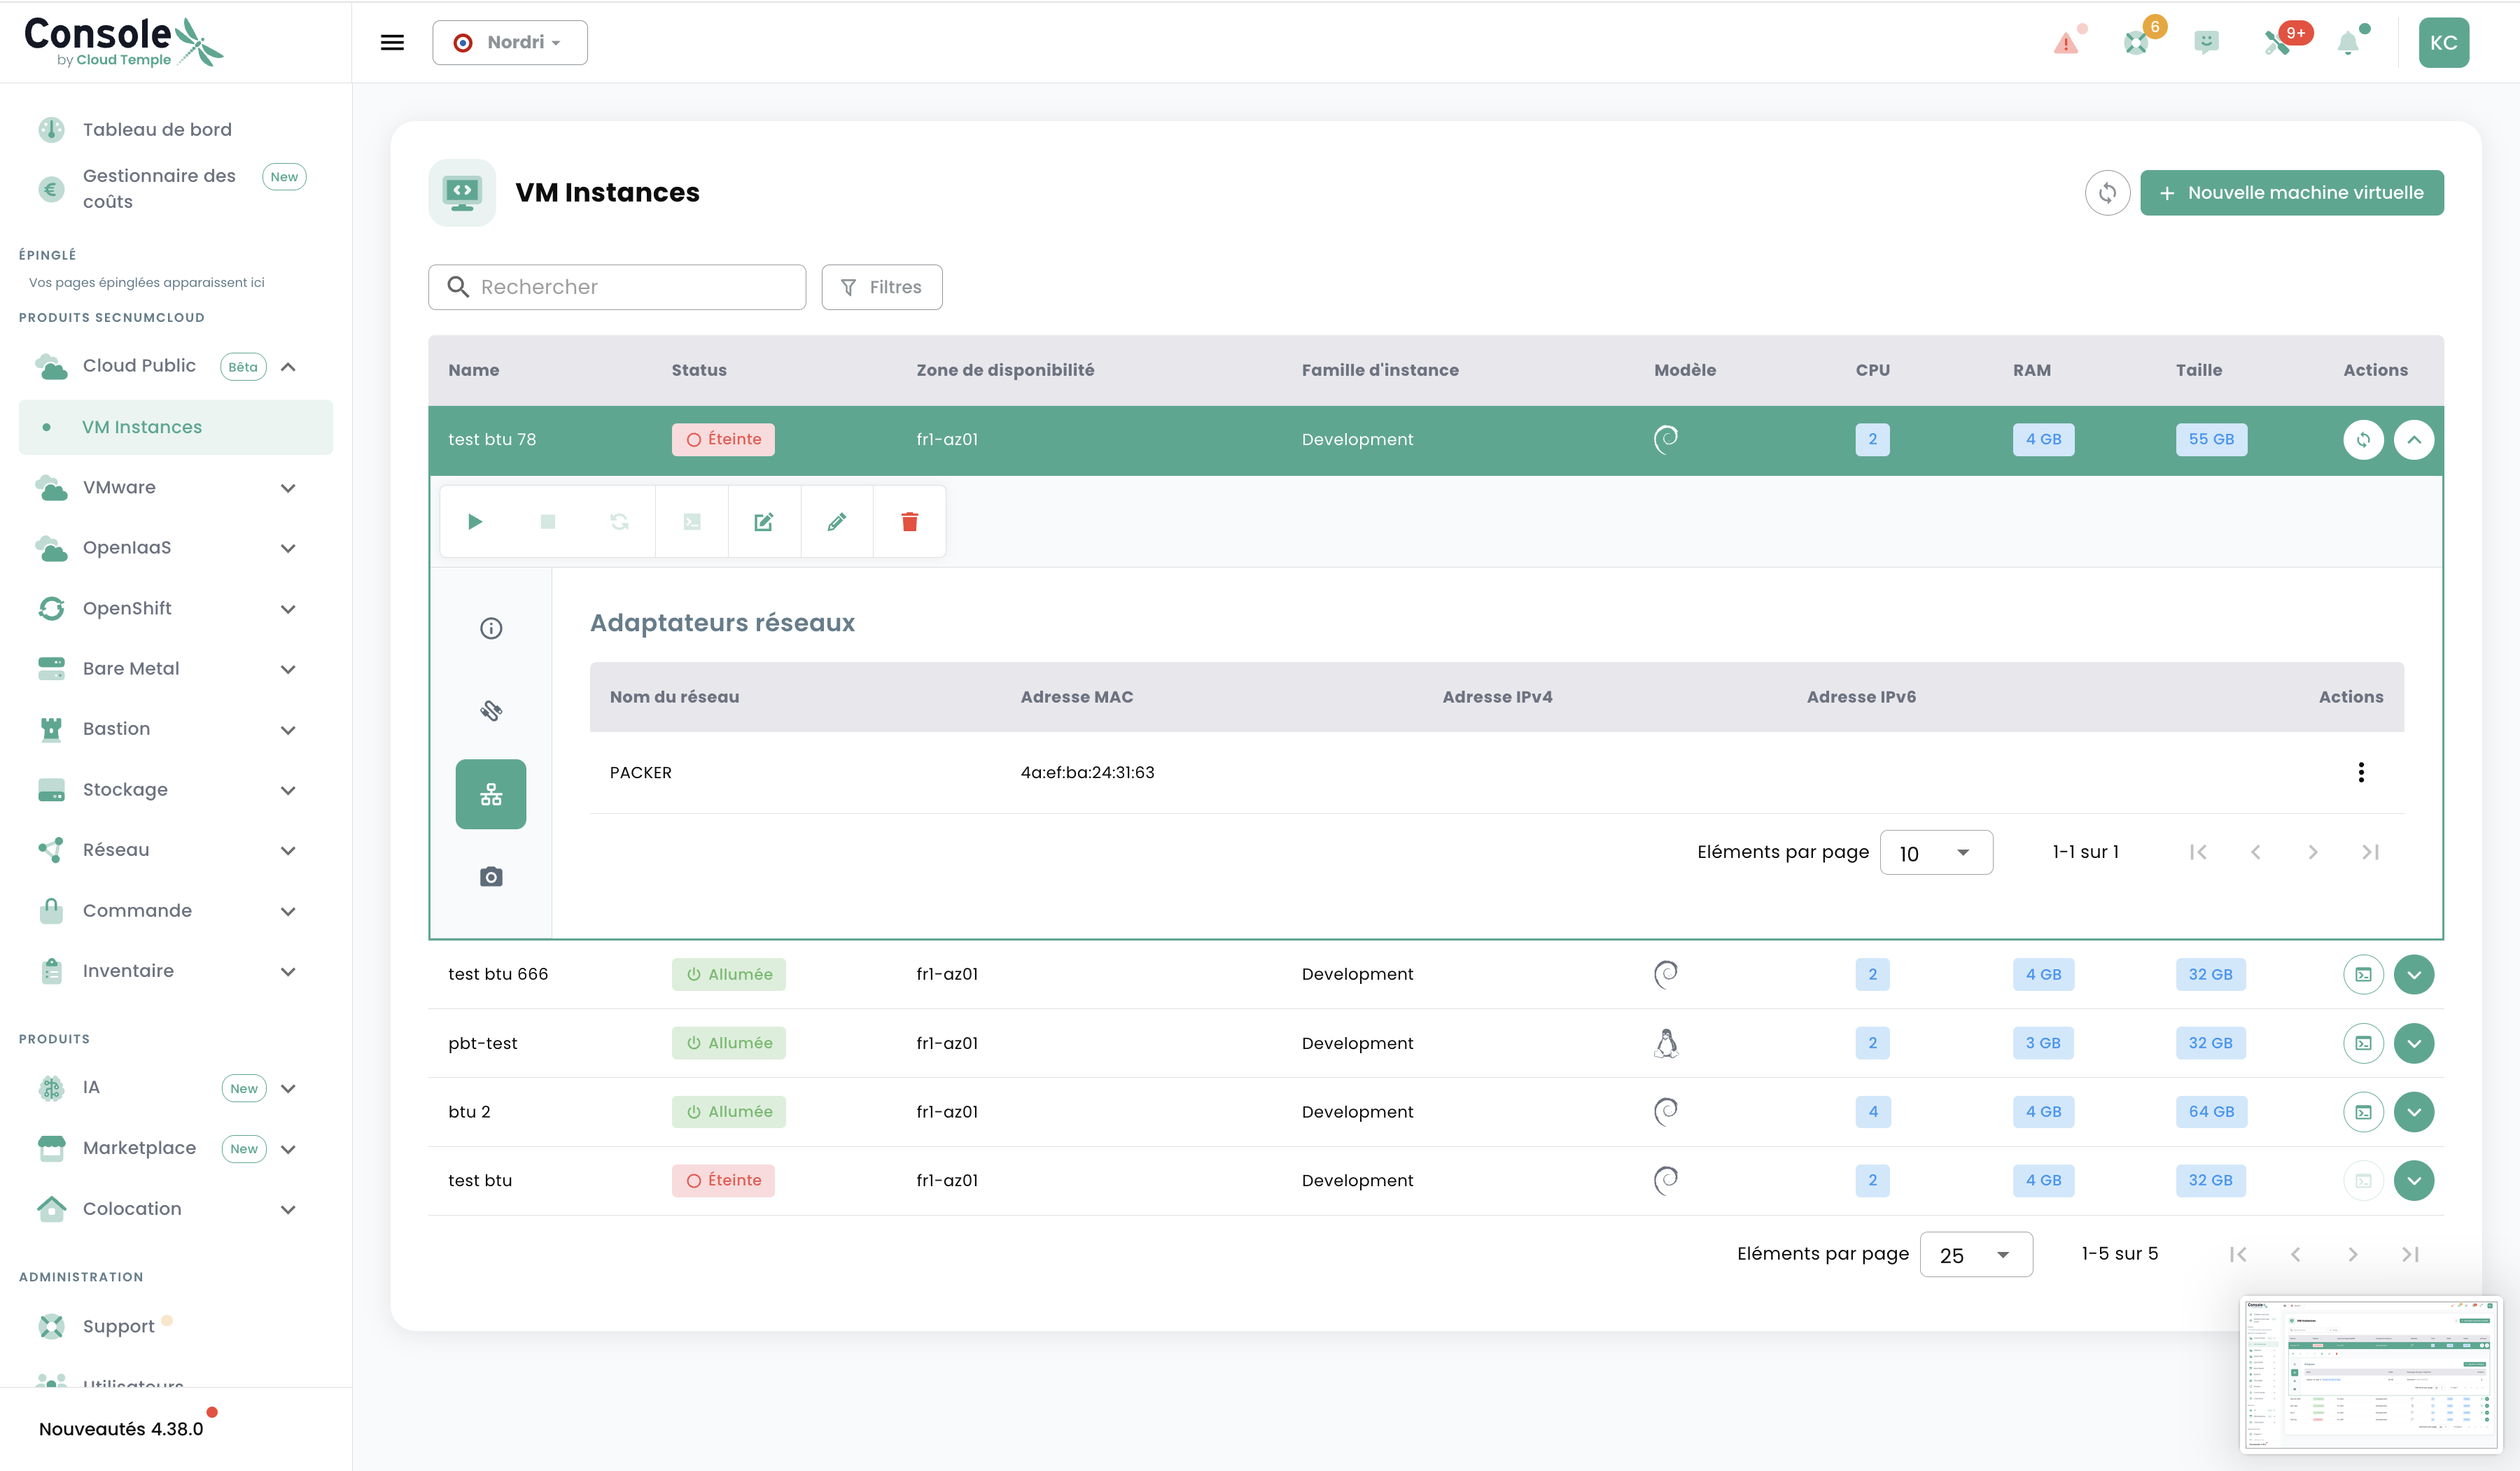
View the VM's network interfaces (network name, MAC address, IPv4/IPv6 address).
Snapshots Tab
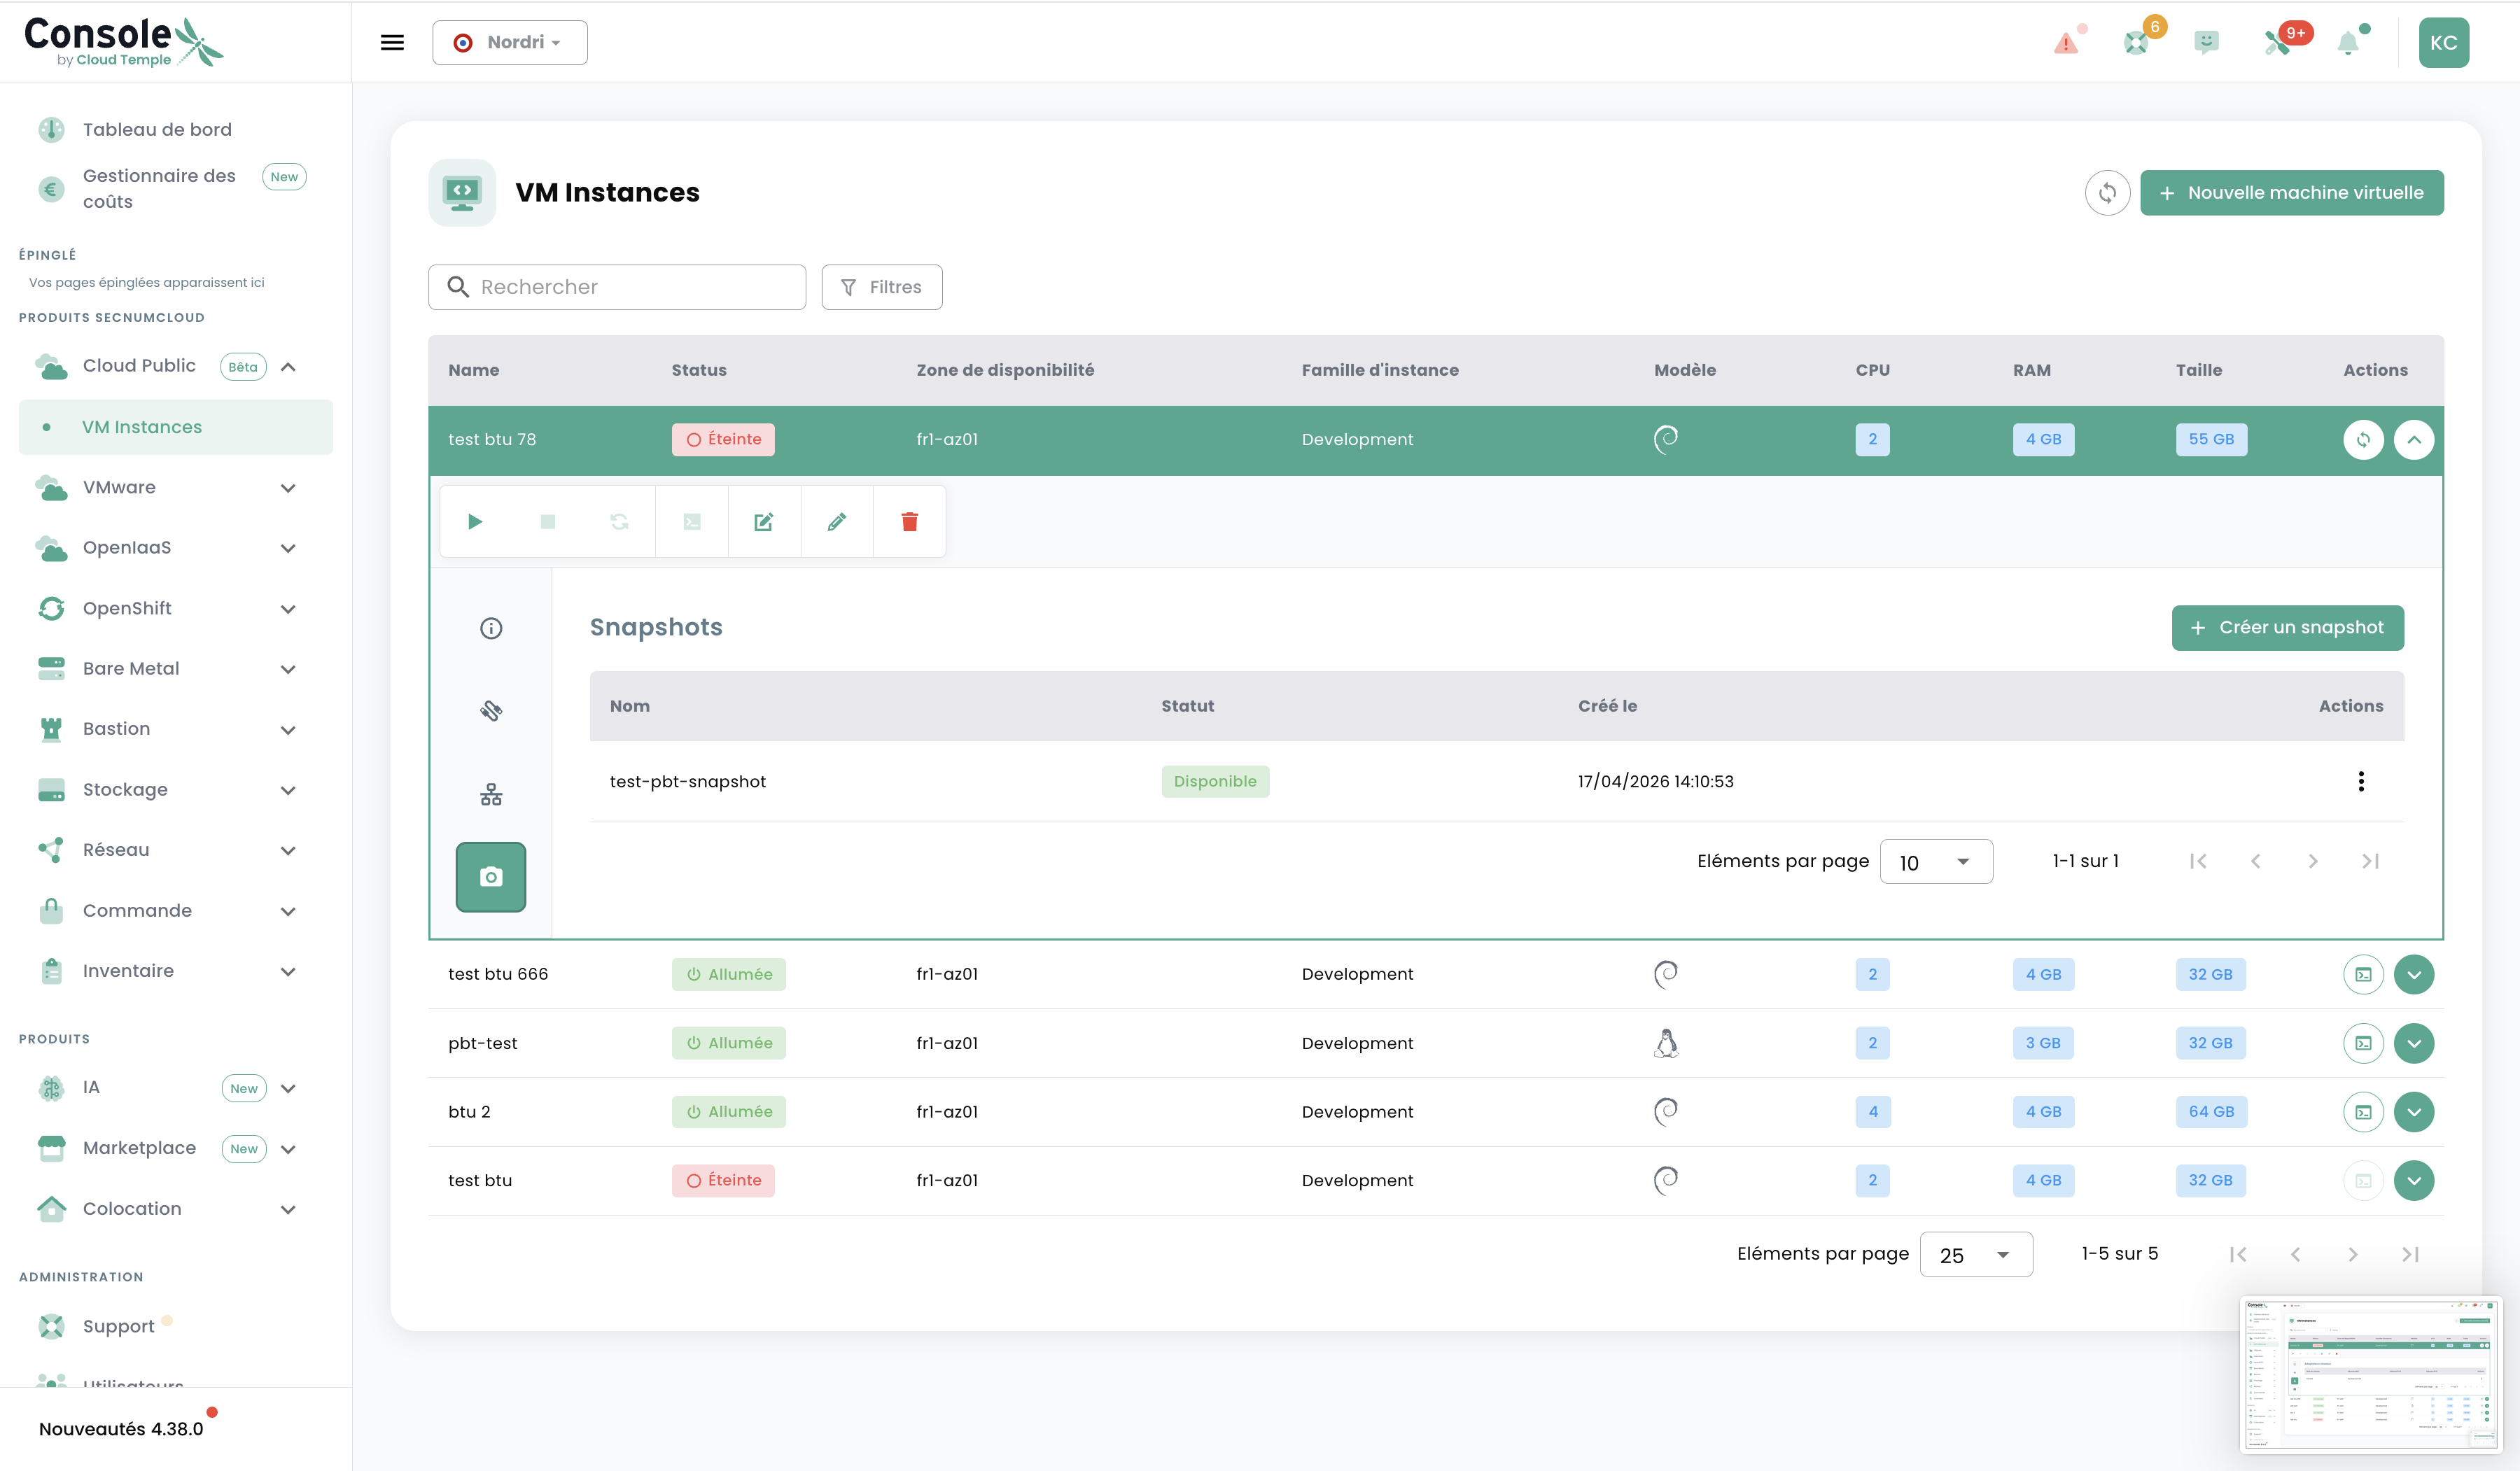
Create and manage snapshots of your VM via the + Create a snapshot button.