Networking in Managed Kubernetes
Objectives
This tutorial aims to familiarize you with the fundamental networking concepts of the Managed Kubernetes offering. By the end of this guide, you will be able to:
- Understand the IP addressing scheme of your cluster (nœuds, pods, services).
- Know the different mechanisms for exposing your applications (Ingress, LoadBalancer).
- Visualize network traffic and security policies with Hubble.
We will use the "ctodev" cluster as an example, which has been assigned the 10.20.0.0/22 range
:::warning[range definition ] This private IP range X.Y.Z.0/22 (RFC 1918) is defined with the client during cluster setup. It cannot be changed later. :::
IP Addressing Plan
Your Managed Kubernetes cluster has a multi-zone VLAN with an IPv4 address range in /22.
The range of our example 10.20.0.0/22 is logically divided into sub-ranges.
-
10.20.0.0/24 is assigned to the cluster Nodes:
-
10.20.0.10 : ctodev-gitrunner (la machine qui pilote l'infrastructure)
-
10.20.0.20 : Virtual IP (load balancée) of the Kubernetes API service
-
10.20.0.21 : ctodev-cp-01 (control plane 01)
-
10.20.0.22 : ctodev-cp-02 (control plane 02)
-
10.20.0.23 : ctodev-cp-03 (control plane 03)
-
10.20.0.41 : ctodev-ceph-01 (Ceph Storage 01)
-
10.20.0.42 : ctodev-ceph-02 (Ceph Storage 02)
-
10.20.0.43 : ctodev-ceph-03 (Ceph Storage 03)
-
10.20.0.51 : ctodev-wrk-01 (Worker 01)
-
10.20.0.52 : ctodev-wrk-02 (Worker 02)
-
10.20.0.53 : ctodev-wrk-03 (Worker 03)
-
...
-
10.20.0.151 : ctodev-wrk-100 (Worker 100)
-
-
Internal MetalLB: 10.20.1.1 – 10.20.1.127
- 10.20.1.1 : ingress
nginx-internal
- 10.20.1.1 : ingress
-
External MetalLB: 10.20.1.128 – 10.20.1.254
- 10.20.1.128 : ingress
nginx-external - 10.20.1.129 : ingress
nginx-external-secure
- 10.20.1.128 : ingress
-
Pods: 10.241.0.0/16
-
Services: 10.95.0.0/12
:::warning[Pods and Services Ranges ] The Pods and Services ranges are defined with the client during cluster setup. They cannot be modified later. :::
Using MetalLB
MetalLB is the component that allows exposing Layer 3 services (non-web / L7) directly to an IP address, whether internal or external, by using the LoadBalancer service type. It serves as an alternative to Ingress for non-HTTP applications or specific use cases.
To use MetalLB, you simply need to create a LoadBalancer type service. MetalLB will automatically assign an IP address from the preconfigured ranges. The distinction between internal and external ranges is a security measure to ensure that an application intended for internal use is not accidentally exposed on a public network.
Example: Exposing a service on the internal network
apiVersion: v1
kind: Service
metadata:
  name: mon-service-interne
  namespace: mon-namespace
spec:
  selector:
    app: mon-app
  ports:
    - protocol: TCP
      port: 8080
      targetPort: 80
  type: LoadBalancer
After applying this manifest, your service will be assigned an IP address in the 10.20.1.1 – 10.20.1.127 range and will be accessible from your internal network connected to the cluster.
Example: Exposing a service on the external network
To request an IP address from the external range (10.20.1.128 – 10.20.1.254), you must add the lb-type: external label to your service.
apiVersion: v1
kind: Service
metadata:
  name: mon-service-externe
  namespace: mon-namespace
  labels:
    lb-type: external
spec:
  selector:
    app: mon-app
  ports:
    - protocol: TCP
      port: 8080
      targetPort: 80
  type: LoadBalancer
Important: This range remains within a private address space. For public exposure, it is necessary to create a NAT (DNAT) rule on your infrastructure's firewall to redirect traffic from one of your external public IPs to the private IP address assigned by MetalLB.
Public IPs
Your managed Kubernetes cluster was originally delivered with 2 public IPv4 addresses.
The 1st IP is used on port 6443 for the Kubernetes API (in our example ctodev.mk.ms-cloud-temple.com:6443)
This same IP is also NATed to the ingress controller "nginx-external-secured" on port 443. This allows exposing the various consoles made available to you (see the quickstart guide). Access to this public IP is filtered using a list of authorized IPs.
The 2nd public IP is NATed to the ingress controller "nginx-external", on ports 80 and 443.
Applications exposed with the ingress class "nginx-external" will therefore be directly accessible from the Internet via this IP.
If you wish to modify the firewall rules (add/remove allowed IPs), you must submit a support request.
It is possible to add additional public IPs if desired.
DNS
For internal DNS (CoreDNS), the cluster will have the following settings:
- Cluster name:
<identifiant du cluster> - Internal domain:
<identifiant du cluster>-cluster.local(in our example: ctodev-cluster.local)
This internal domain is critical for inter-service communication within the cluster. It enables an application to reach another application using only its Kubernetes service name, without needing to know its internal IP address.
For example, a service named api-backend in the production namespace will automatically resolve to the address api-backend.production.svc.ctodev-cluster.local.
The public DNS zone used for Managed Kubernetes clusters is .mk.ms-cloud-temple.com
The "nginx-external" ingress (mapped to public IP #2) is accessible at "*.external.<votre identifiant de cluster>.mk.ms-cloud-temple.com".
If you deploy an application with this ingress-class, you can access it directly via this domain name. See the tutorial: Deploy your first application
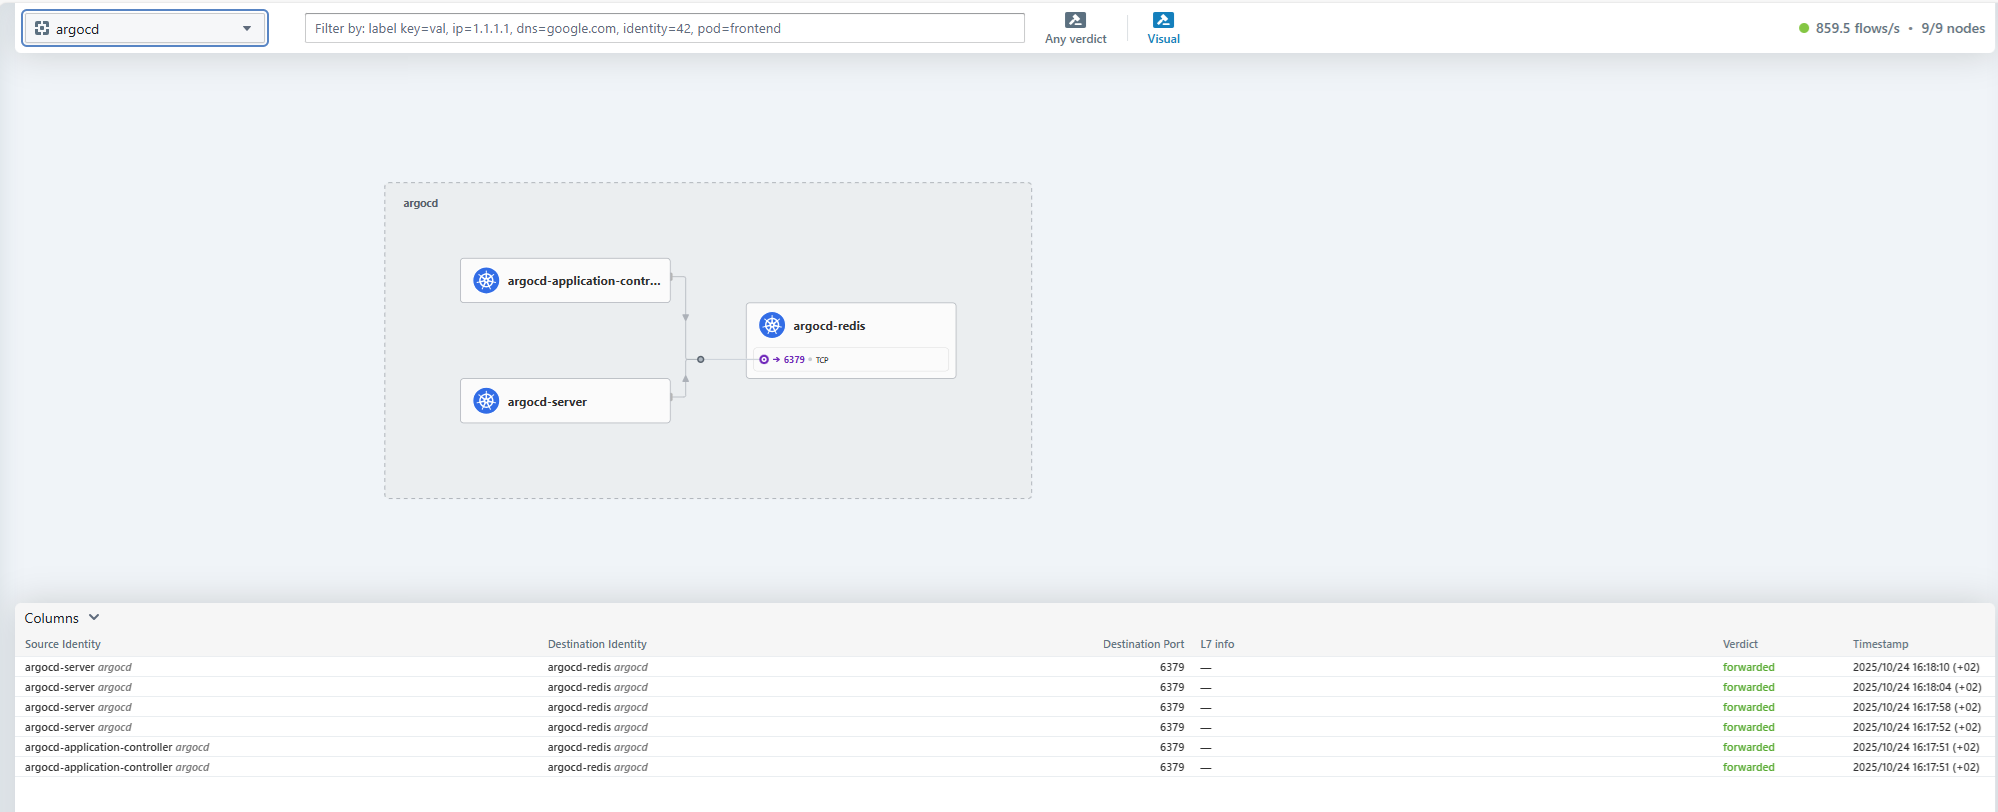
Hubble: Network observability at your fingertips
Hubble is a graphical and command-line interface for visualizing and understanding the network flows of your cluster. Built on Cilium, it provides a detailed map of services, dependencies, and network policies in real time.
With Hubble, you can:
- Visualize traffic flows between your pods and services.
- Identify connectivity issues and network errors.
- Verify the enforcement of your security policies (Network Policies).
- Explore dependencies between your various applications.
Access the Hubble UI
The Hubble UI is exposed on an internal URL within your cluster. Access is not possible via kubectl port-forwarding because users do not have sufficient permissions in the kube-system namespace.
To access it, you must be connected to the cluster's internal network (e.g., via a bastion host or VPN). The URL to use is as follows:
http://hubble.internal.<votre-identifiant-de-cluster>.mk.ms-cloud-temple.com
To make this URL resolvable by your workstation, you will likely need to add an entry to your hosts file or internal DNS. You can retrieve the internal IP address of the Hubble Ingress using the following command:
kubectl get ingress hubble-ui -n kube-system
Creating Internal DNS Zones (Private Cluster)
To enhance security and simplify access to your services and the Kubernetes API from your internal network, it is recommended to create an internal DNS zone. This zone will allow you to resolve the domain names of your Ingresses and the Kubernetes API to their respective private IP addresses, thereby avoiding transit over public networks.
Example configuration with our "ctodev" cluster, whose assigned range is 10.20.0.0/22:
Based on the URLs provided in the getting started guide, you can configure your internal DNS as follows:
-
Create the private DNS zone on your internal DNS servers for
.<identifiant du cluster>.mk.ms-cloud-temple.com -
Add the following A records:
-
For the Kubernetes API:
. -> 10.20.0.20(Virtual IP of the API)
-
For internal services (via the
nginx-internalIngress):hubble.internal -> 10.20.1.1argocd.internal -> 10.20.1.1ceph.internal -> 10.20.1.1
-
For secured services (via the
nginx-external-secureIngress):k10.external-secured -> 10.20.1.129grafana.external-secured -> 10.20.1.129harbor.external-secured -> 10.20.1.129opencost.external-secured -> 10.20.1.129opencost-mcp.external-secured -> 10.20.1.129
-
This configuration ensures that traffic to the API and internal services remains confined to your private network, in accordance with security best practices.
Tutorial: Deploying Your First Application
Follow our detailed guide to learn how to expose an application using an Ingress.
:::warning[Pour aller plus loin : la sécurité en production ] This document explains fundamental networking concepts. For a production deployment, it is crucial to implement additional security measures:
- Use secure images: Prefer images from your secure enterprise registry such as Harbor over public images.
- Control network traffic: Set up
NetworkPoliciesto restrict communications to only the necessary traffic flows between your applications. - Apply governance policies: Use tools like Kyverno to enforce security rules (e.g., disallowing "root" containers, requiring resource
requestsandlimits, etc.). :::