Automation with Terraform
This guide will enable you to deploy your first instances on the Cloud de Confiance in less than 5 minutes.
Prerequisites
- Have subscribed to the Cloud Temple product (subscription to the IaaS product).
- Have permissions enabled for the 'IaaS' object driver.
Deploy a virtual machine via Terraform
In this section, we will see how to deploy a virtual machine on the Cloud de Confiance in a few minutes using the Terraform Cloud Temple provider. If you have not yet used the Cloud Temple provider, follow the instructions at the following address to install it and authenticate to your tenant.
We will start by creating a .tf file that describes the instance we wish to deploy. The following script allows you to deploy a virtual machine from scratch.
data "cloudtemple_compute_virtual_datacenter" "dc" {
  name = "DC-EQX6"
}

data "cloudtemple_compute_host_cluster" "flo" {
  name = "clu002-ucs01_FLO"
}

data "cloudtemple_compute_datastore_cluster" "koukou" {
  name = "sdrs001-LIVE_KOUKOU"
}

resource "cloudtemple_compute_virtual_machine" "scratch" {
  name = "from-scratch"

  memory                 = 8 * 1024 * 1024 * 1024
  cpu                    = 2
  num_cores_per_socket   = 1
  cpu_hot_add_enabled    = true
  cpu_hot_remove_enabled = true
  memory_hot_add_enabled = true

  datacenter_id                = data.cloudtemple_compute_virtual_datacenter.dc.id
  host_cluster_id              = data.cloudtemple_compute_host_cluster.flo.id
  datastore_cluster_id         = data.cloudtemple_compute_datastore_cluster.koukou.id
  guest_operating_system_moref = "amazonlinux2_64Guest"

  tags = {
    created_by = "Terraform"
  }
}
The parameters used in this script are as follows:
- datacenter_id (required) : datacenter in which the virtual machine is deployed
- host_cluster_id (required) : cluster in which the virtual machine is deployed
- name (required) : machine name
- memory : RAM allocated to the machine initially
- cpu : number of vCPUs allocated to the machine initially
- num_cores_per_socket : number of cores per socket
- datastore_cluster_id : datastore to which the machine is attached
- guest_operating_system_moref : operating system of the machine
Additional parameters can be applied to a virtual machine during its deployment. You can find all of these parameters on the following page of the Terraform documentation
Once the .tf file is created and saved, run the following command to verify your code:
terraform validate
Then, plan the deployment and verify that the plan matches what you intend to do:
terraform plan
Finally, deploy the virtual machine by running the following command:
terraform apply
Use cloud-init to configure a virtual machine deployed from the Terraform provider
The 'cloud-init' tool enables customization of a virtual machine or cloud instance during its first boot. It is a widely adopted standard. For more information, refer to the documentation
Compatibility
To be able to configure a virtual machine deployed from the Terraform Cloud Temple provider via cloud-init, the OVF used to deploy it must be compatible with cloud-init.
To verify your virtual machine's compatibility with cloud-init, enter the following command:
systemctl status cloud-init.service
If cloud-init is correctly installed on the machine, you should see a response like this. (See screenshot below)

If needed, you can find cloud-init compatible images online (for example Ubuntu Cloud Image) or install it yourself on your machine before converting it to an OVF.
Deployment
Now that you are certain that the deployed OVF is fully compatible with cloud-init, here is an example of a Terraform (.tf) file that you can use to configure your virtual machine. Note: All examples shown here can be found in the examples folder of the Cloud Temple Terraform provider repository here: Examples
main.tf
resource "cloudtemple_compute_virtual_machine" "ubuntu-cloud-init" {
  name = "ubuntu-cloud-init"

  memory                 = 8 * 1024 * 1024 * 1024
  cpu                    = 2
  num_cores_per_socket   = 1
  cpu_hot_add_enabled    = true
  cpu_hot_remove_enabled = true
  memory_hot_add_enabled = true

  datacenter_id   = data.cloudtemple_compute_virtual_datacenter.TH3S.id
  host_cluster_id = data.cloudtemple_compute_host_cluster.CLU001.id
  datastore_id    = data.cloudtemple_compute_datastore.DS003.id

  content_library_id      = data.cloudtemple_compute_content_library.local.id
  content_library_item_id = data.cloudtemple_compute_content_library_item.ubuntu-cloudimg.id

  power_state = "on"

  backup_sla_policies = [
    data.cloudtemple_backup_sla_policy.sla001-daily-par7s.id,
    data.cloudtemple_backup_sla_policy.sla001-weekly-par7s.id,
  ]

  cloud_init = {
    network-config = filebase64("./cloud-init/network-config.yml")
    user-data      = filebase64("./cloud-init/user-data.yml")
  }
}
network-config.yml
#cloud-config
network:
  version: 2
  ethernets:
    eth0:
      dhcp4: false
      addresses:
        - 172.16.100.192/24
      gateway4: 172.16.100.1
      nameservers:
        addresses:
          - 172.16.11.4
user-data.yml
#cloud-config
users:
  - default
  - name: terraform
    primary_group: users
    shell: /bin/bash
    sudo: ['ALL=(ALL) NOPASSWD:ALL']
    groups: sudo
    lock_passwd: false
    plain_text_passwd: password
The interesting aspect here is the presence of the cloud-init property; you can see that it consists of two sub-properties: network-config, and user-data.
These are part of a set of 7 properties that you can use to configure your virtual machine with cloud-init.
- user-data : This value must be base64 encoded and notably contains configuration information for the virtual machine's user accounts. You can also add scripts to install or update packages.
- network-config : This value must be base64 encoded and notably contains network configuration information for the virtual machine.
- public-keys : Indicates that the instance should populate the default user's 'authorized_keys' with this value.
- instance-id : Allows setting a unique instance identifier for cloud-init.
- password : If set, the default user's password will be set to this value to allow password-based login. The password will only be valid for a single login. If the value is 'RANDOM', a random password will be generated and displayed on the console.
- hostname : Specifies a hostname for the deployed instance.
- seedfrom : Allows setting a URL from which cloud-init will fetch the configuration files it needs to use. For more information on how cloud-init works, please refer to the official documentation
Execution
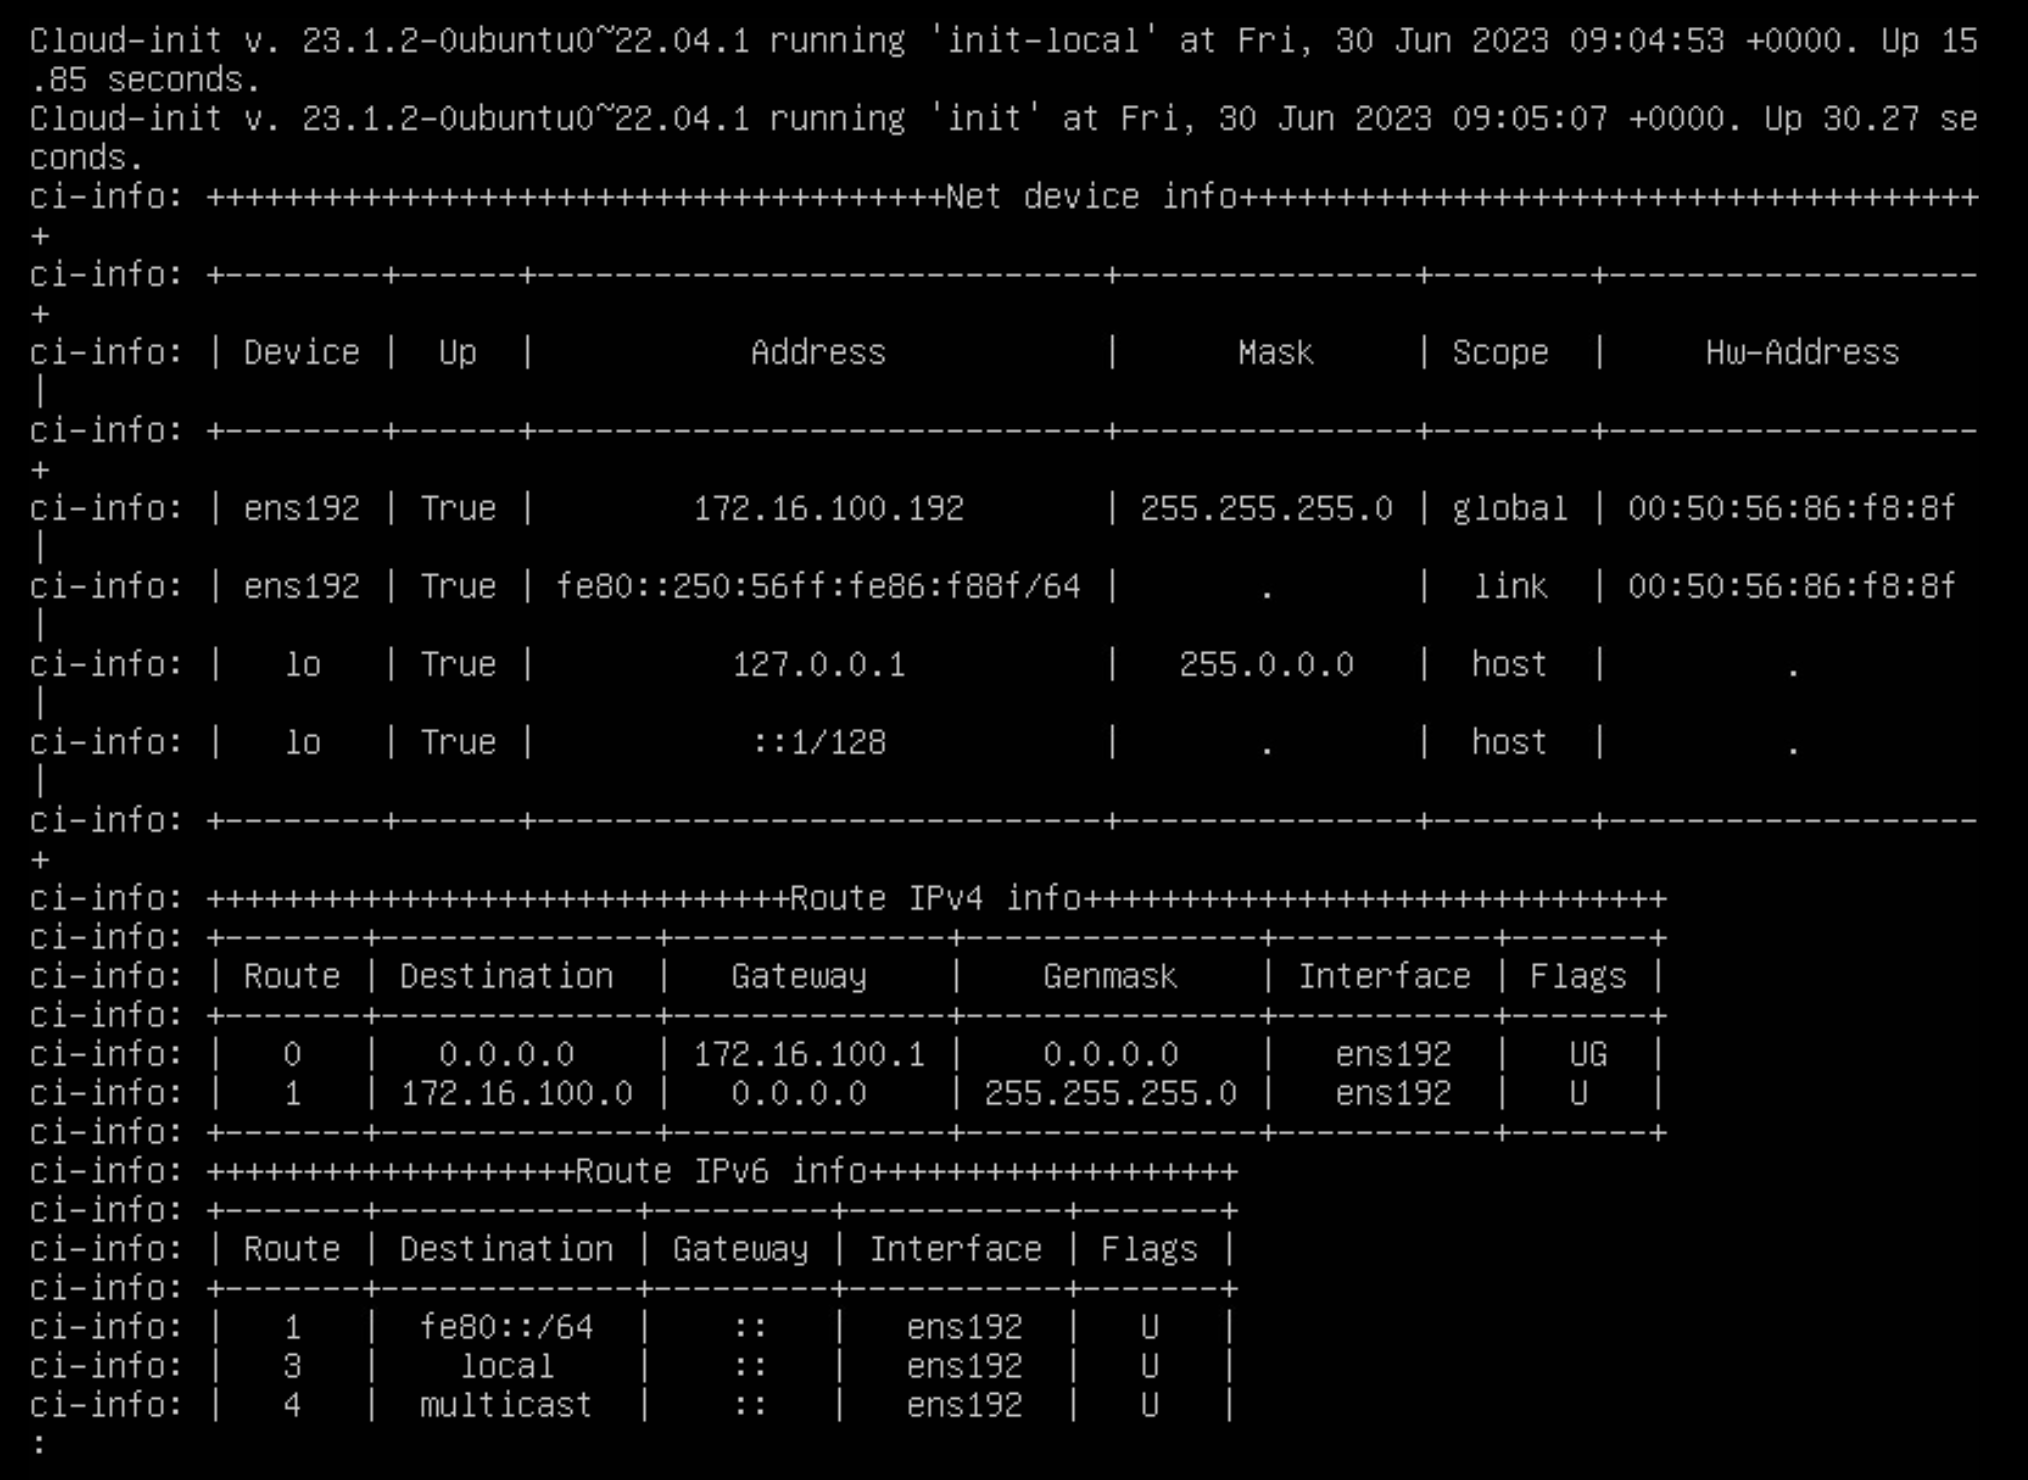
To verify that cloud-init executed correctly, you should be able to log in using the user you configured in the user-data.yml file, or the hostname should have been updated to the one you specified in ‘hostname’.
If you encounter any issues, you can check the cloud-init logs using the following command:
sudo cat /var/log/cloud-init-output.log
You should see various details regarding the cloud-init execution. As shown in the screenshot below, the network configuration completed successfully.