Getting Started Guide
Calculation
Virtual Machine Management
The management interface for your virtual machines is available in the Console in the 'IaaS' menu located on the green bar on the left side of the screen.
List of virtual machines
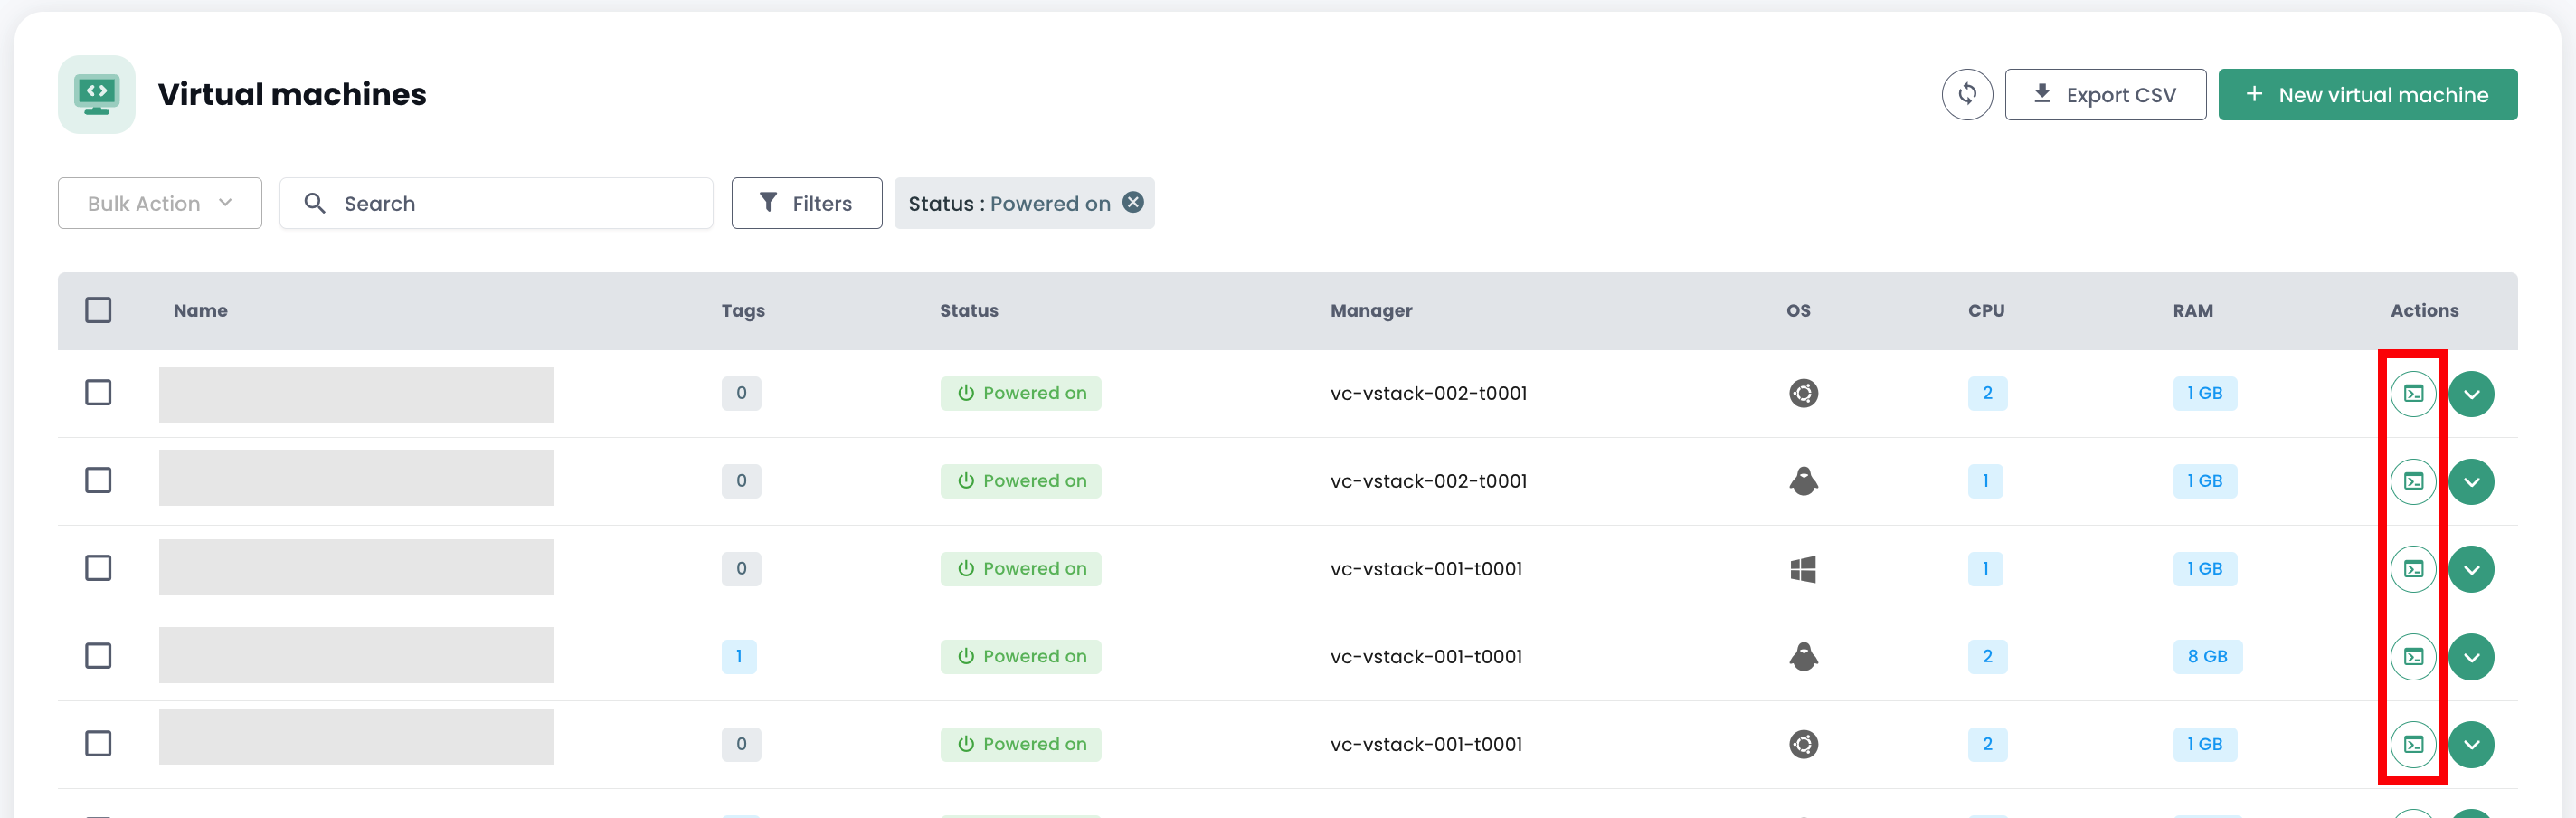
In the 'Virtual Machines' section, you have access to the list of your virtual machines hosted on your trusted cloud.
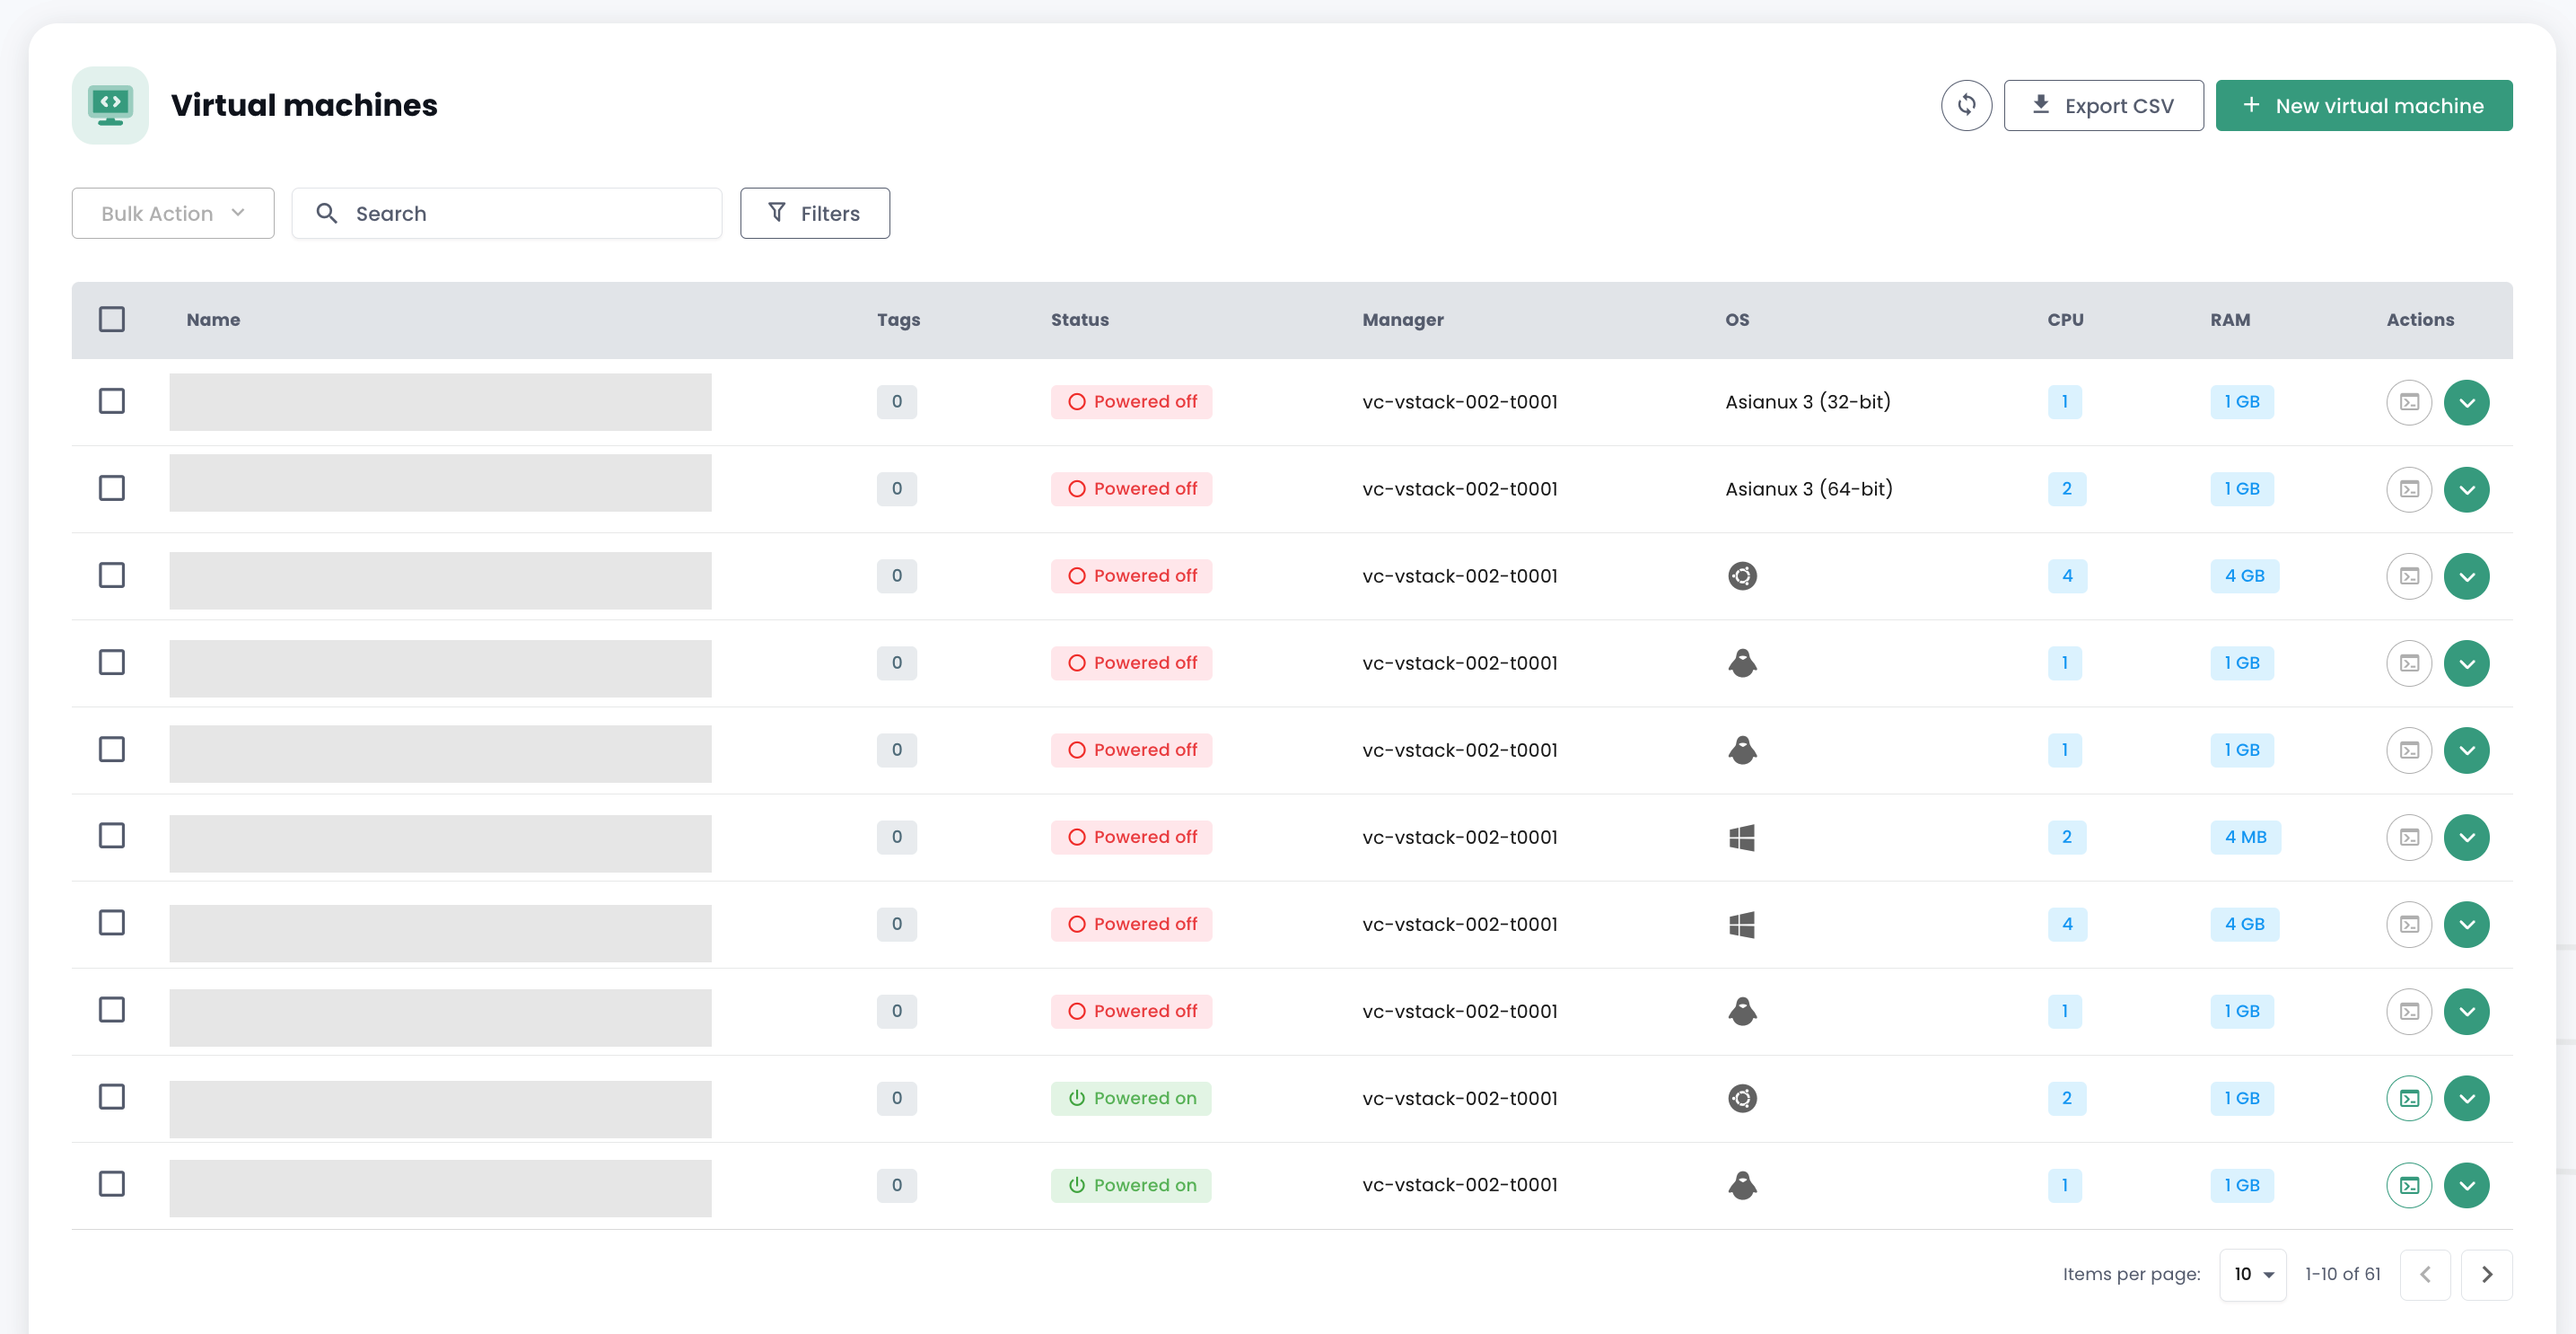
You have access to the following information for each virtual machine:
- its name,
- the tags assigned to it,
- its status (off, on, processing, host disconnected, or invalid),
- its manager (in a VMware environment, the associated vCenter),
- its operating system,
- the number of virtual CPUs (vCPUs),
- the amount of virtual memory (vRAM).
Virtual Machine Actions
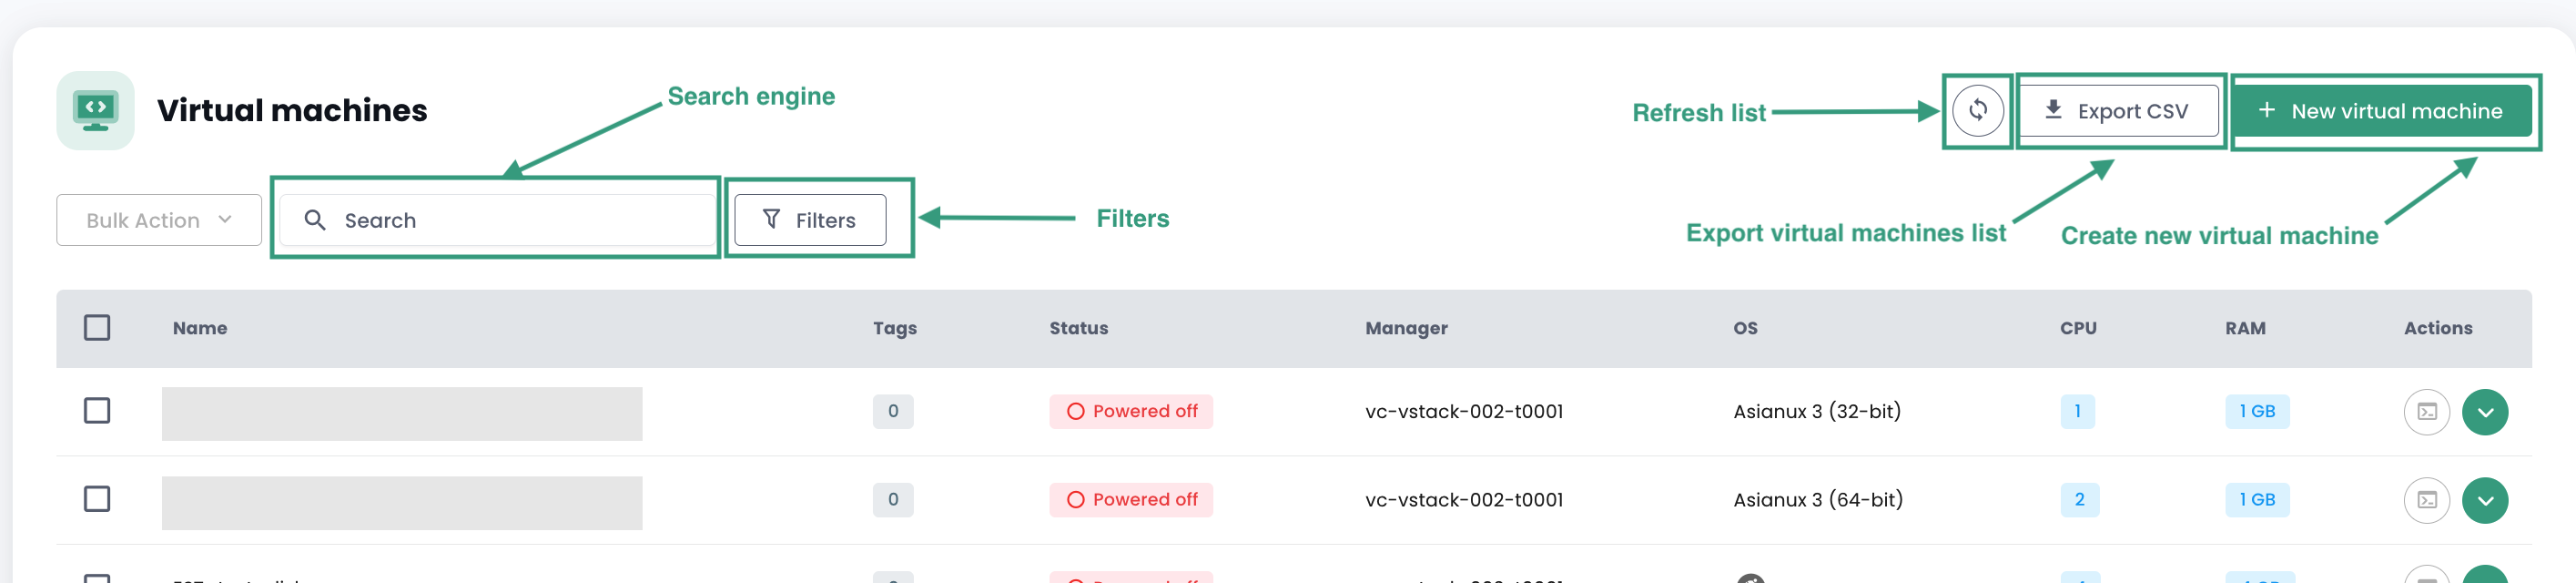
The following actions are available from this interface:
- Refresh the list of virtual machines;
- Export the list in CSV format;
- Filter the list;
- Search for a virtual machine by name;
- Create a new virtual machine.
An alert banner may appear at the top of the list: it indicates that critical alarms have been triggered on one or more of your virtual machines. The 'View' button allows you to view the virtual machines affected by this notification.

When you click the green dropdown arrow on the right side of the list for a virtual machine:

You can access all information regarding it:

A quick action banner allows you to perform the following actions:

- Power on the virtual machine;
- Power it off;
- Restart it;
- Modify the guest OS power options;
- Open the console;
- Mount an ISO;
- Unmount an ISO;
- Clone the virtual machine;
- Move it (vMotion);
- Rename it;
- Delete it.
A quick view provides a visualization of the virtual machine's storage, CPU, and RAM.

In the 'General Information' tab, you will find detailed information about your virtual machine, such as its OS, physical location (datacenter, datastore, etc.), RAM, CPU, IP addresses, logs, and more.
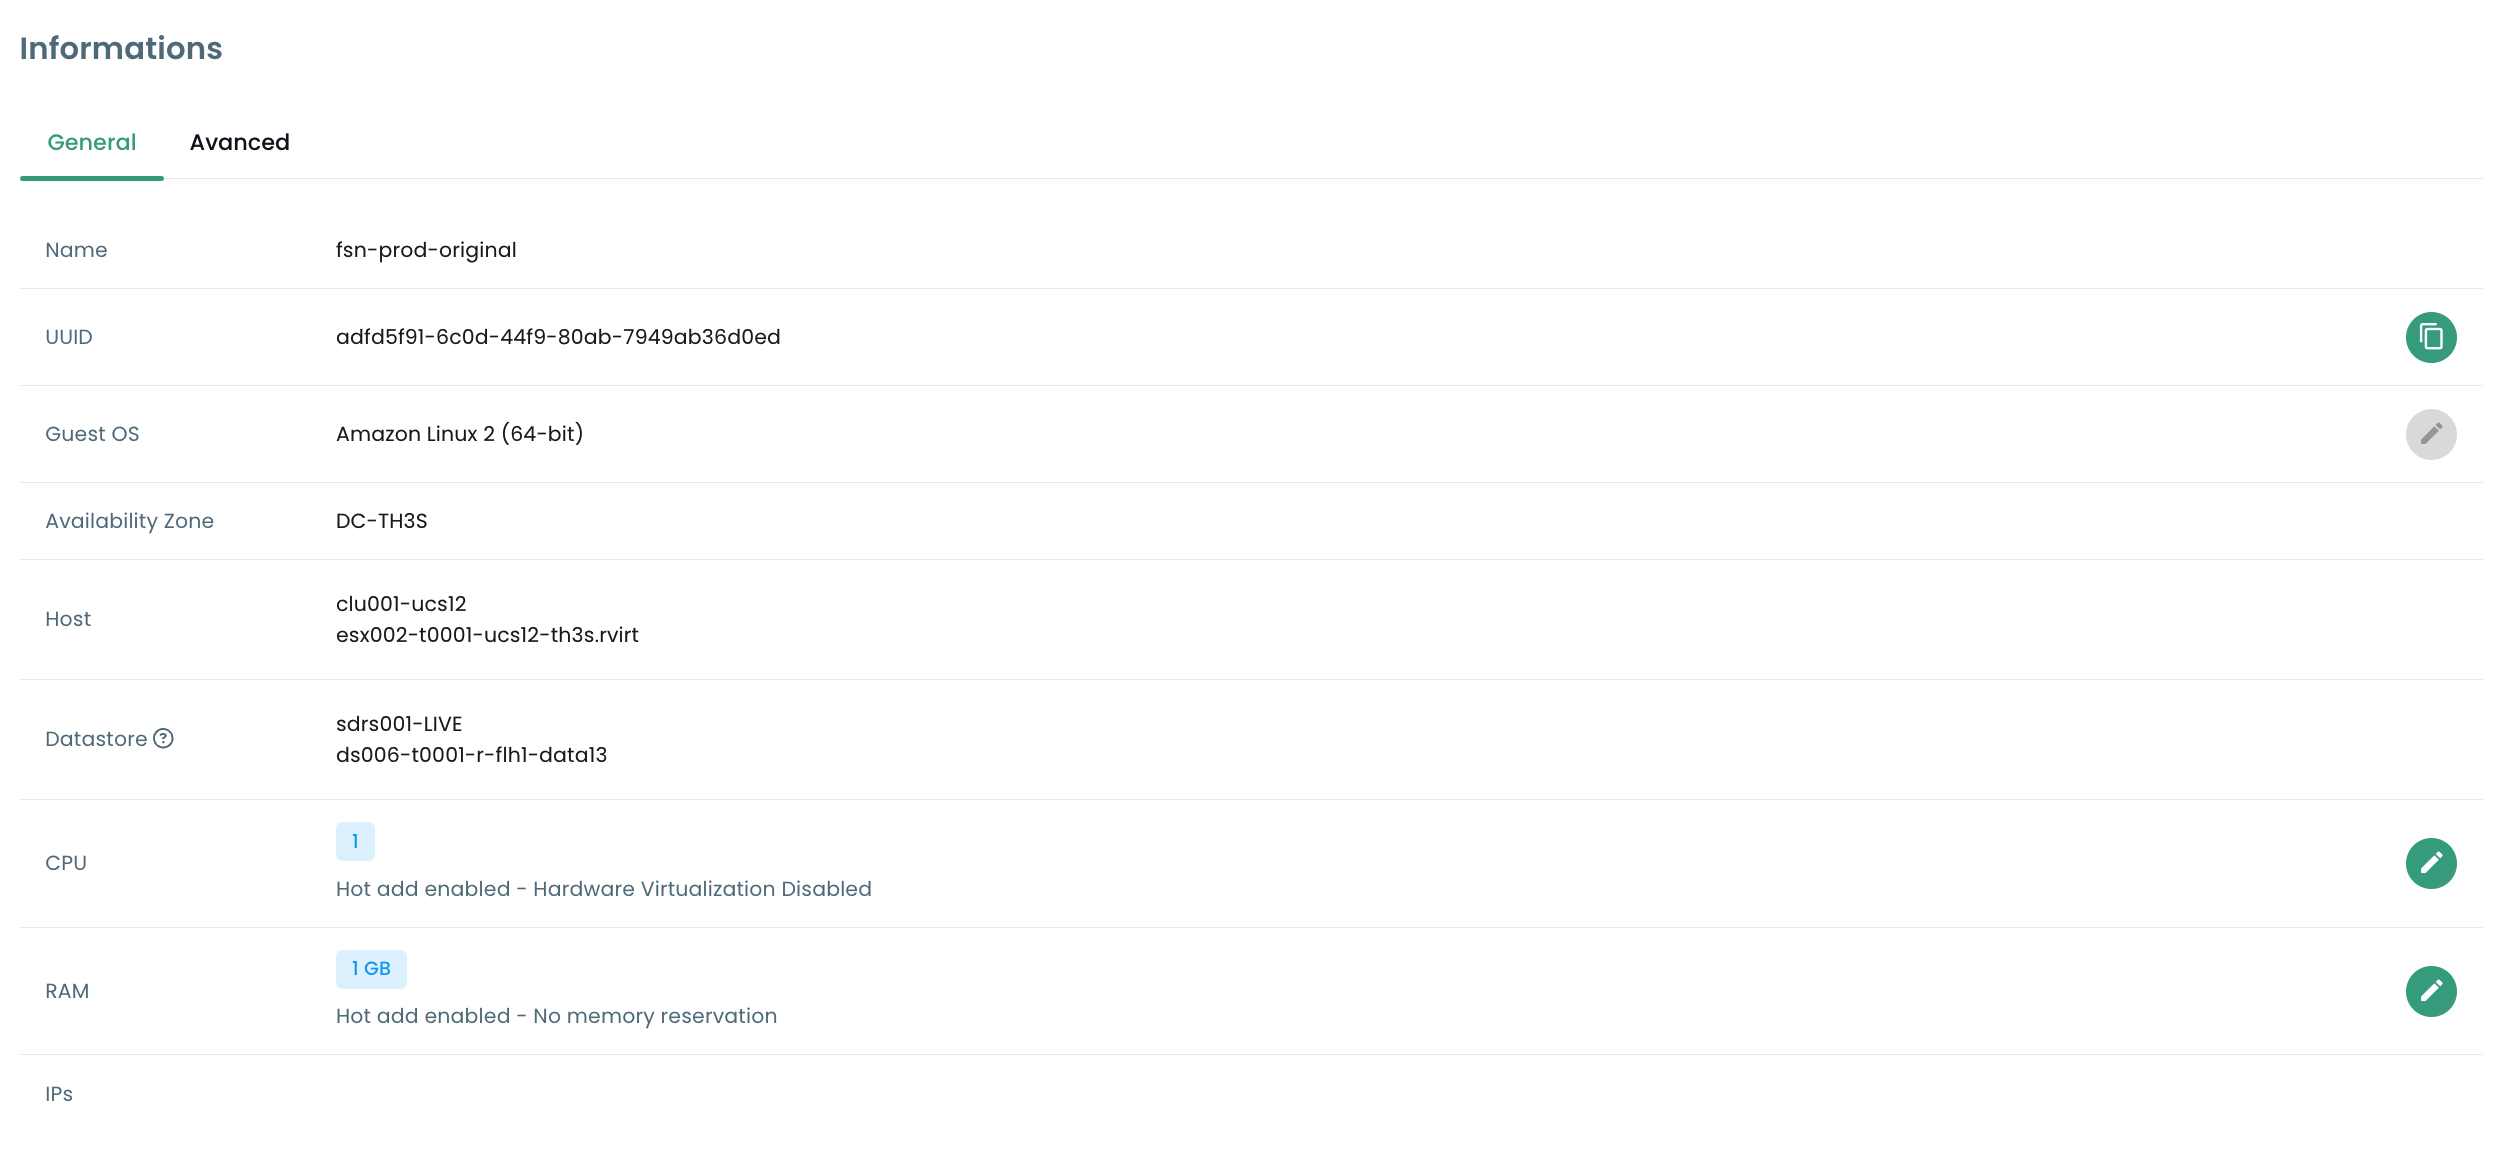
From this view, you can perform the following actions:
- Change the operating system (the virtual machine must be powered off),
- Update the hardware version (the virtual machine must be powered off),
- Modify the RAM or CPU.
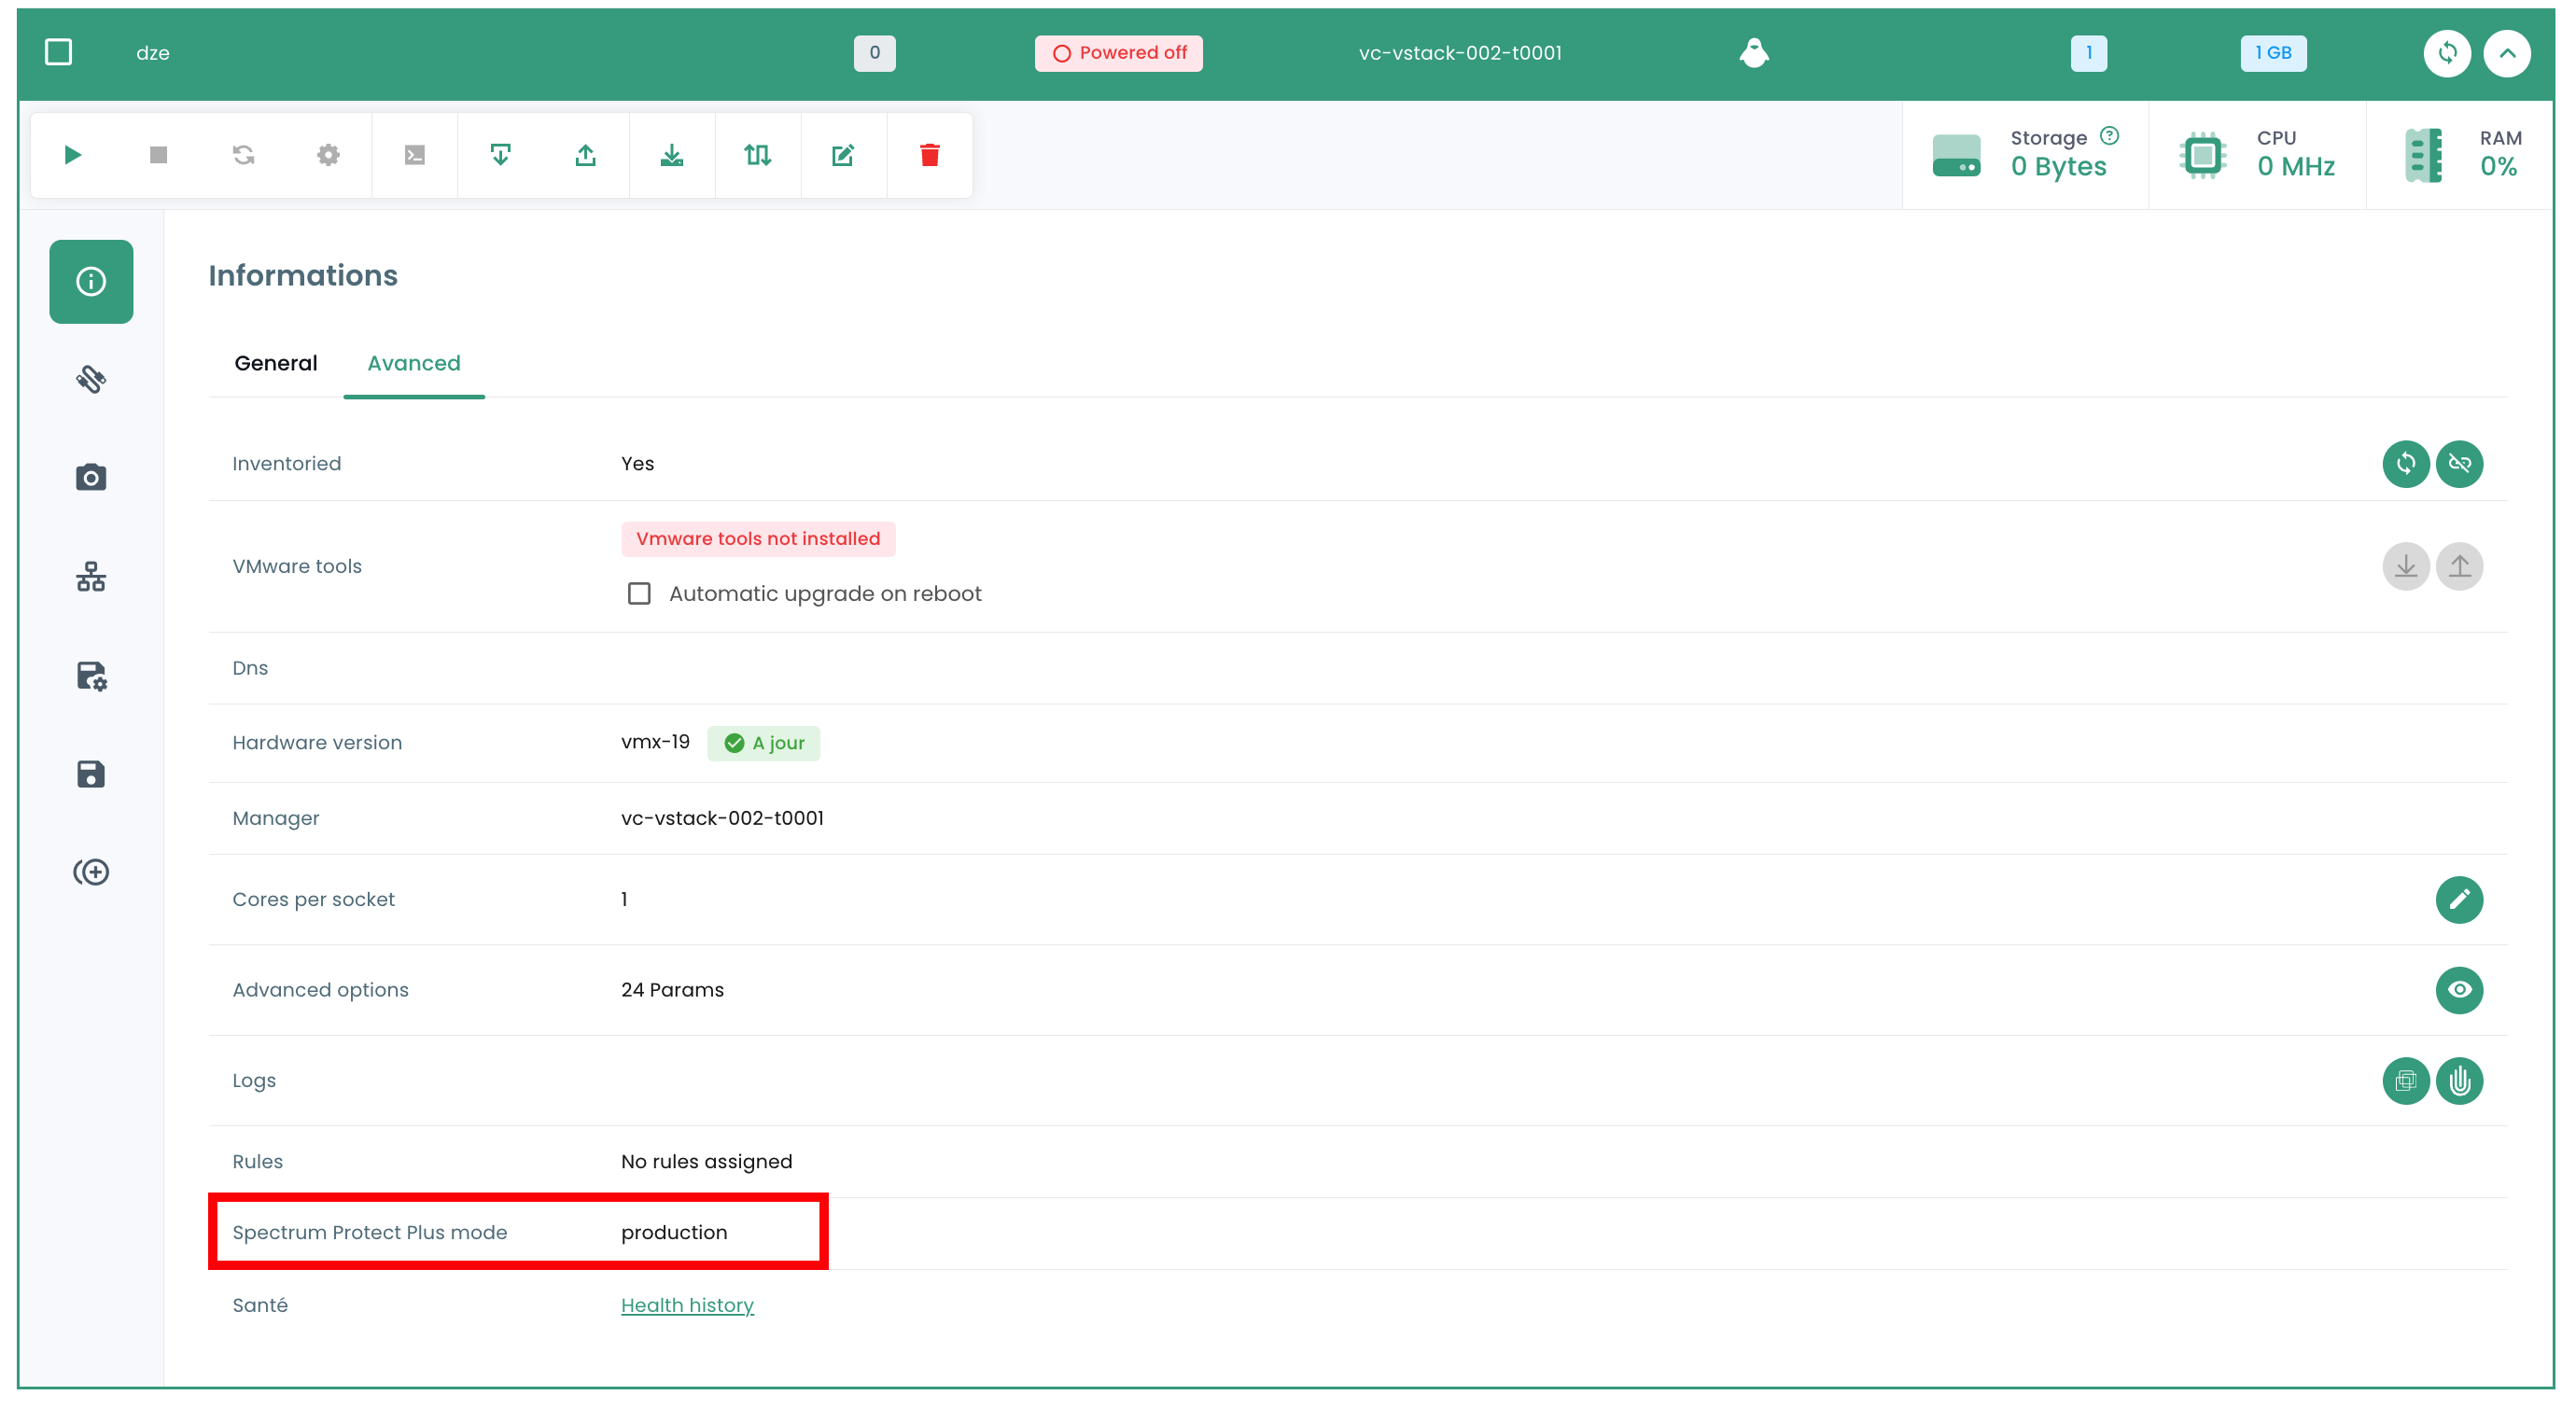
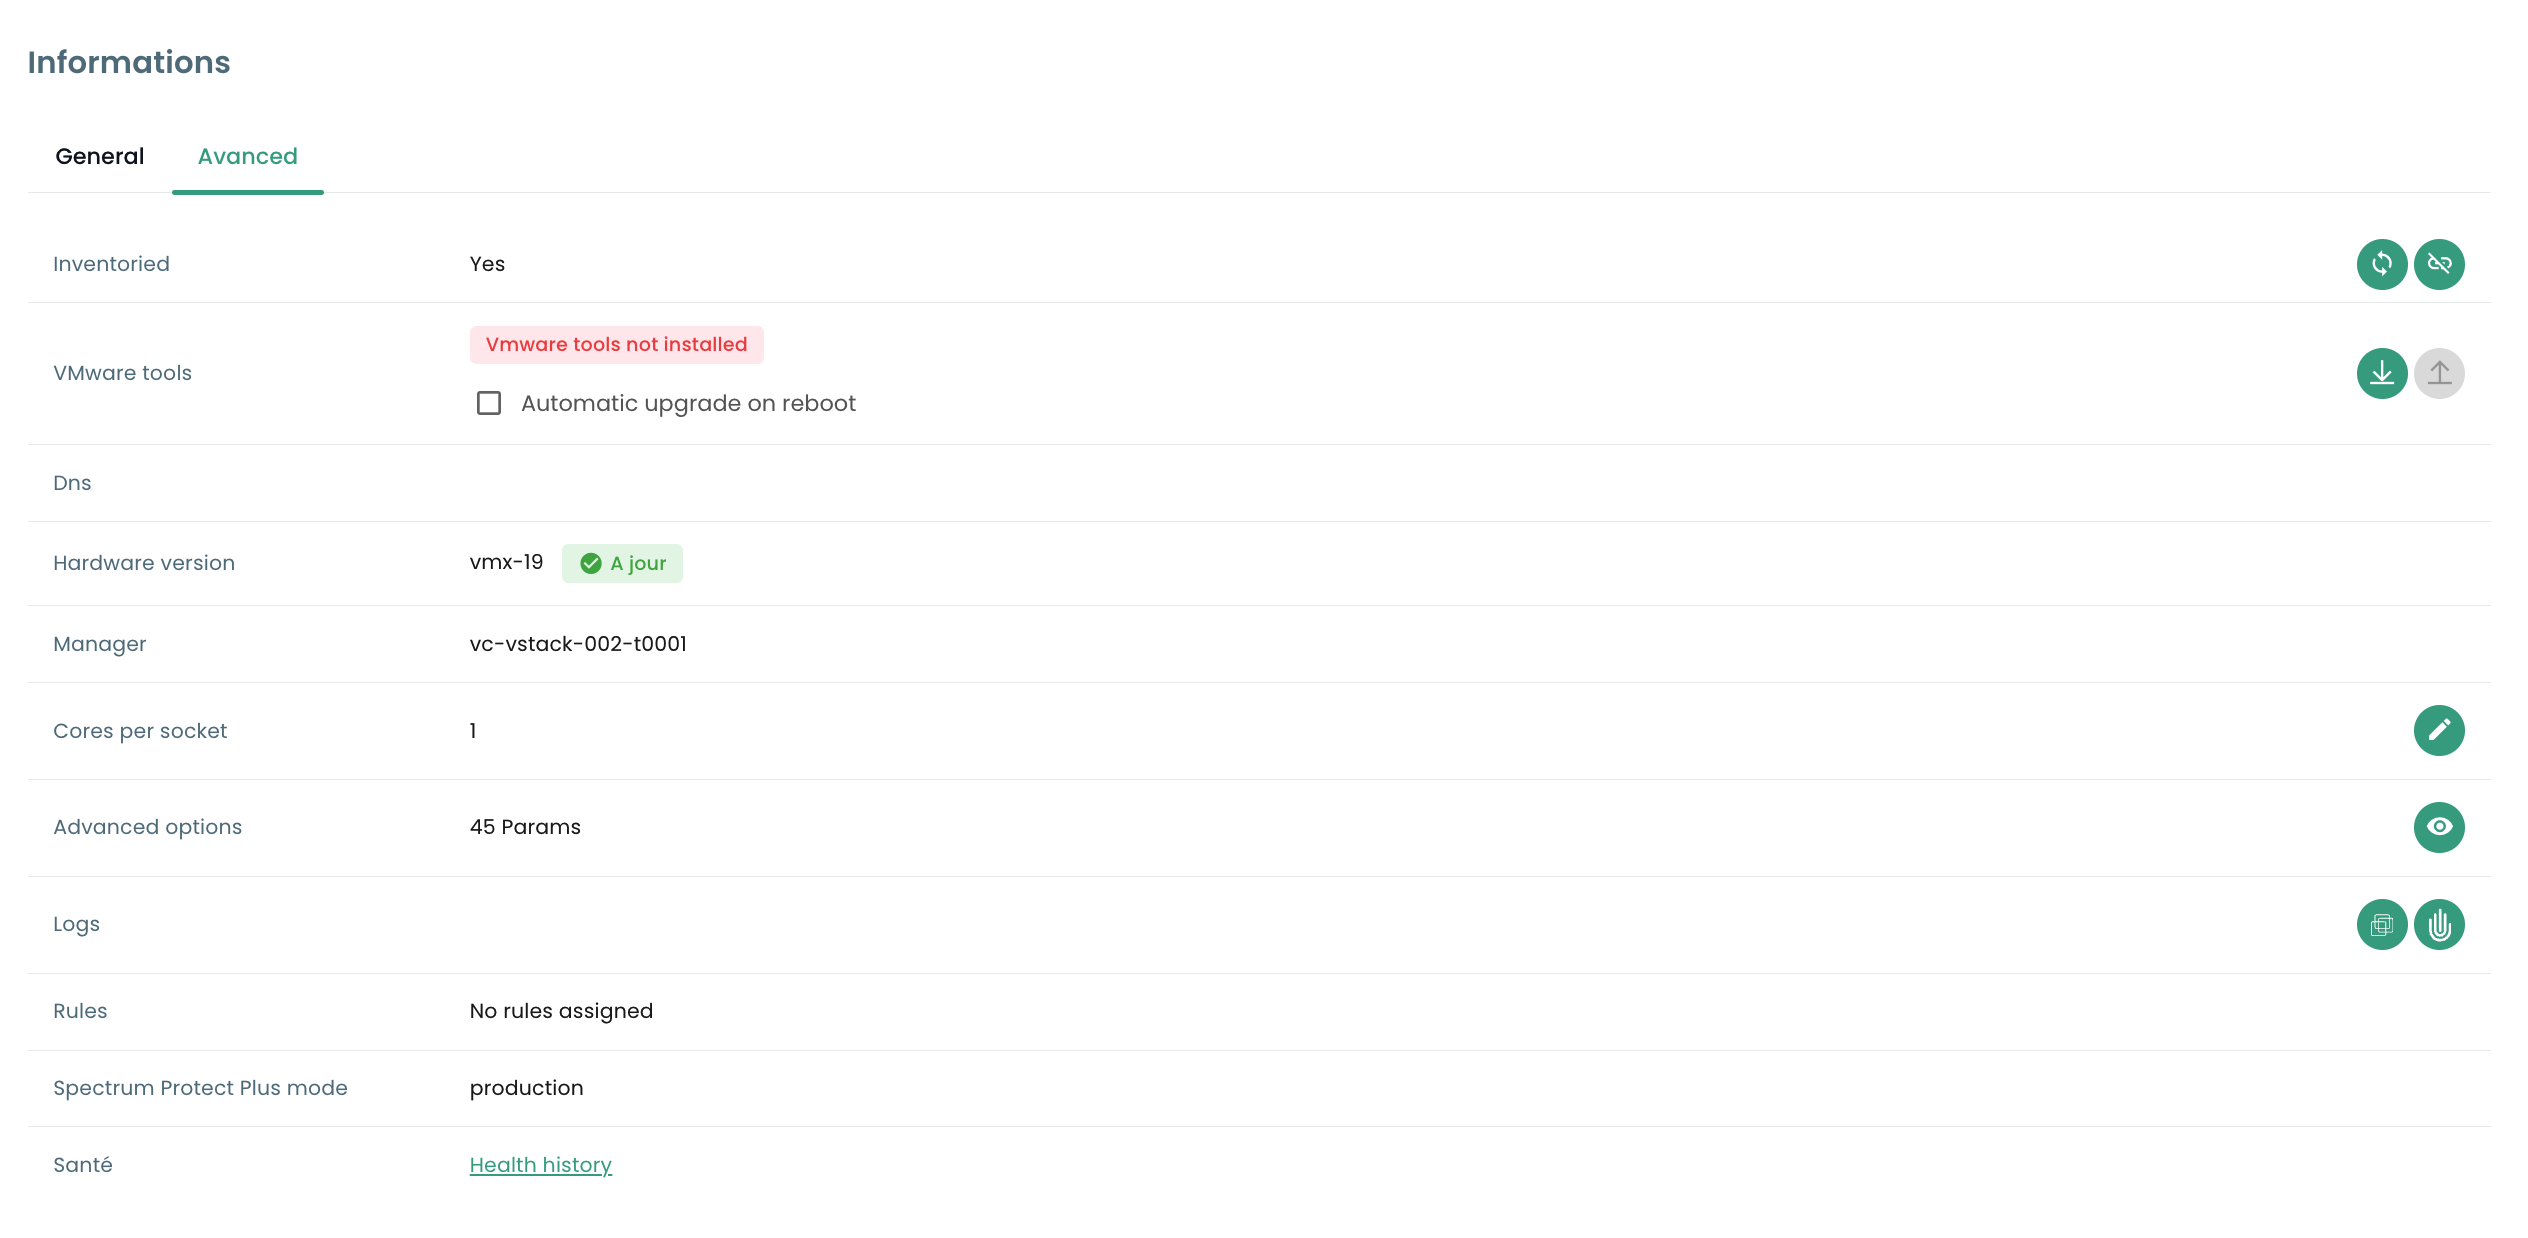
The 'Advanced' tab allows you to view more specific information such as "VMware Tools" details, hardware version, manager, etc...
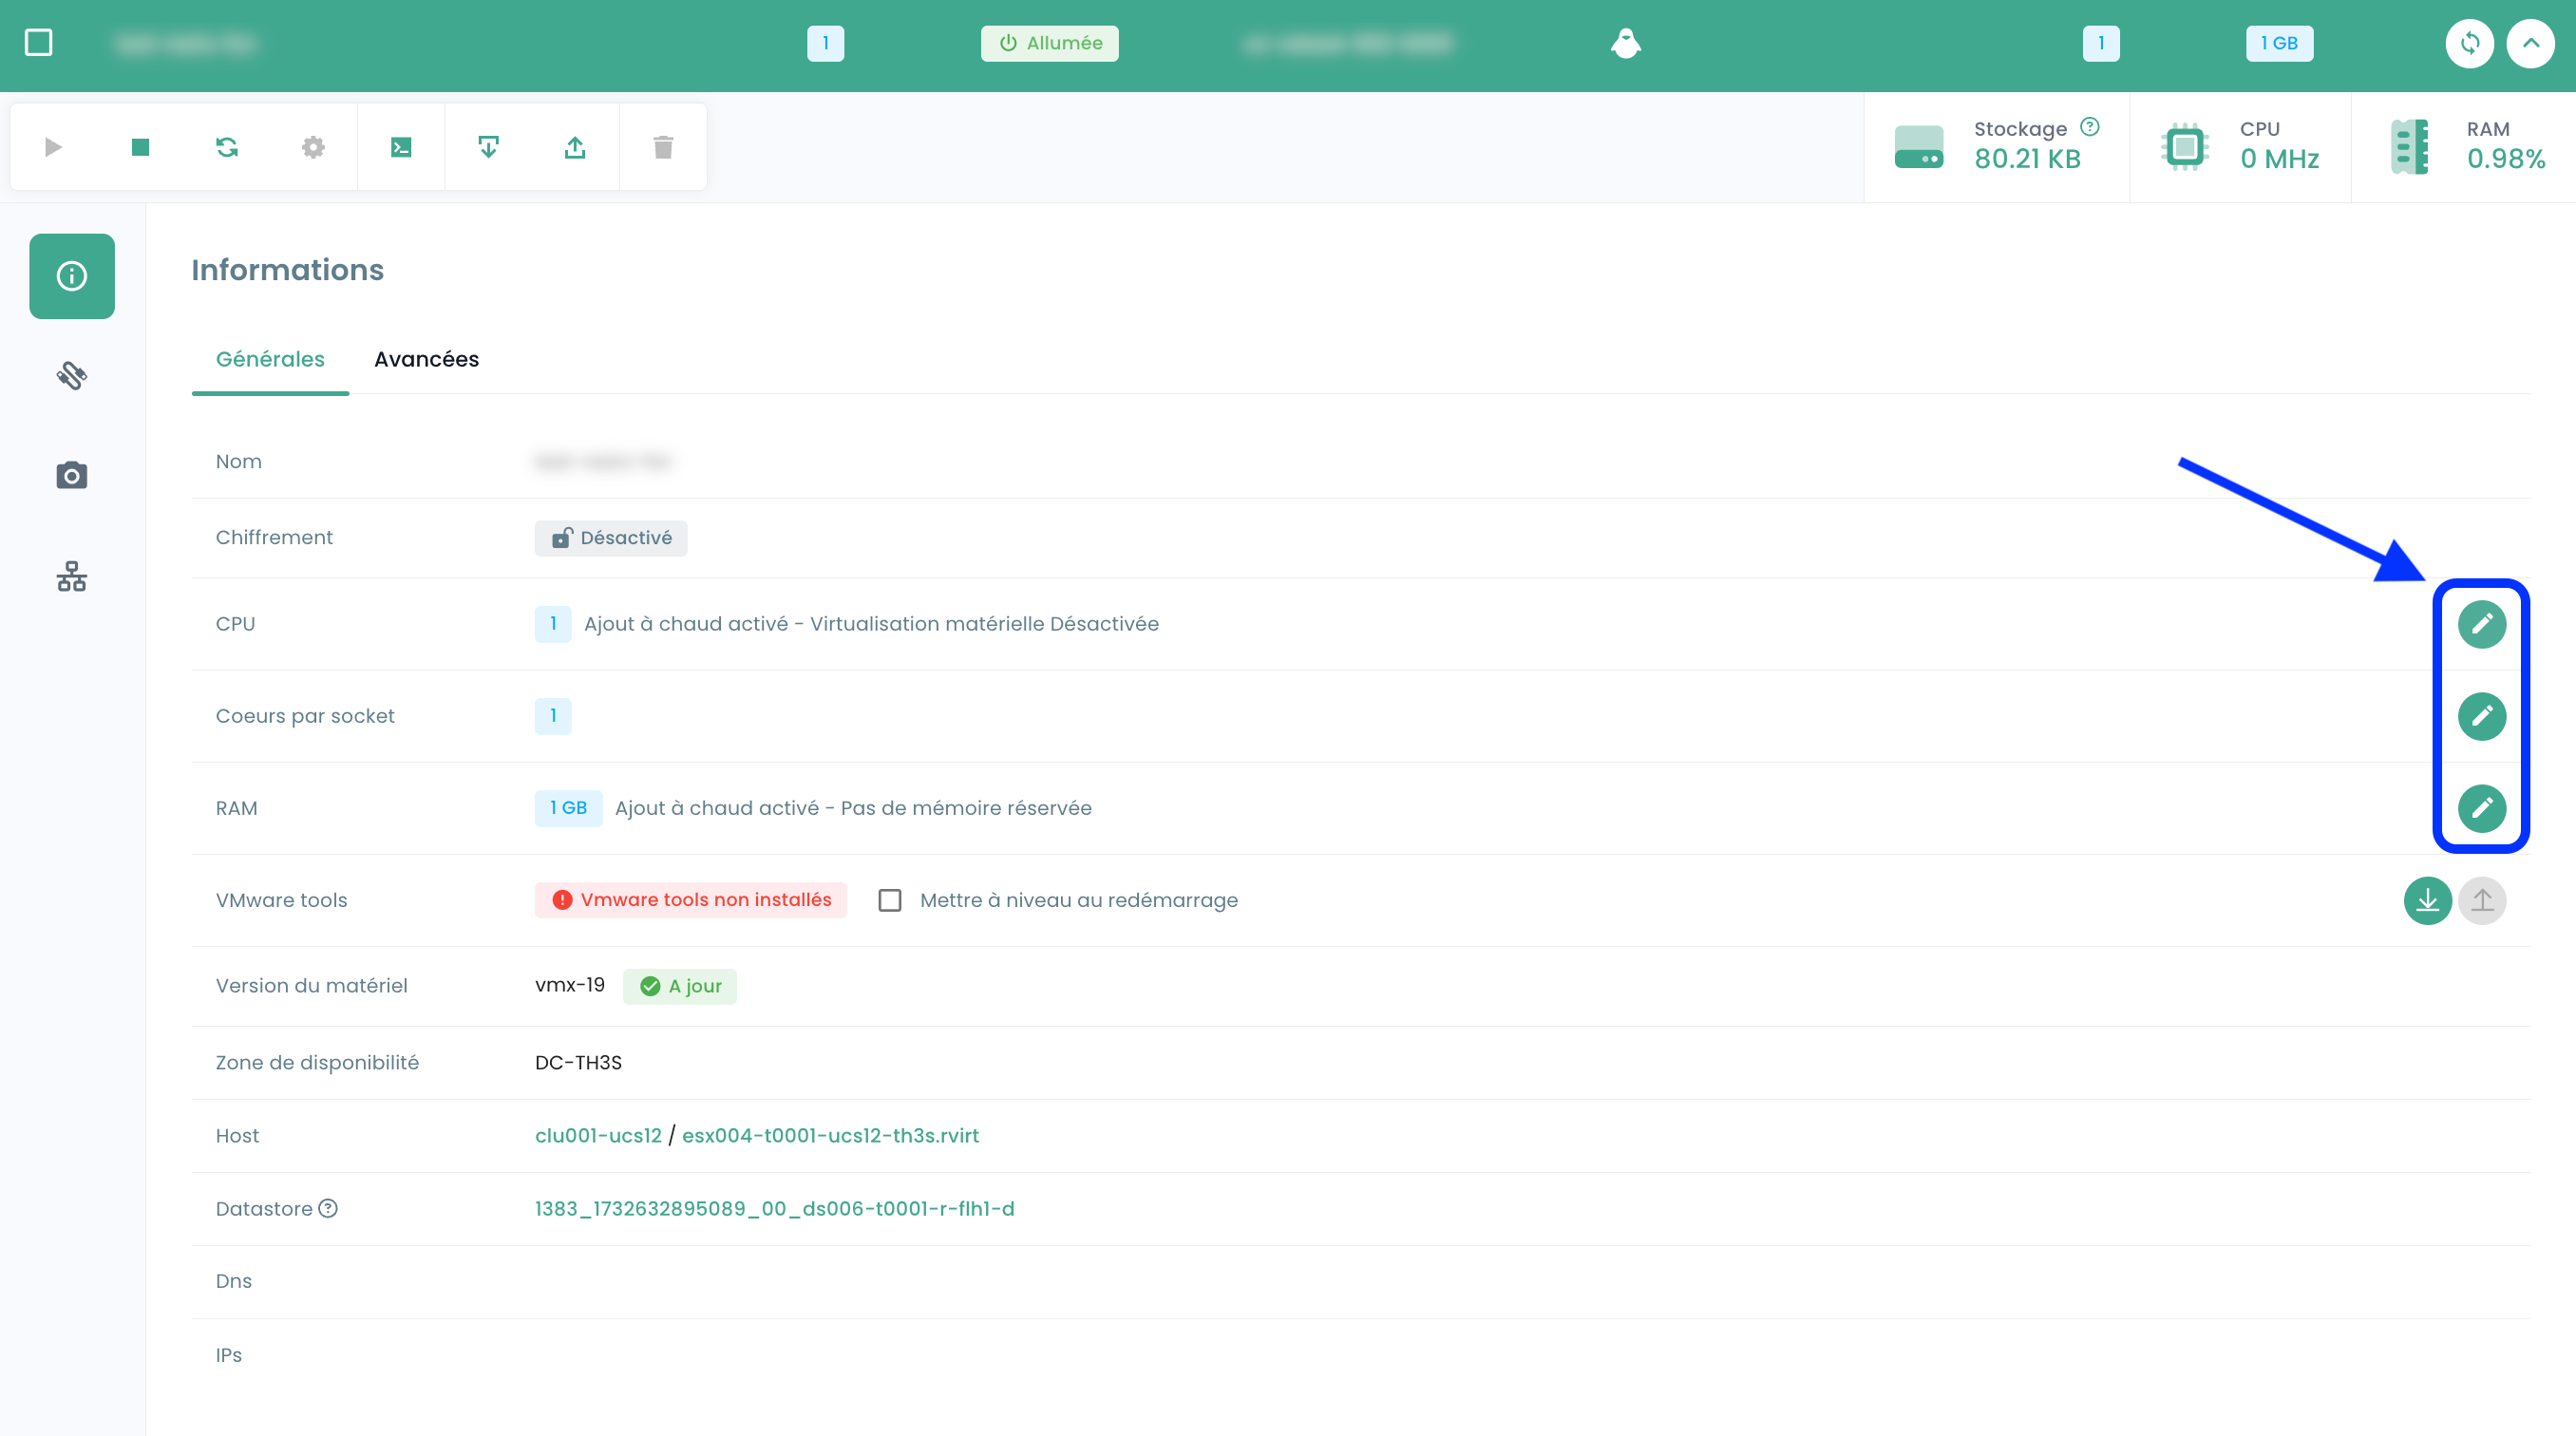
Editing the RAM or CPU of a virtual machine
Go to the 'Virtual Machines' tab, view the details of a virtual machine, select the 'General Info' tab and click the edit button for the variable to modify :
Disk modes
You can add different disk modes:
- Persistent : Changes are immediately and permanently written to the virtual disk. This is the recommended mode.
- Independent non-persistent : Changes made to the virtual disk are recorded in a new log and discarded on power off. Not affected by snapshots. It is not supported by backup.
- Independent persistent : Changes are immediately and permanently written to the virtual disk. Not affected by snapshots. It is not supported by backup.
Virtual Machine Controller Management
You can change the disk controller type for your virtual machine.
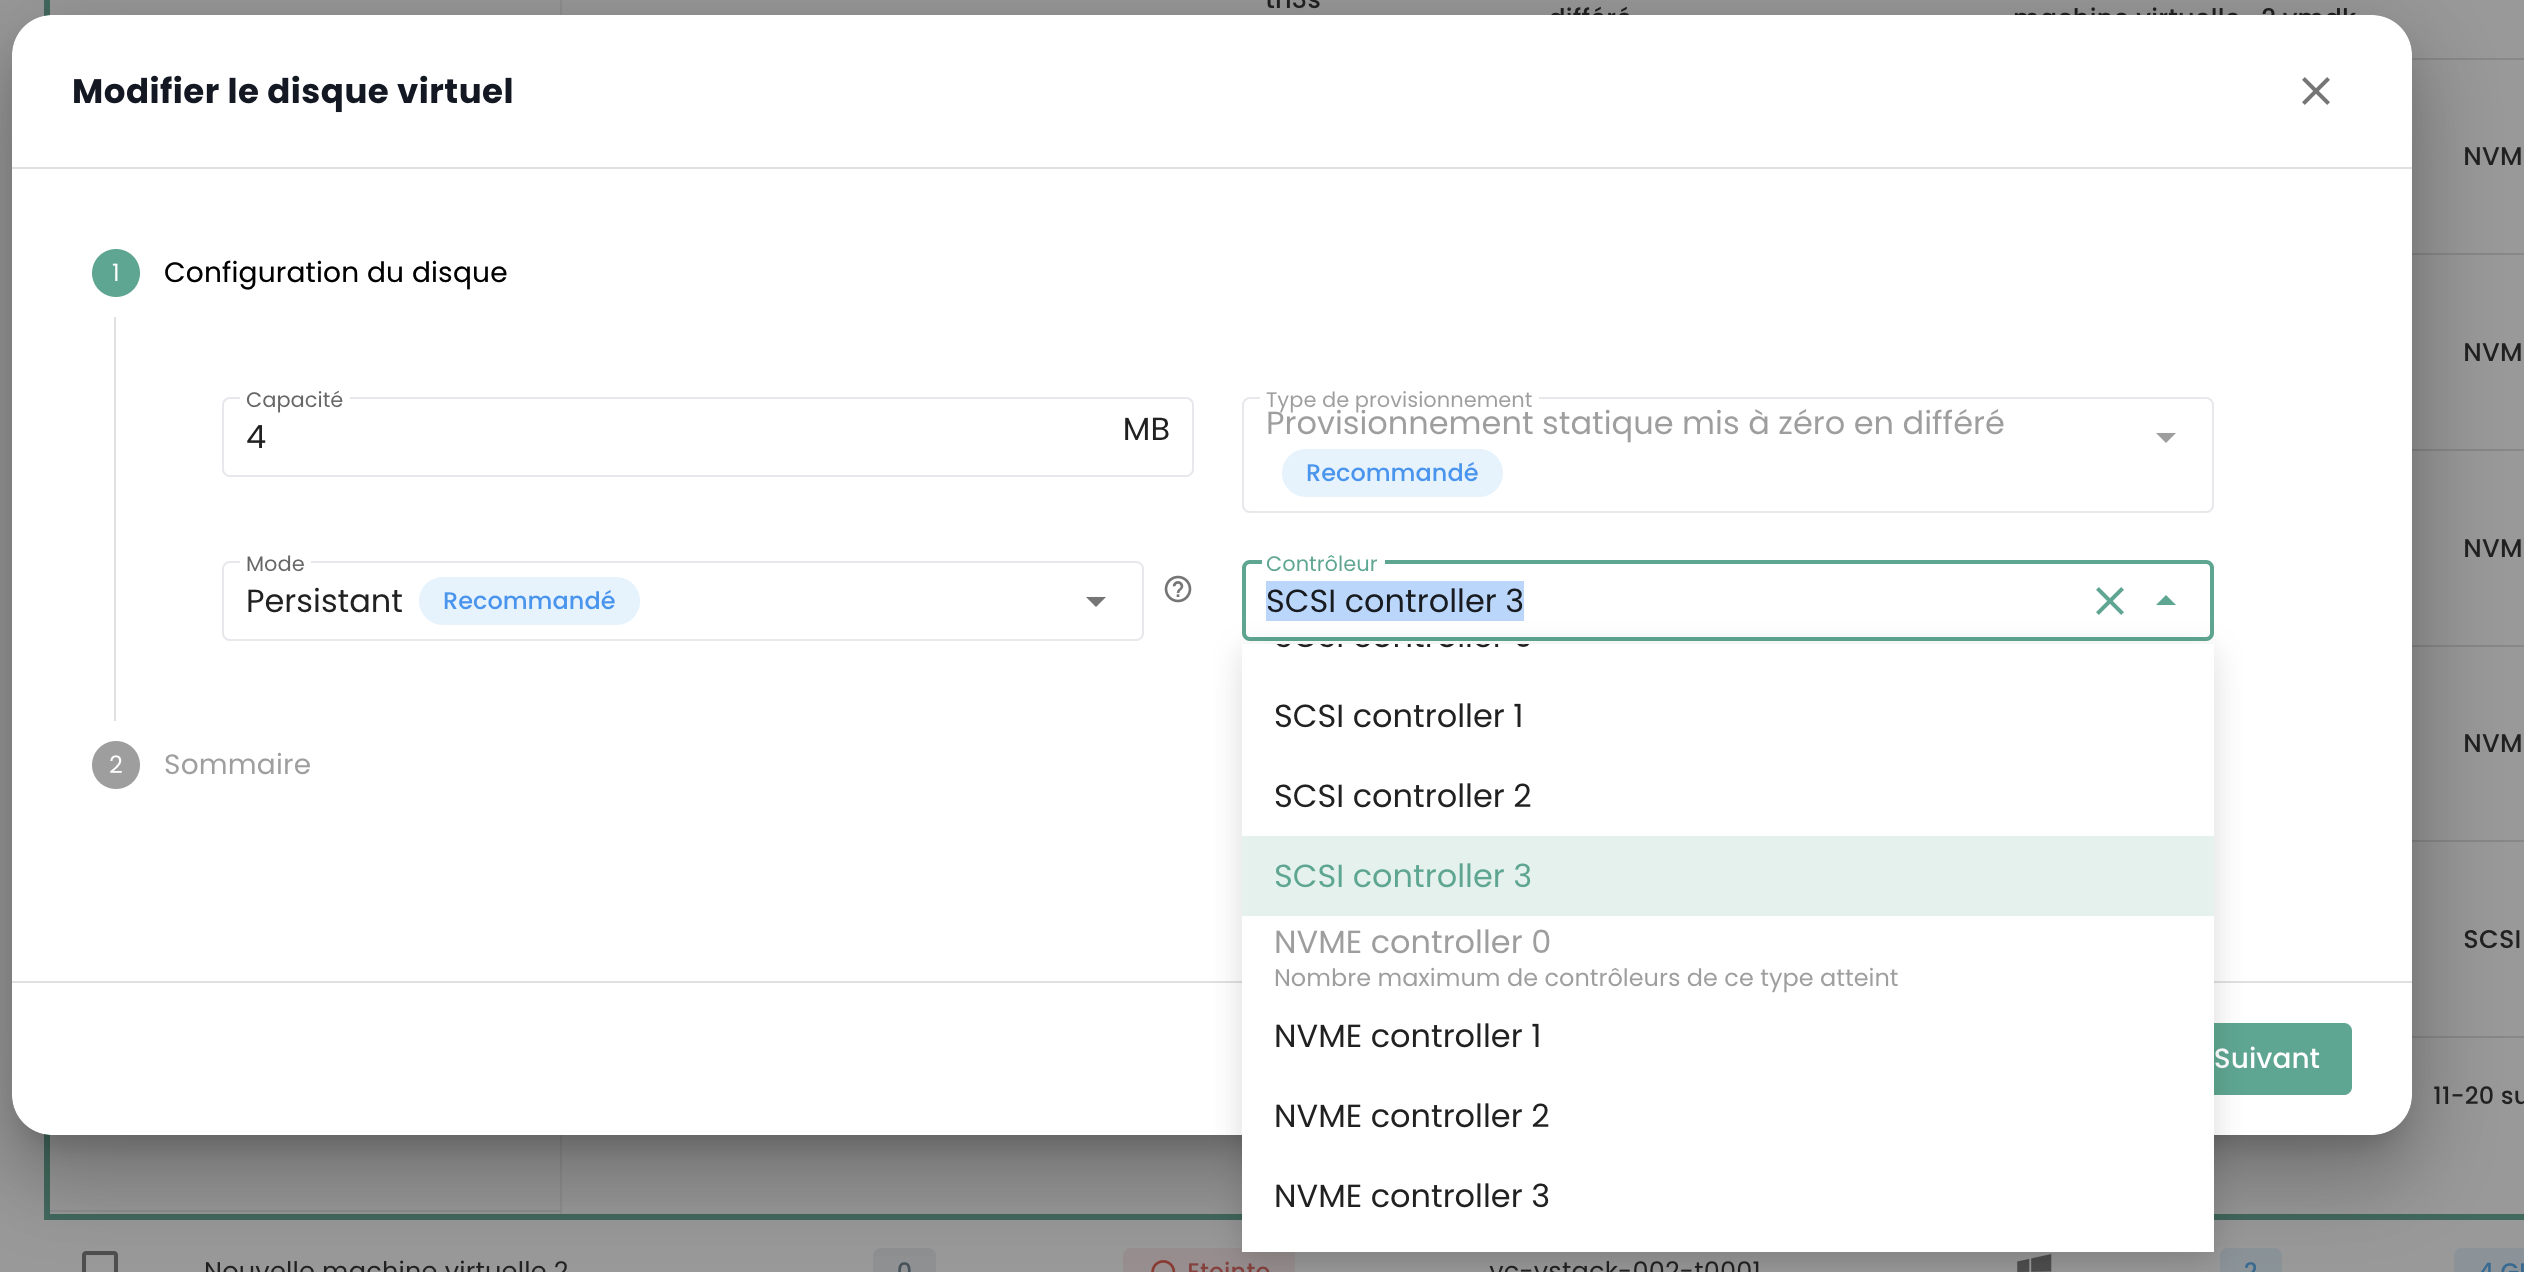
Virtual machines can be equipped with SCSI and NVMe controllers, with a limit of 4 controllers of each type. Each controller can handle up to 15 disks.
An SCSI controller can be configured with different subtypes: Para Virtual, Bus Logic, LSI Logic, or LSI Logic SAS.
The Para Virtual controller is distinguished by its extended capacity. It can support up to 64 disks when the virtual machine's hardware version is compatible with ESXi version 6.7 or later.
Important: If you want to change the type of a Para Virtual controller that has more than 15 disks, you must first detach the disks from the corresponding slots.
Virtual Machine Console
The virtual machine console is accessible from the virtual machines list by clicking the 'Console' icon:
A new browser tab opens and displays your machine's console, based on a VNC client:
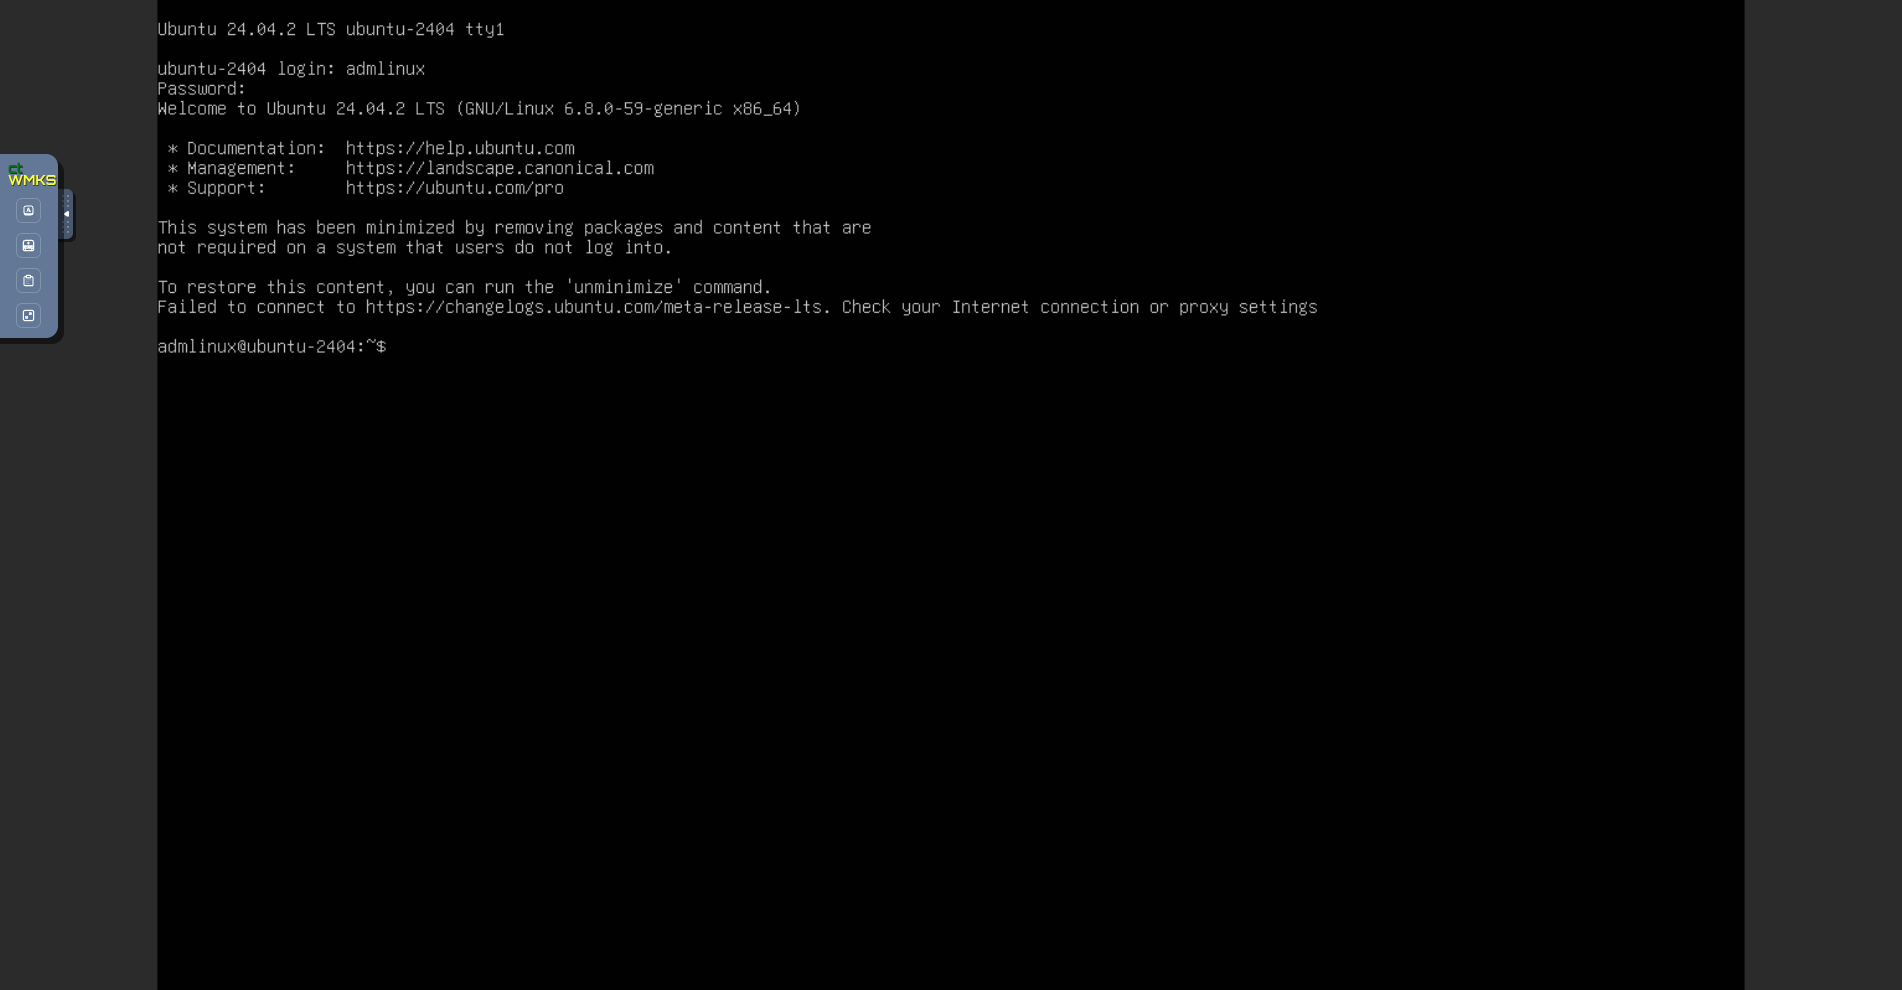
The VNC menu allows you to:
- send specific keys,
- force a keyboard layout mapping (in case we were unable to correctly identify your keyboard),
- open a text field to send to the machine. This method replaces the old non-functional clipboard,
- switch to full-screen mode.
Note : Window scaling is automatic.
Keyboard Layout Support
Console input depends on your web browser's keyboard language, the virtual machine's keyboard language, and whether the 'enforce keyboard' option on the left side of the screen is enabled or not. Here is a summary of possible scenarios:
| Physical machine keyboard language (input) | Virtual machine keyboard language | 'enforce keyboard' option selected | Result (output) |
|---|---|---|---|
| French | French | No | ✅ |
| French | French | Yes | Not recommended |
| French | English | No | English |
| French | English | Yes | ✅ |
| English | French | No | French |
| English | French | Yes | ✅ |
| English | English | No | ✅ |
| English | English | Yes | Not recommended |
Note :
- If certain characters do not pass during manual input, you can try using the clipboard.
Clipboard Functionality
This feature allows you to send an entire string of characters to your virtual machine. It is important to note that the "enforce keyboard" key affects how this string of characters
will be transmitted to your virtual machine. If you notice during console input that the "enforce keyboard" option is necessary, remember to enable it before using the clipboard.
This feature can be used to send a password, a command, or a configuration file content, for example:
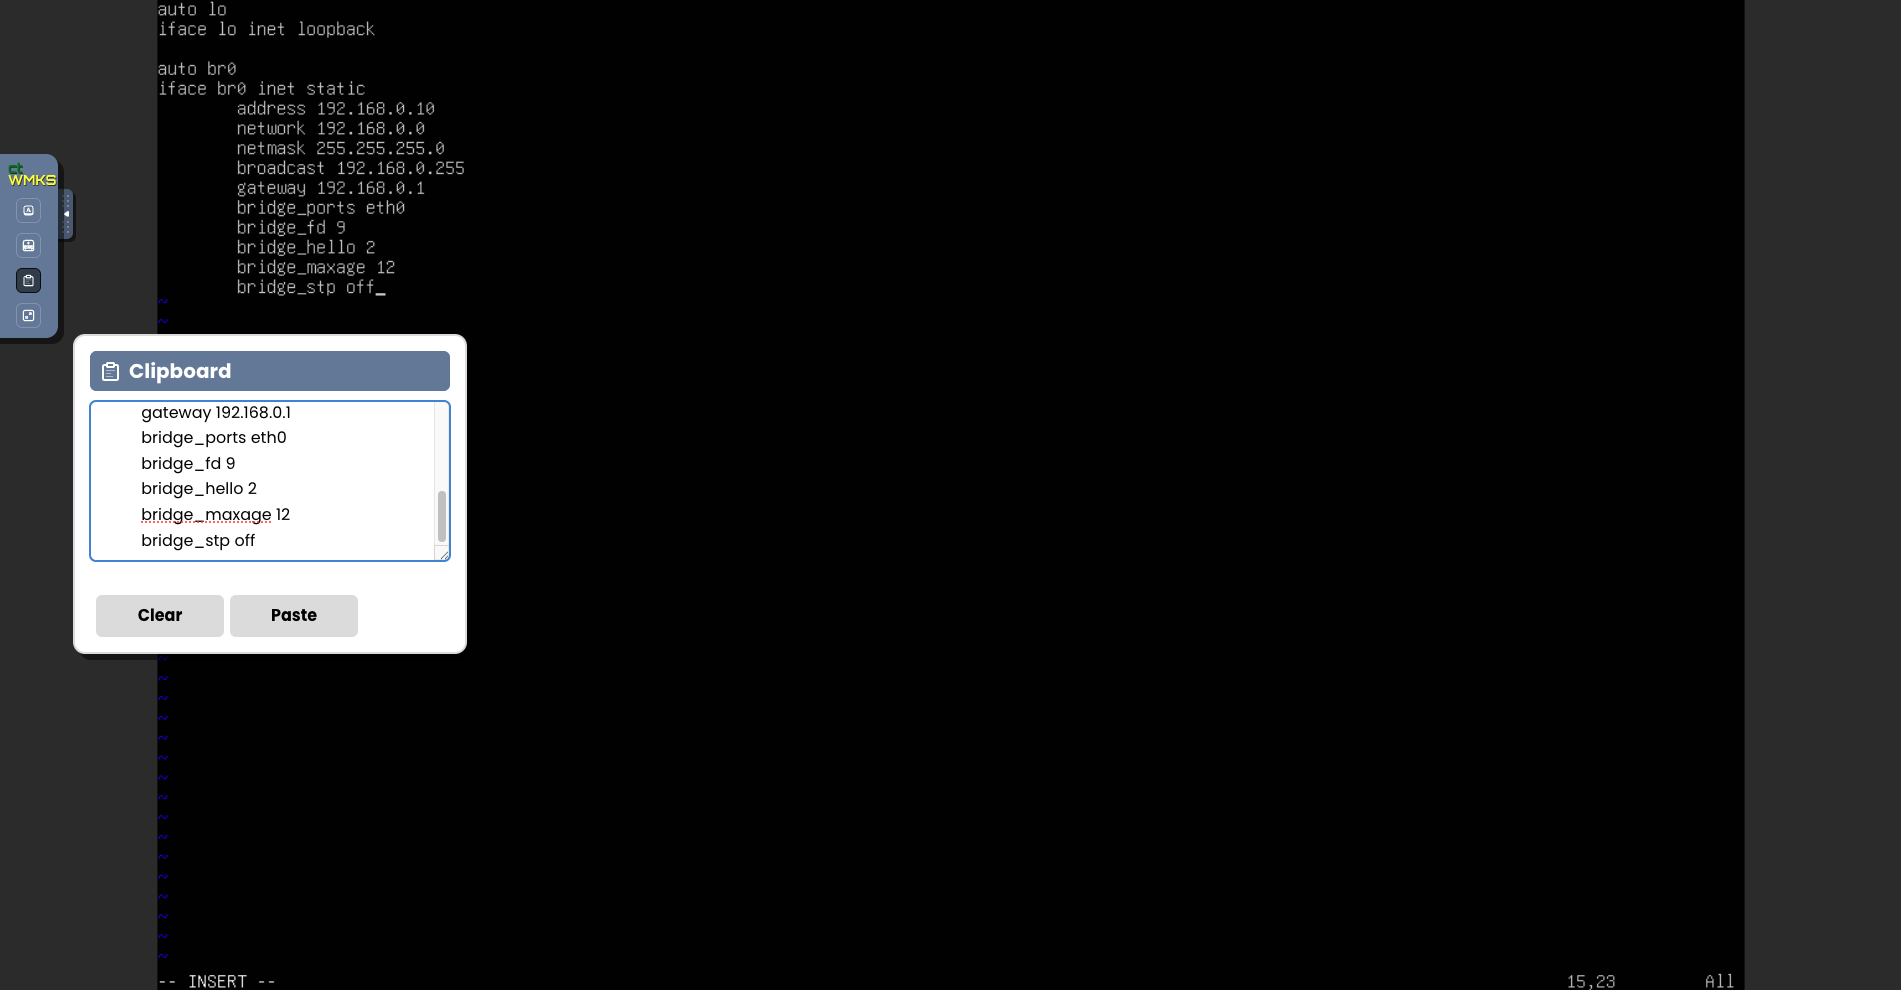
When clicking the "Paste" button, the content of your text field is sent to your virtual machine.
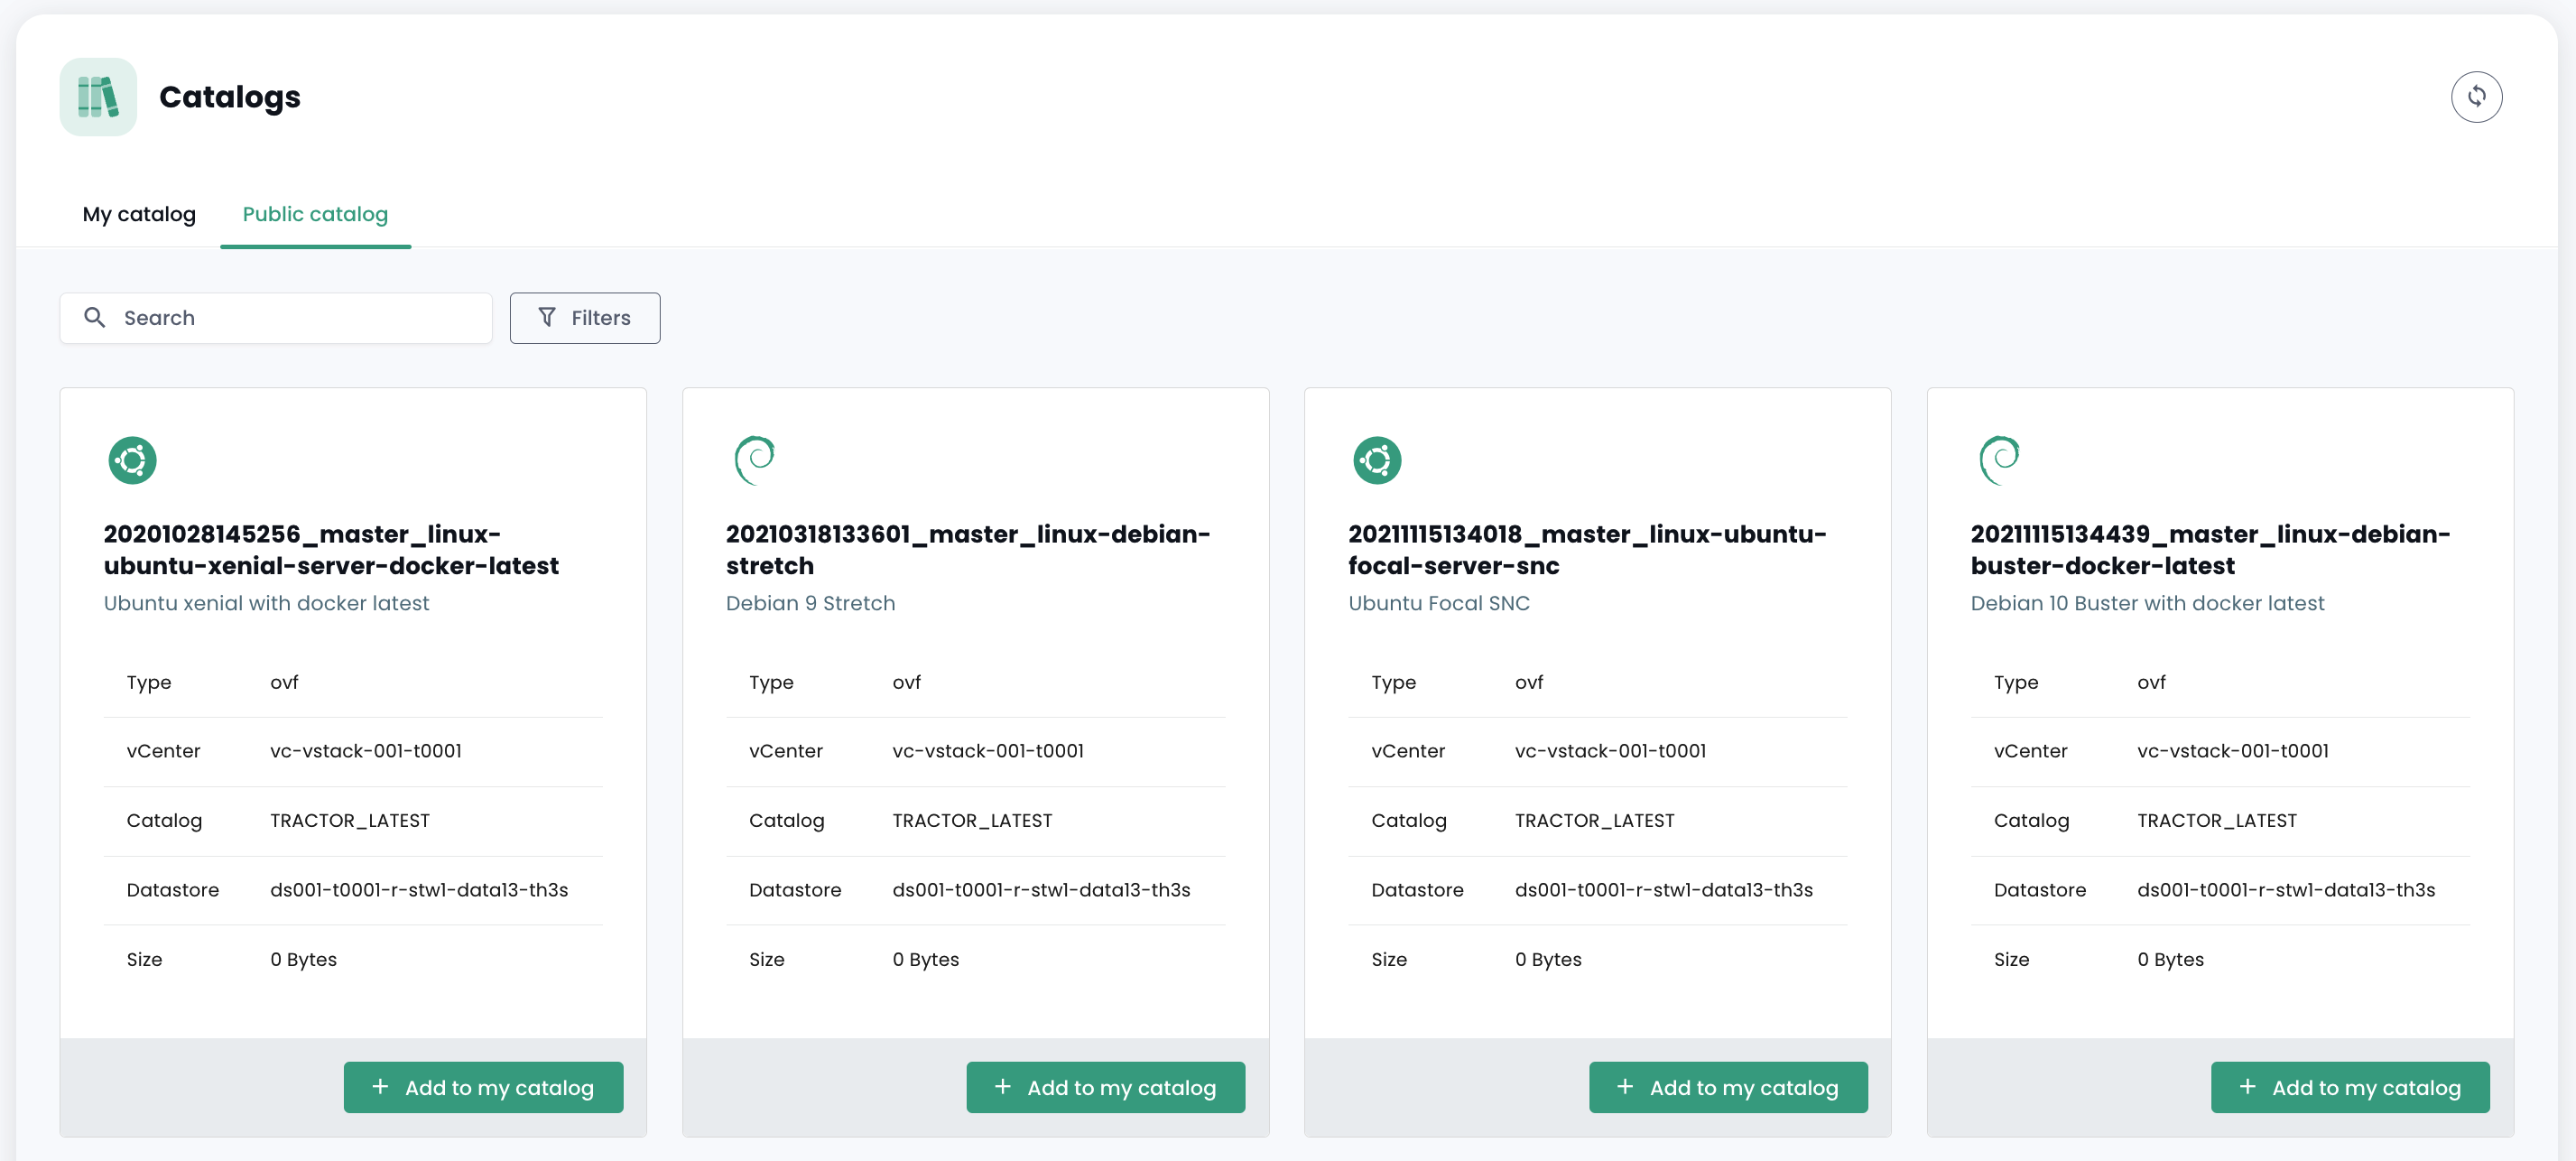
Cloud Temple Virtual Machine Catalogs
Cloud Temple provides you with a Templates catalog regularly enriched and updated by our teams.
It currently includes several dozen Templates and images to mount on your virtual machines.
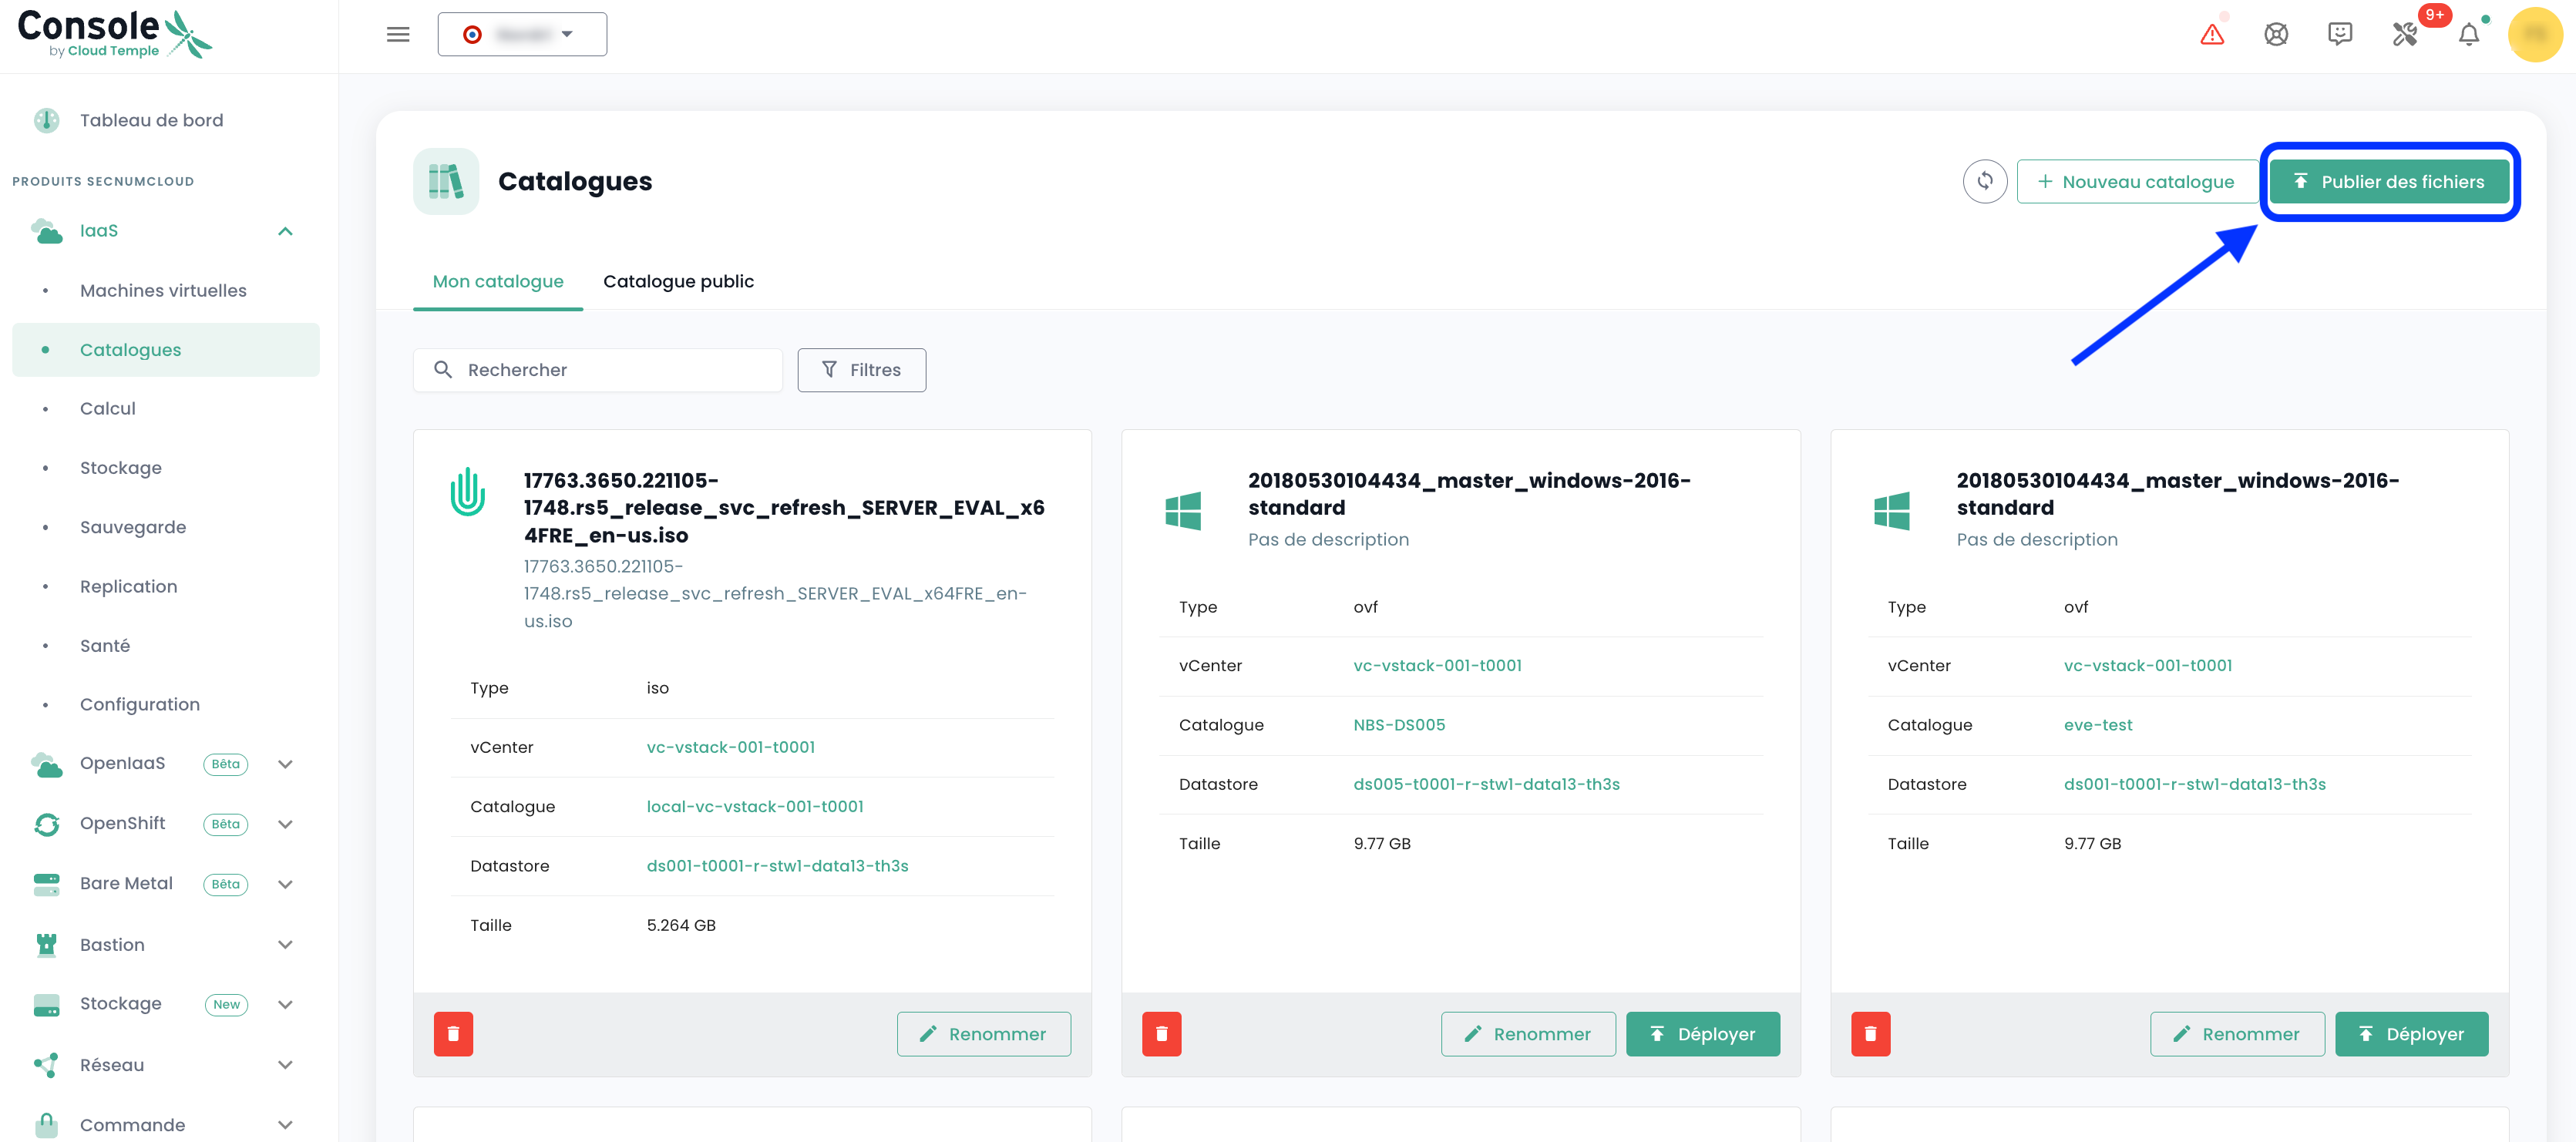
To publish an ISO/OVF, go to the 'Catalog' view and click the 'publish files' button at the top of the page:
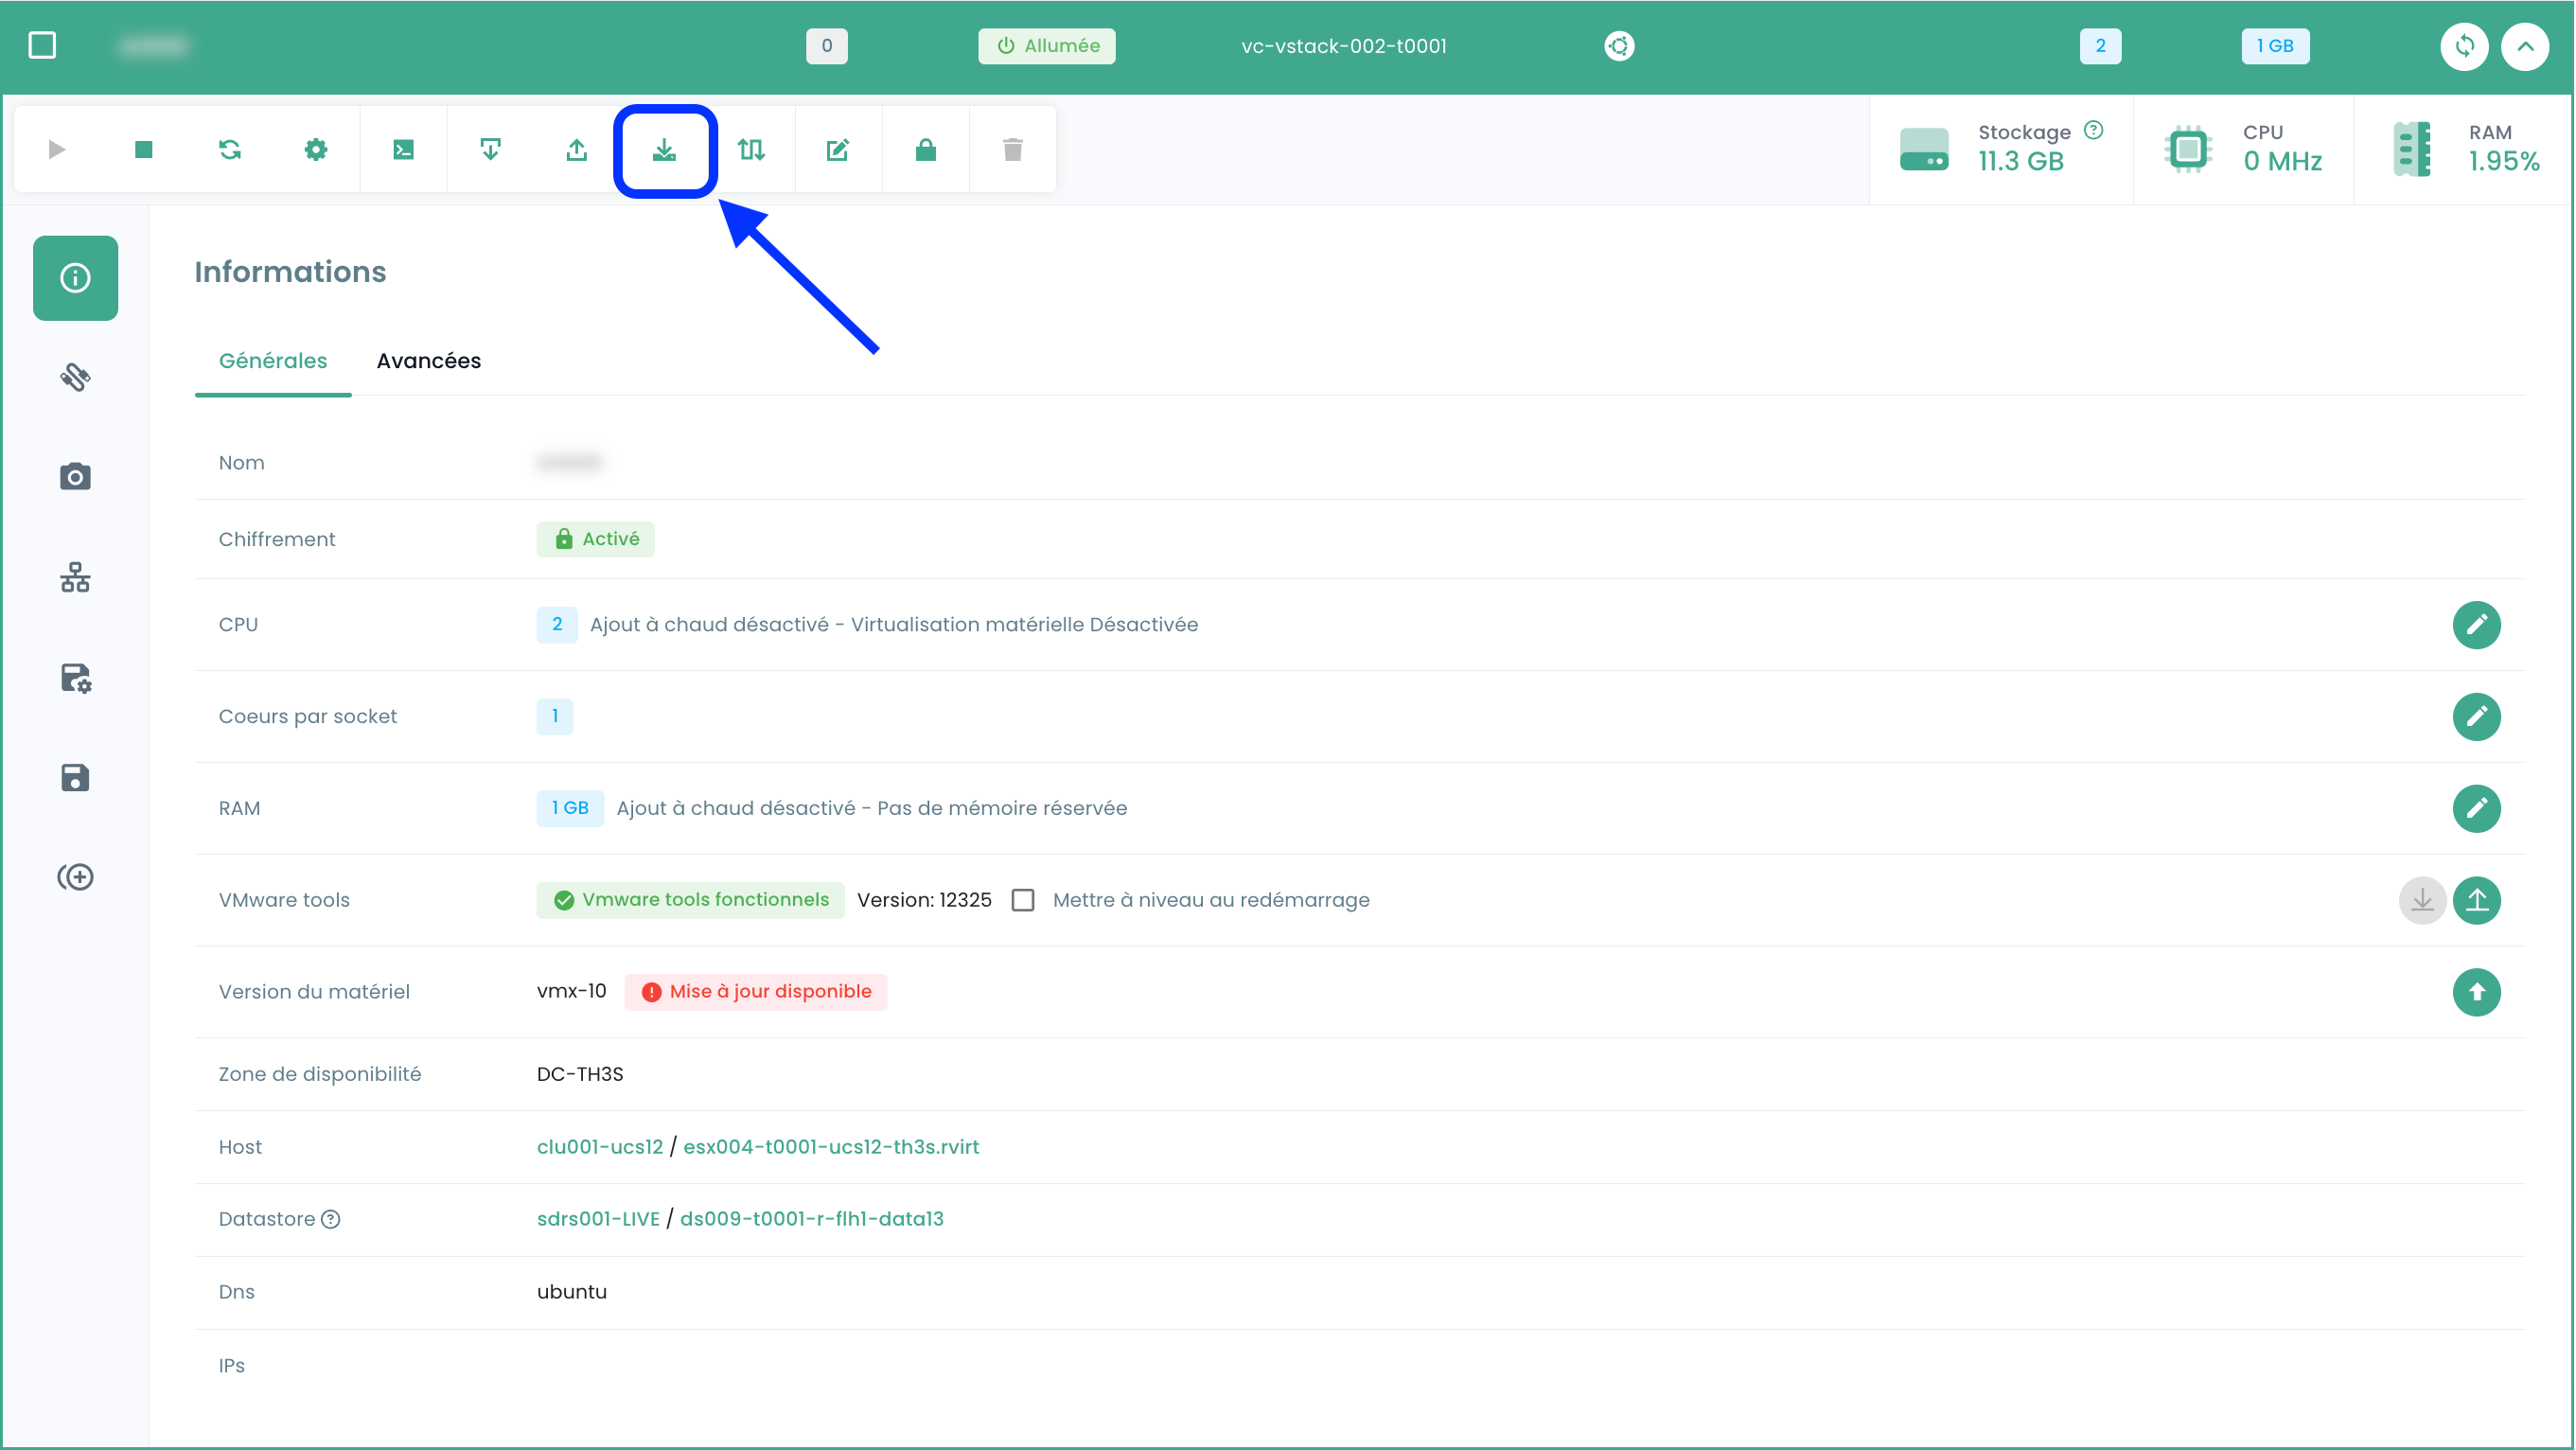
It is possible to convert a VM into a template and export it to the catalog. To do this, select a virtual machine and use the 'clone' action button:
Select 'Export as vm-template':
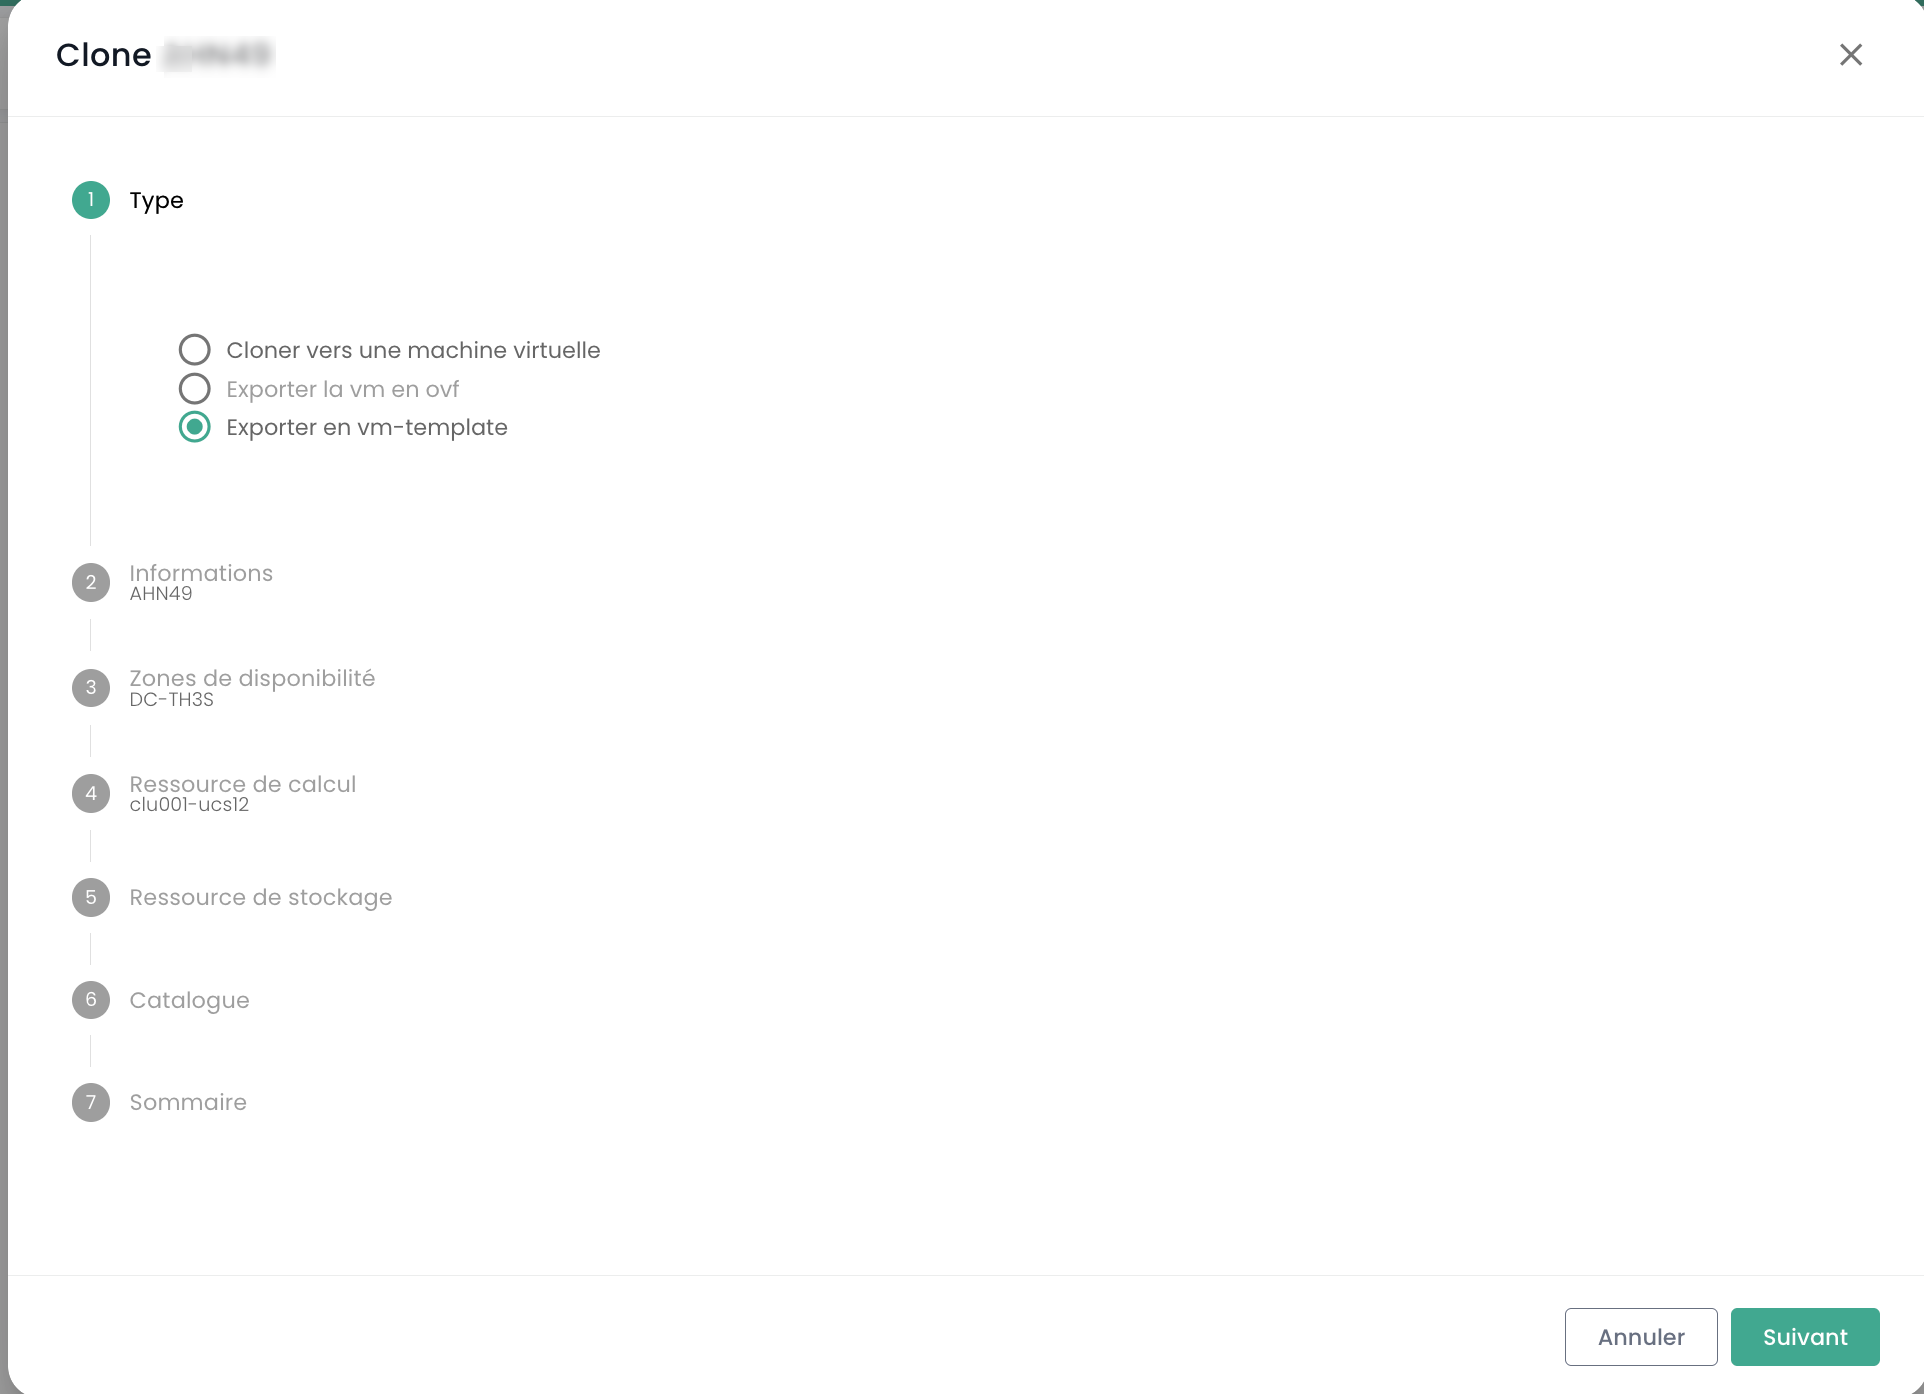
Then fill in the required information. You will then be able to deploy a new VM from the template using the 'New virtual machine' button or from the 'Catalogs' page. It is also possible to export the VM in OVF format.
Good to know: it is possible to convert an OVA file to OVF and vice versa.
The most commonly used method is VMware Converter, but there is also a simple method using tar
Extracting the ova file:
tar -xvf vmName.ova
Creating an OVA file from an OVF file:
tar -cvf vmName-NEW.ova vmName.ovf vmName-disk1.vmdk vmName.mf
Advanced virtual machine settings: Extra Config
Extra Config provides a flexible way to include key=value pairs in a virtual machine's configuration. The keys and values are interpreted by the system when the virtual machine is deployed.
You can now modify Extra Config properties in the advanced options of a virtual machine:
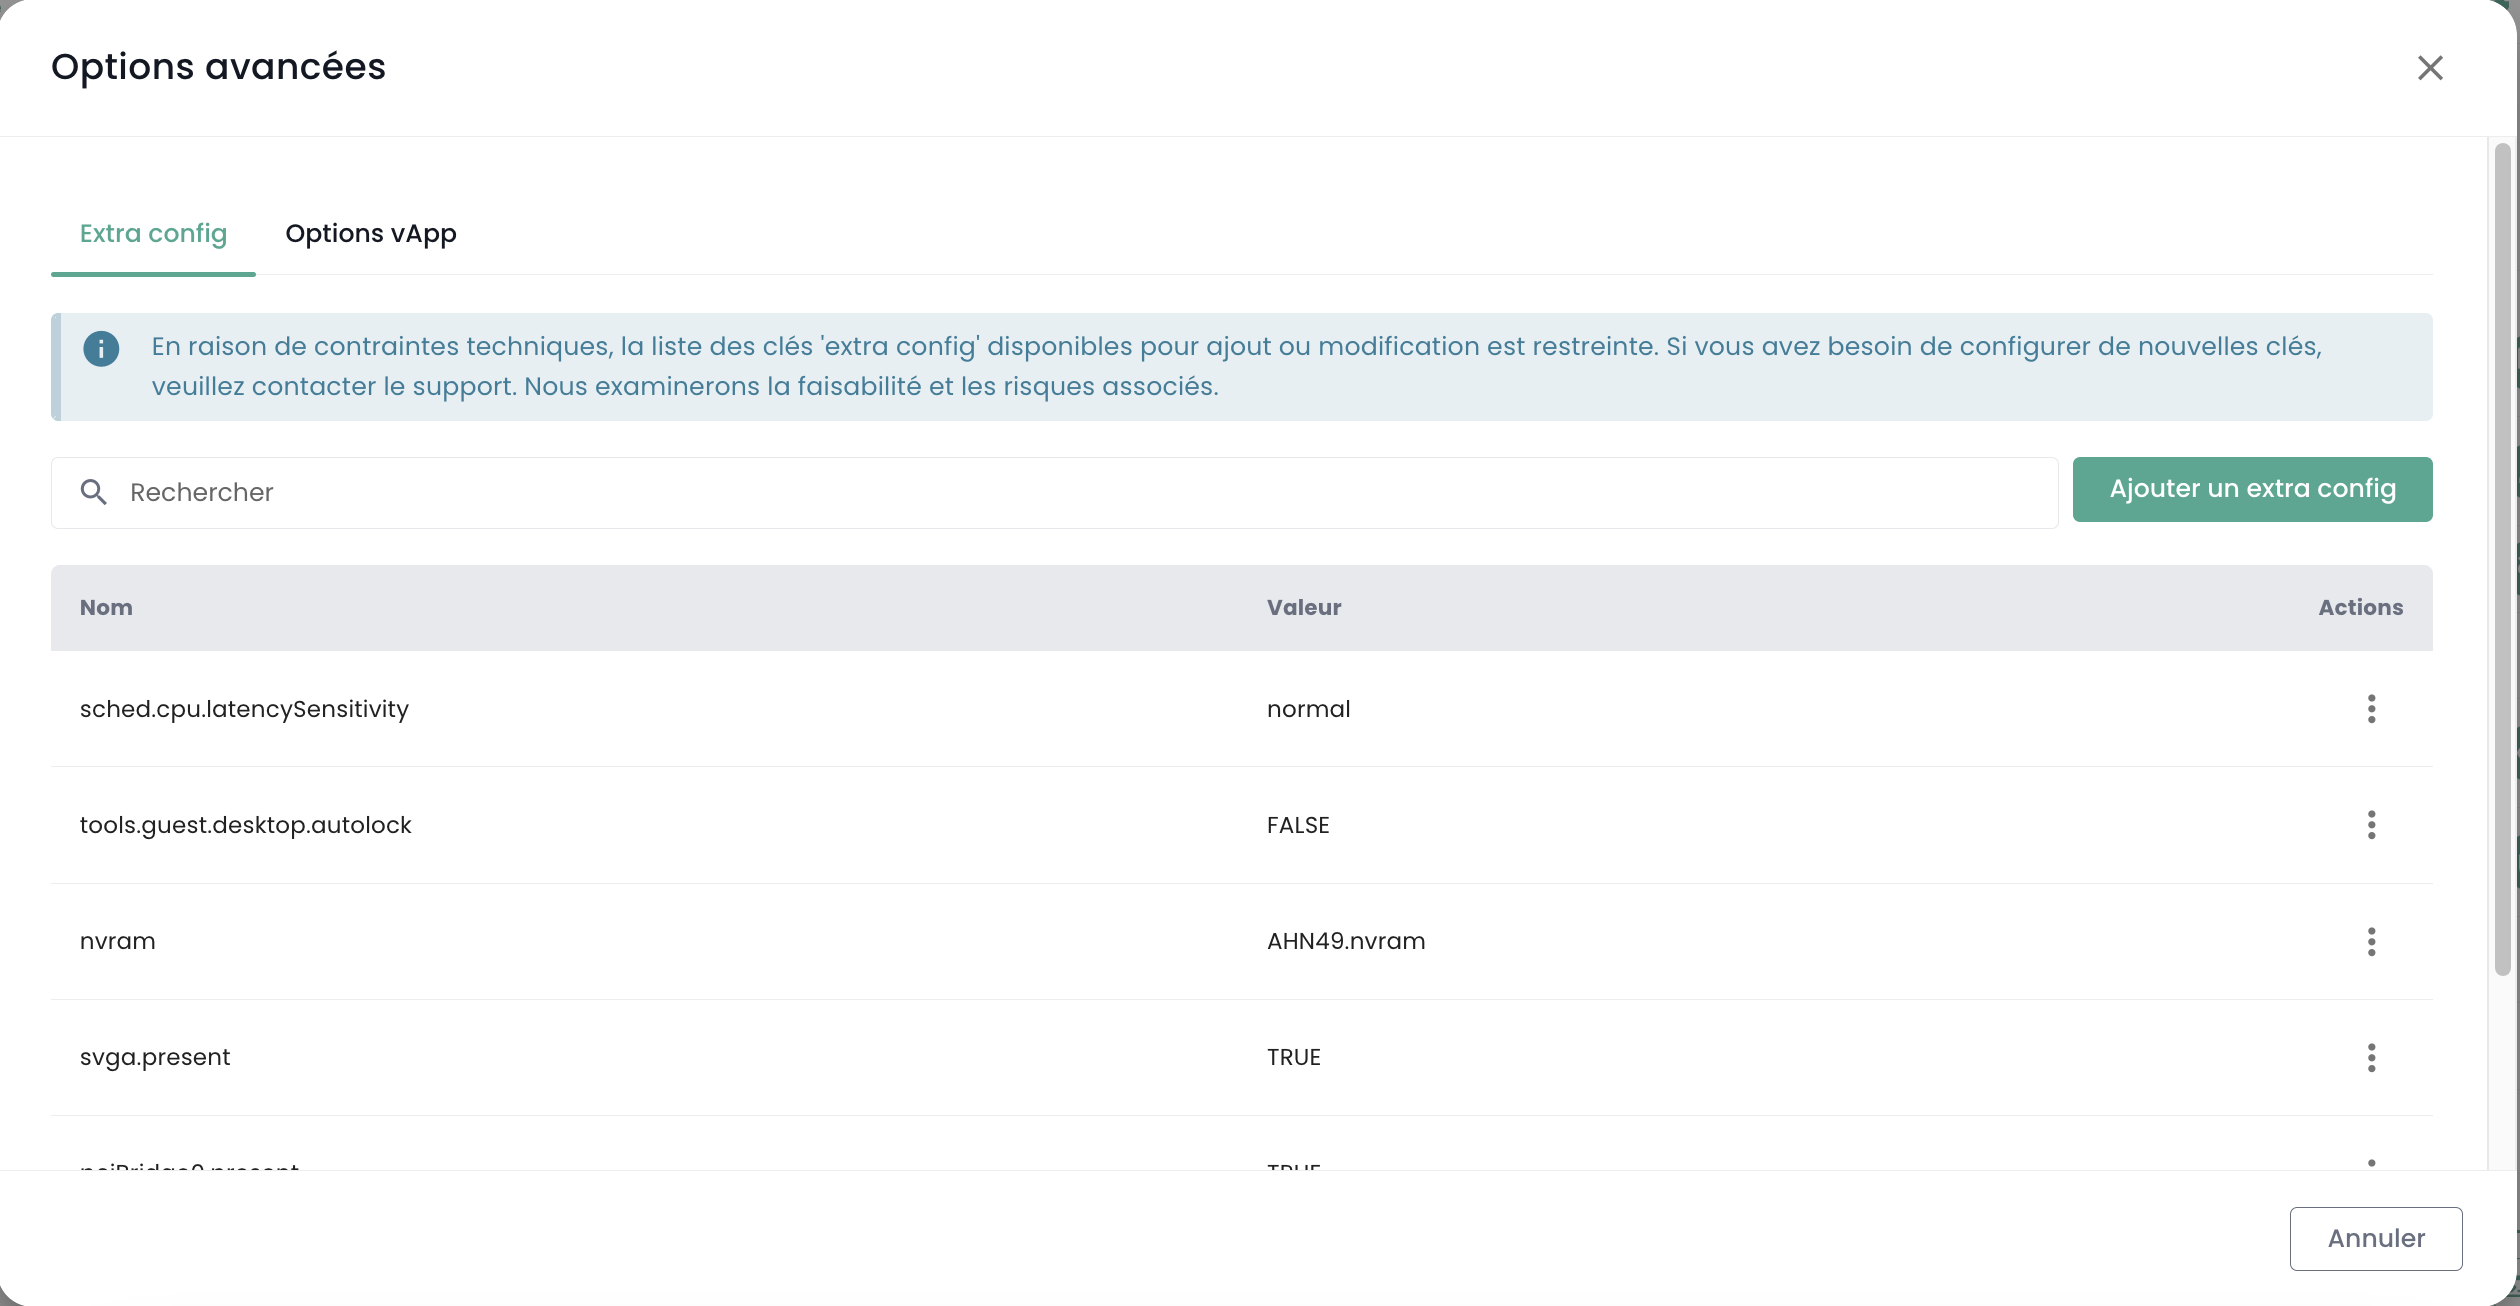
You can add a property from a list of keys. Additionally, you can modify the value of a key that you have added yourself. Existing key=value pairs are not modifiable.
Please contact support for any requests to add new keys.
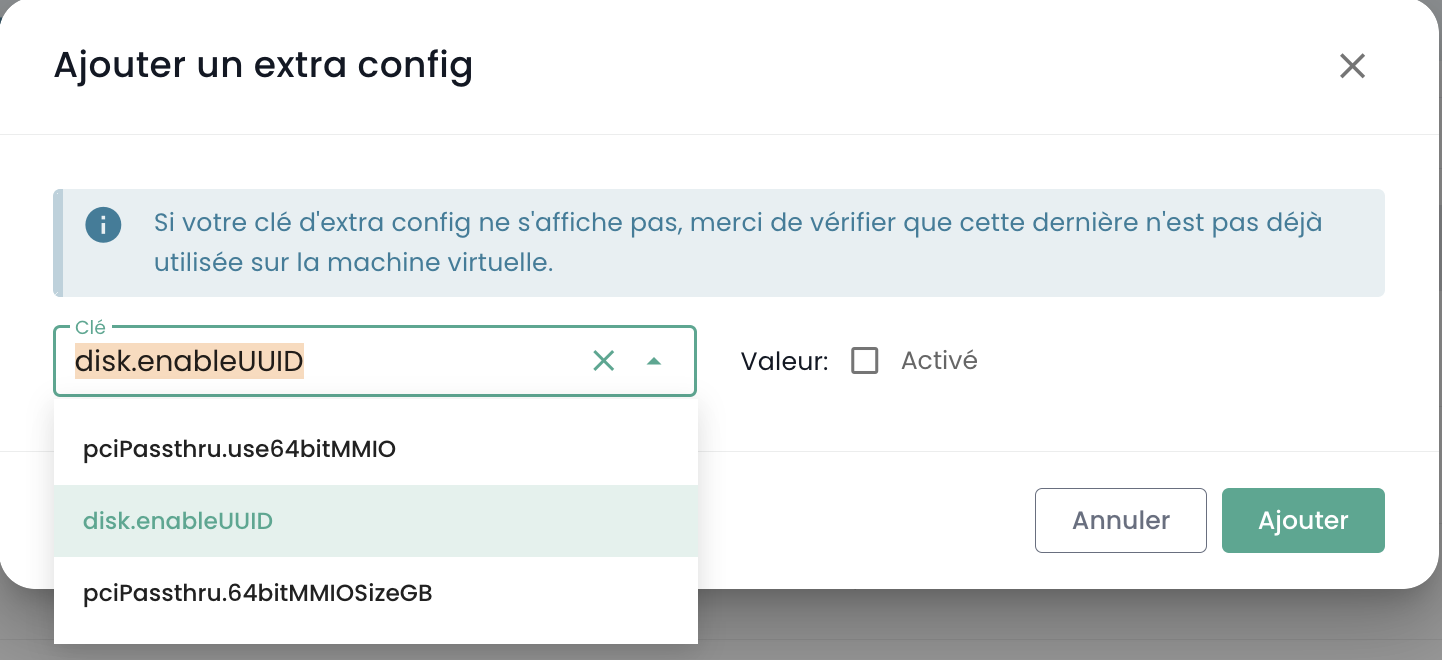
Note : To use a GPU with the virtual machine, it is mandatory to enable the 'pciPassthru.use64bitMMIO' key and allocate the required MMIO (Memory-mapped I/O) space via 'pciPassthru.64bitMMIOSizeGB'. It is highly recommended to refer to the official Nvidia documentation.
Advanced virtual machine settings: vAPP
You can also modify vAPP type properties in the advanced options of a virtual machine:
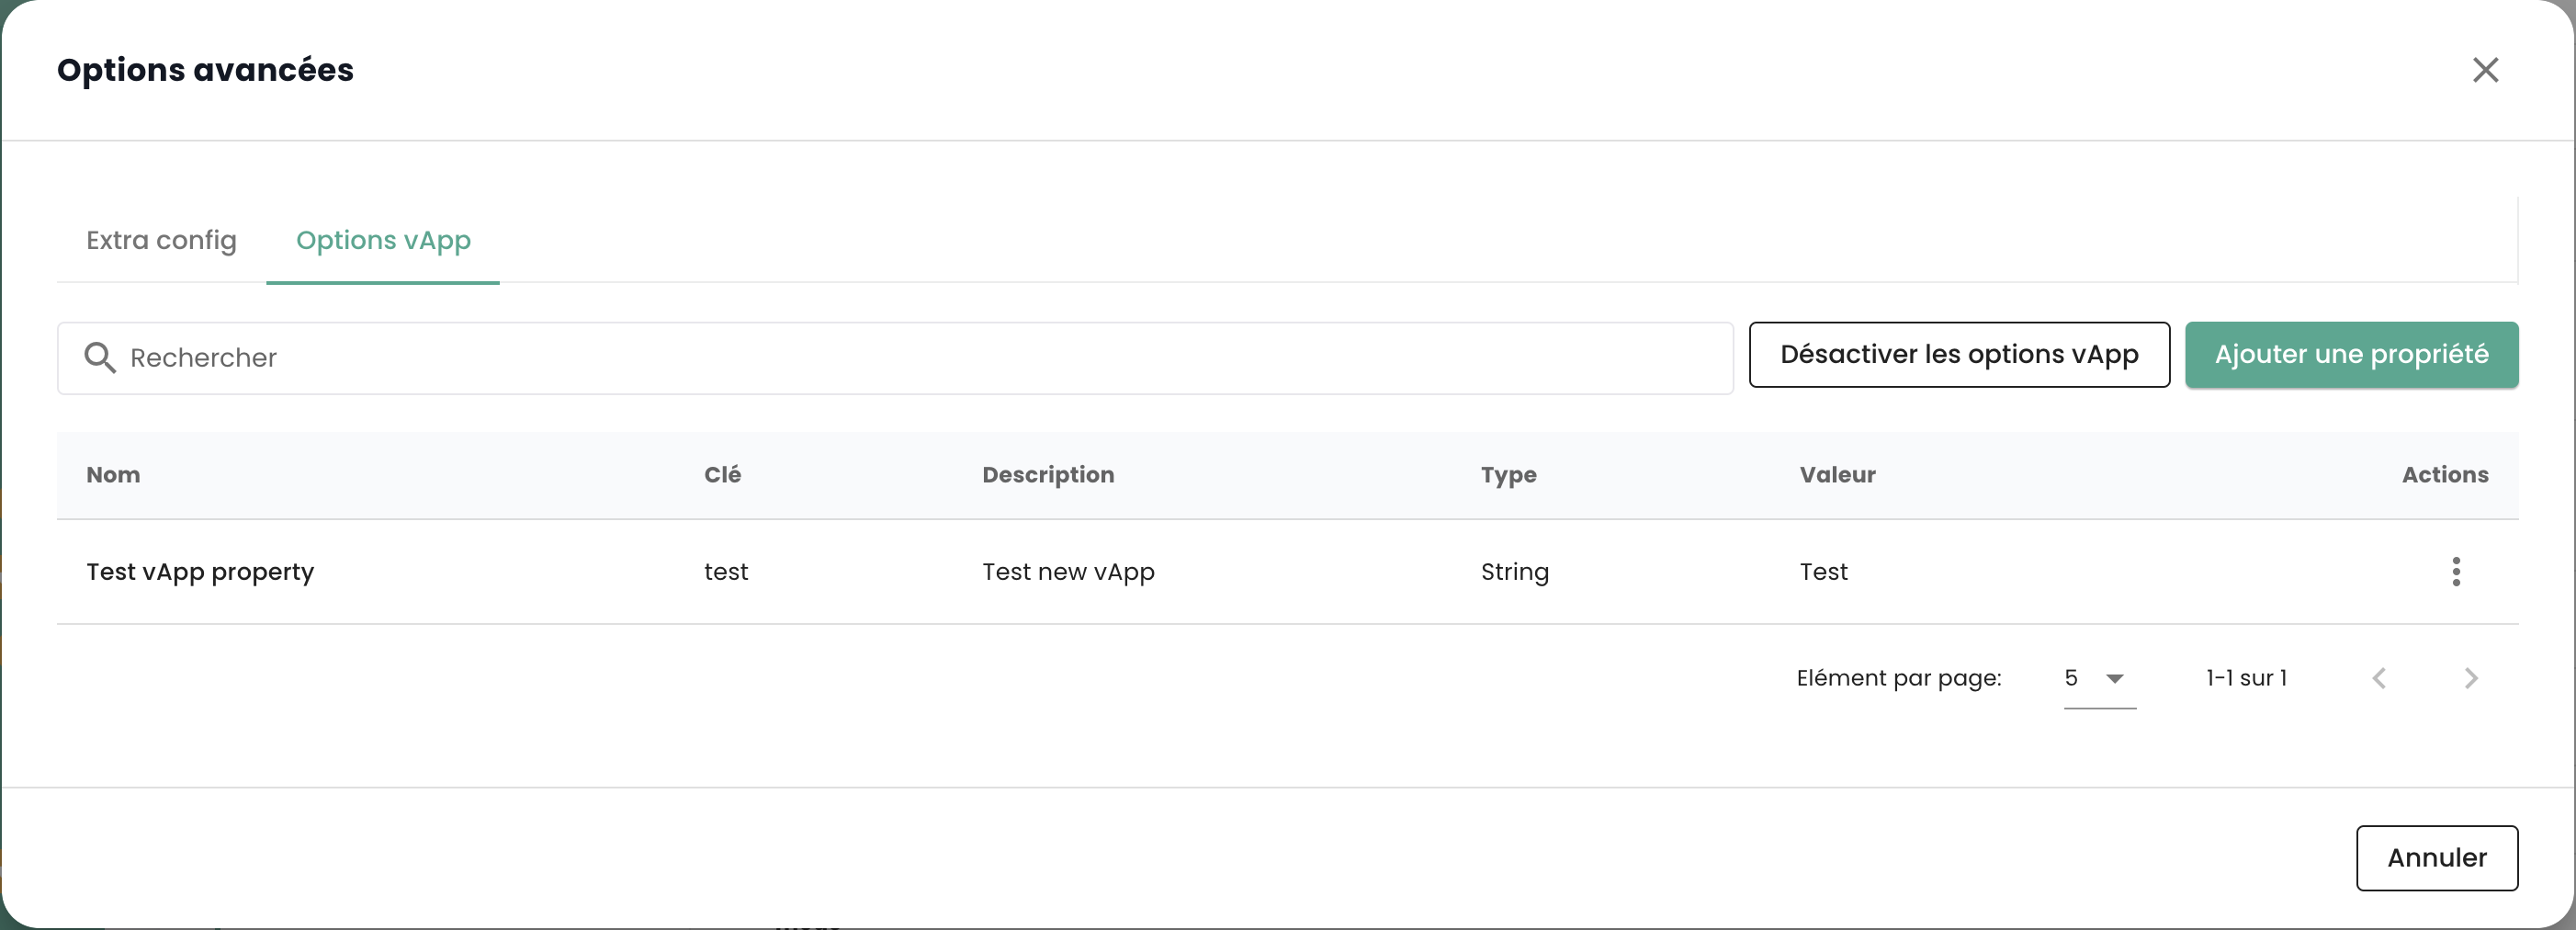
You can add a property, modify it, or delete it. Four types of properties are available: String, Number, Boolean, Password:

Note: The virtual machine must be stopped to modify its vAPP properties.
Management of 'hypervisors' and 'Cpool' (hypervisor clusters)
Your hypervisors are managed in the 'Compute' submenu of the 'IaaS' menu, located in the green sidebar on the left side of your screen.
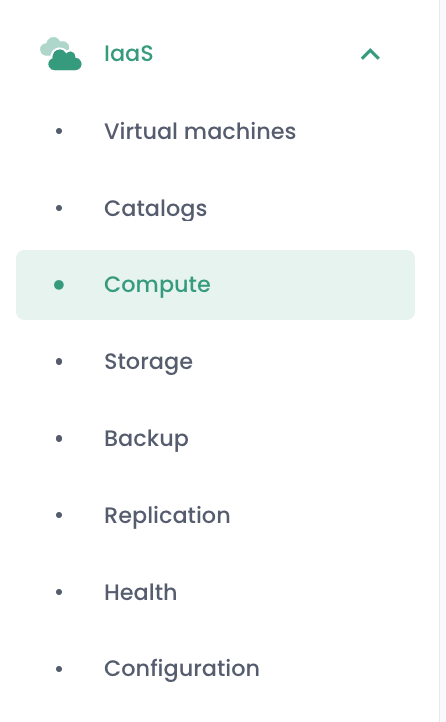
In this submenu, you have a view of:
- The hypervisor software stack, their AZs and resources,
- The backup software stack.
As of January 2024, the hypervisor offering available on the Cloud Temple qualified infrastructure is based on VMware. The backup software used is IBM Spectrum Protect Plus.
VMware Cluster Management
To access VMware cluster management, click in the 'Compute' submenu of the 'IaaS' menu:
By default, the first tab lists all hypervisors (across all clusters):

You can view the details of a hypervisor by clicking on its name:

There is a tab for each hypervisor cluster to view the details of each:
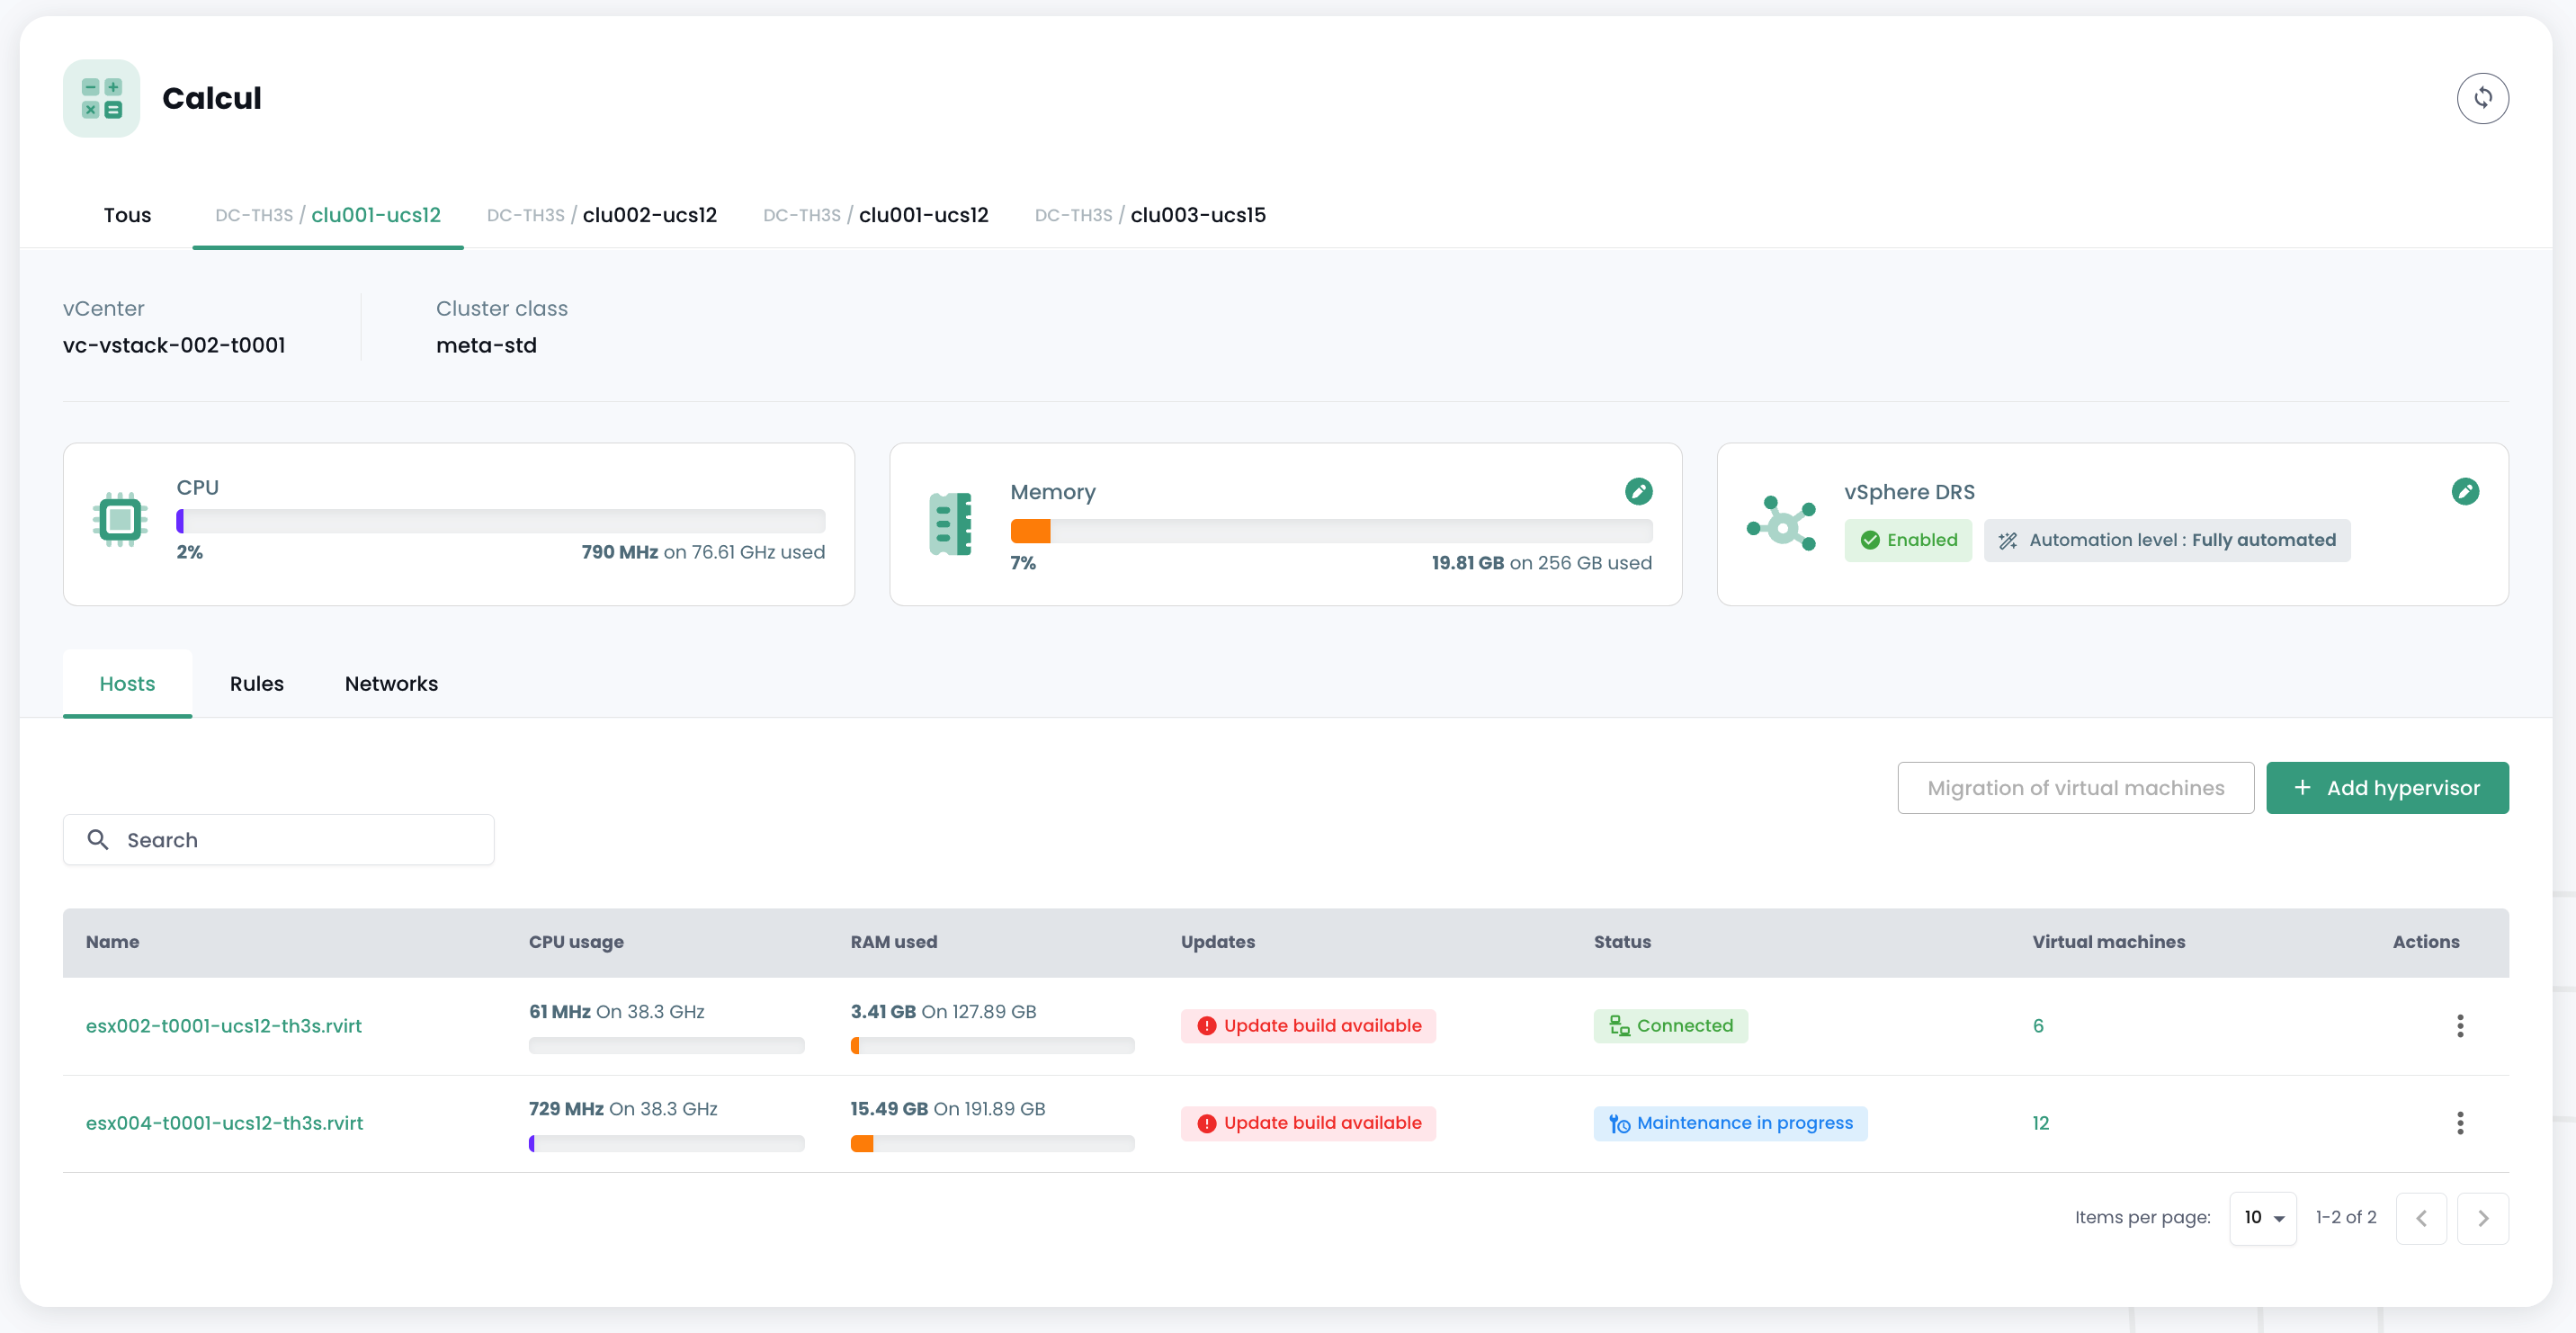
If you click on a cluster, you will see a summary of its composition:
- The total compute power expressed in GHz,
- The total available memory and the utilization ratio,
- The total storage space (all types combined) as well as the used quota,
- Automation mechanisms for compute node unavailability ('Vsphere DRS'),
- The number of virtual machines,
- The number of hypervisors.
Interpreting the displayed consumption data
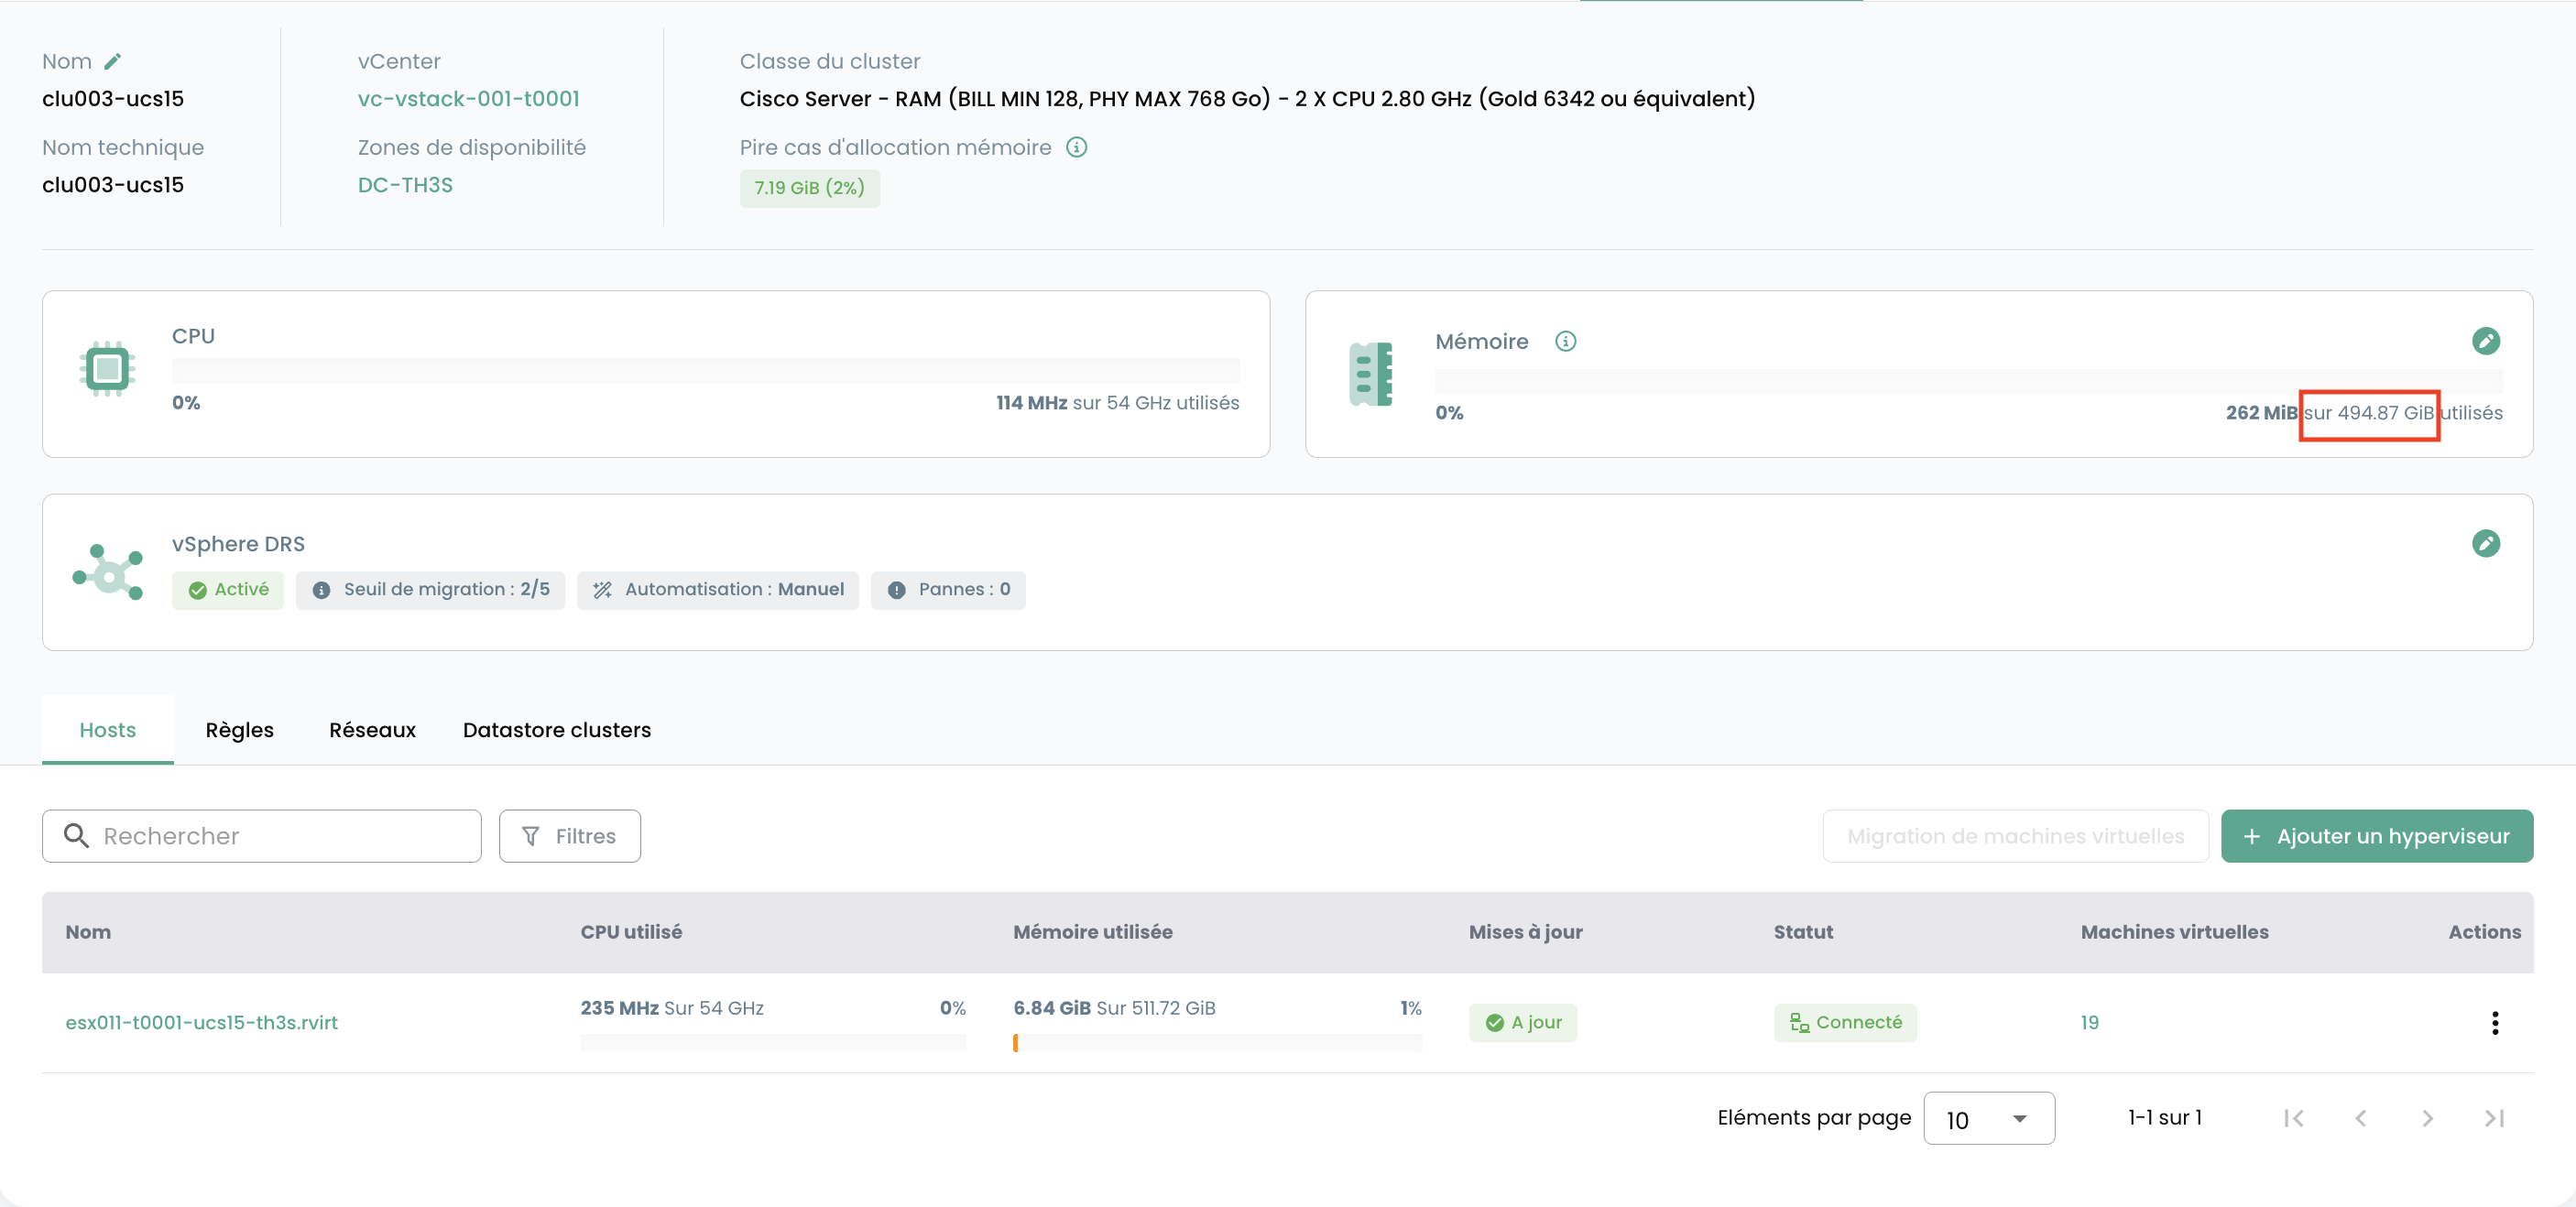
Provisioned Memory (Cluster): This chart represents the total amount of memory allocated to the cluster.
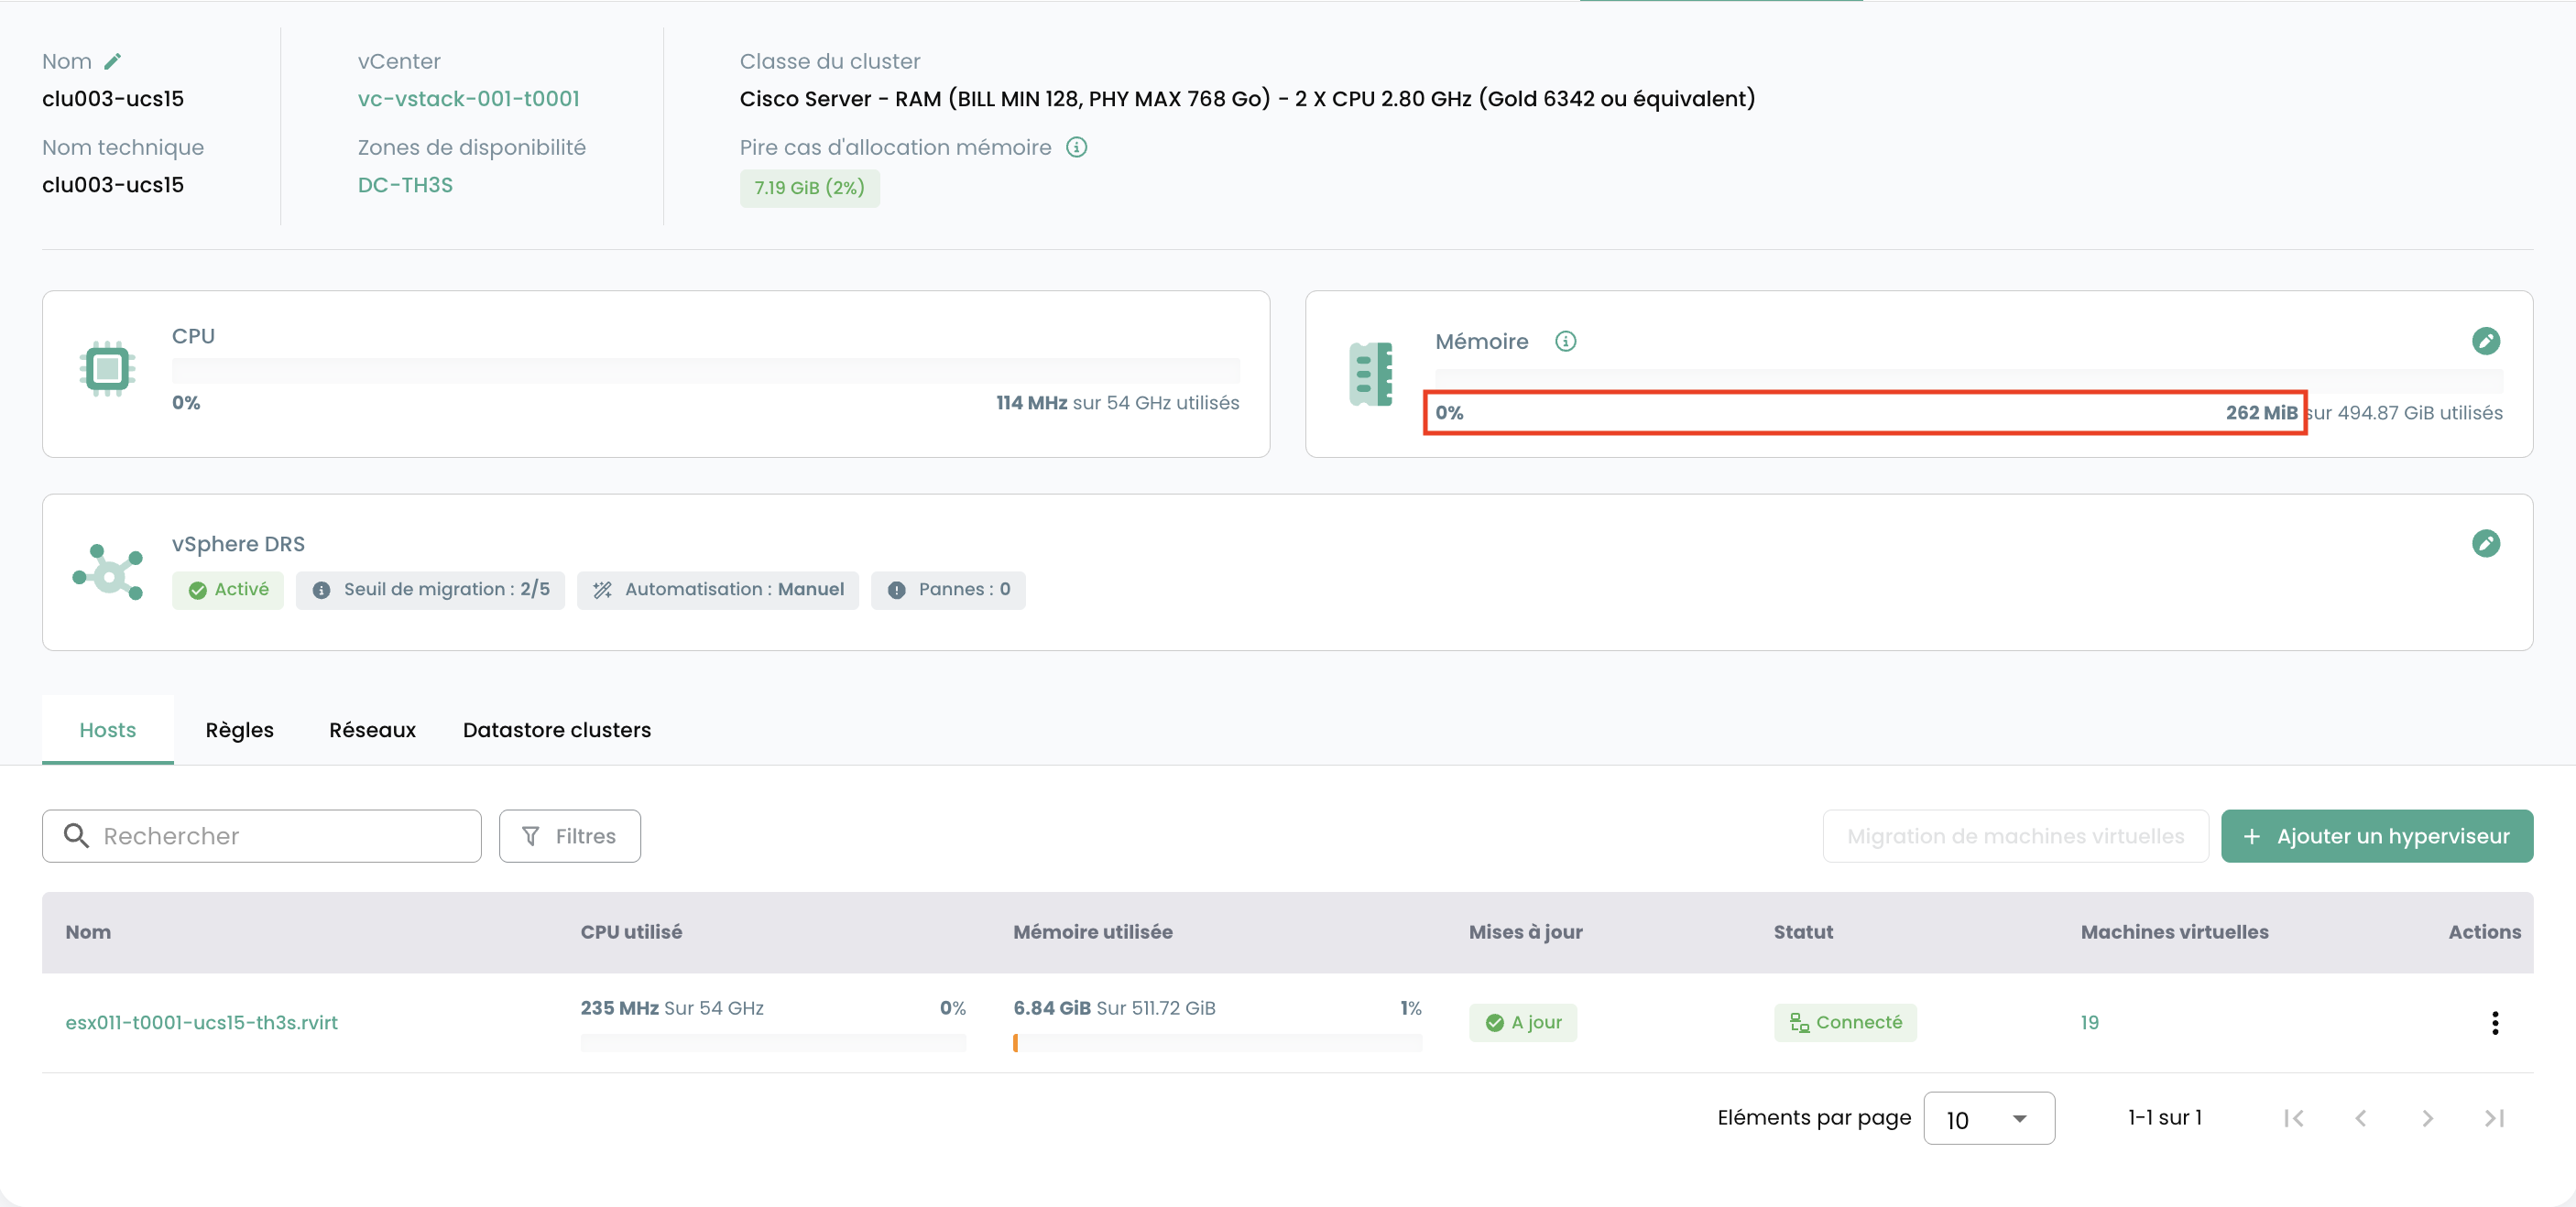
Used Memory (Cluster): This view displays the memory actively consumed solely by the cluster's virtual machines. It corresponds to the physical memory actually used by the VMs for their operations, which is a key indicator of the current workload.
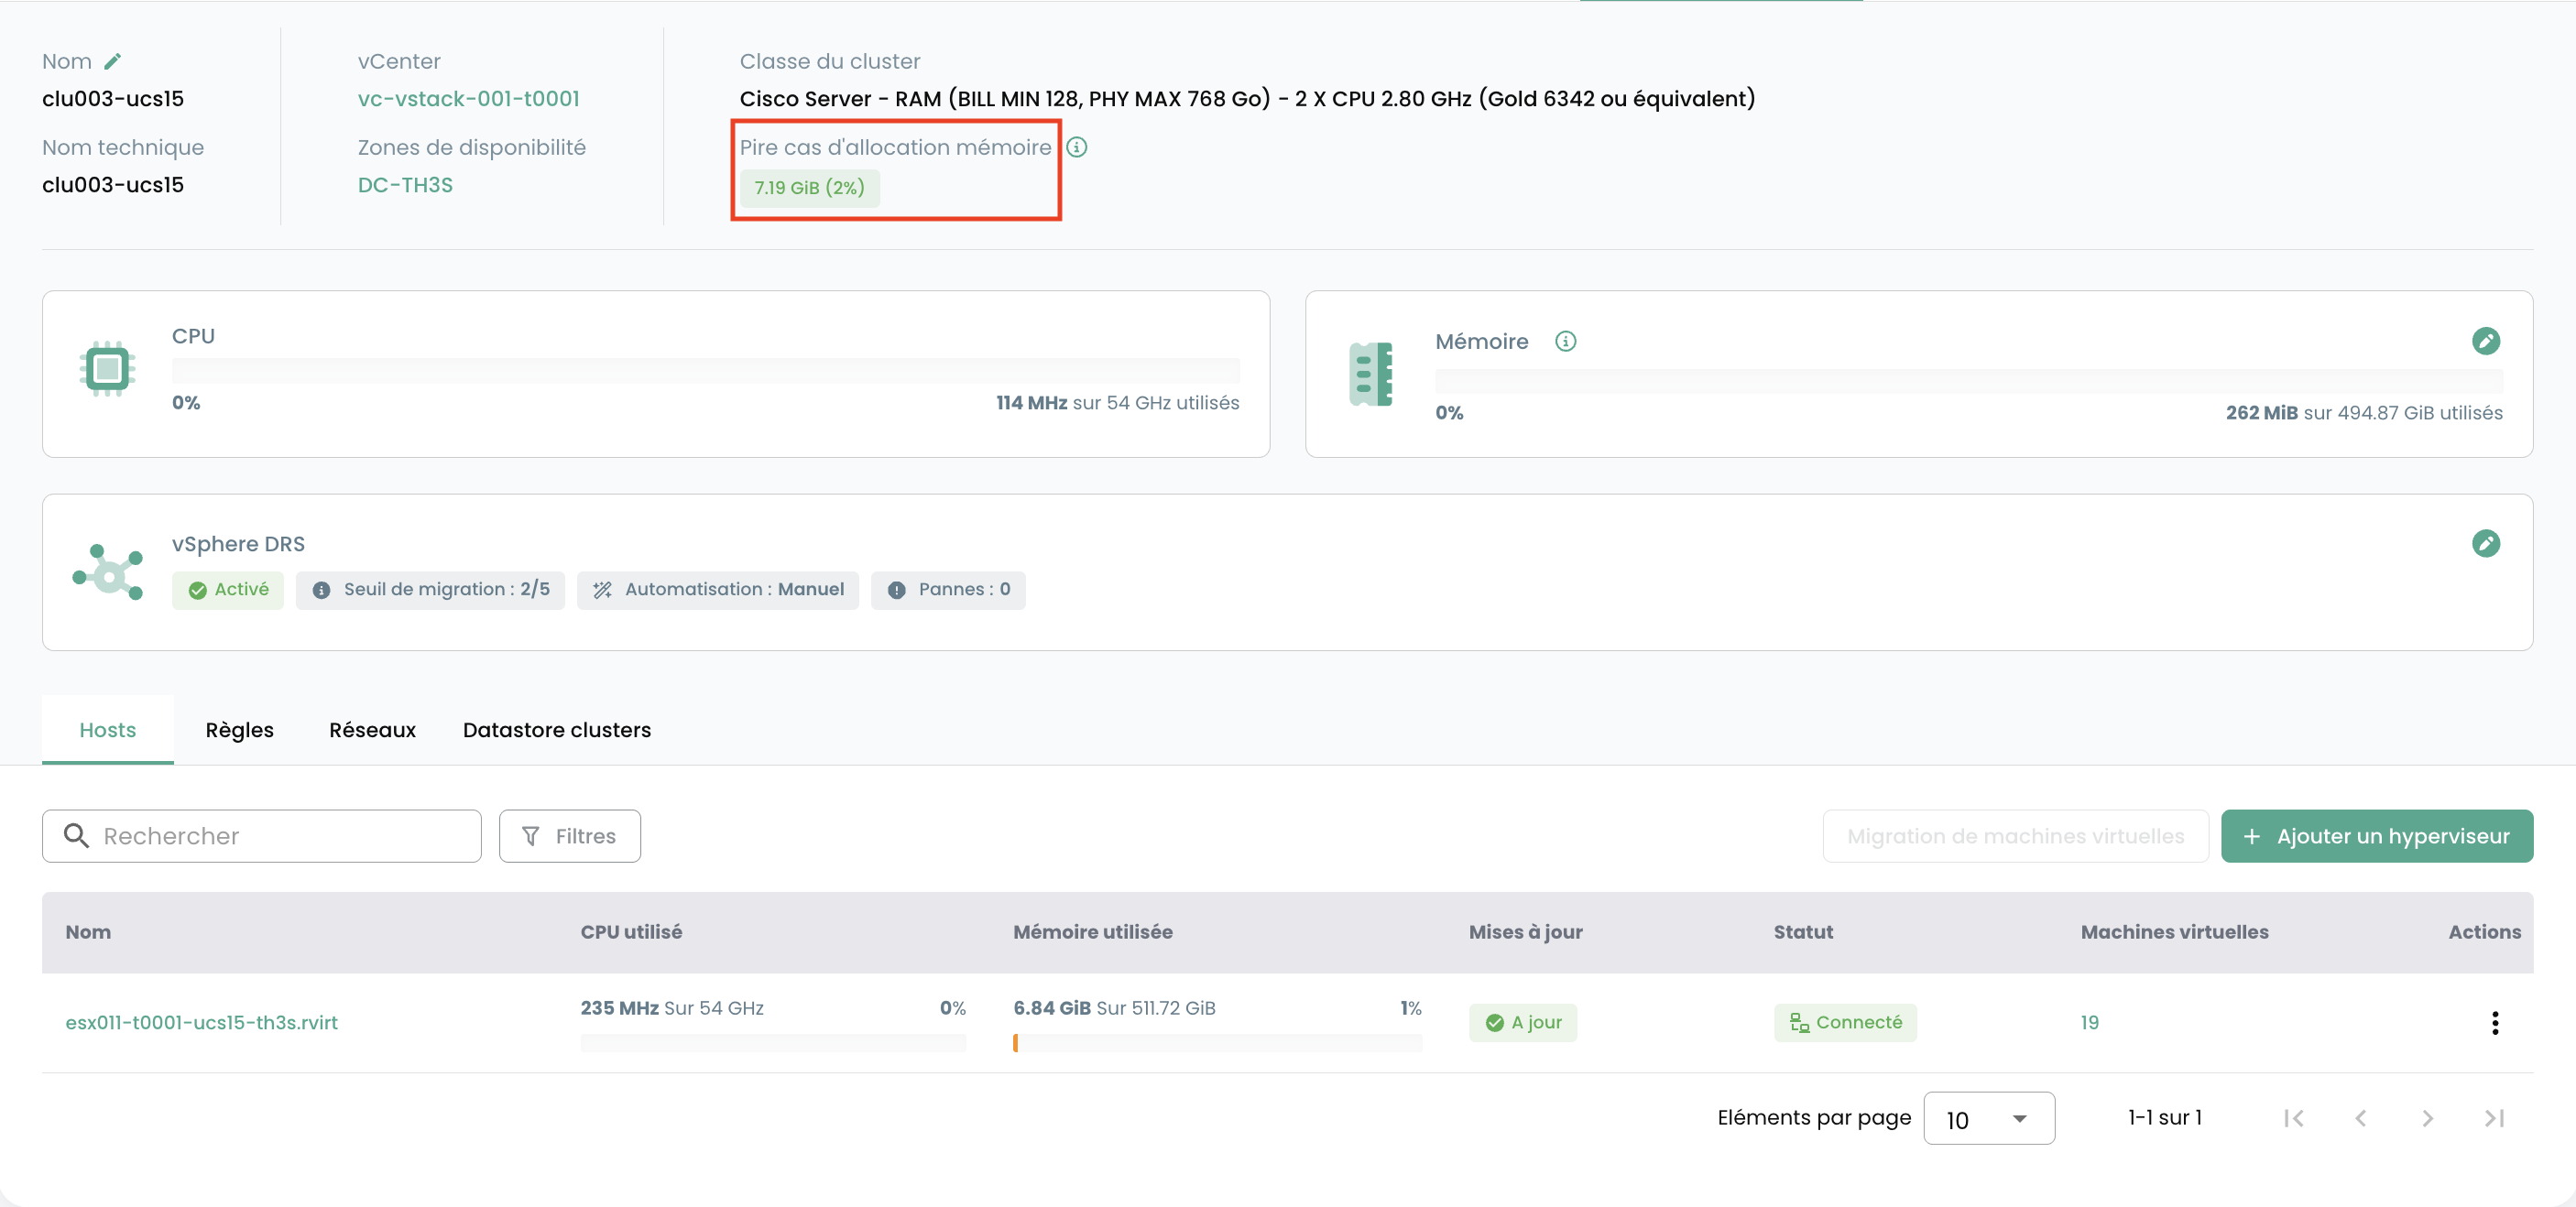
Worst-Case Allocation (Cluster): This chart illustrates the memory that would be required if all virtual machines in the cluster were to simultaneously consume their entire allocated memory (the maximum consumption scenario). The result also includes the memory required for cluster operations as well as various VMware-specific parameters (the calculation is not simply equal to the sum of the RAM of all virtual machines). This allows anticipating critical resource needs and preventing memory exhaustion.
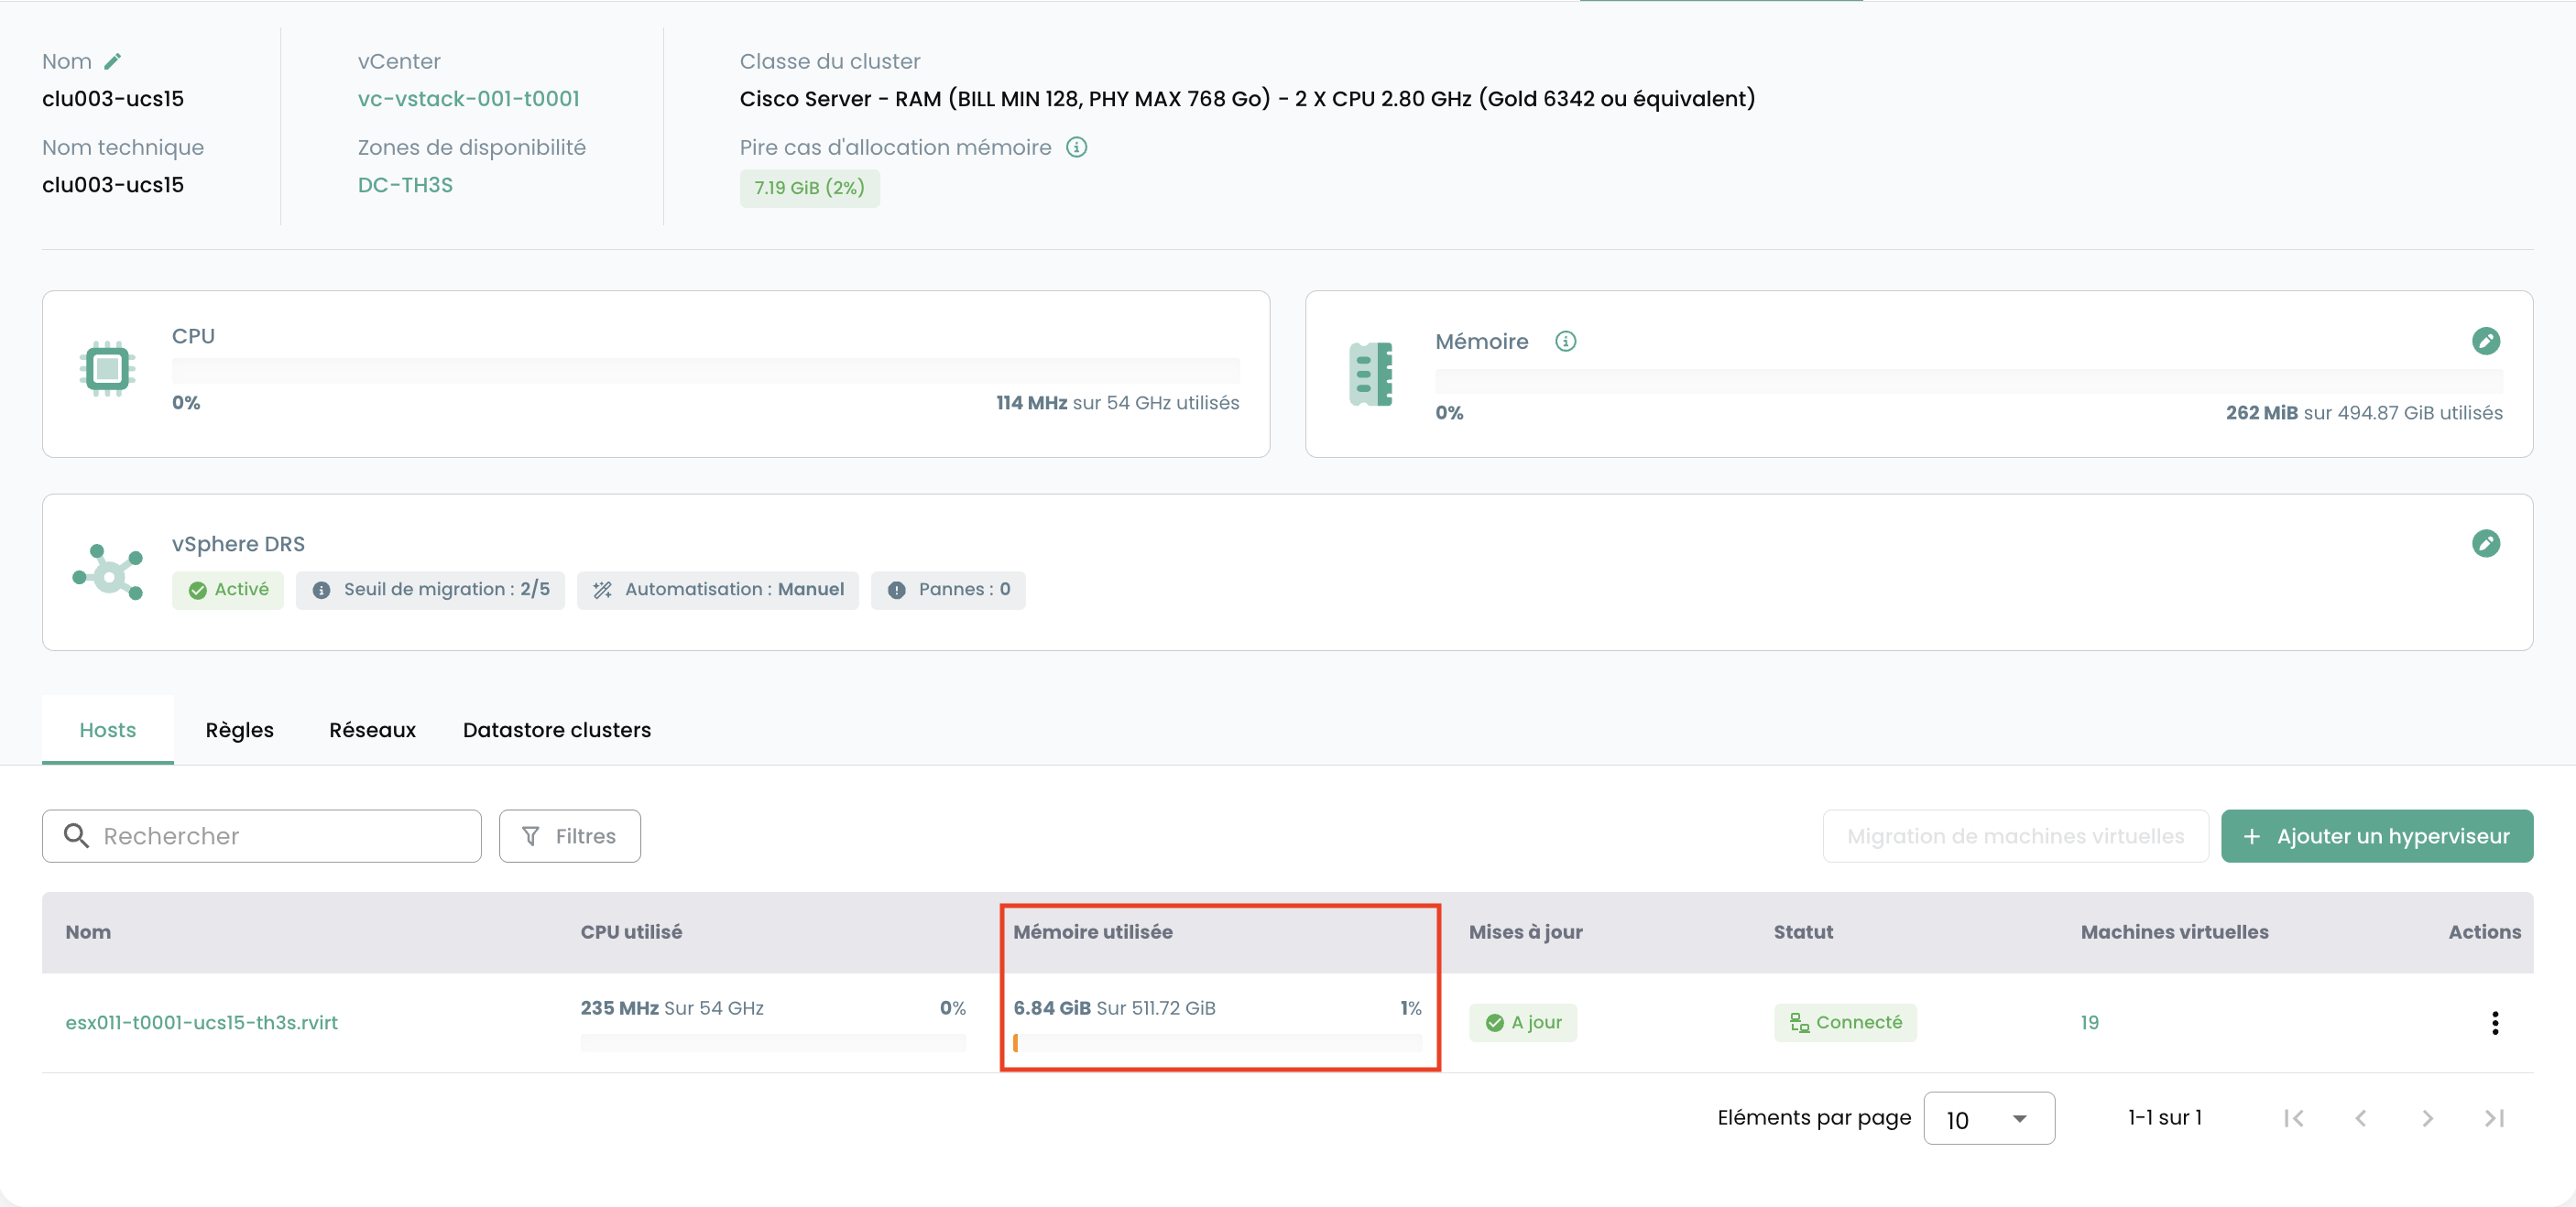
Used Memory (ESX): Unlike the cluster charts, this one shows the total memory consumed on a specific ESX host. This includes not only the memory used by the virtual machines hosted on this host, but also the memory consumed by the hypervisor's own system (ESXi overhead).
You will see the following for each hypervisor in the 'Hosts' tab:
- CPU and Memory usage,
- The number of affected virtual machines,
- The availability of a new build for the hypervisor's operating system, if applicable,
- The hypervisor status (connected in production, in maintenance, powered off, ...),
- An action menu.
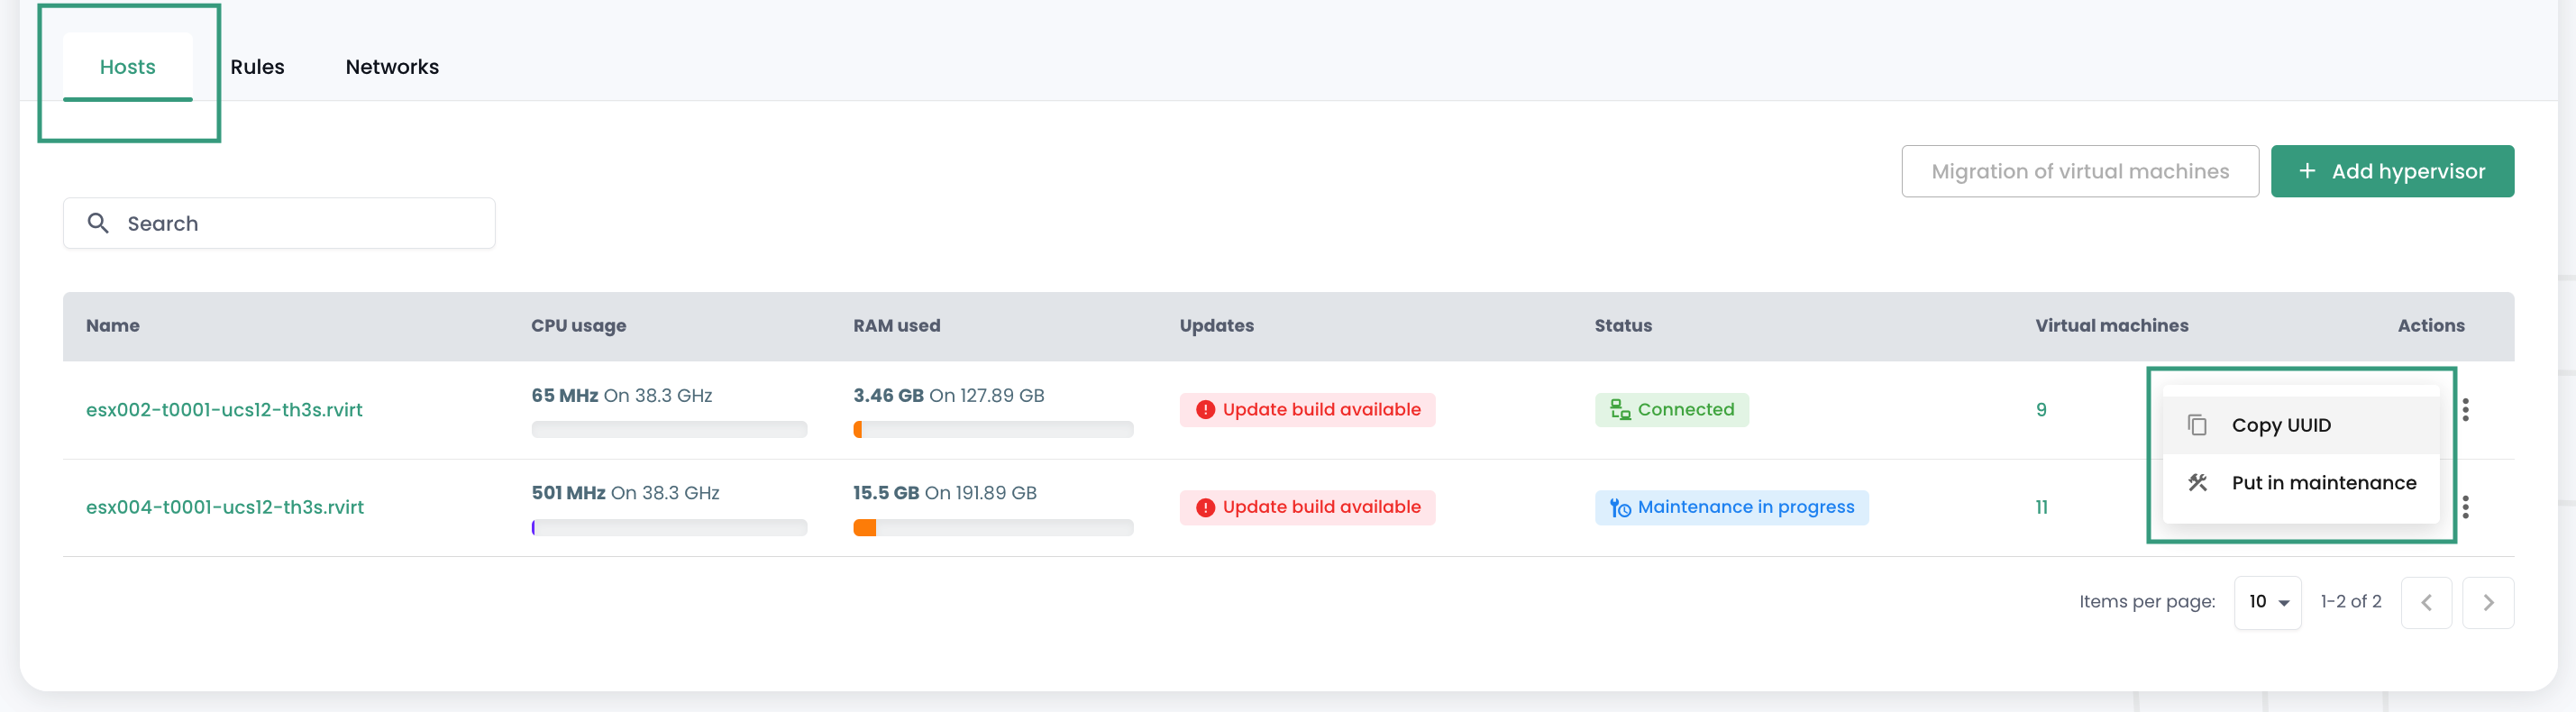
Several actions are possible from the 'Hosts' tab:
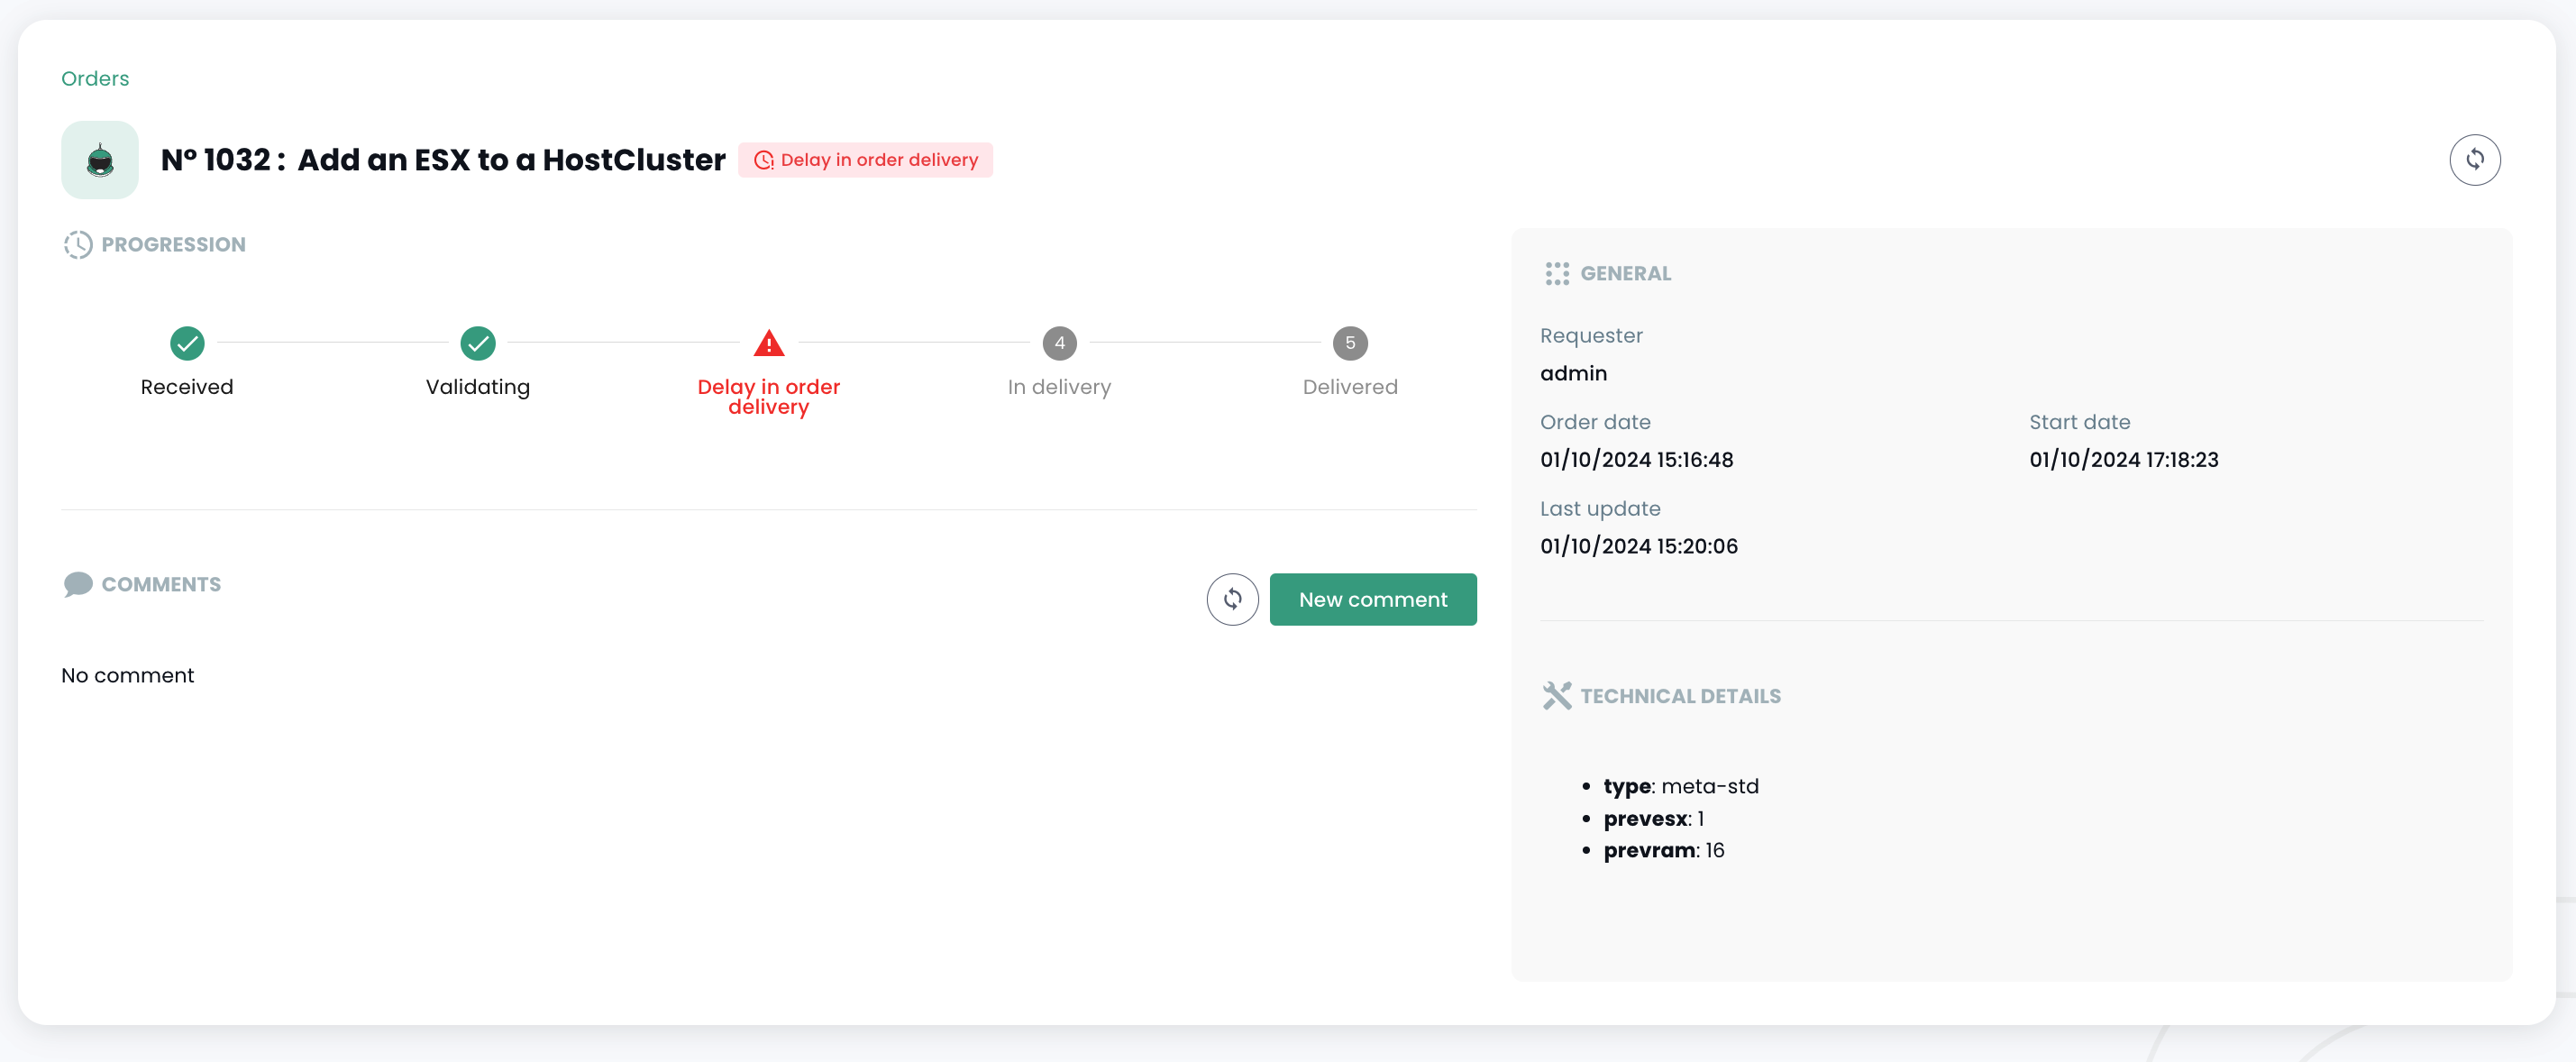
- order new hypervisors via the 'Add a host' button:
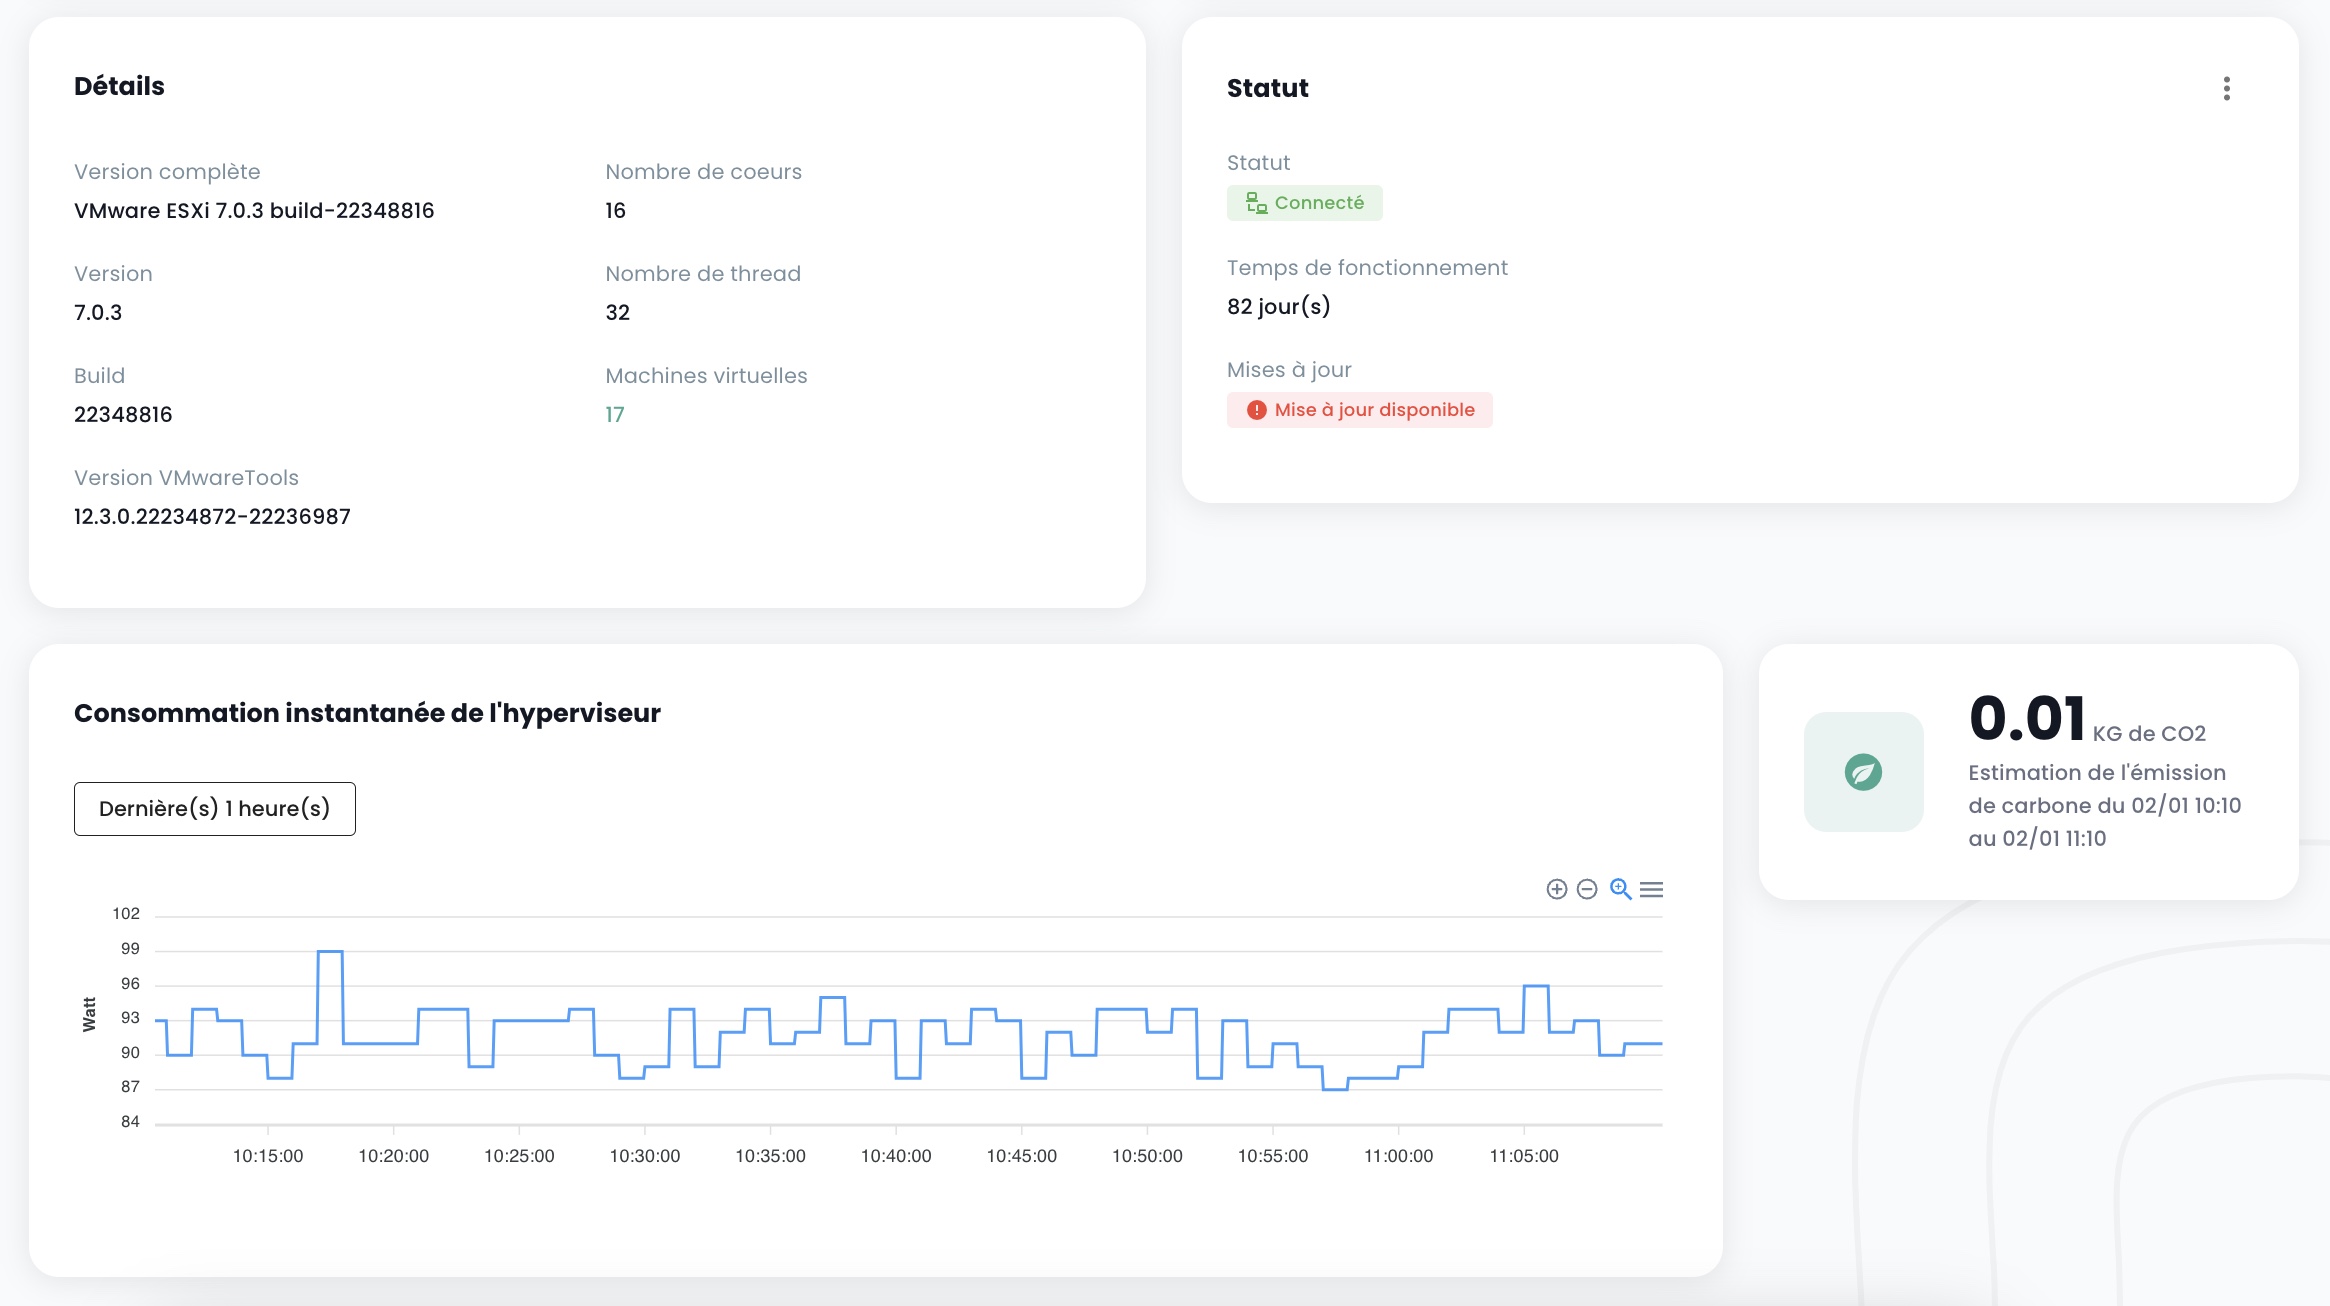
- the possibility to view the details of a hypervisor:
- to put a hypervisor in or out of maintenance mode,
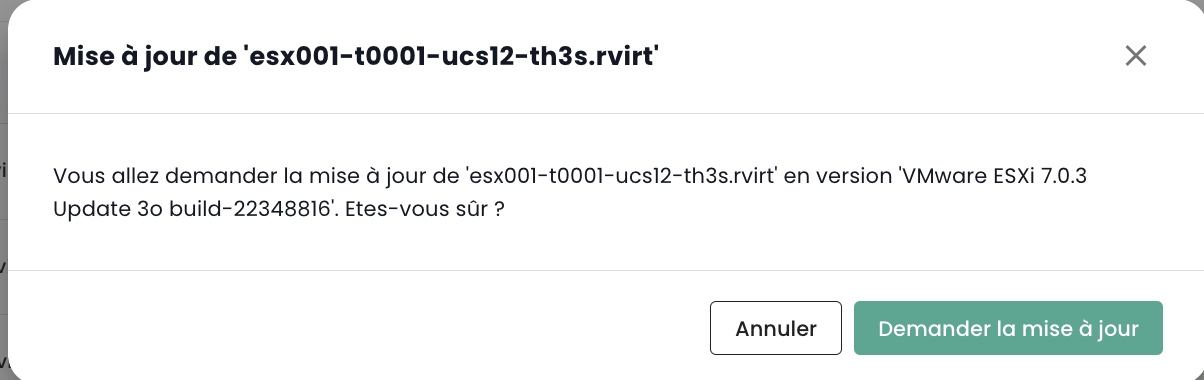
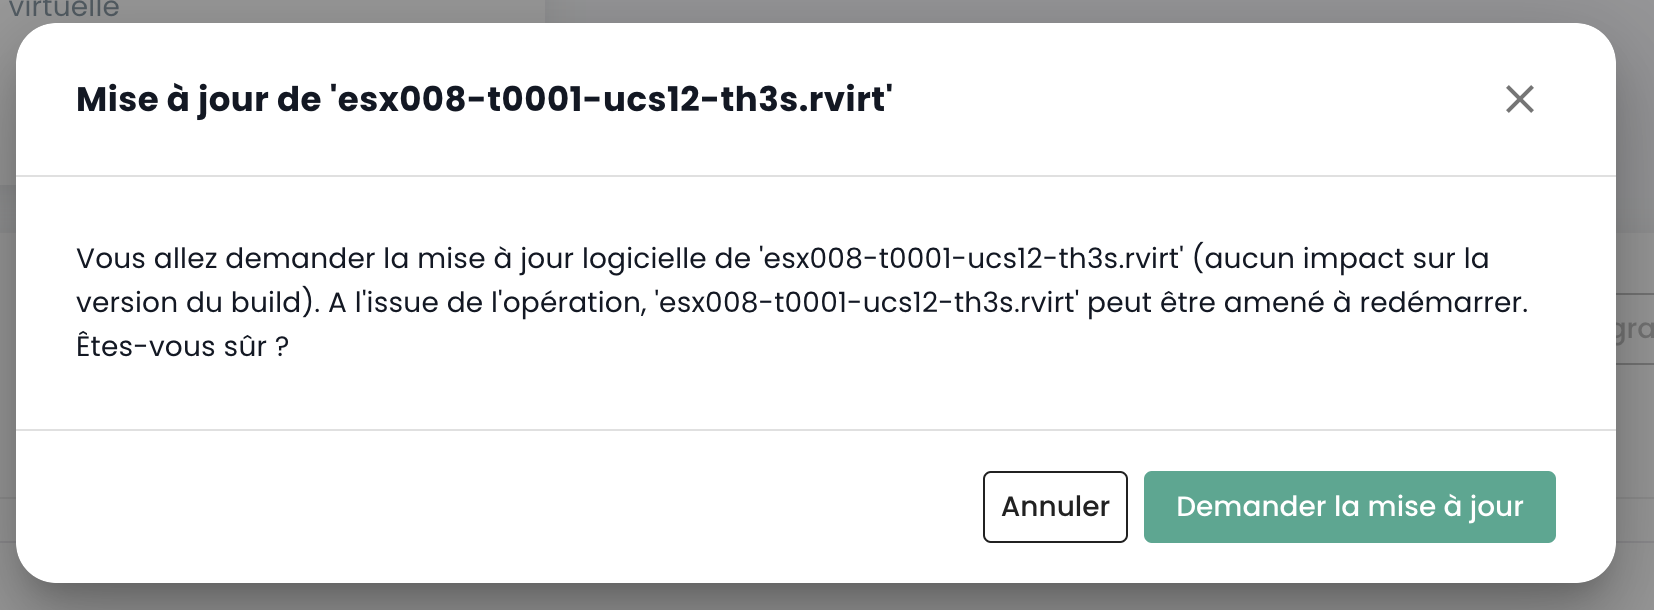
- to update this hypervisor if applicable; to do so, it must be in maintenance mode. There are two types of updates:
- VMware builds (new versions of the hypervisor):
- Updating the firmware of your compute blade (BIOS and daughter board firmware):
Note:
- Cloud Temple provides hypervisor builds at regular intervals. It is important to regularly update your hypervisors, particularly to allow the application of security patches. However, we do not update your hypervisors automatically. Cloud Temple has no visibility into the availability commitments of your workloads. We therefore leave it to you to implement your change management process and apply the new builds at the most appropriate time.
- The update process is fully automated. You must have at least two hypervisors in your cluster to enable zero-downtime updates.
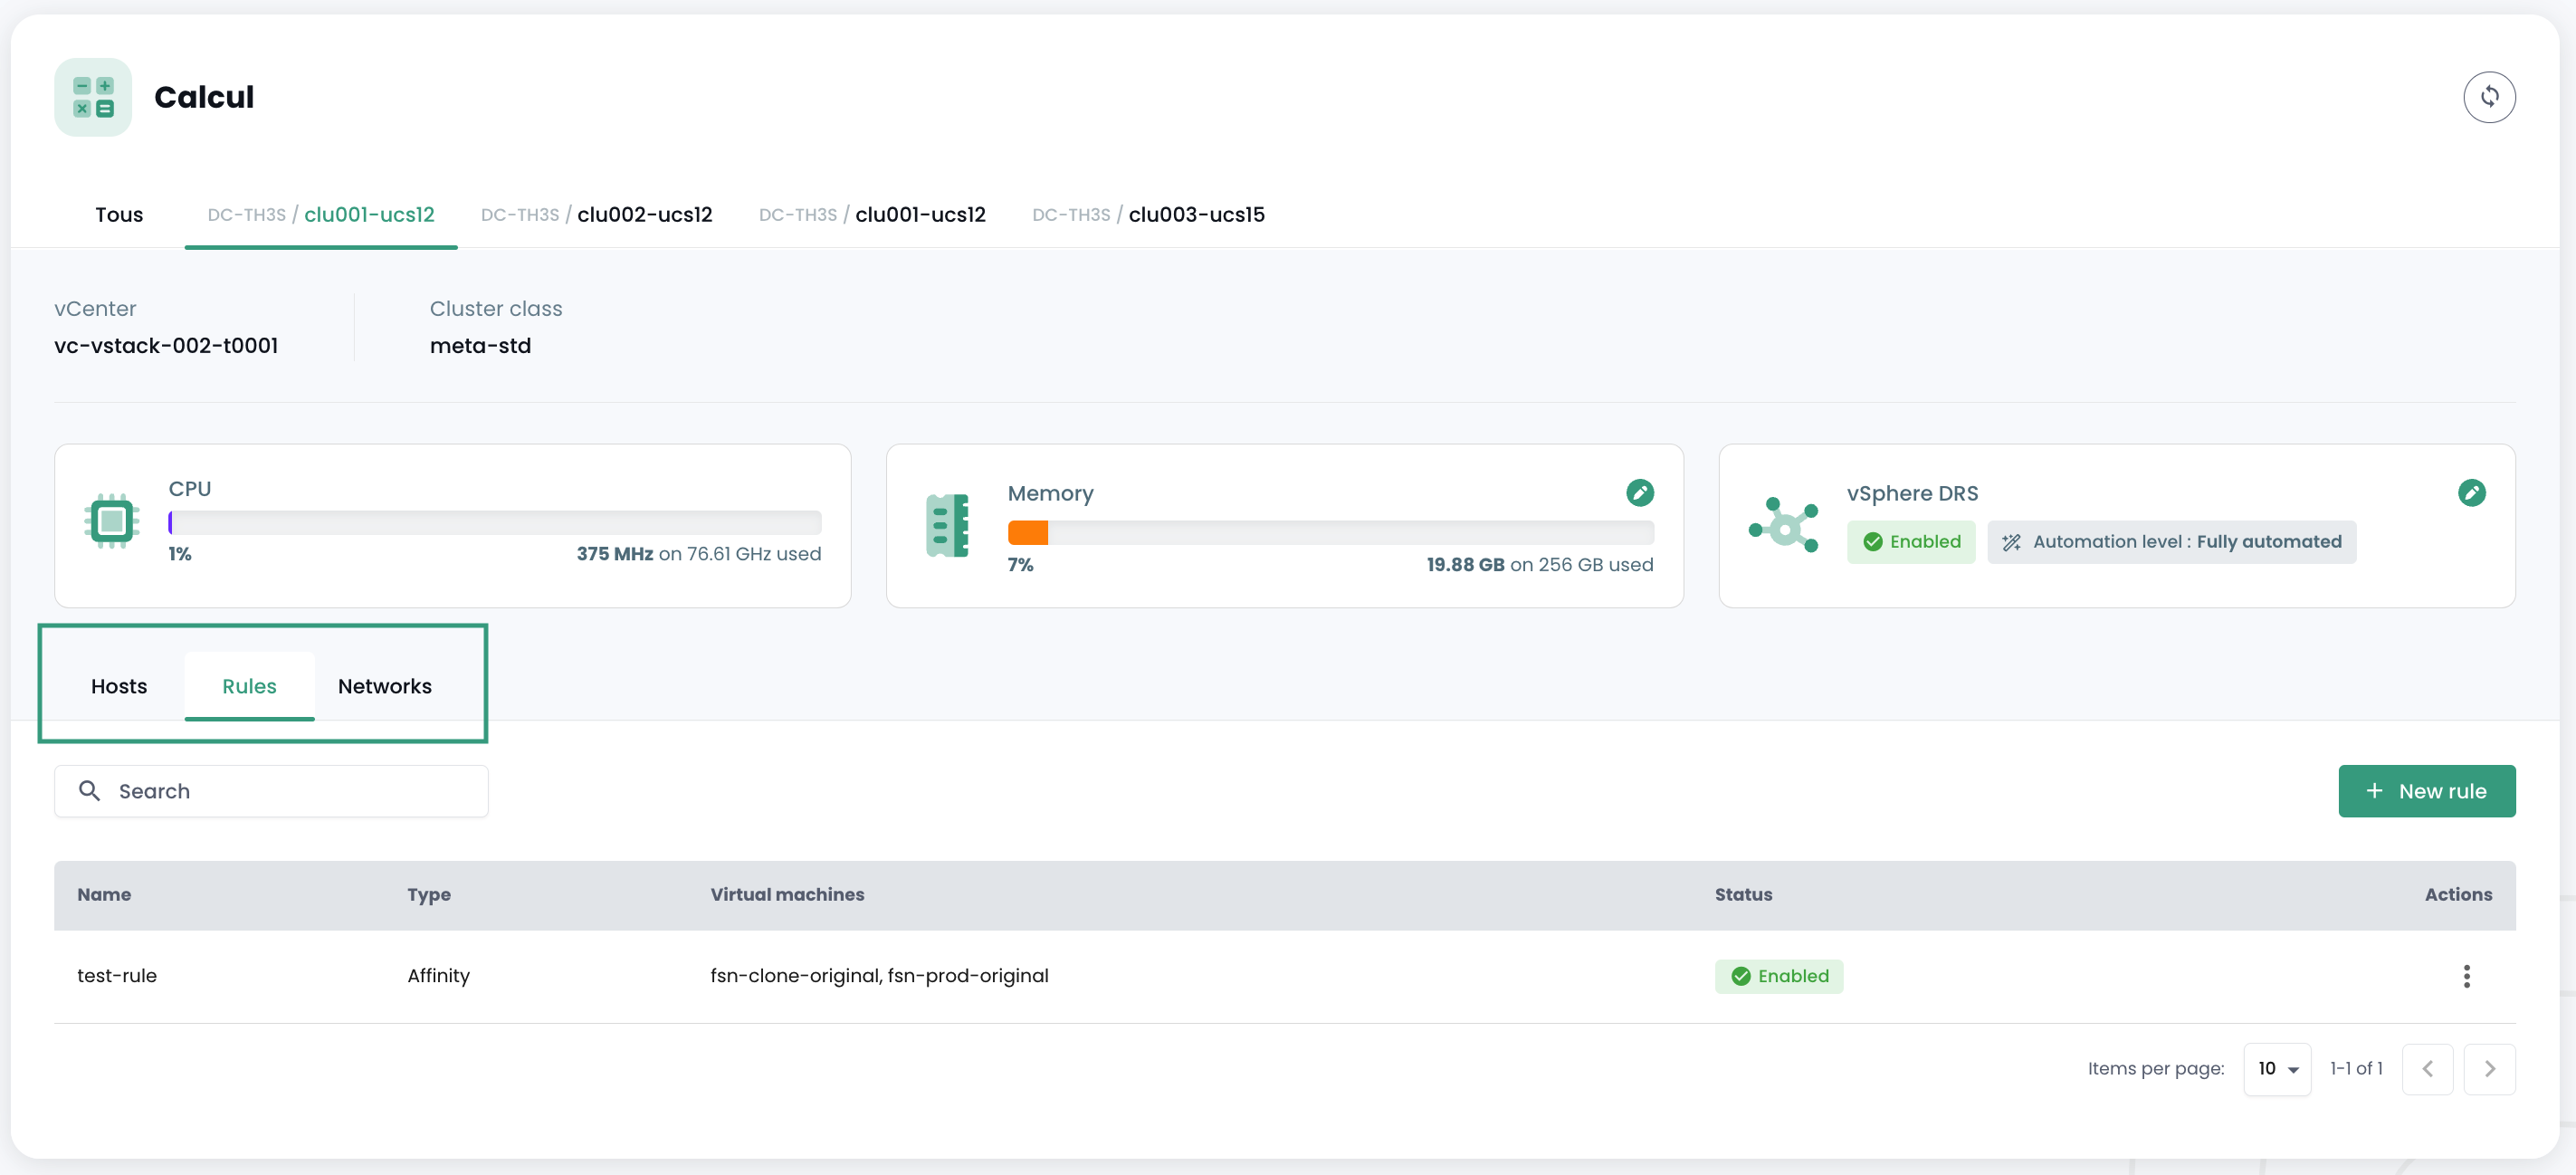
You will also see all affinity/anti-affinity rules for your hypervisor cluster in the 'Rules' section.
Managing affinity for your virtual machines
The affinity and anti-affinity rules allow you to control the placement of virtual machines on your hypervisors. They can be used to manage resource utilization in your 'Cpool'. For example, they can help balance workload across servers or isolate resource-intensive workloads. In a VMware 'Cpool', these rules are often used to manage virtual machine behavior with vMotion. vMotion allows virtual machines to be moved from one host to another without service interruption.
You can configure the following through rule management:
-
Affinity Rules: These rules ensure that certain virtual machines run on the same physical host. They are used to improve performance by keeping frequently communicating virtual machines together on the same server to reduce network latency. Affinity rules are useful in scenarios where performance is critical, such as with databases or applications that require fast communication between servers.
-
Anti-Affinity Rules: Conversely, these rules ensure that certain virtual machines do not run on the same physical host. They are important for availability and resilience, for example, to prevent critical machines from being affected in the event of a single server failure. Anti-affinity rules are crucial for applications requiring high availability, such as in production environments where fault tolerance is a priority. For example, you do not want your two Active Directories on the same hypervisor.
When creating a rule, you define the rule type (affinité / anti-affinité), the rule name, its activation status ('Statut'), and the affected machines in your hypervisor cluster.
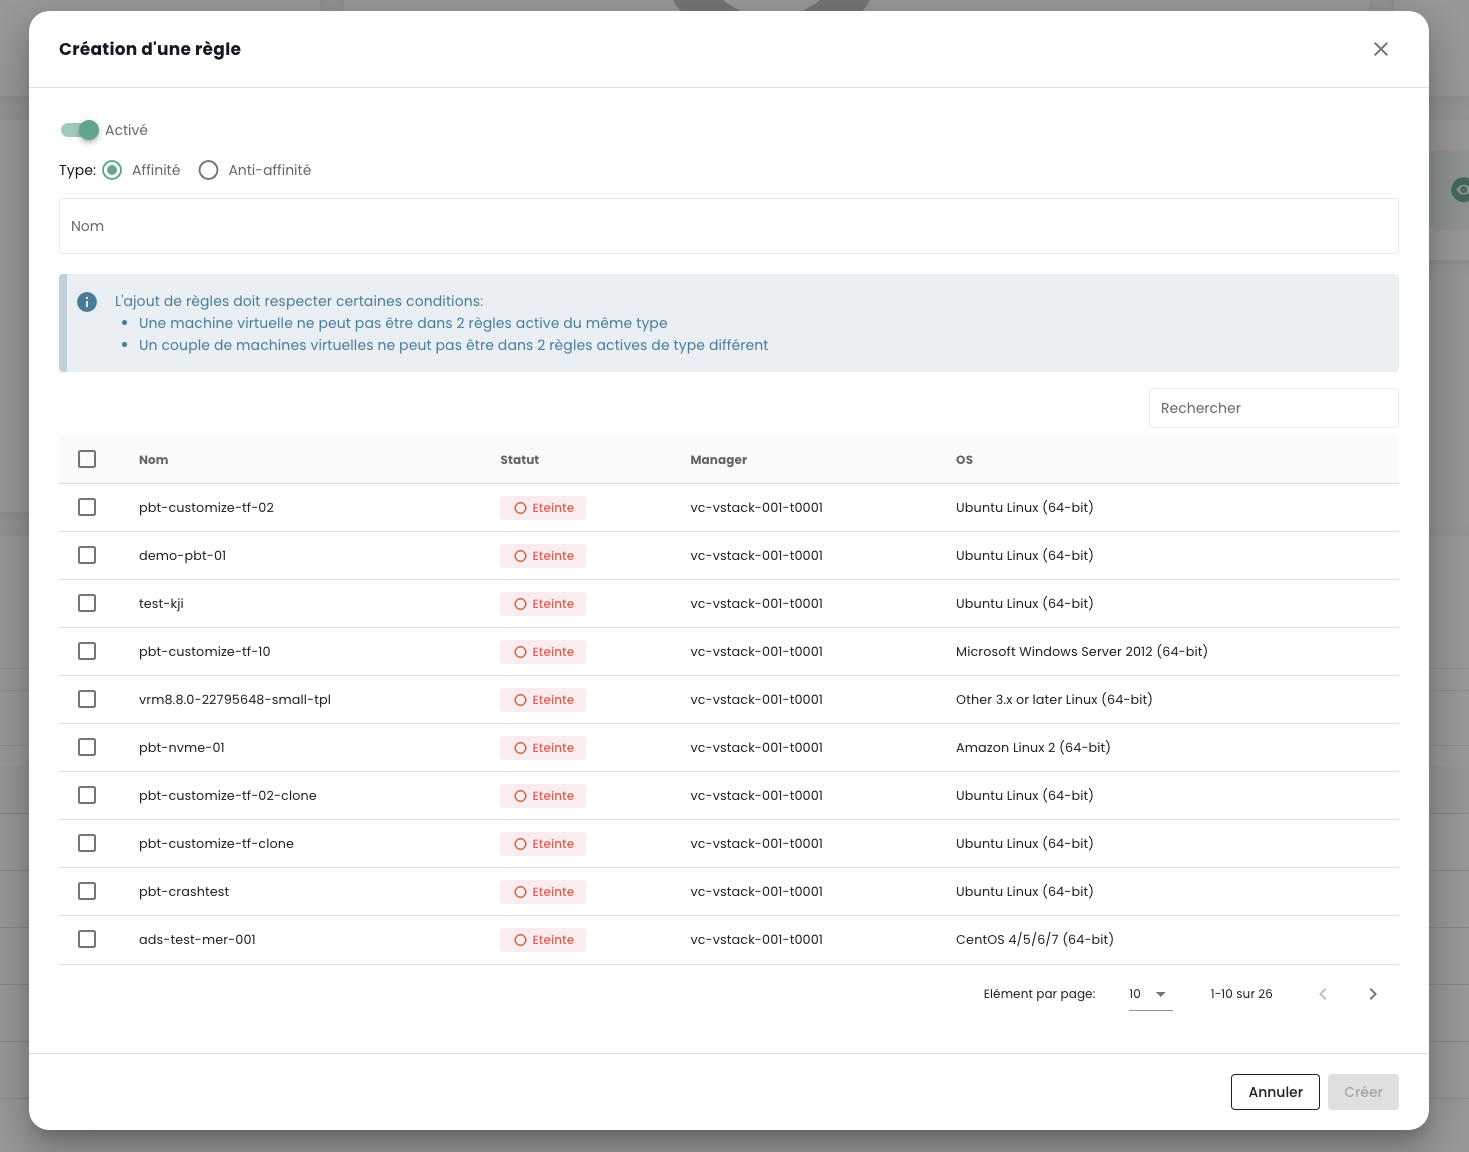
Note: The affinity/anti-affinity rules offered in the console are rules regarding virtual machines with respect to each other (no rules between hypervisors and virtual machines).
Backup
Create a backup policy
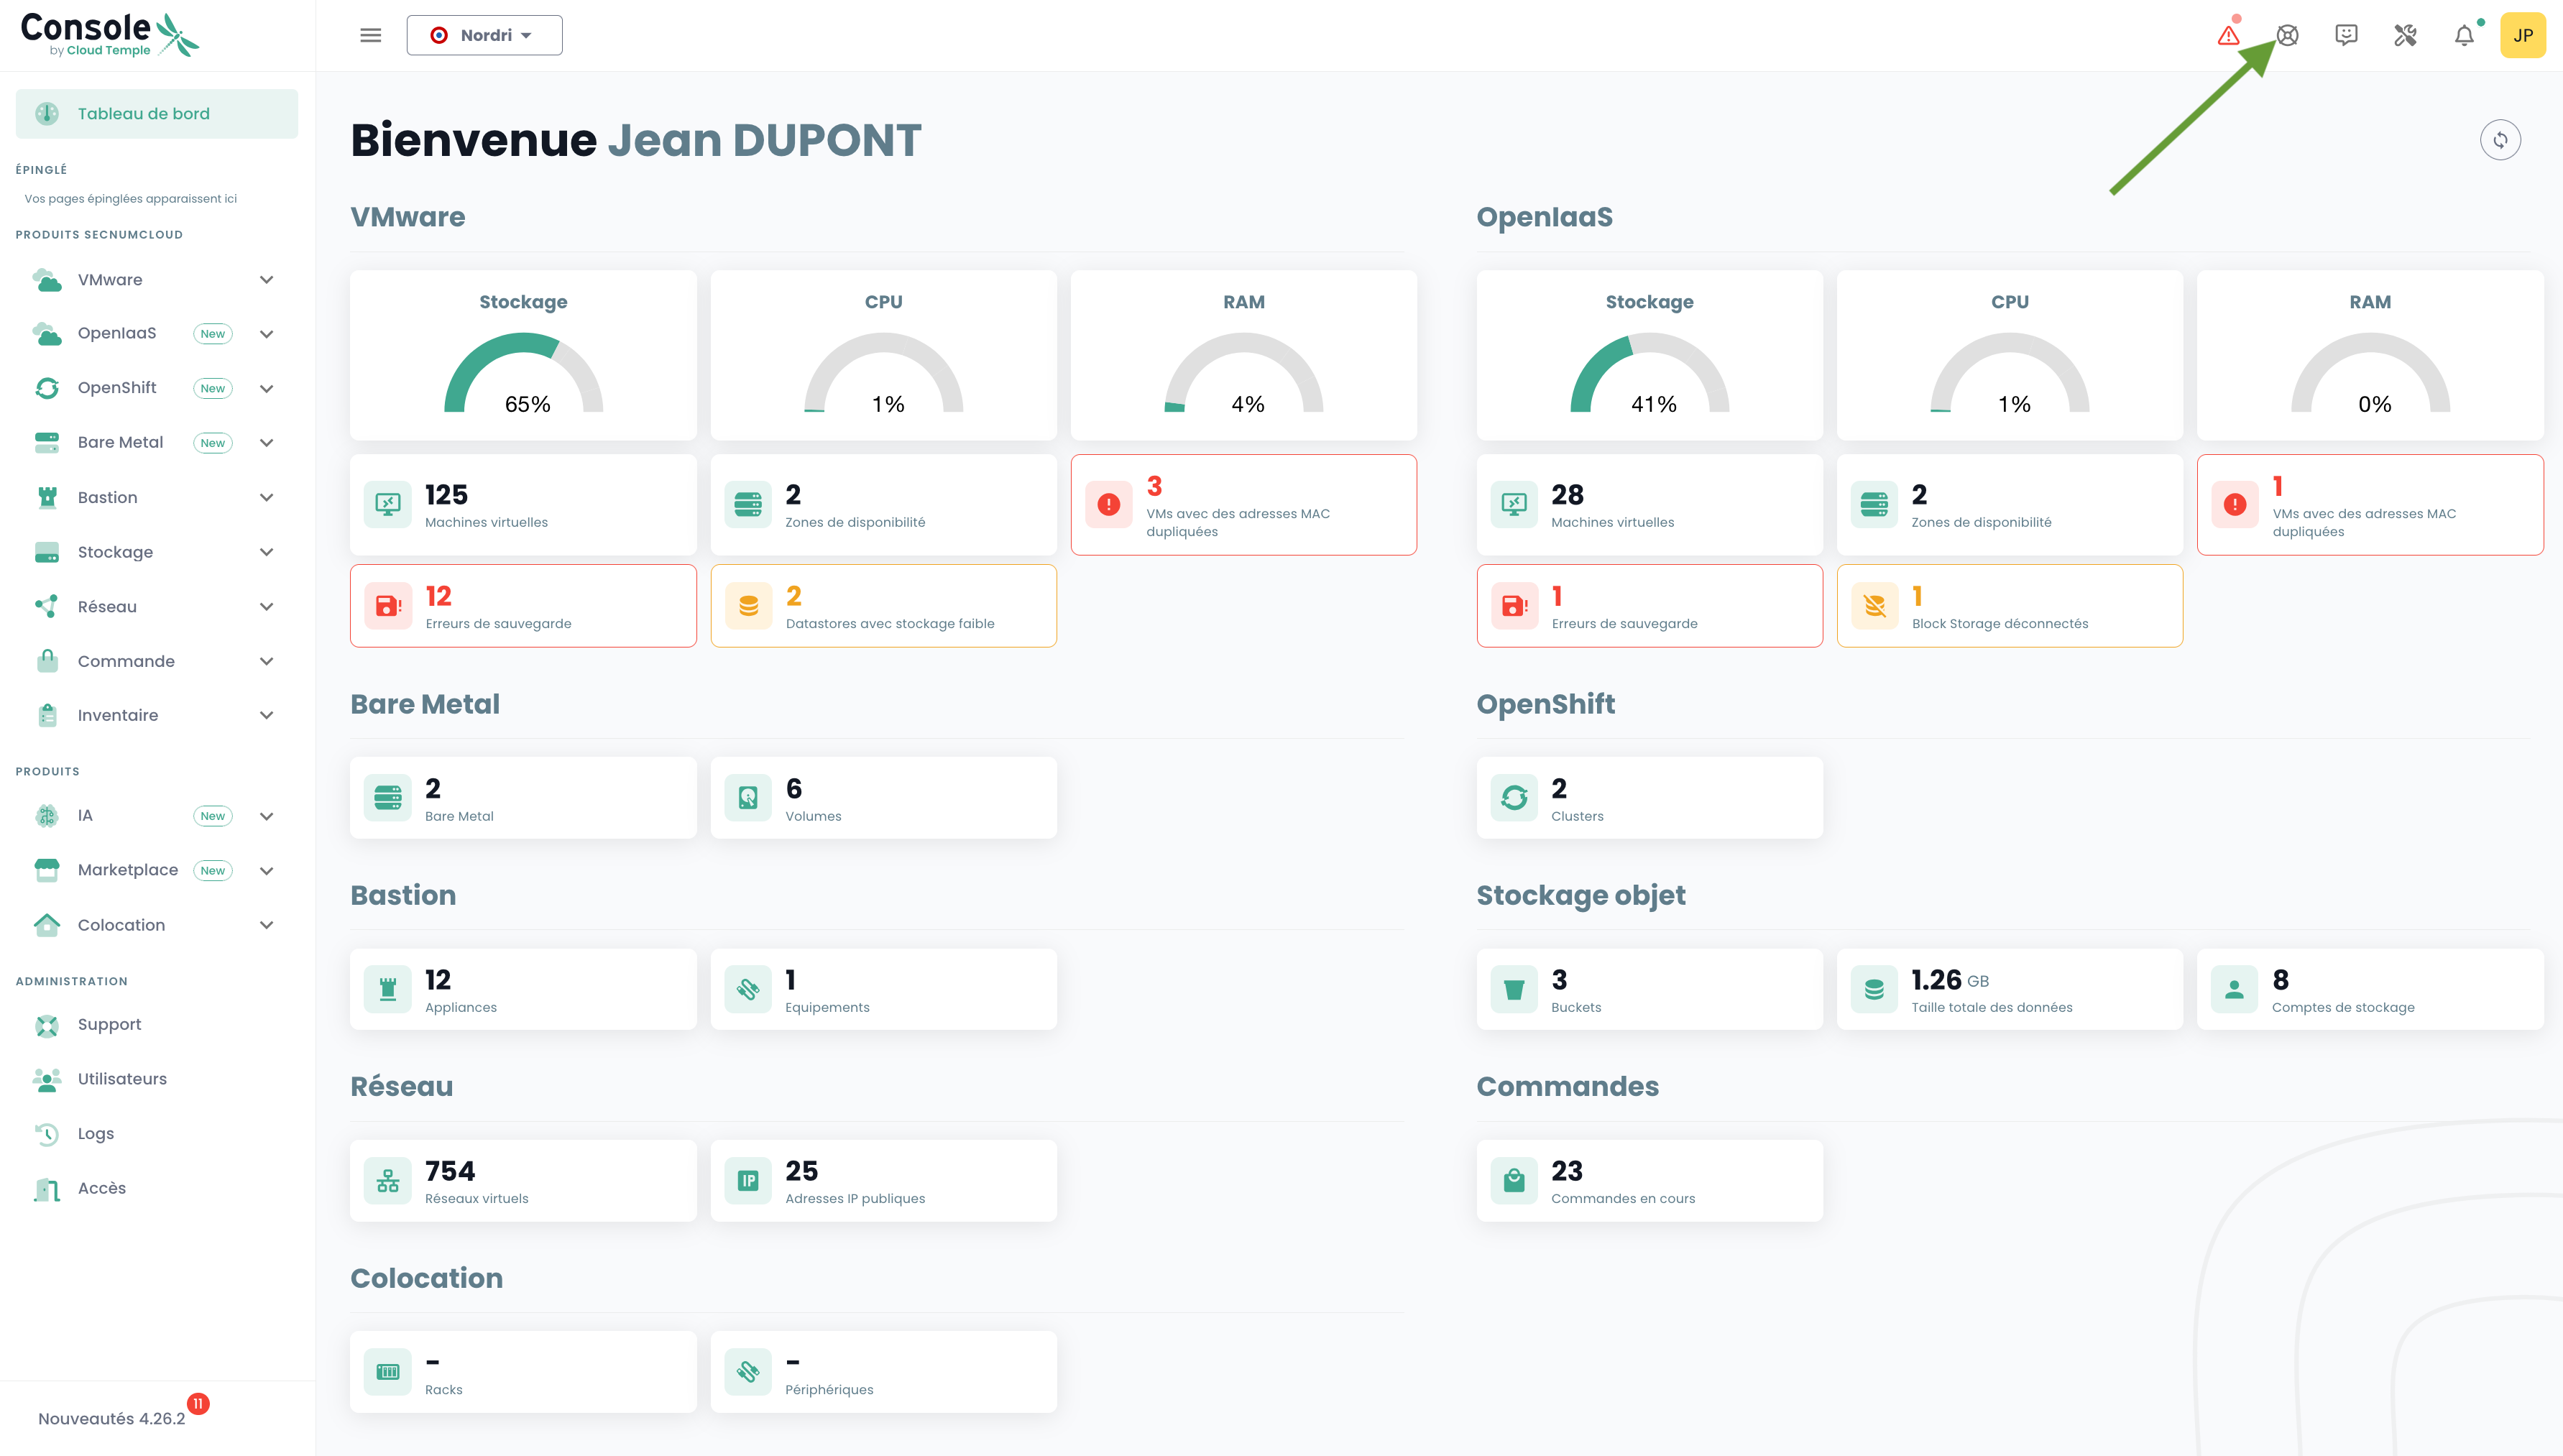
To add a new backup policy, you must submit a request to support. Support is accessible via the lifebuoy icon in the top right corner of the window.
The creation of a new backup policy is done via a service request specifying:
Your Organization name A contact name with their email and phone number to finalize the configuration The tenant name The backup policy name The characteristics (x days, y weeks, z months, ...)
Assign a backup policy to a virtual machine
When an SLA is assigned to a virtual machine (VM), all disks associated with that VM automatically inherit the same SLA. You can then manually trigger the backup execution via the "Backup Policies" tab. If not triggered manually, the backup will run automatically according to the schedule configured by the SLA.
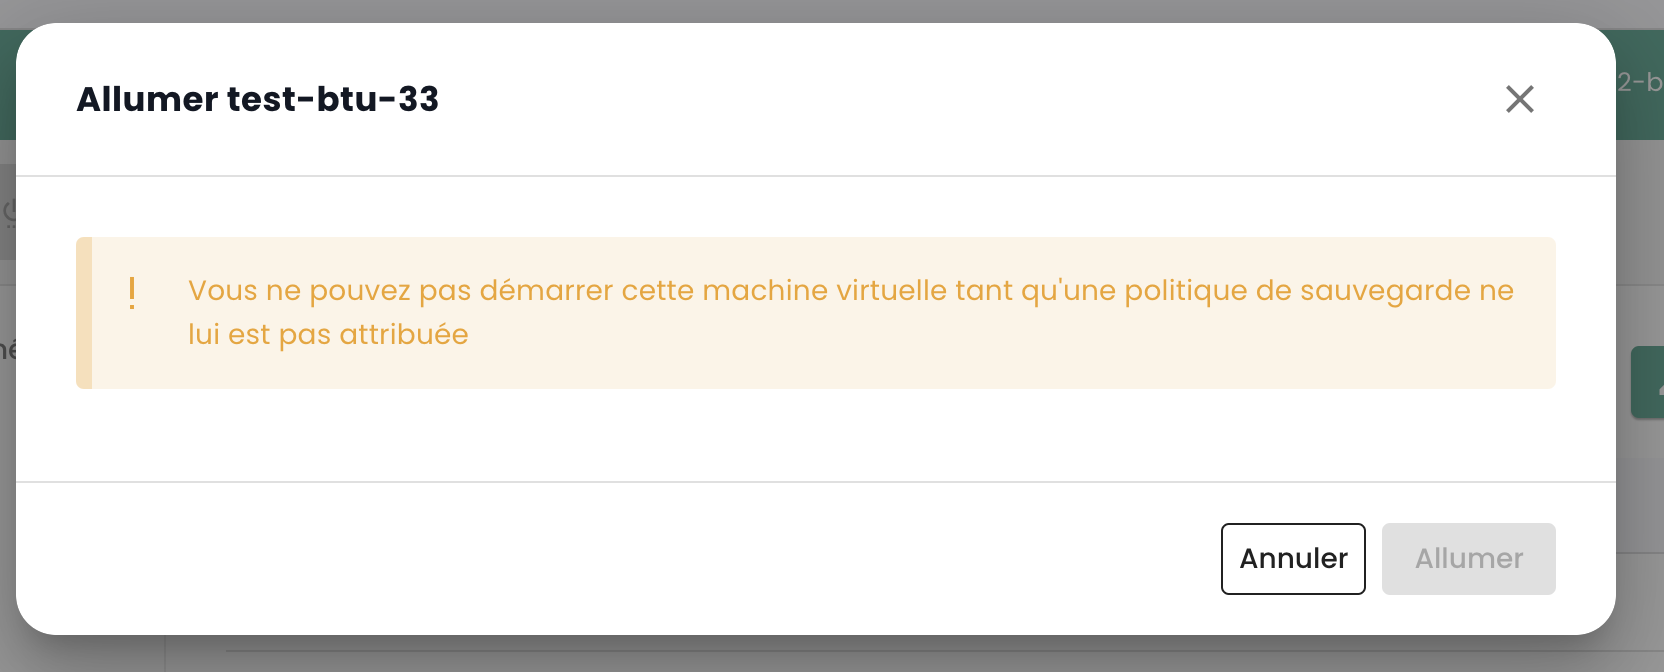
SecNumCloud requires a backup policy to be assigned to a virtual machine before it starts. Otherwise, you will see the following notification:
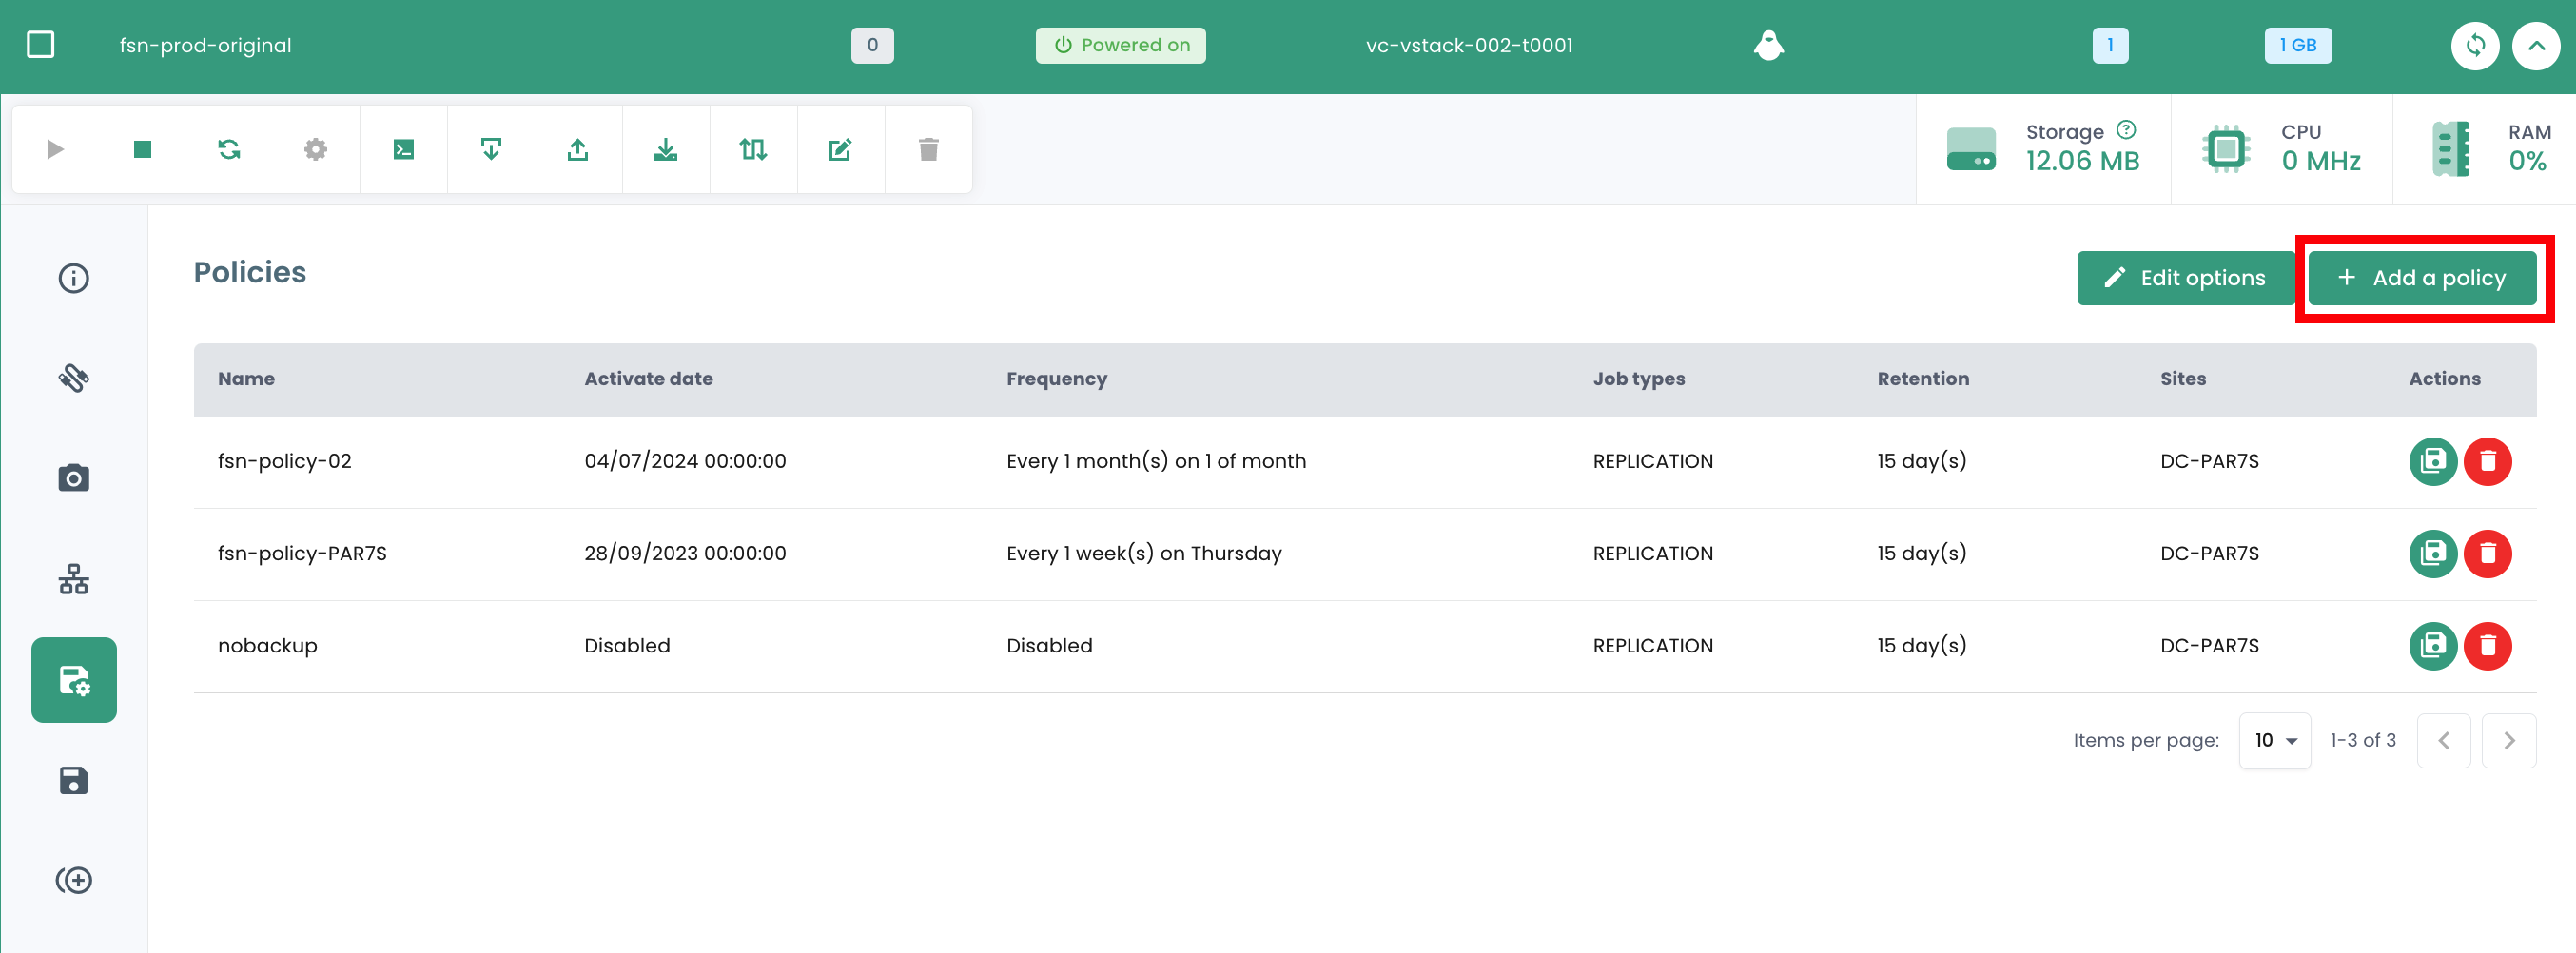
Click the 'Backup Policies' tab in your virtual machine's menu. You can view the backup policy or policies assigned to it.
To assign a new backup policy to the virtual machine, click the 'Add a policy' button and select the desired backup policy.
Assign a backup policy to a virtual disk
It is also possible to assign an SLA directly to a specific virtual disk of a machine. In this case, the virtual machine does not inherit this SLA applied individually to the disk. However, it is not possible to manually trigger backup execution at the disk level, as this feature is not supported in Spectrum Protect Plus.
Conversely, it is possible to exclude certain disks from one or more backup policies (SLA) of the VM, which allows unassigning one or more SLA(s) on a per-disk basis. This approach offers the flexibility to manually trigger backup execution for an SLA without affecting all disks of the virtual machine, thereby enabling more granular backup management.
Click the action bar of the disk to which you want to assign a backup policy. Then, click 'Policies' and select the desired backup policy.
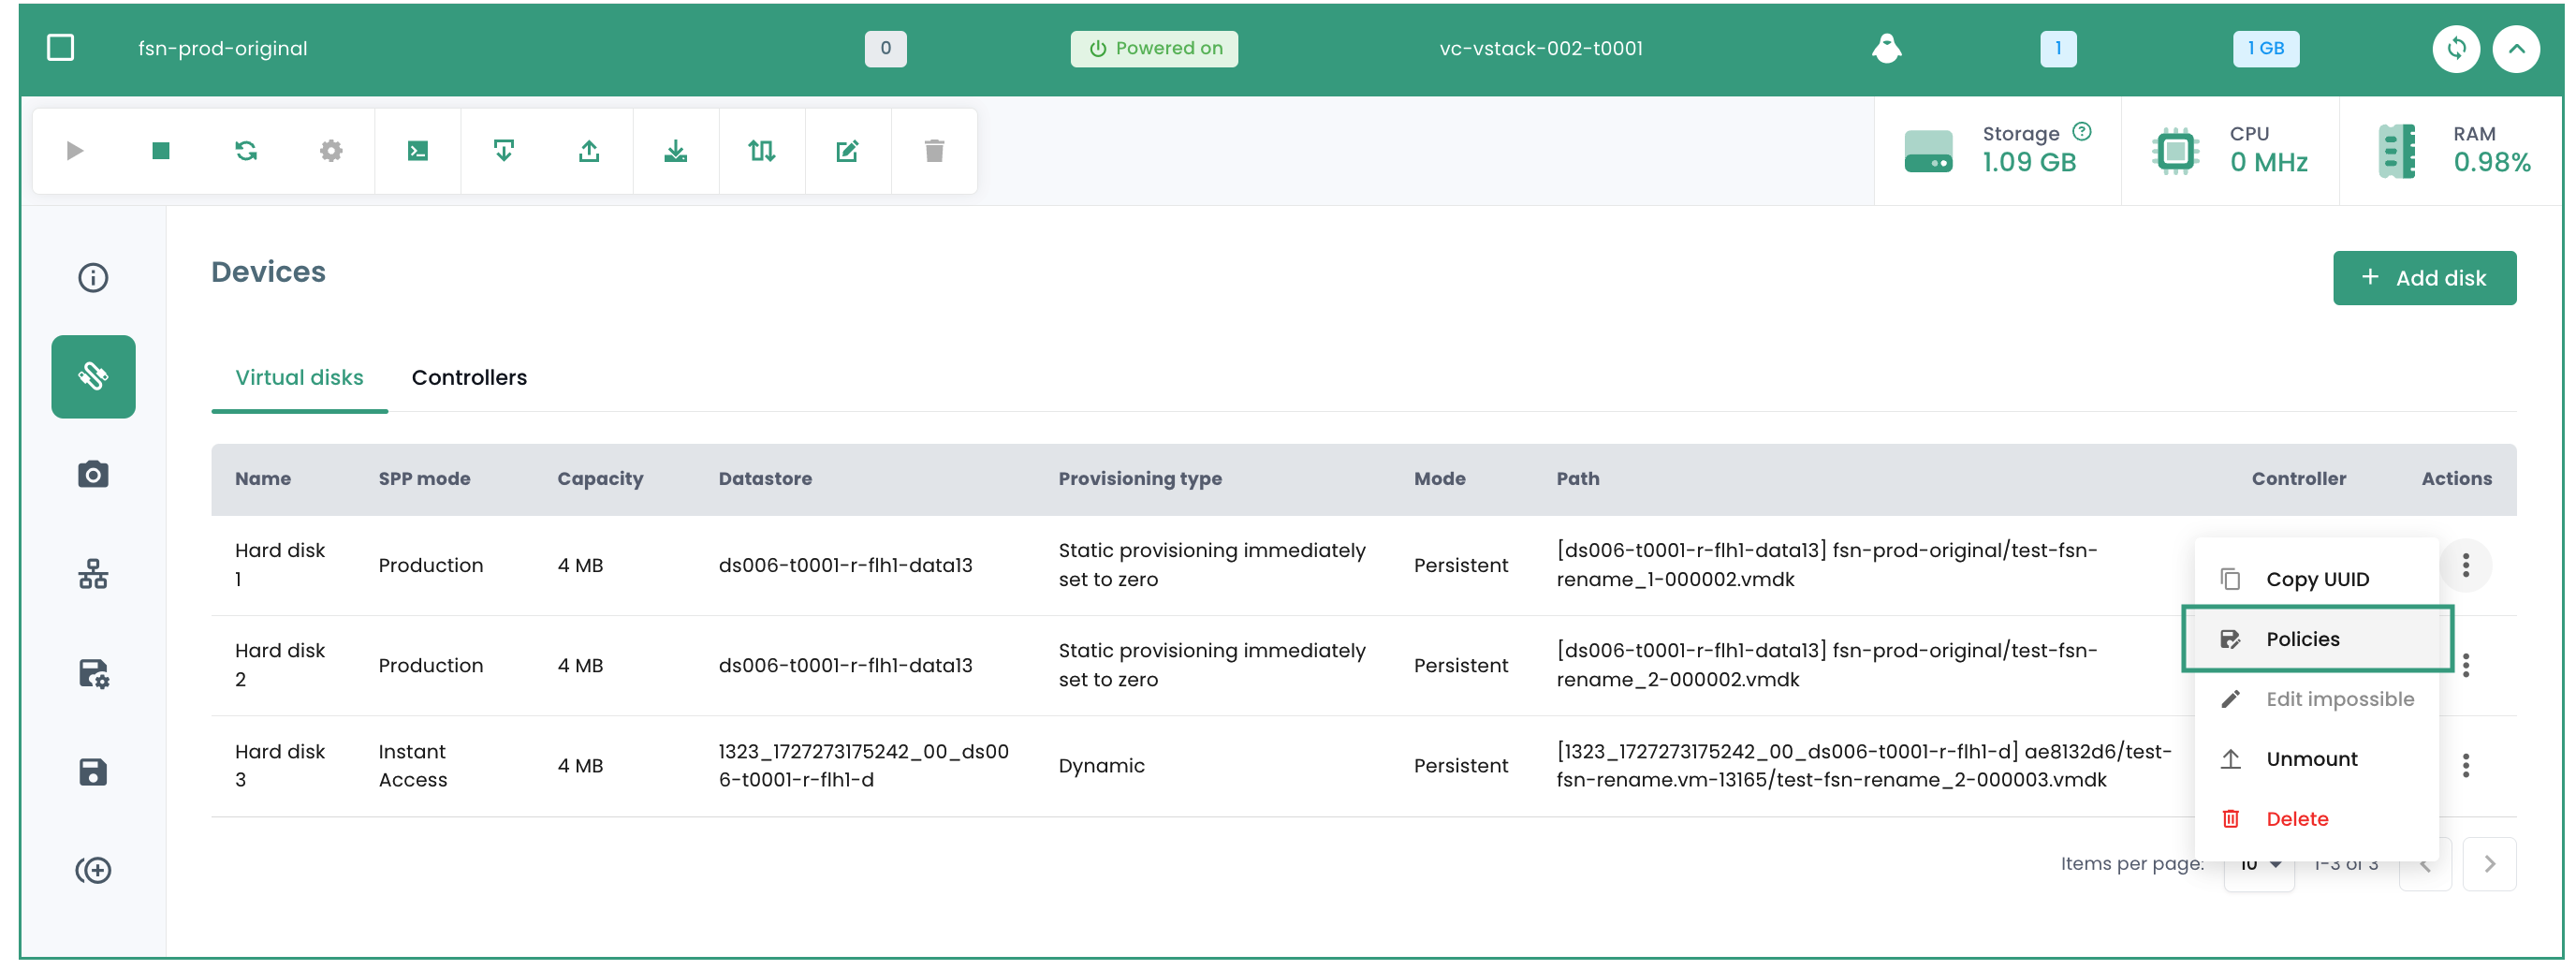
Note: The policy to add must be located in a different availability zone than the virtual machine.
Run a backup policy
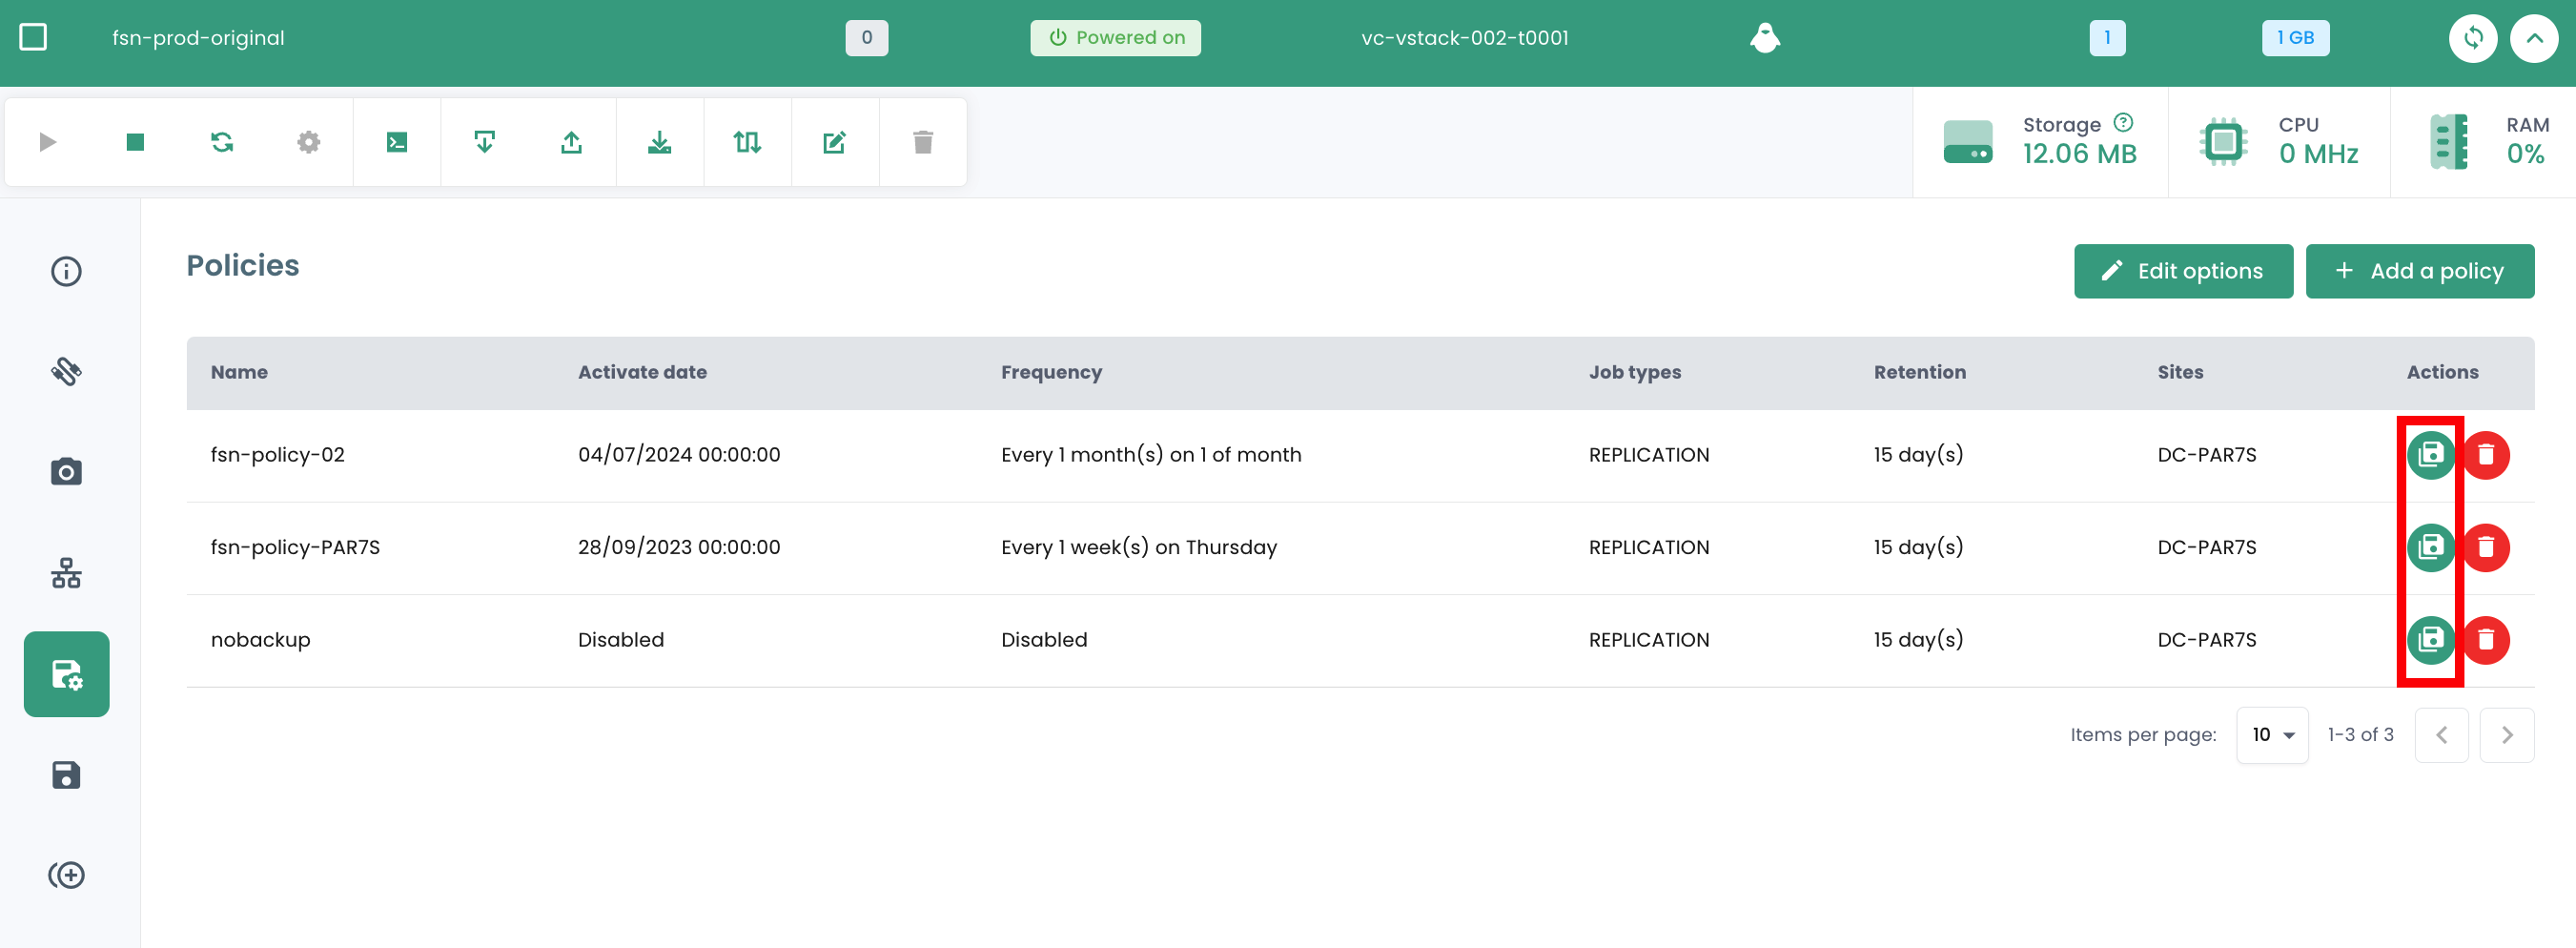
In the 'Backup Policies' menu of your virtual machine, click the 'Run' button in the 'Actions' column for the backup policy you want to run.
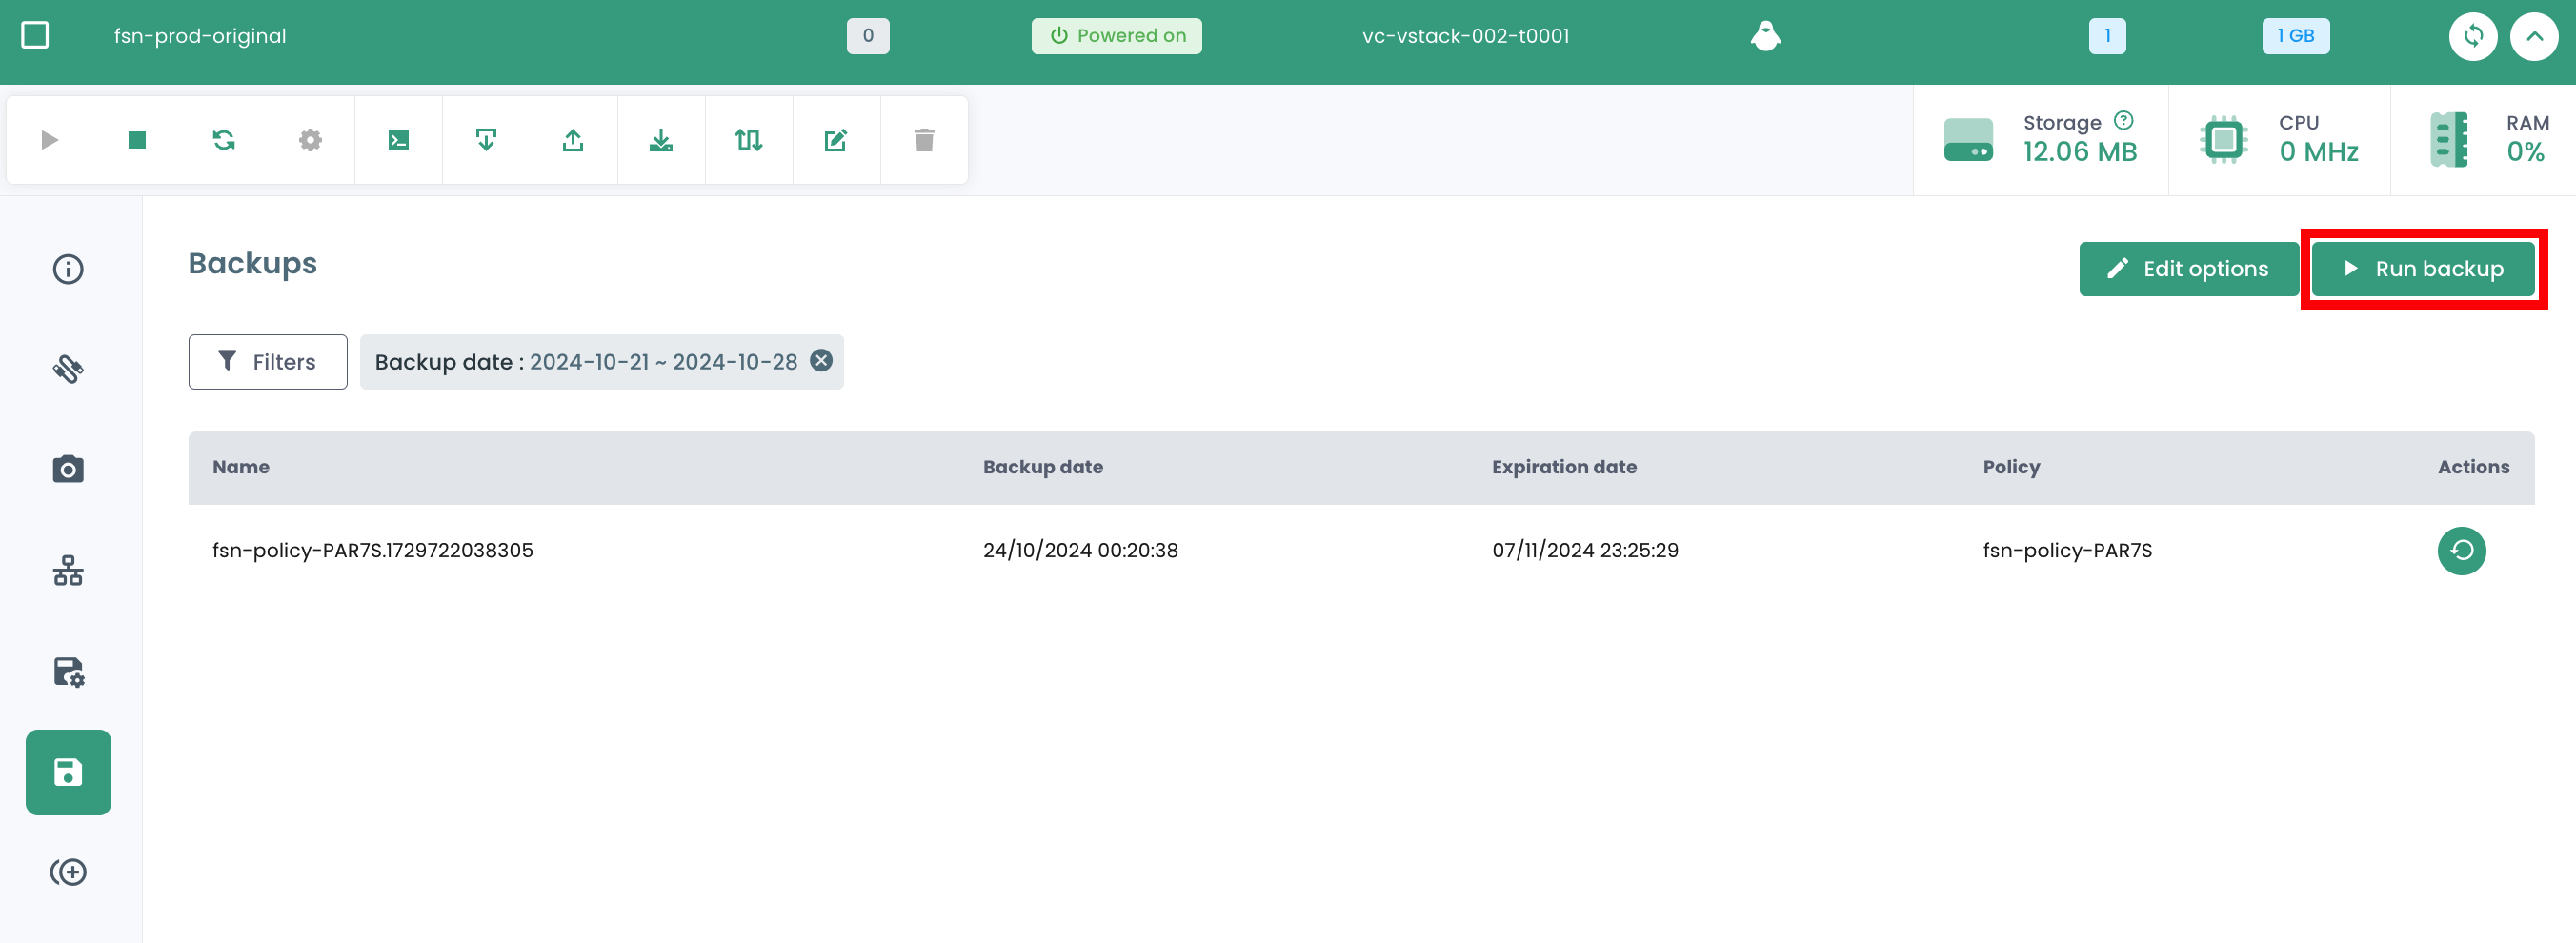
To run a backup policy, you can also start from the 'Backups' section in your virtual machine's menu. Click the 'Run Backup' button, then select the backup you want to run from the dropdown list.
Remove a backup policy
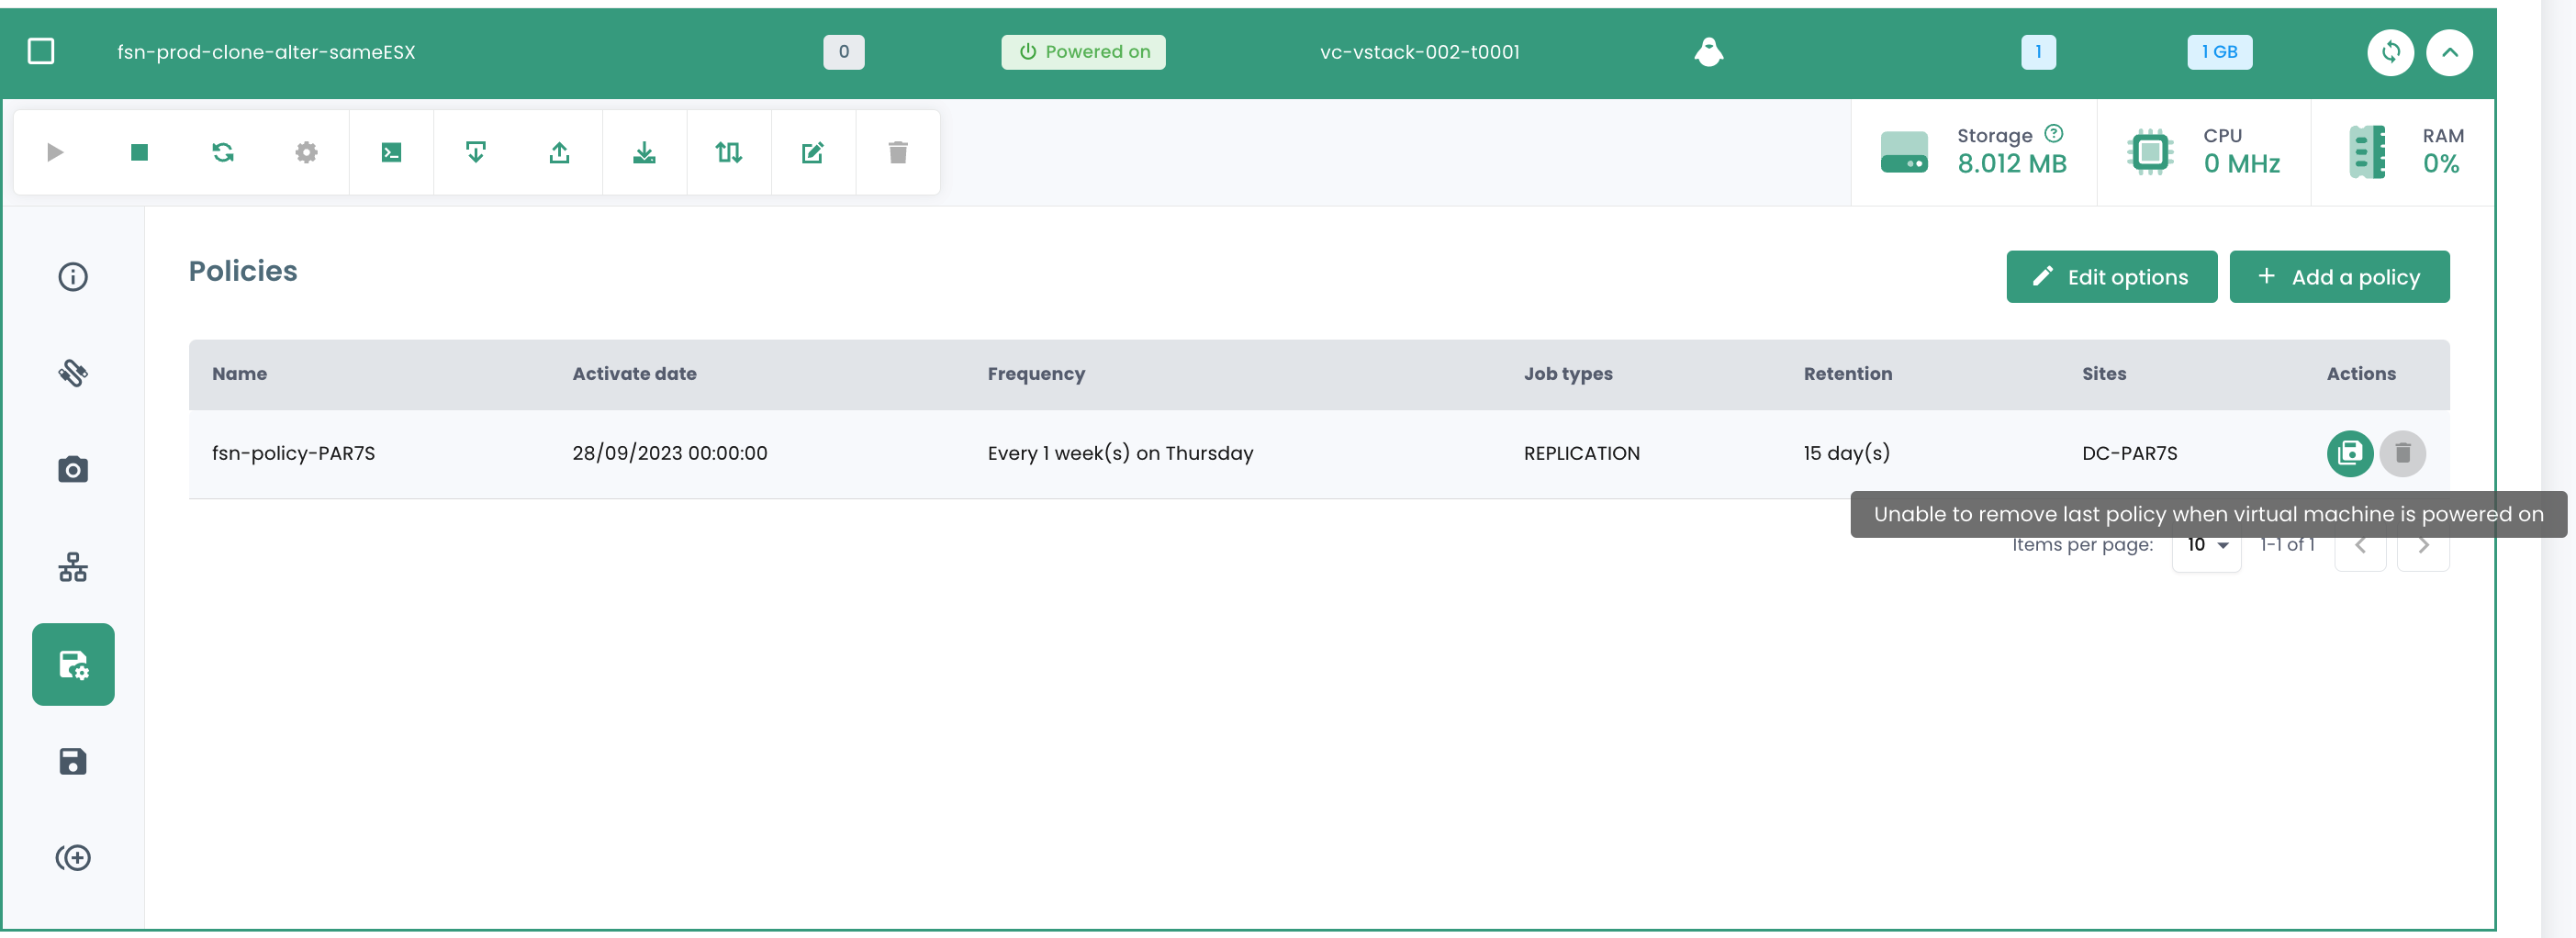
In the 'Backup Policies' menu of your virtual machine, click the 'Remove' button in the 'Actions' column of the backup policy you wish to remove.
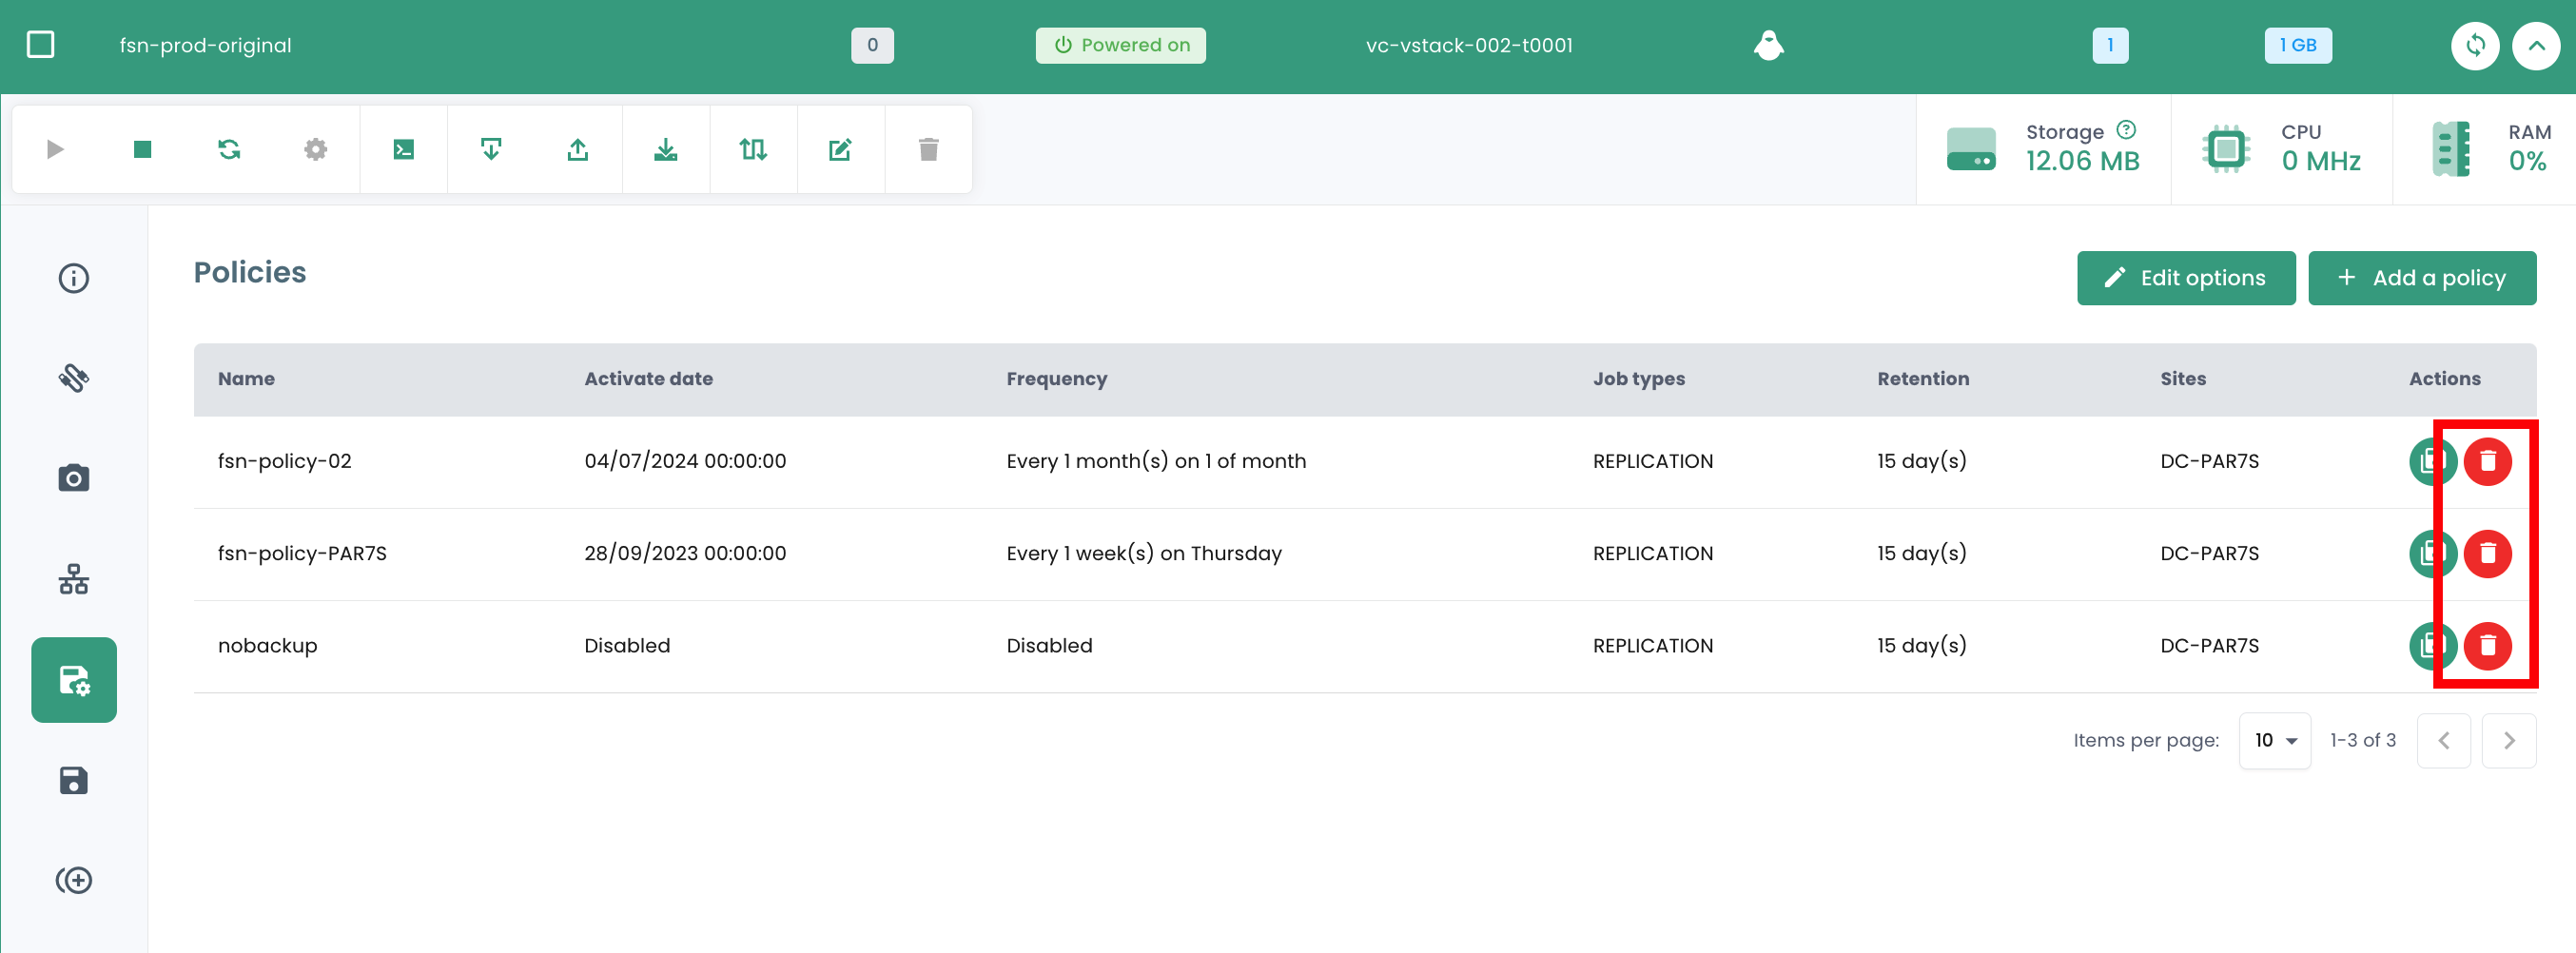
Note: It is not possible to remove the last SLA from a running virtual machine:
Deleting a backup policy: case of a suspended backup policy ("held")
When the last resource is disassociated from an SLA policy, the system automatically detects this situation. As a result, all jobs associated with this SLA policy automatically switch to the "Suspended" ("Held") state. It is important to note that at this stage, direct deletion of the SLA policy is not possible due to the existence of dependent jobs. To proceed with the policy deletion, a series of steps must be followed.
You must verify that the affected jobs are indeed in the "Suspended" state. Once this verification is complete, these jobs can be deleted. Only after deleting these dependent jobs can the SLA policy be permanently removed from the system.
A special case requires specific attention: adding a new resource to an SLA policy whose dependent jobs have not been deleted. In this situation, the job identifiers will be retained. However, it is crucial to note that jobs in the "Suspended" state will not automatically resume. Manual intervention will be required to reactivate them and allow their execution.
note : For any clarification regarding this situation, contact Cloud Temple support.
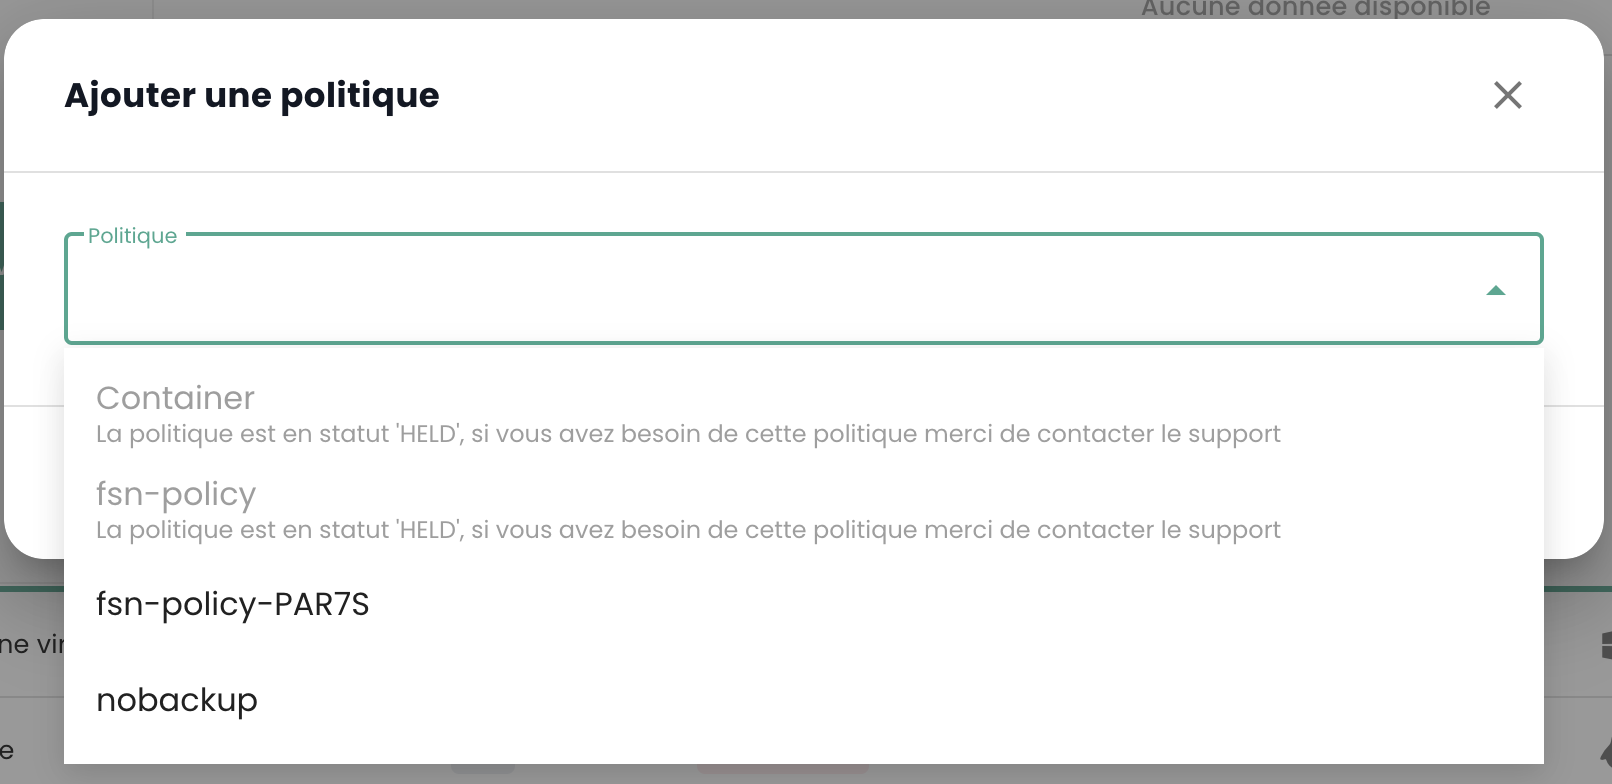
The Cloud Temple console prevents assigning a virtual machine to a suspended policy:
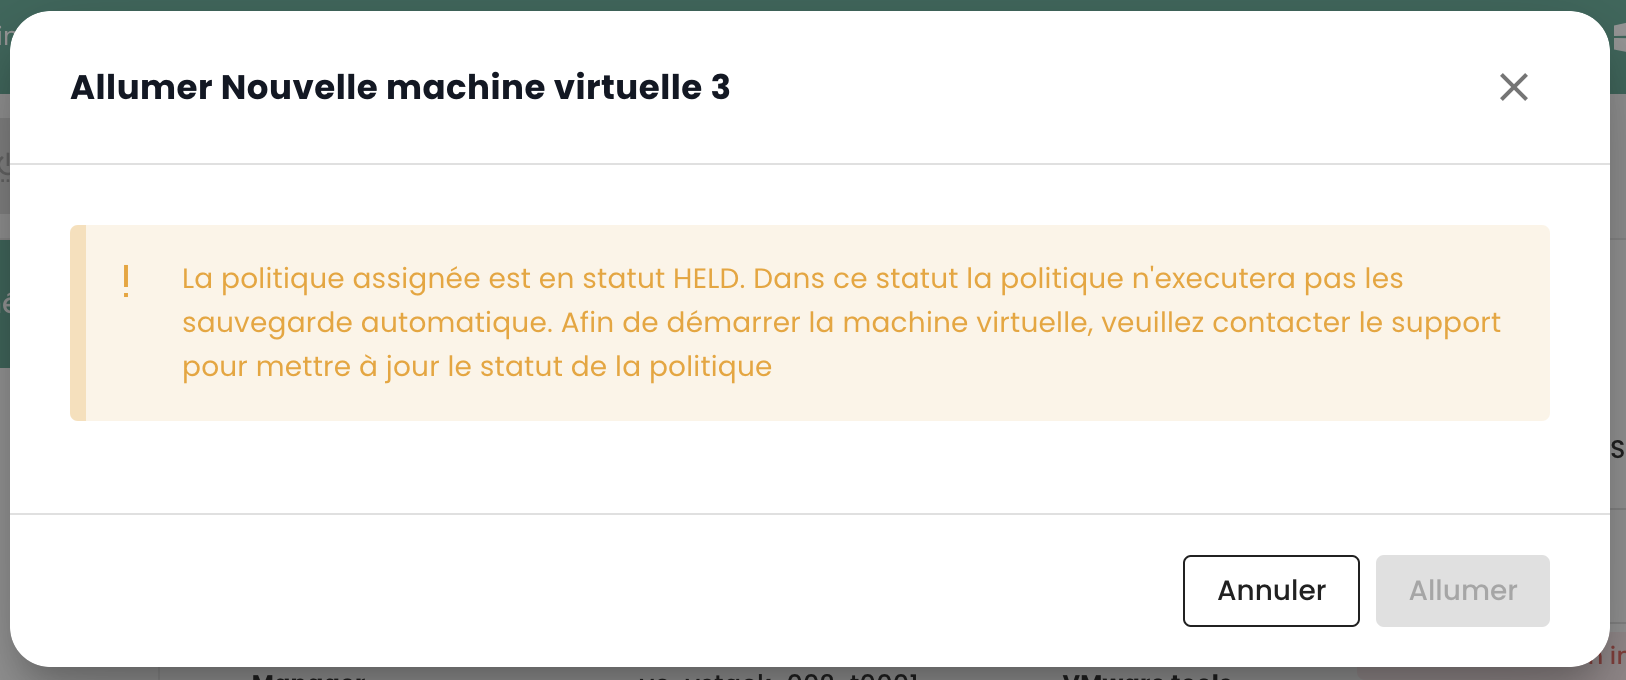
Similarly, it is not possible to start a virtual machine that is associated with a suspended backup policy:
Restore a backup
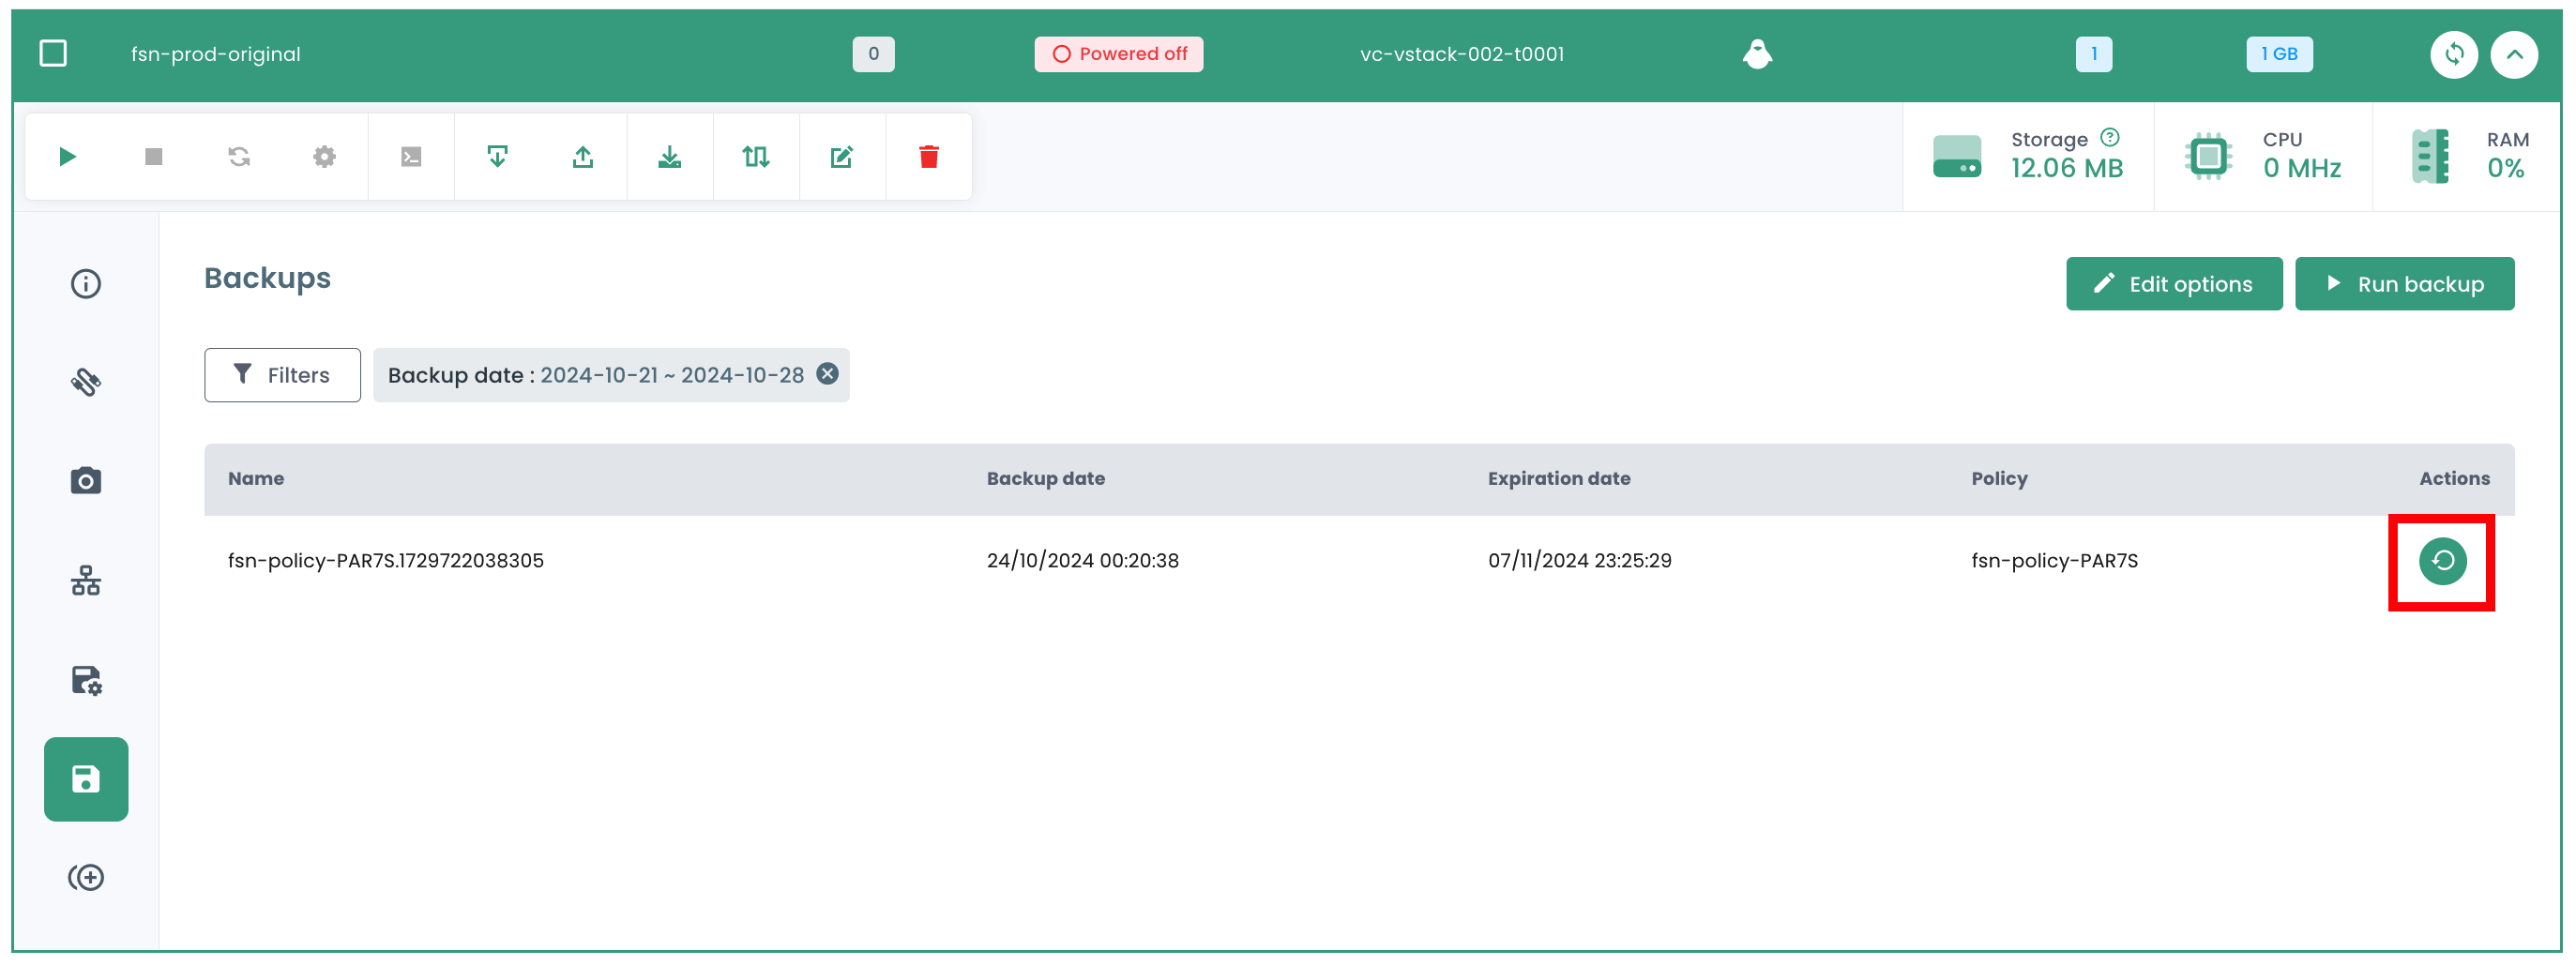
The 'Backups' tab in your virtual machines' menu allows you to access the list of their backups. To restore a backup, click the 'Restore' button on the row corresponding to the backup you wish to restore.
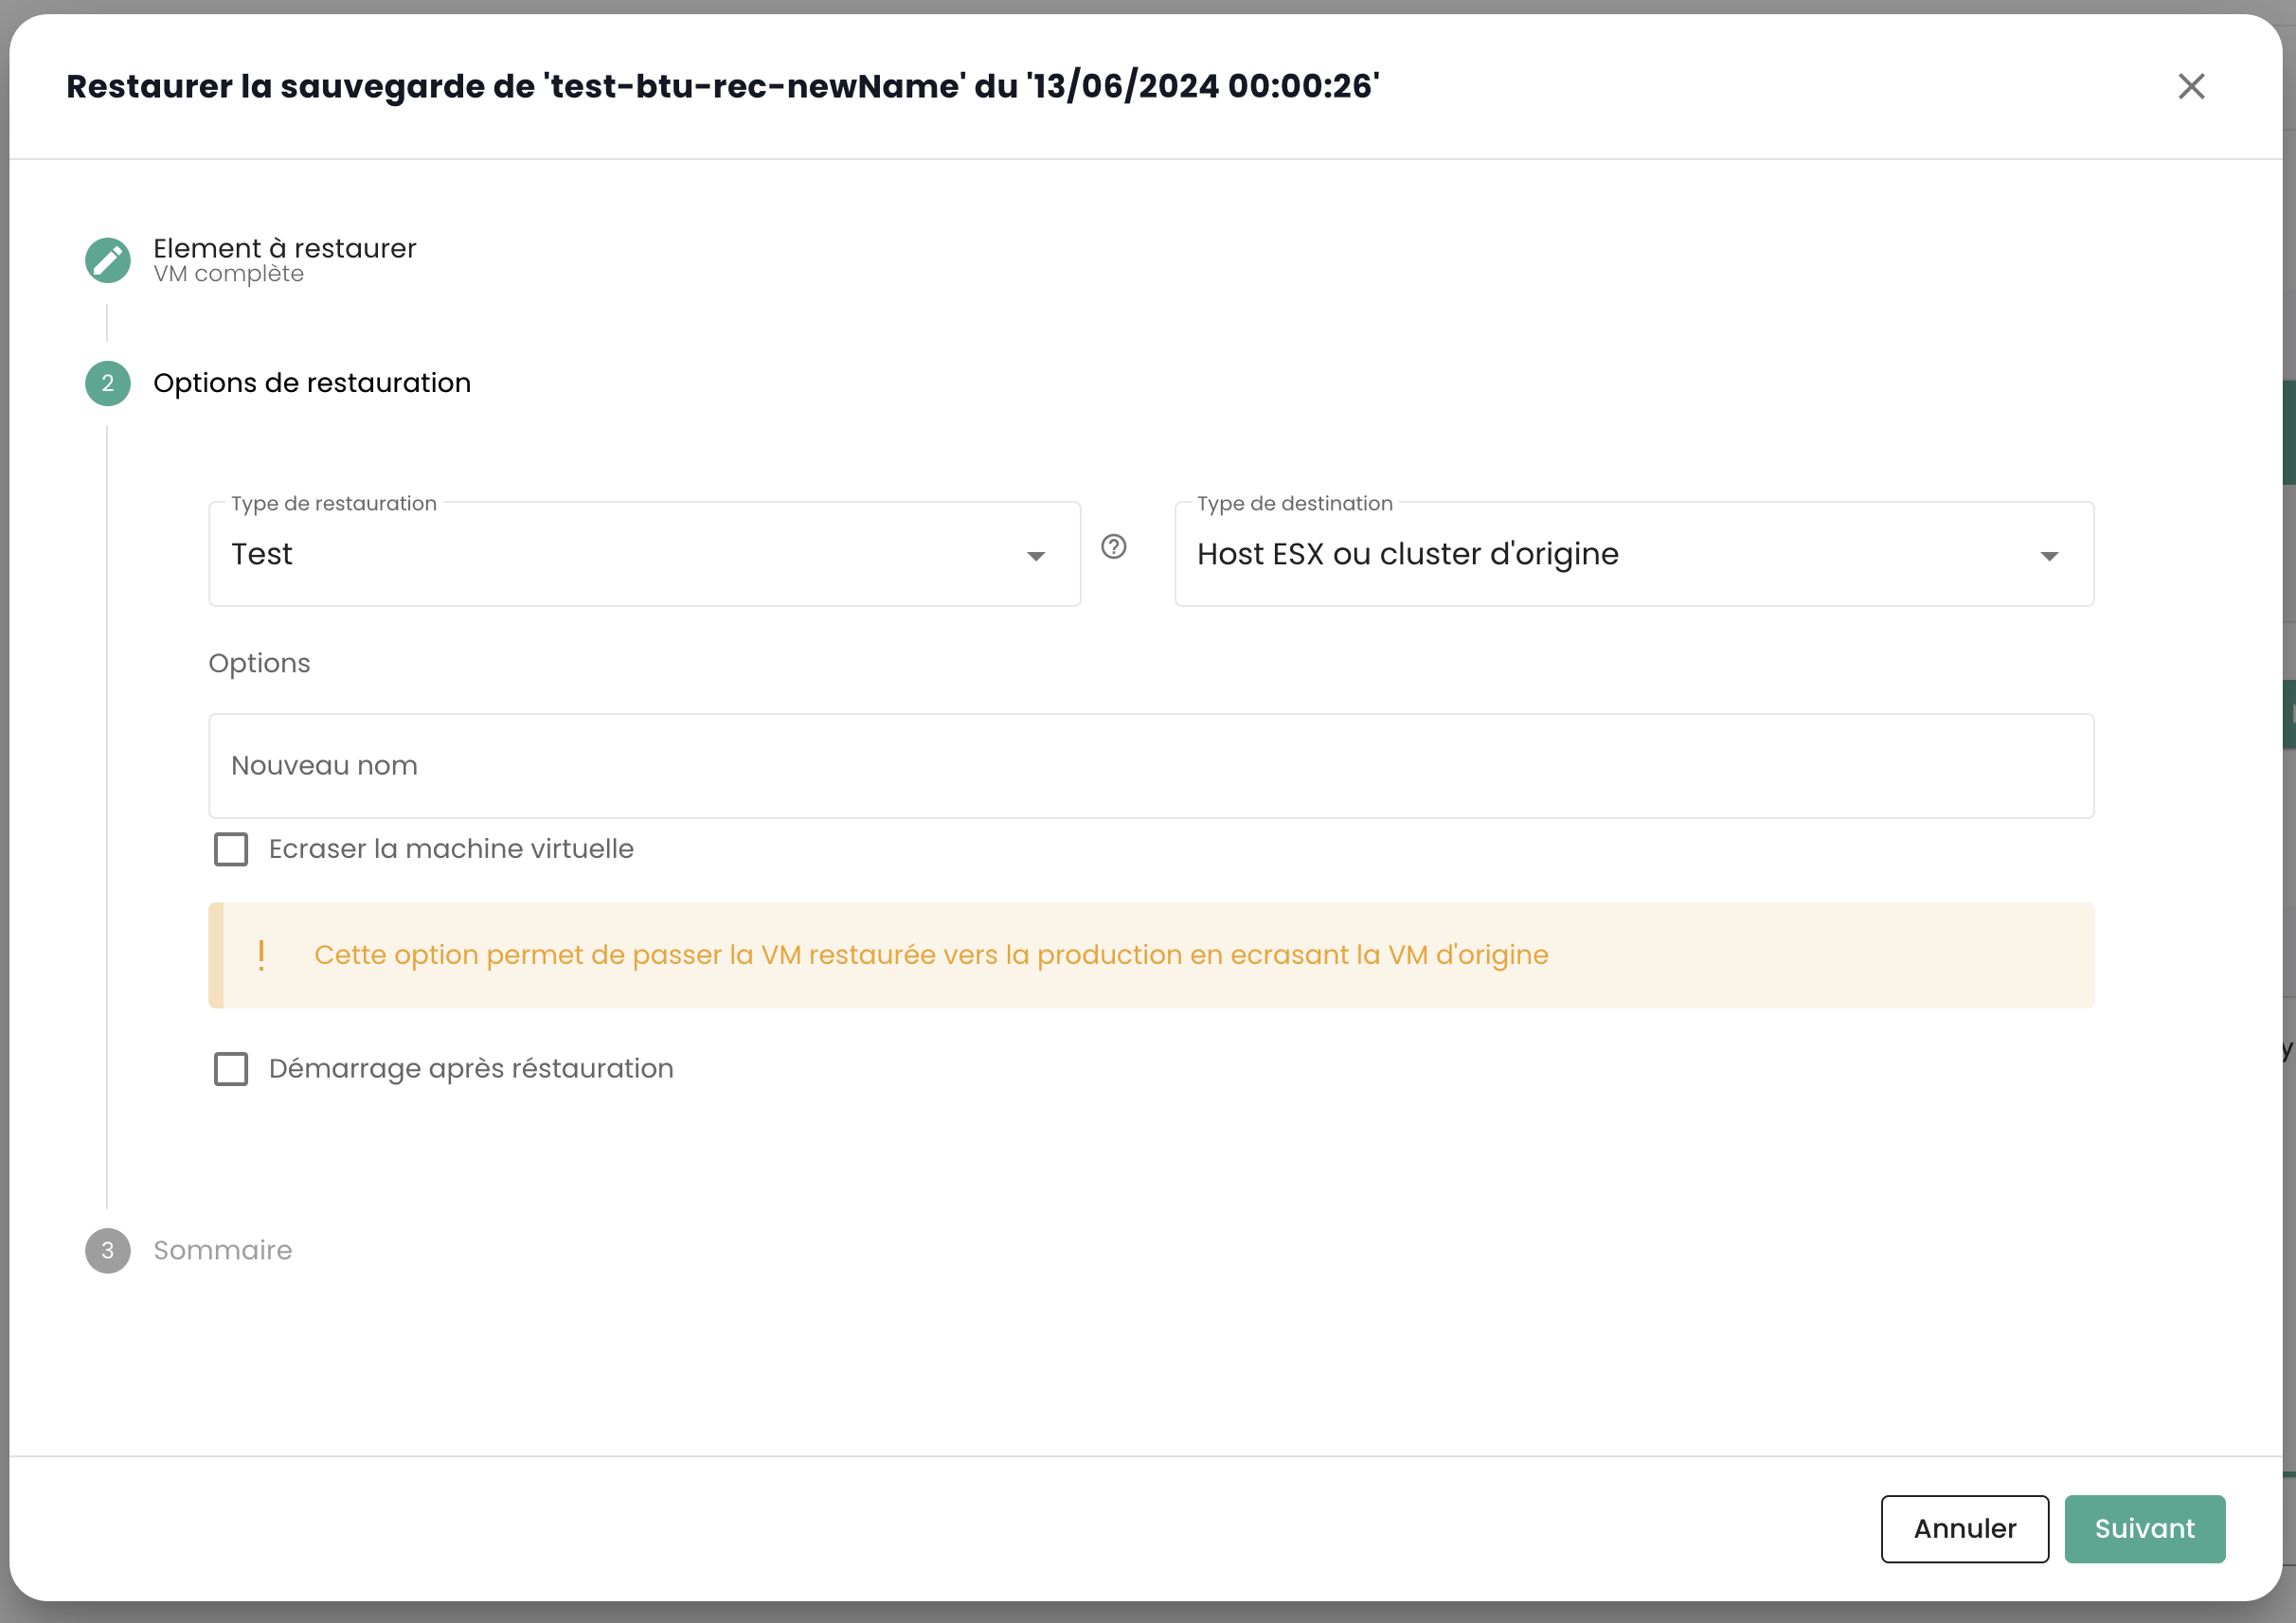
-
Production mode: Production mode allows for disaster recovery on the local site from primary storage or a remote disaster recovery site, by replacing the original machine images with recovery images. All configurations are transferred as part of the recovery, including names and identifiers, and all data copy jobs associated with the virtual machine continue to run. During a production mode restore, you can choose to replace the storage in the virtual machine with a virtual disk from a previous virtual machine backup.
-
Test mode: Test mode creates temporary virtual machines for development, testing, snapshot verification, and disaster recovery verification based on a repeatable schedule, without impacting production environments. Test machines run as long as necessary to perform the test and verification, after which they are cleaned up. Through isolated networking, you can establish a secure environment to test your workloads without interfering with virtual machines used for production. Virtual machines created in test mode have unique names and identifiers to avoid conflicts in your production environment.
-
Clone mode: Clone mode creates copies of virtual machines for use cases requiring permanent or long-running copies for data exploration or duplicating a test environment on an isolated network. Virtual machines created in clone mode have unique names and identifiers to avoid conflicts in your production environment. In clone mode, you must be mindful of resource consumption as clone mode creates permanent or long-term machines.
Restoration defaults to "TEST" mode to preserve production and you can choose the name of the restored VM:
Note that if the tests are satisfactory, it is possible to move a virtual machine from test mode to production mode: