Identity Federation Example with Microsoft EntraID
Here is an example configuration of the identity provider for a Cloud Temple organization using Microsoft EntraID (Azure Active Directory).
Configuring your Microsoft identity provider at the Cloud Temple organization level simplifies user authentication on the Console. This helps avoid the proliferation of authentication factors and reduces the attack surface.
If your users are already authenticated to their Microsoft accounts, logging into the Console services will be seamless and transparent.
Below are the steps to complete this configuration:
Step 1: SSO Configuration on Microsoft Azure Side
Registering a New Azure Application (Azure Portal)
To create the app registration, navigate to the Microsoft Azure portal, then go to Microsoft Entra ID, and select "Add > App Registration".
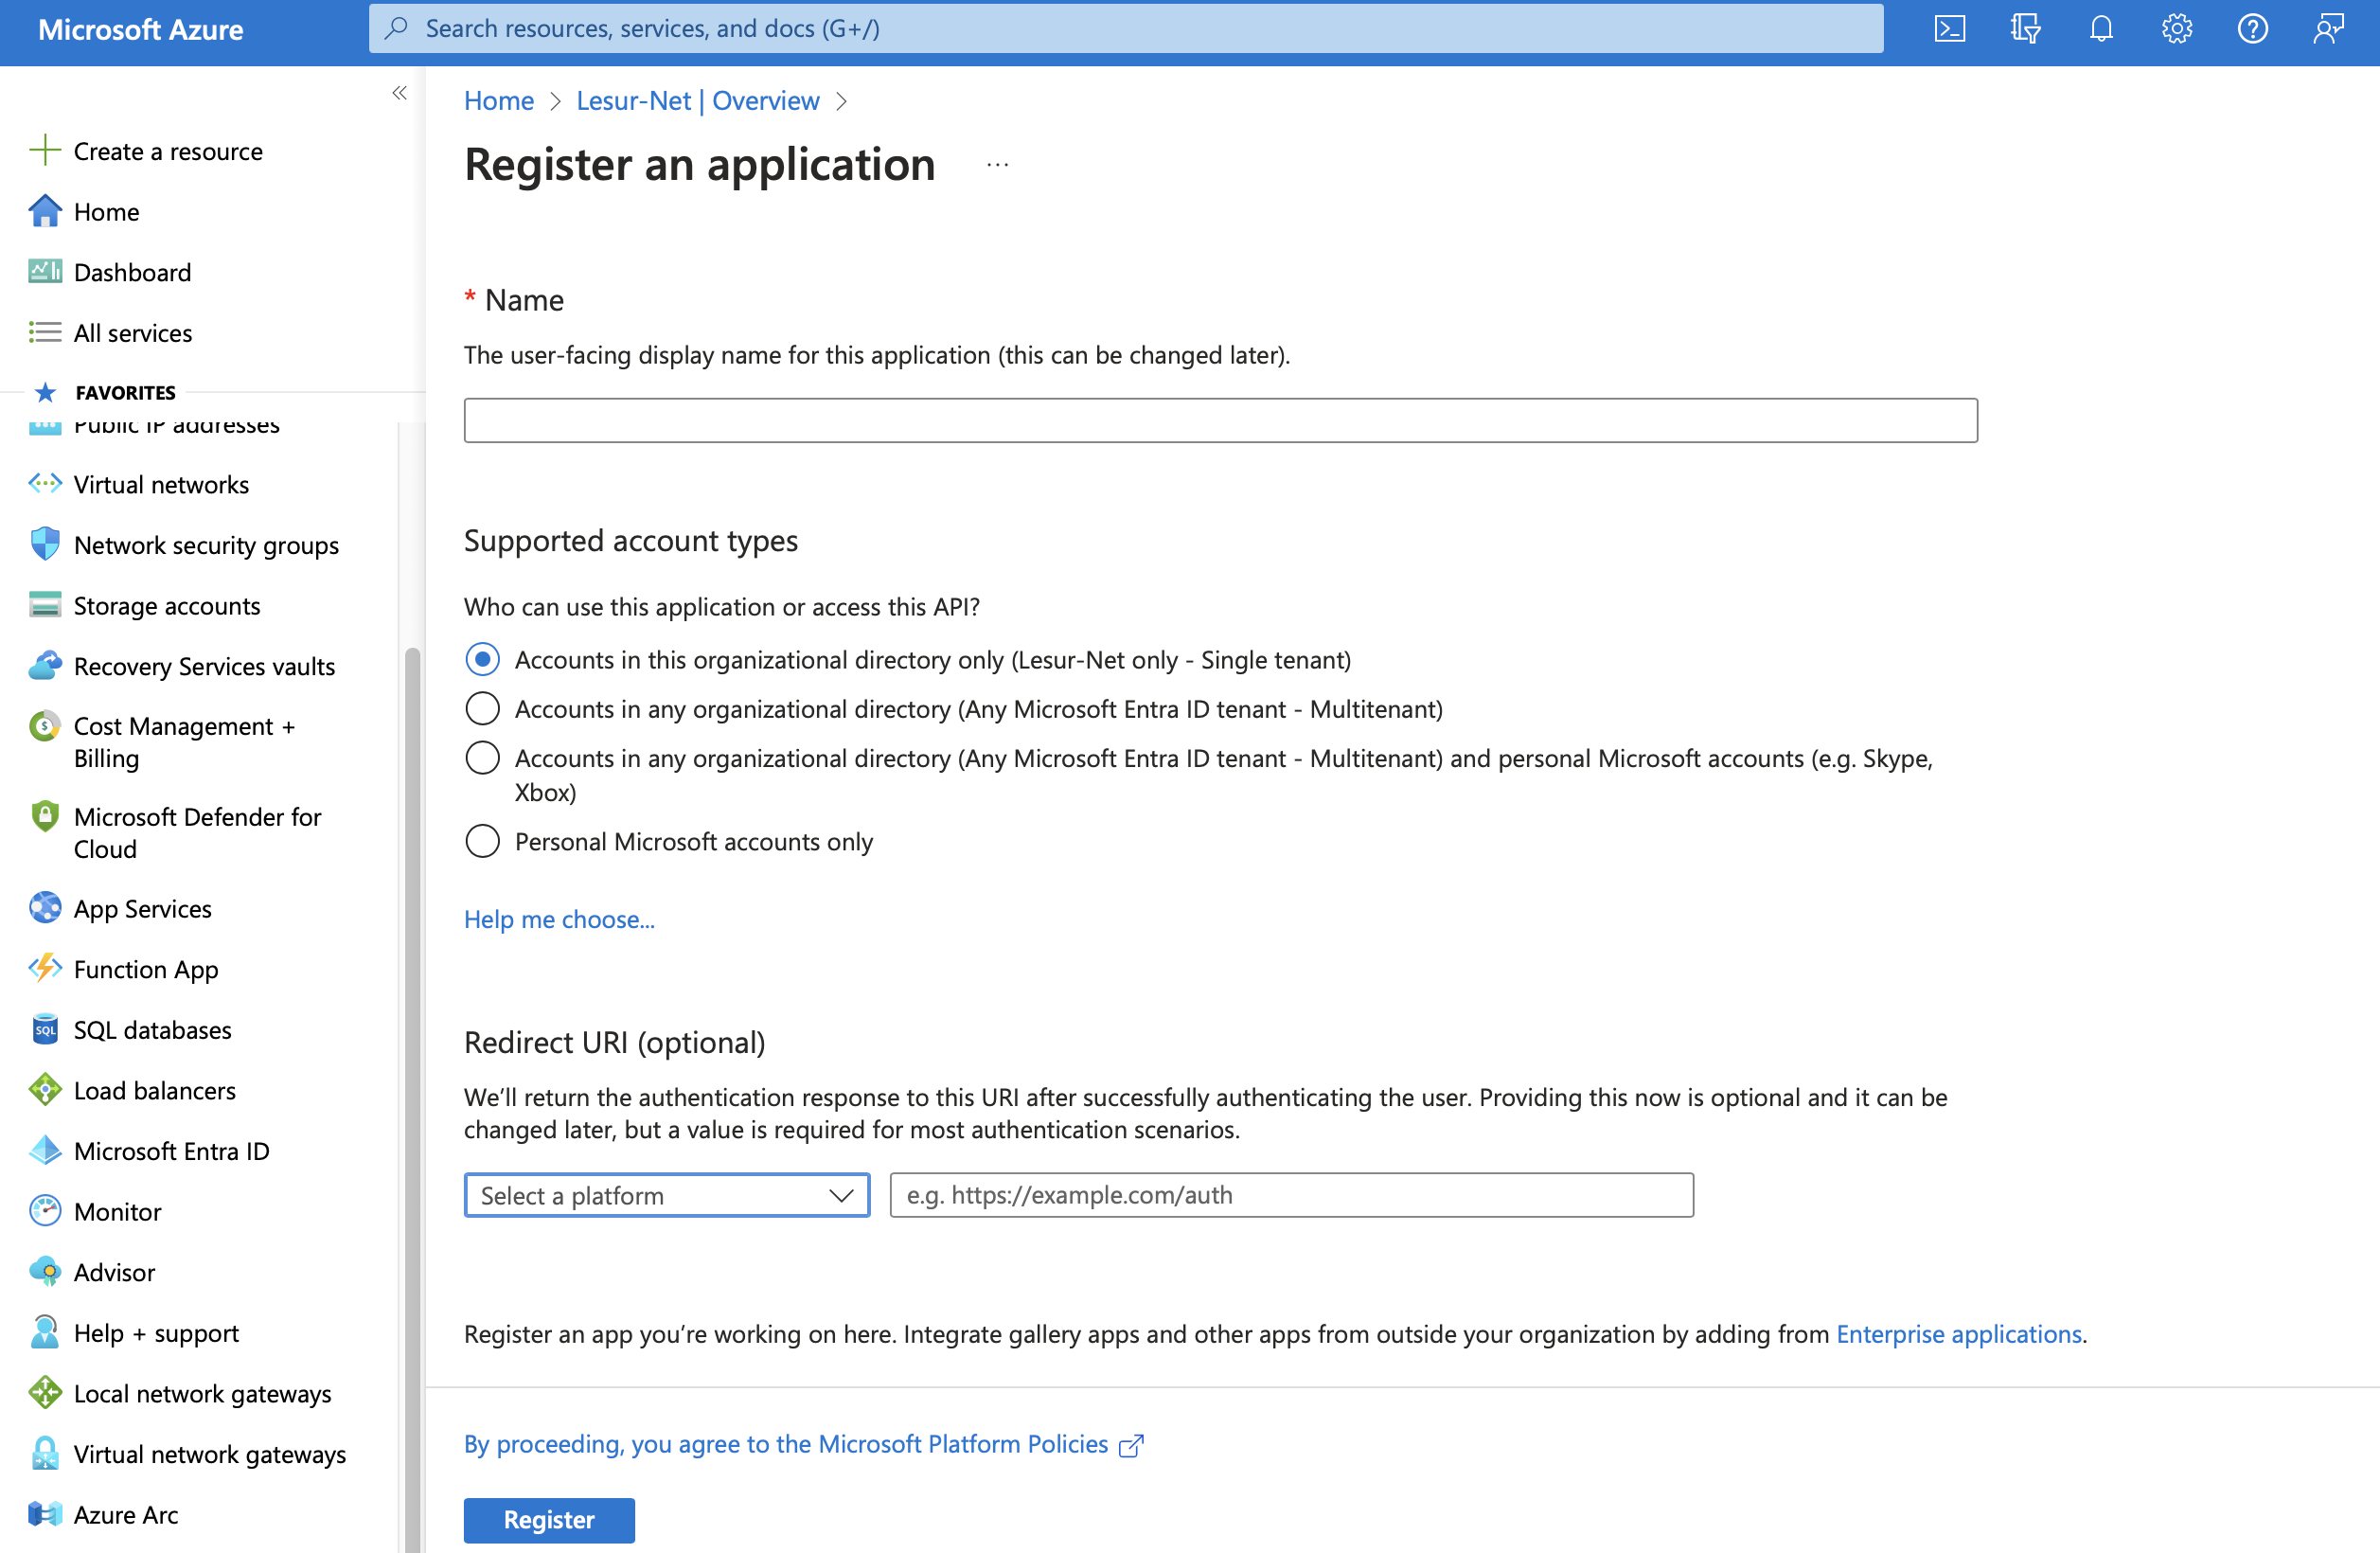
On the "Register an application" page, please provide the following:
- __Name__ : Enter "__SHIVA__"
- __Supported account types__ : __Accounts in this organizational directory only__ (__<Your Azure Tenant>__ only - Single tenant)
- __Redirect URL__ : Do not configure this field at this time. The URL will be provided by Cloud Temple support and should be added to this field later.
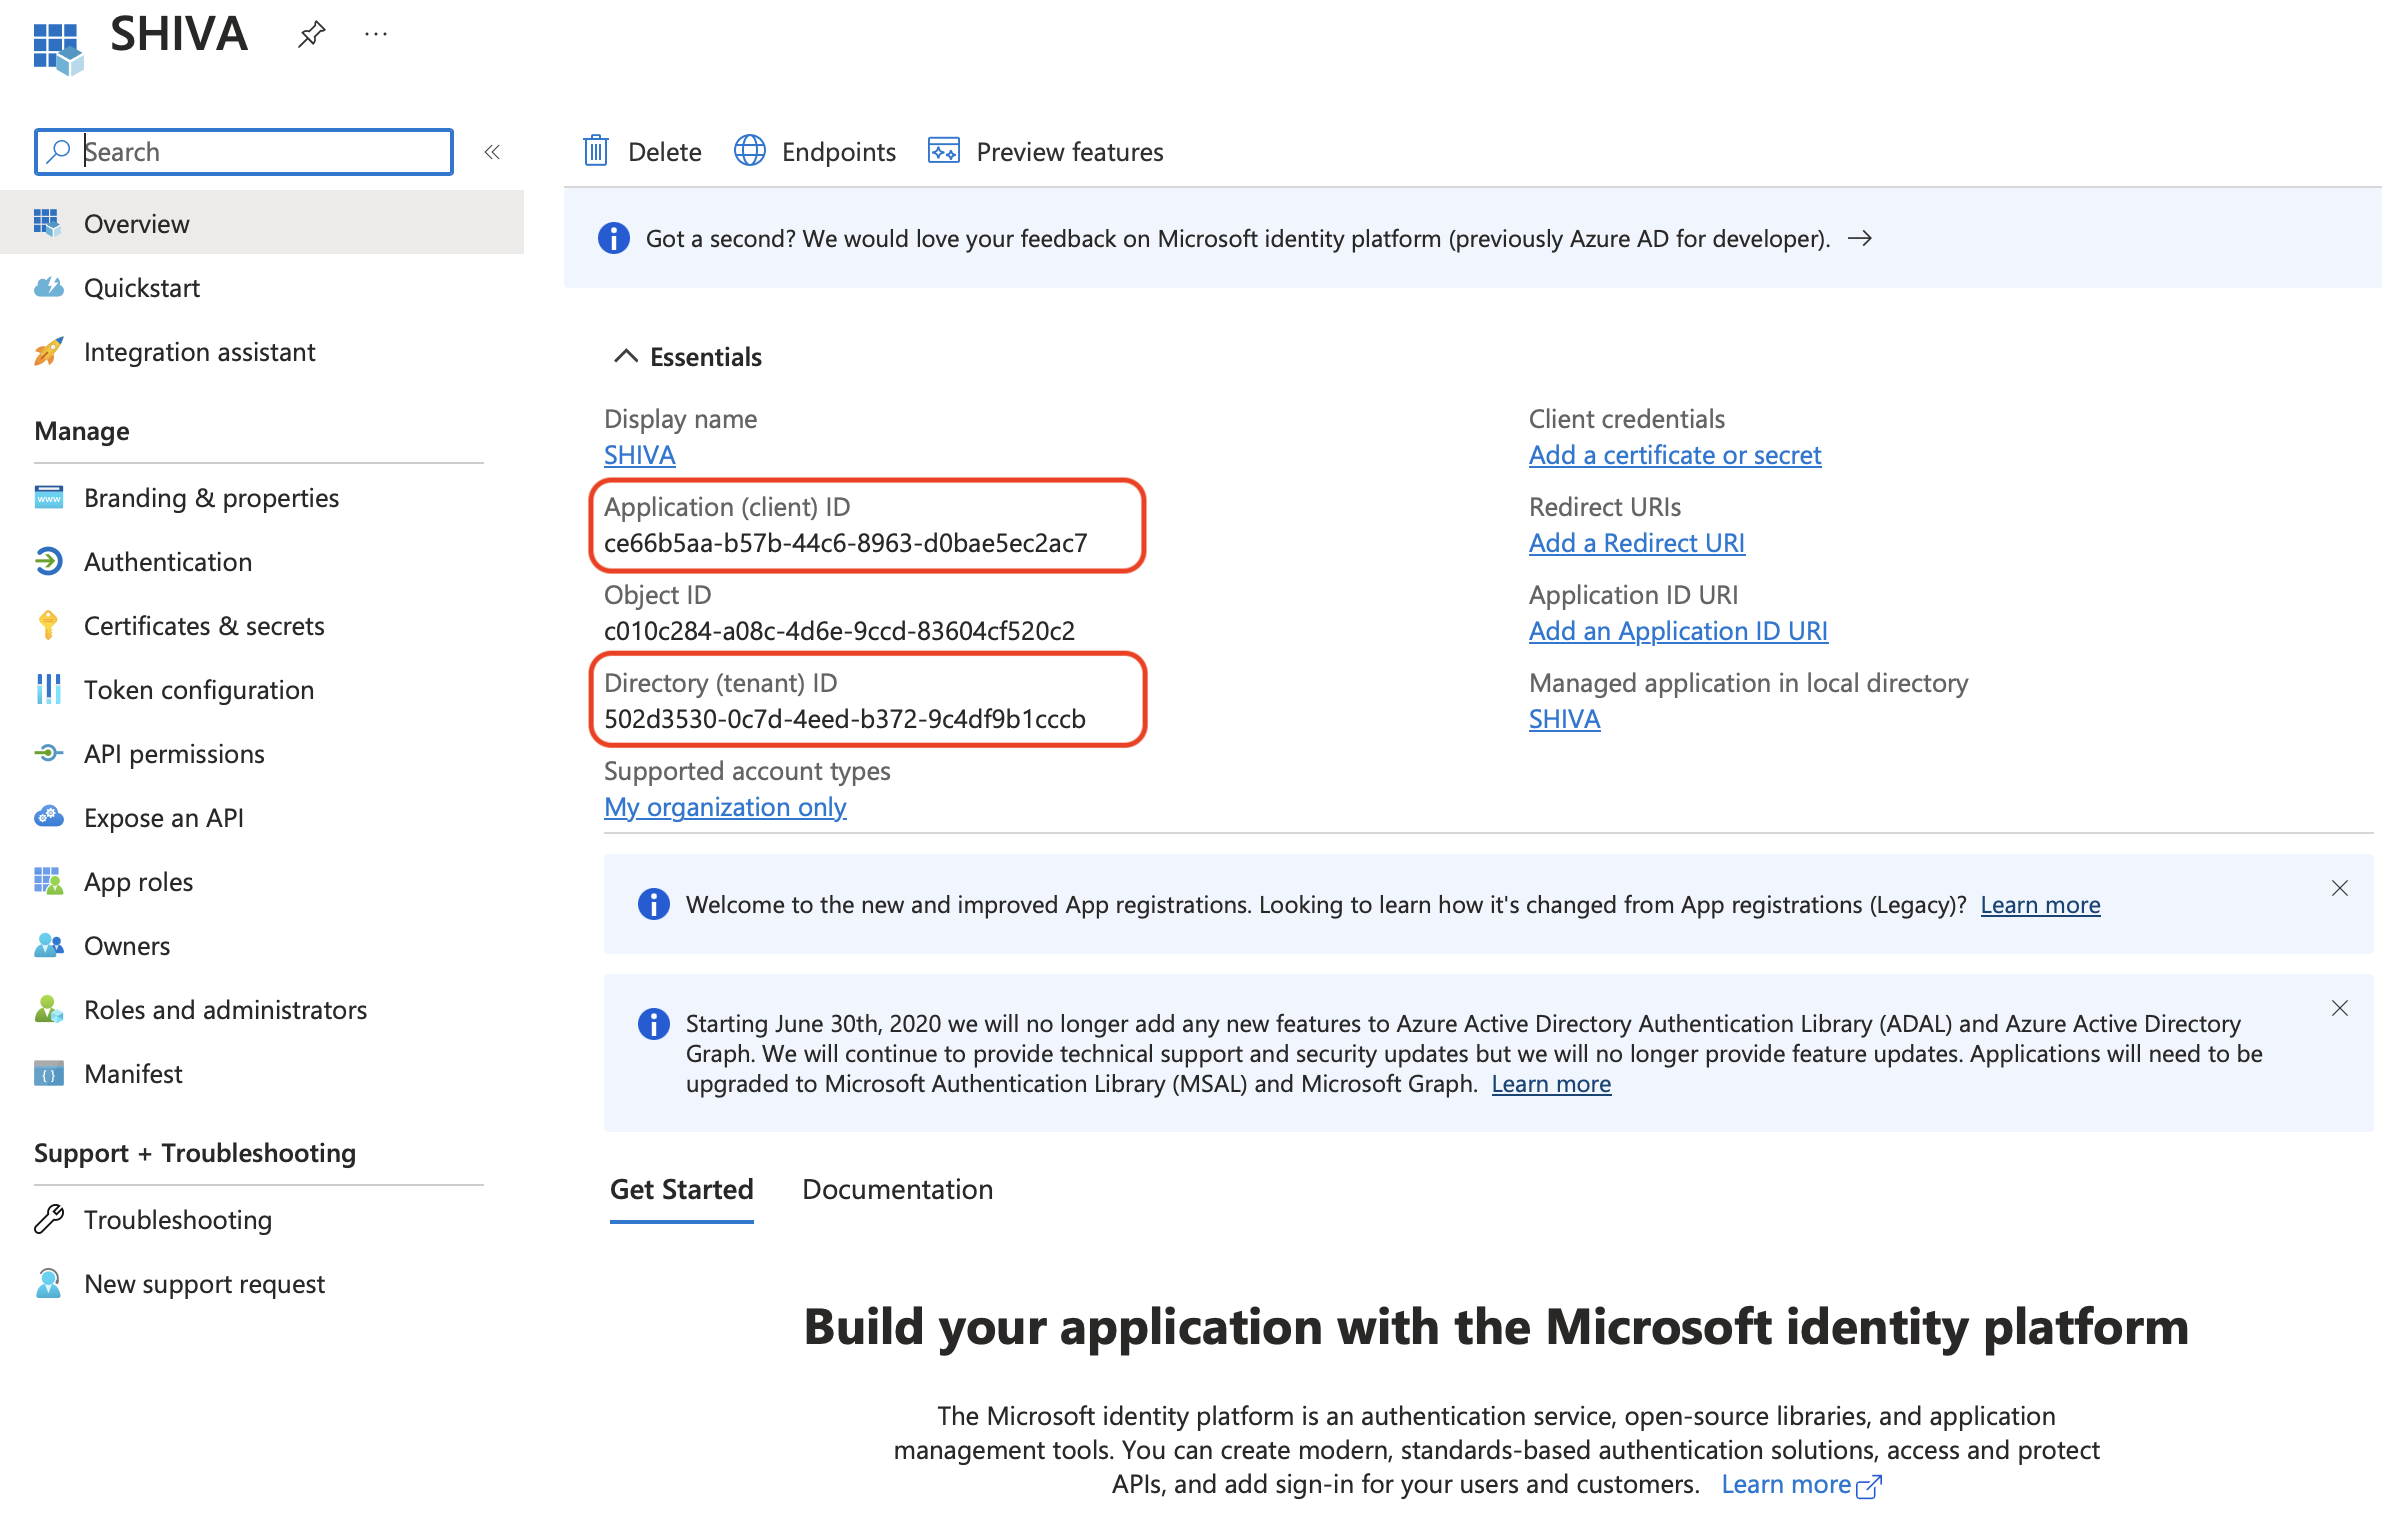
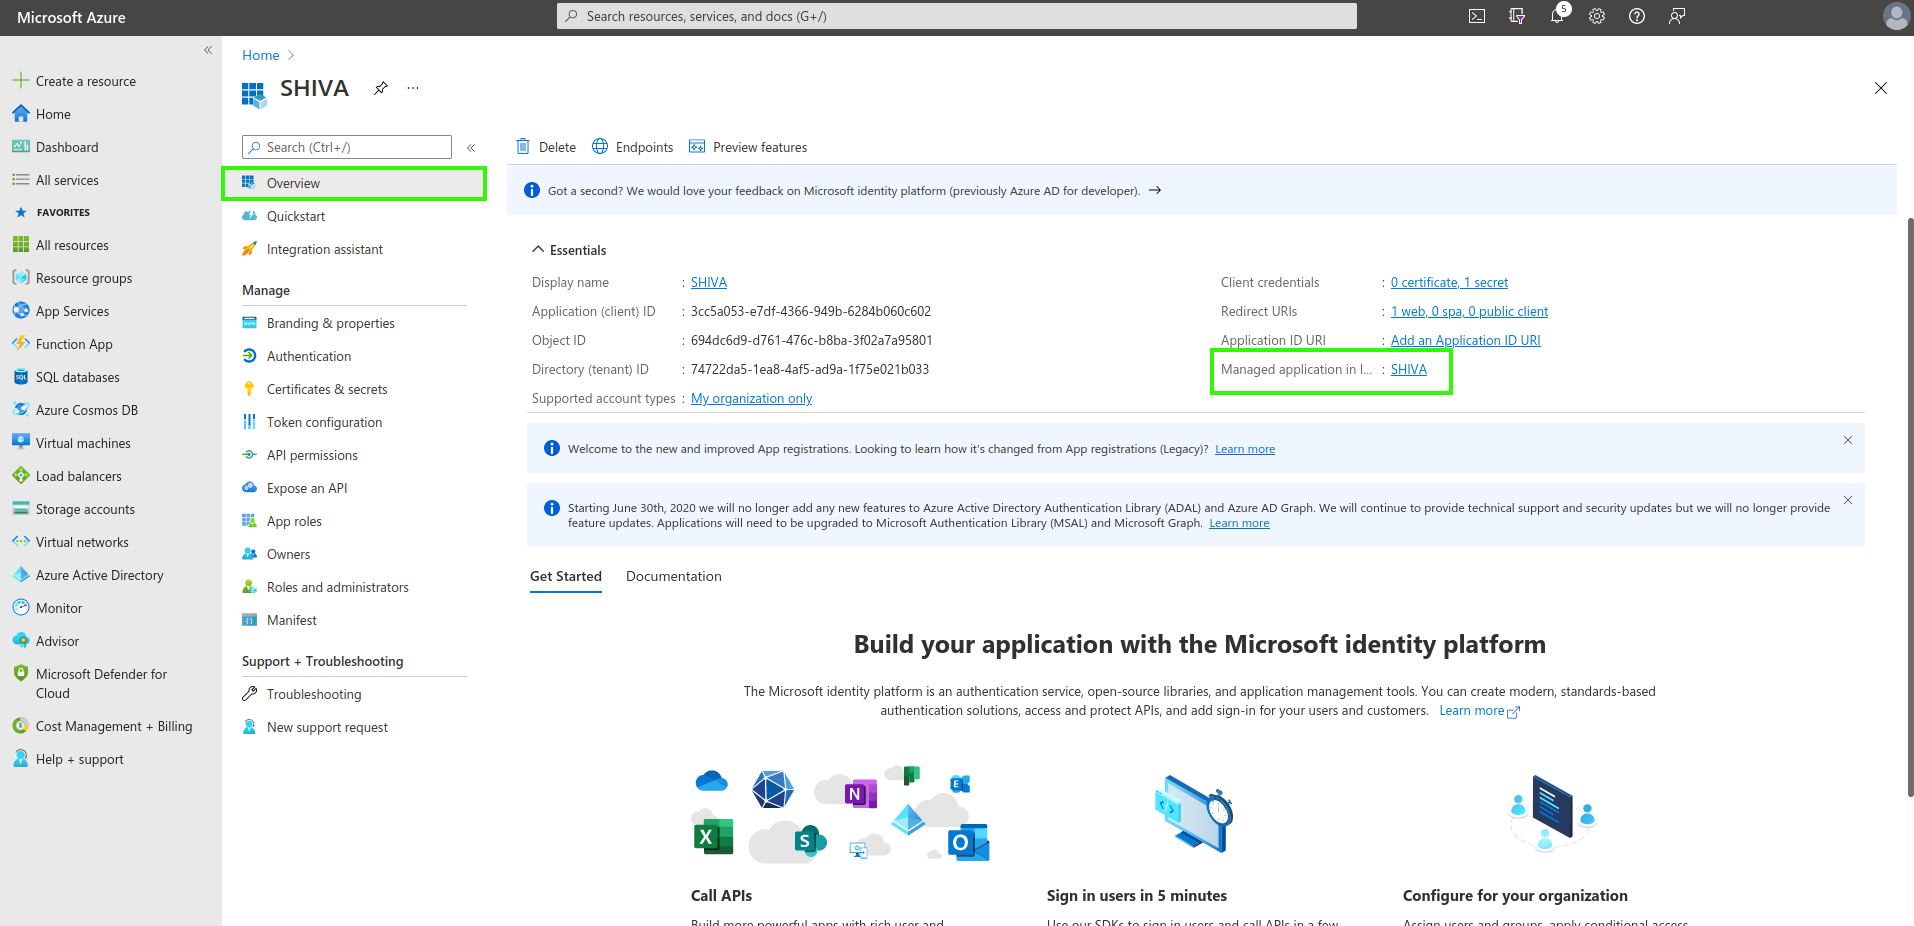
The Application (client) ID and Directory (tenant) ID are the key details to provide in your support request to the Cloud Temple team to enable Microsoft Entra ID authentication for your organization.
Definition of a Secret
In the "Certificates & secrets" tab, create a new secret.
Note: The secret's expiration date cannot exceed 24 months, even with a custom expiration date.
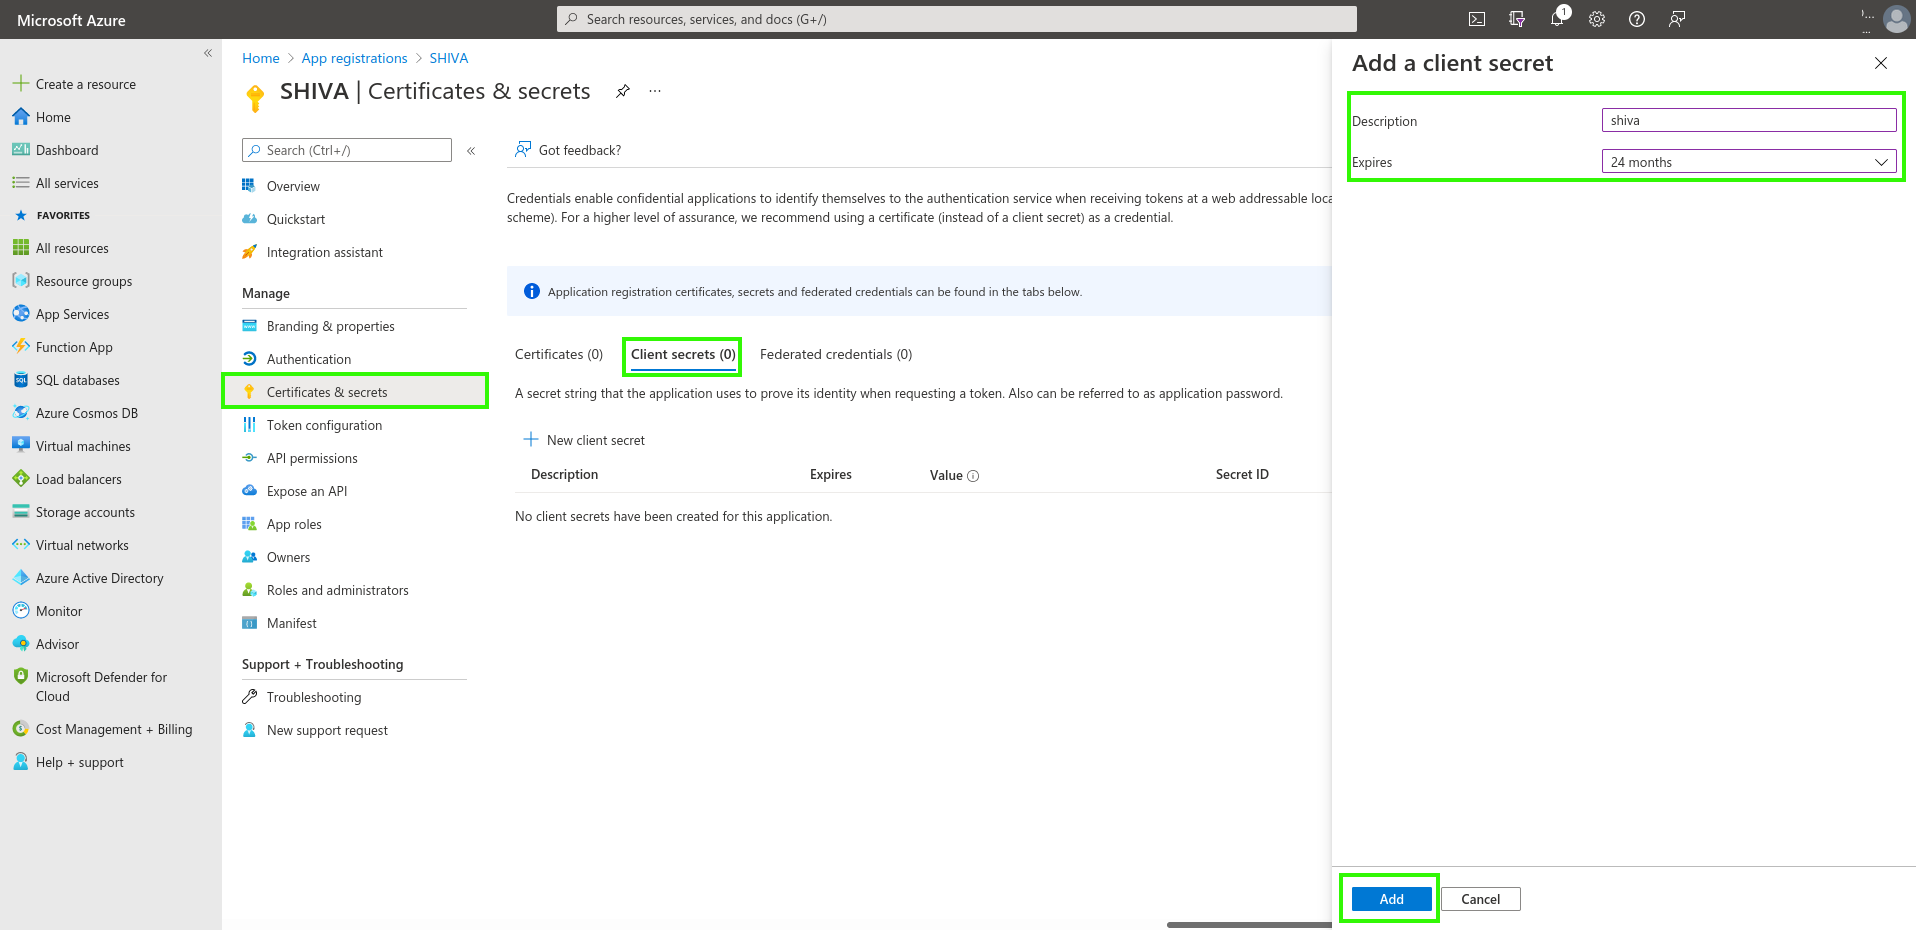
The generated secret will need to be provided in the support request:

Definition of EntraID Token
The EntraID token is required for authentication configuration.
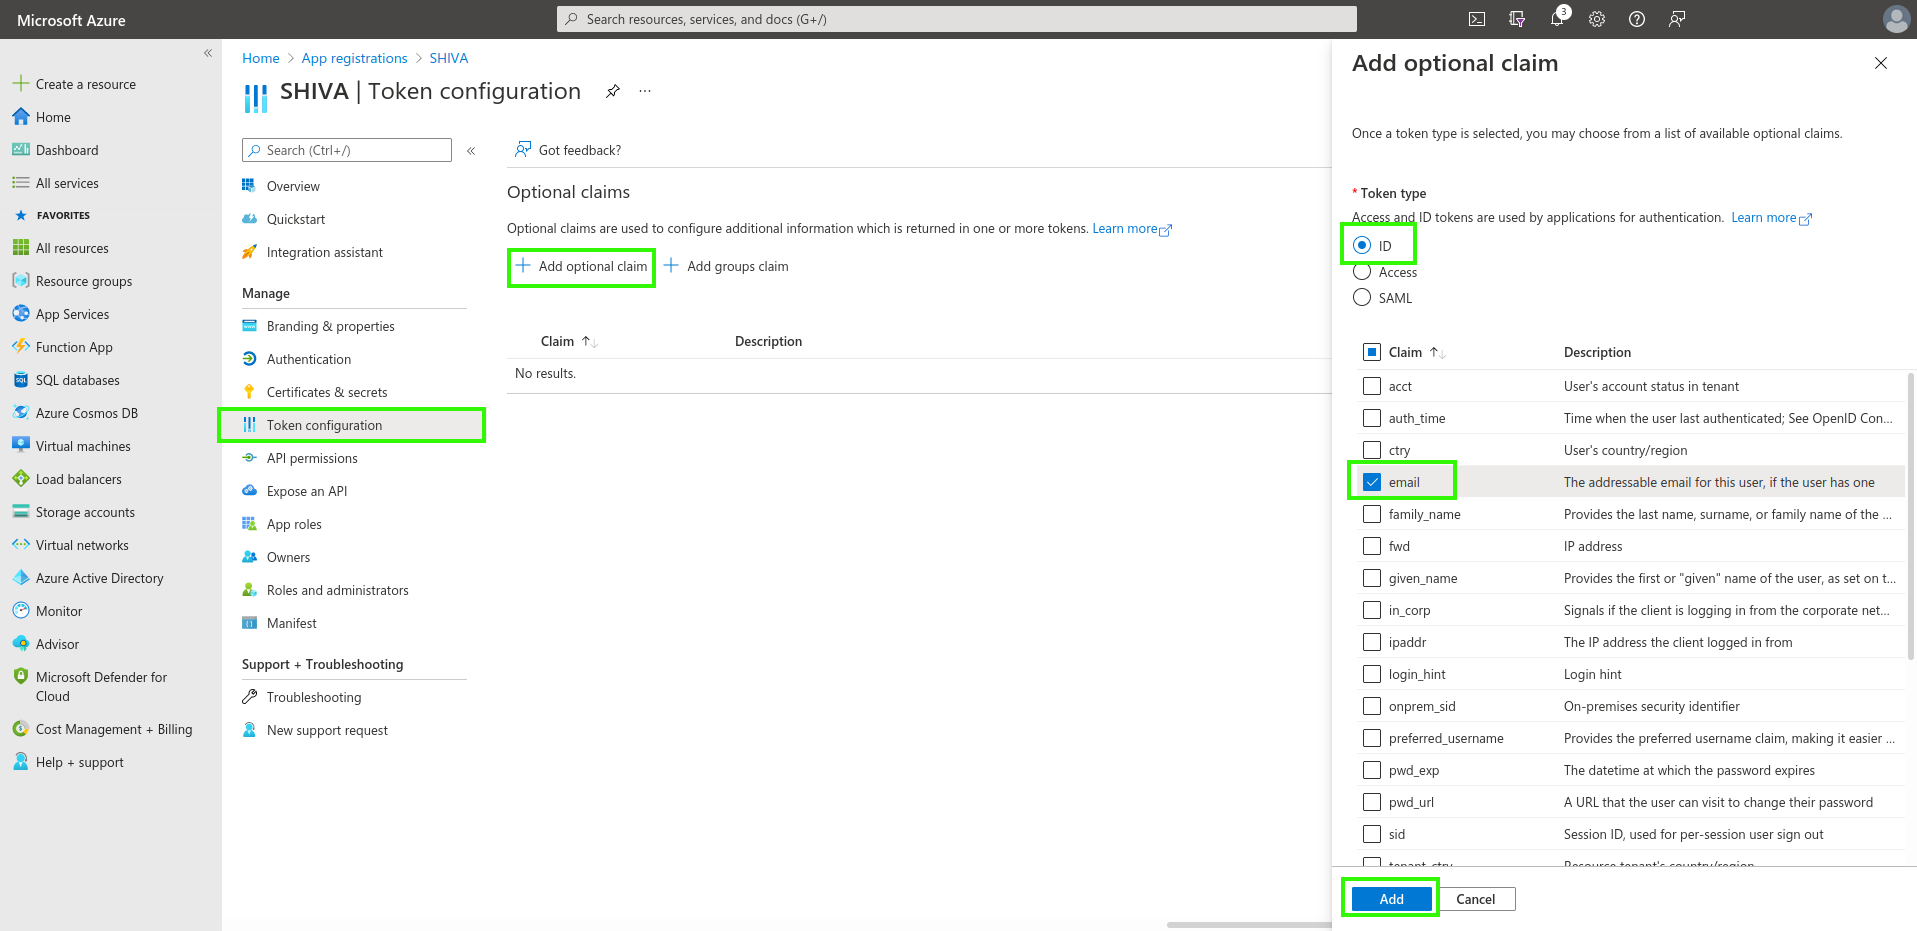
In the _"Token Configuration" menu, click on "Add optional claim". You will need to select "ID" as the token type and check "email".
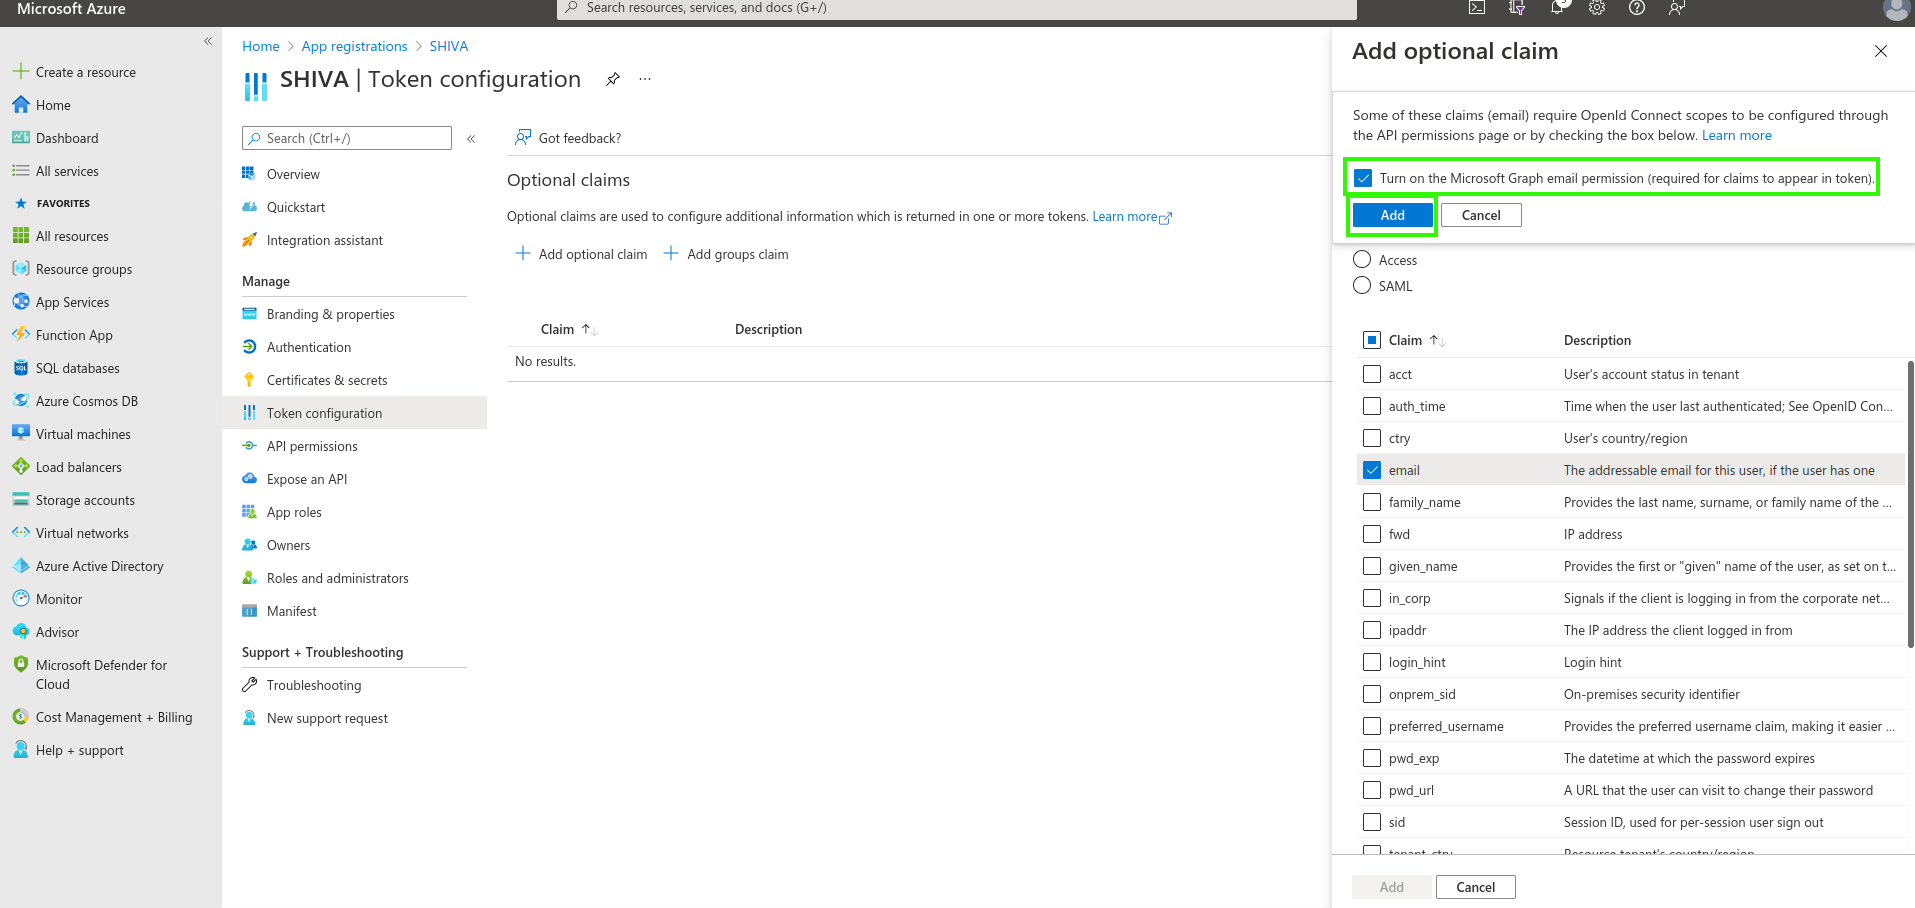
Azure will prompt you to grant a permission allowing you to read a user's email (Microsoft Graph email). Check the box and confirm.
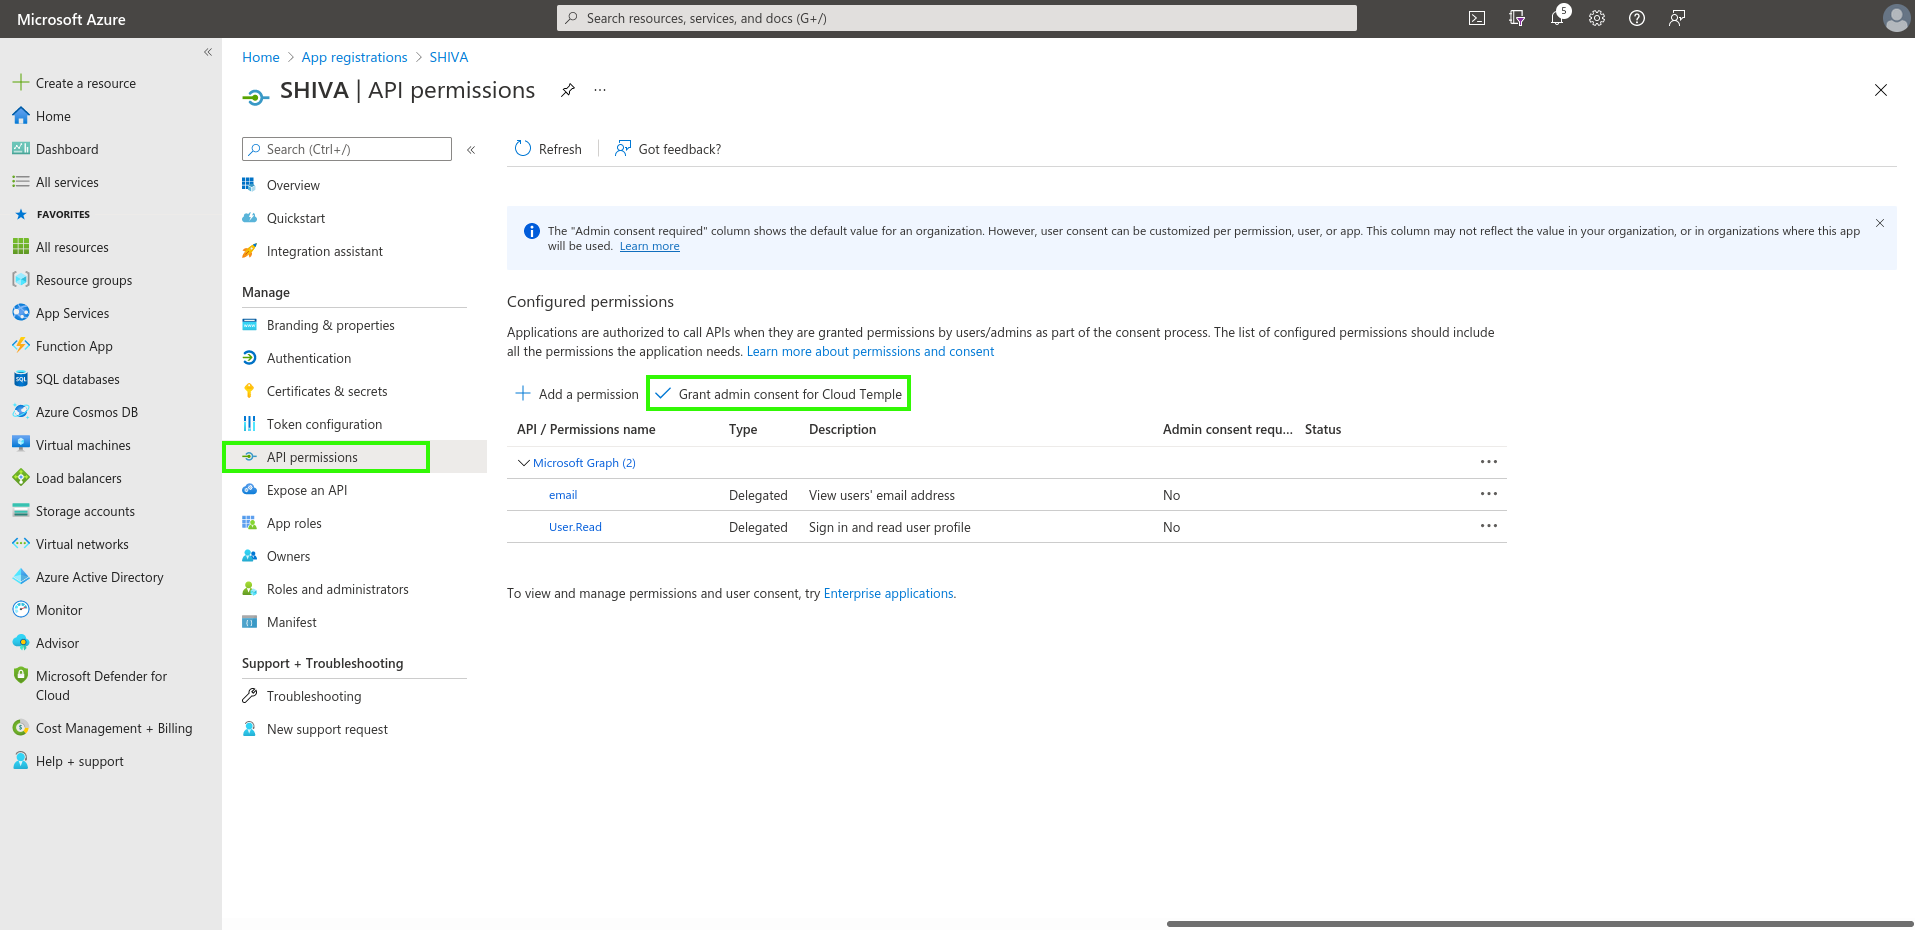
Next, go to "API permissions" and click on "Grant admin consent for Cloud Temple".
Additional Security Configurations (Optional but Recommended)
By default, Microsoft Entra ID, as configured, will allow any user from your Azure tenant to sign in to your Cloud Temple organization.
It is possible to restrict access at the "App Registration" level, allowing only a specific list of users or groups to sign in to your Cloud Temple organization.
Follow the procedure below:
Access additional "App Registration" settings
Option 1
Go to the "Overview" tab, then click on the application name (the link located next to "Managed application").
Option 2
Go to "Enterprise applications" and search using the name of the previously created application.

Authentication restriction to users assigned to the application
Indicate here the requirement for user assignment to the application to allow authentication:
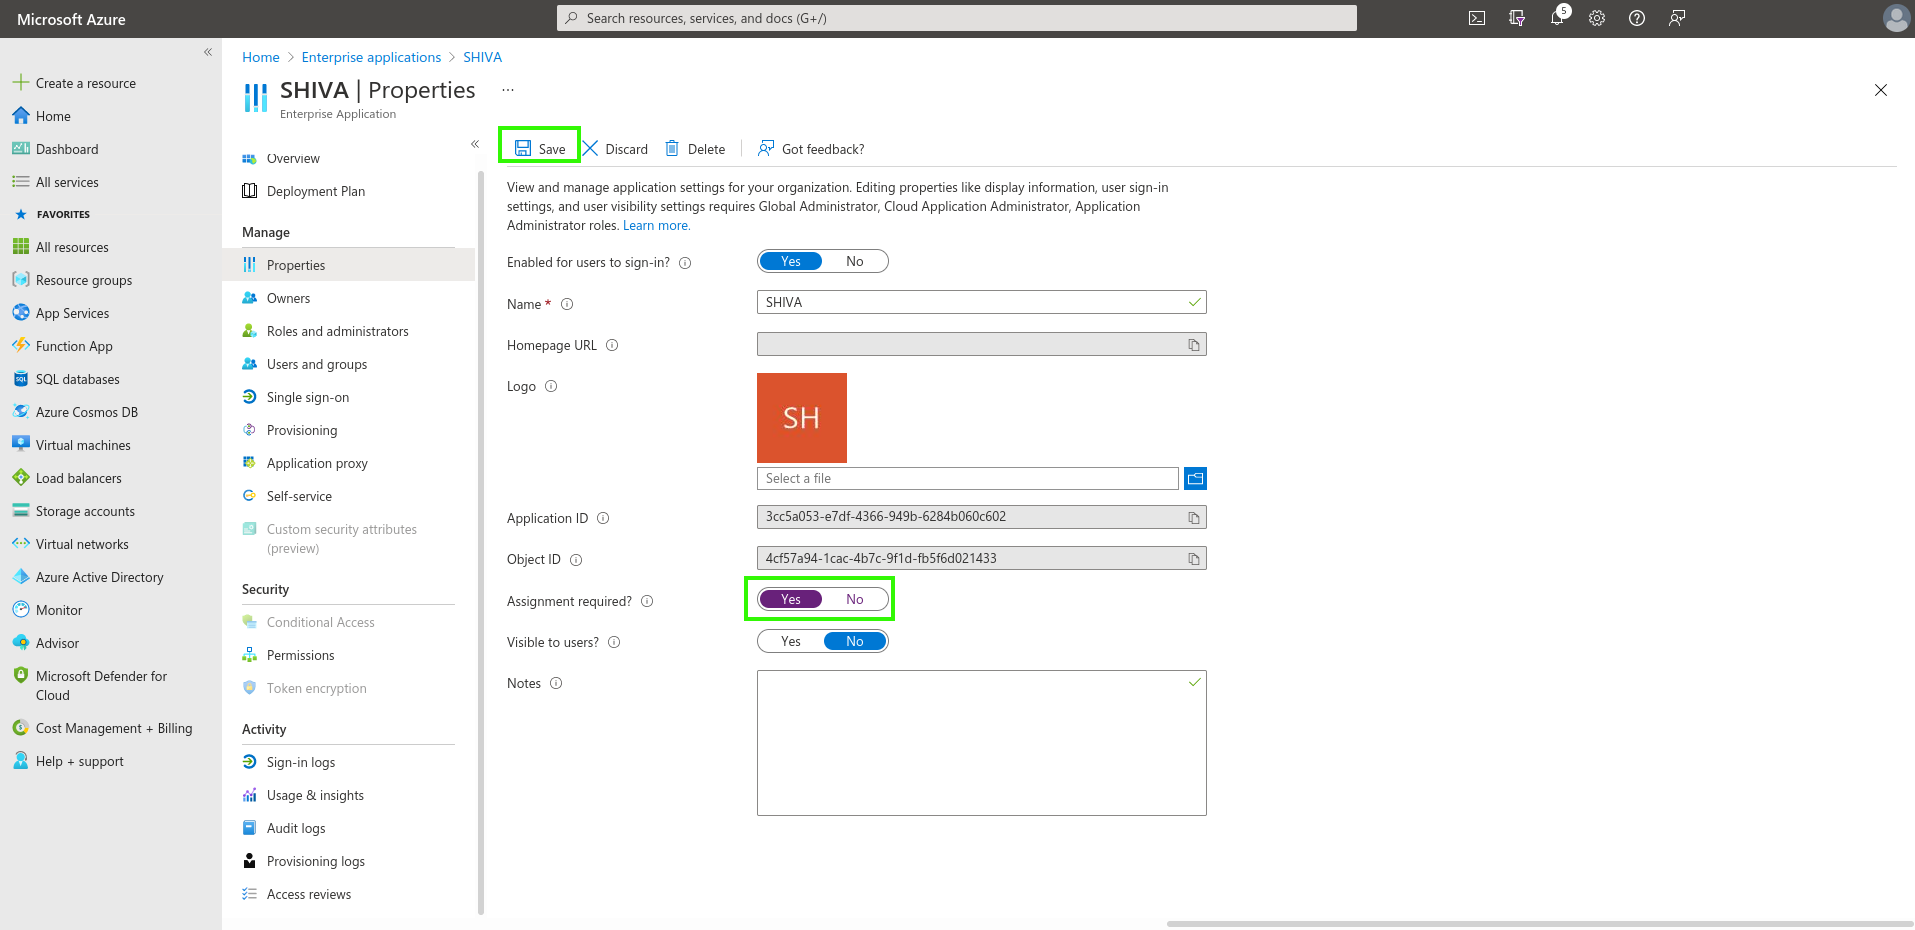
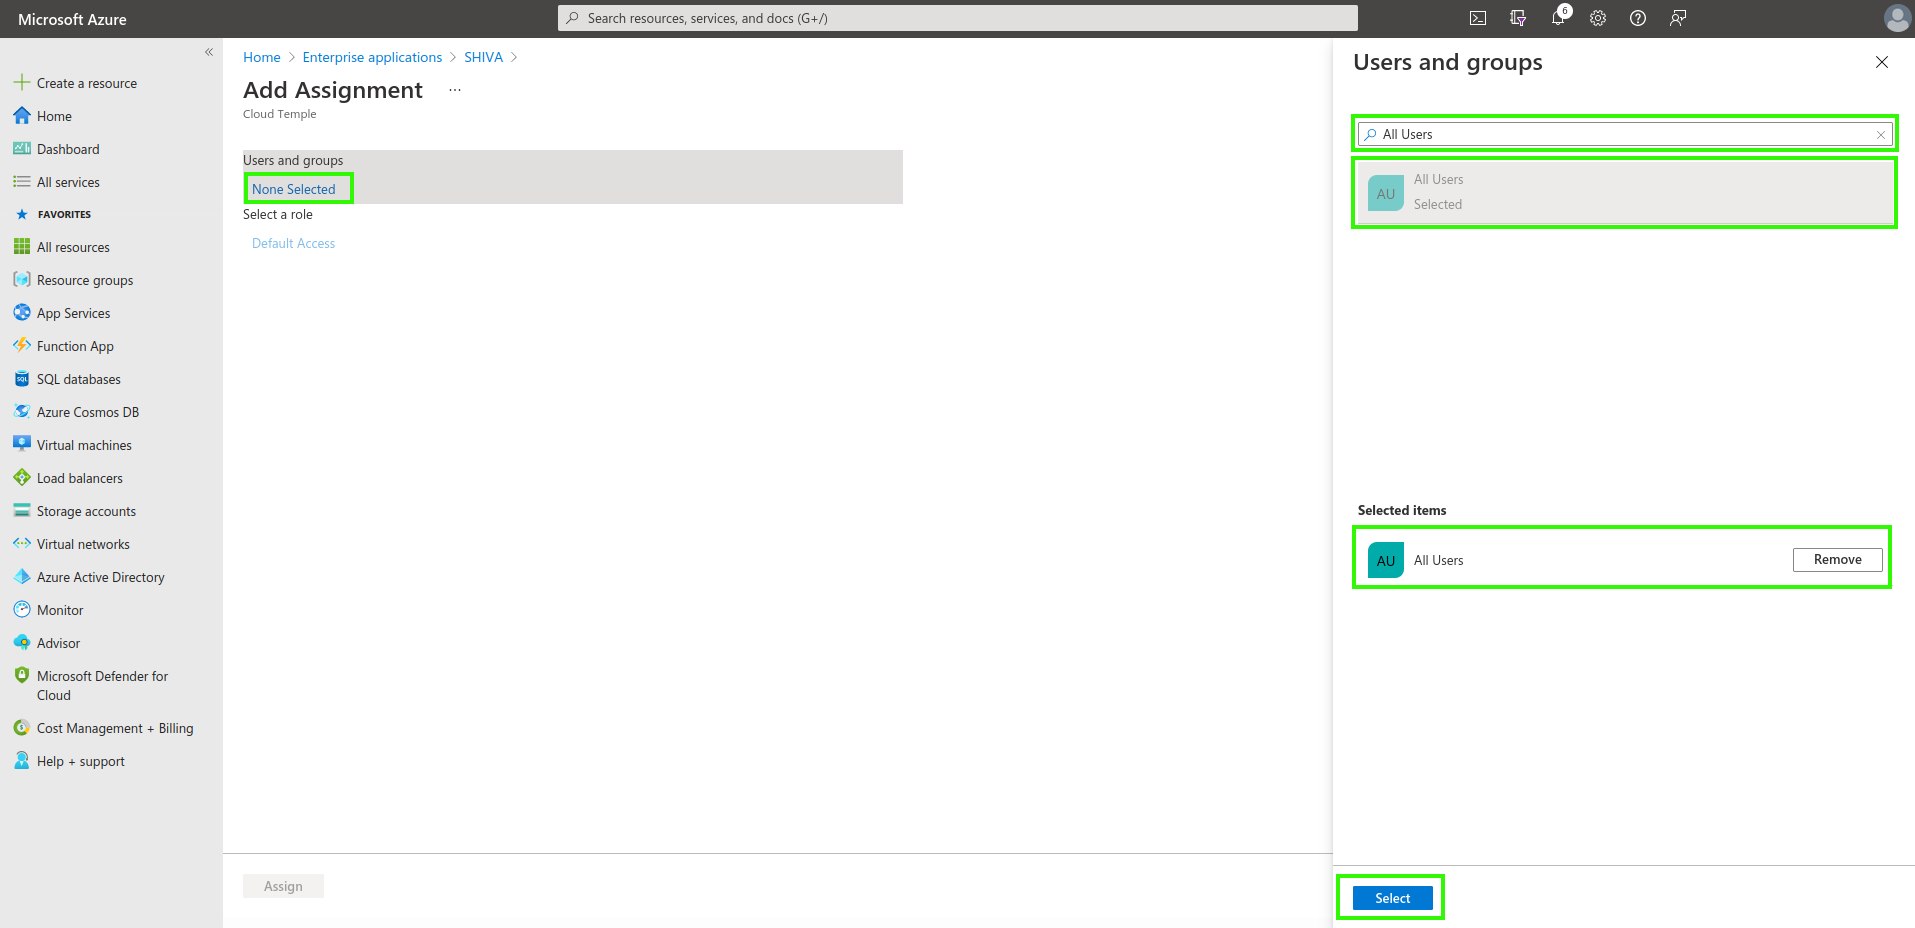
Assigning Users and Groups to the Application
Only users and groups assigned to the application will be able to sign in to your Cloud Temple organization via the app registration.
Finally, simply apply the assignment by clicking "Assign".
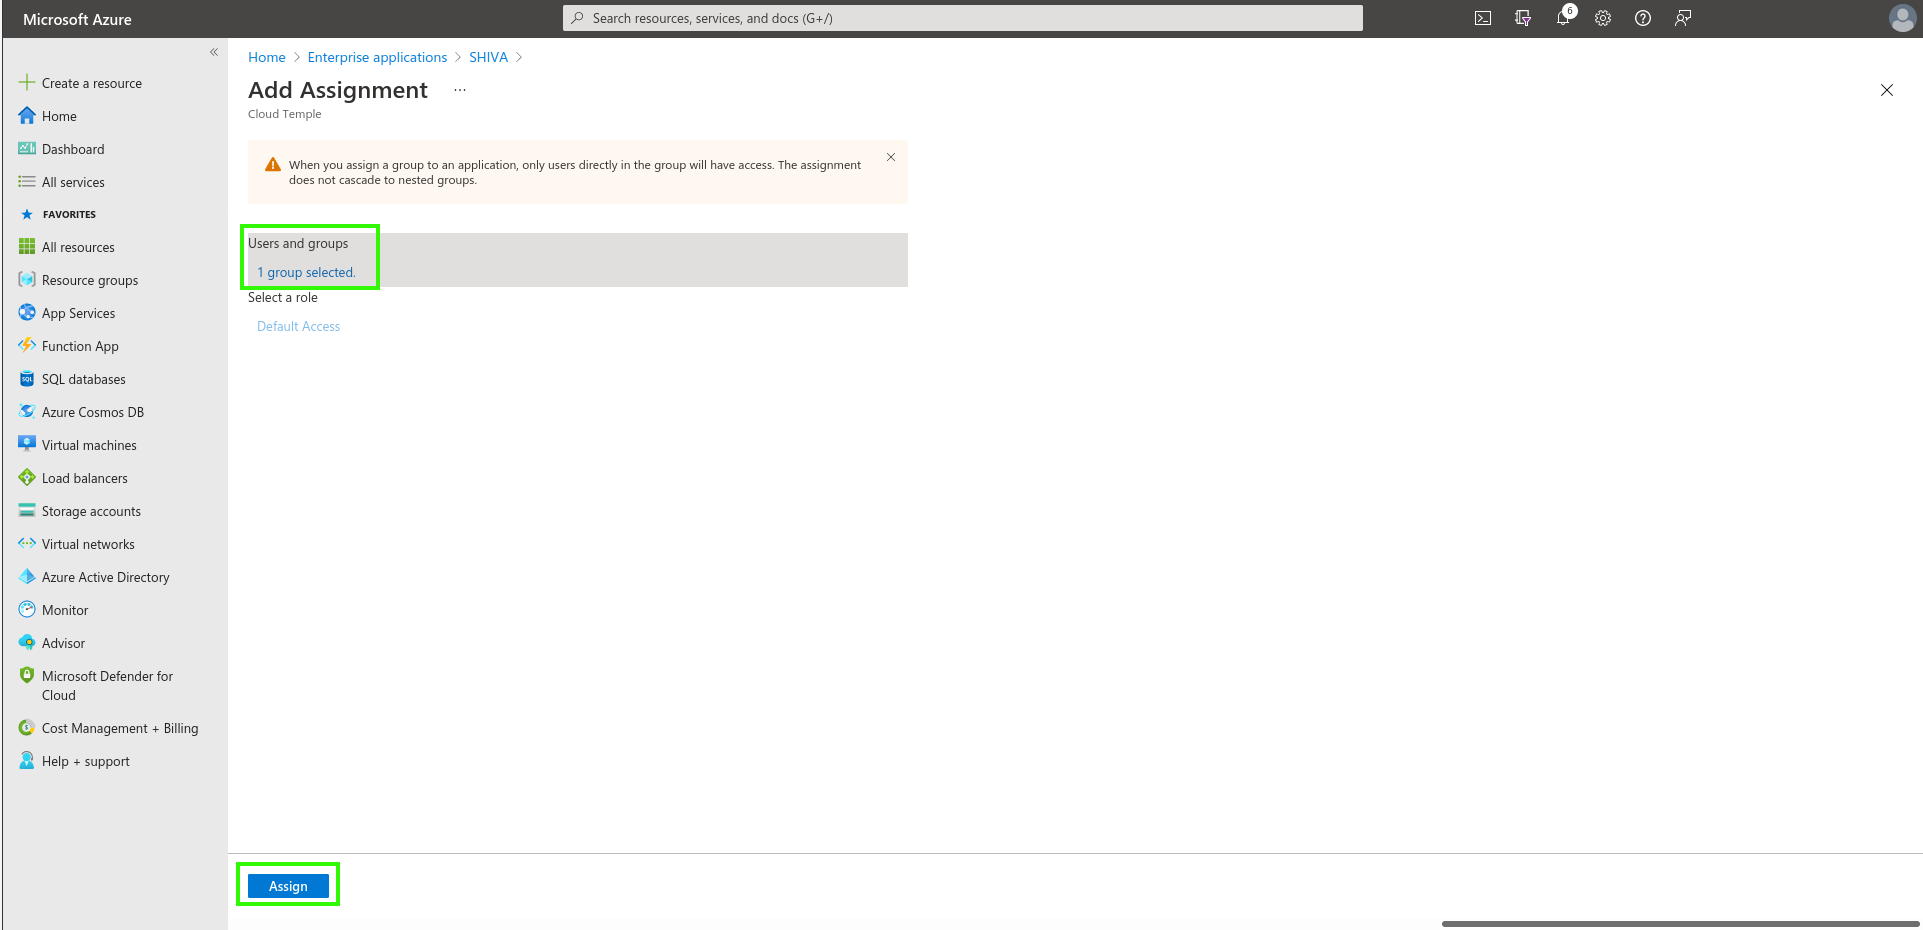
From now on, assigned users will be able to sign in to your Cloud Temple organization through the created application.
Step 2: Request SSO (Single Sign-On) Configuration for Your Organization
This configuration step is performed at the organization level by the Cloud Temple team.
To proceed, submit a support request in the console indicating your intent to set up Microsoft Entra ID SSO.
Please include the following information in your support request:
- Name of your Organization
- Name of a contact person, along with their email address and phone number, to finalize the configuration
- Application ID (unique identifier associated with the previously created application)
- Directory ID (corresponds to the Azure AD tenant ID in Azure)
- Secret (secret associated with the previously created application)
Once the configuration is completed on the Console side, the designated contact will be notified.
Step 3: Finalize the Configuration
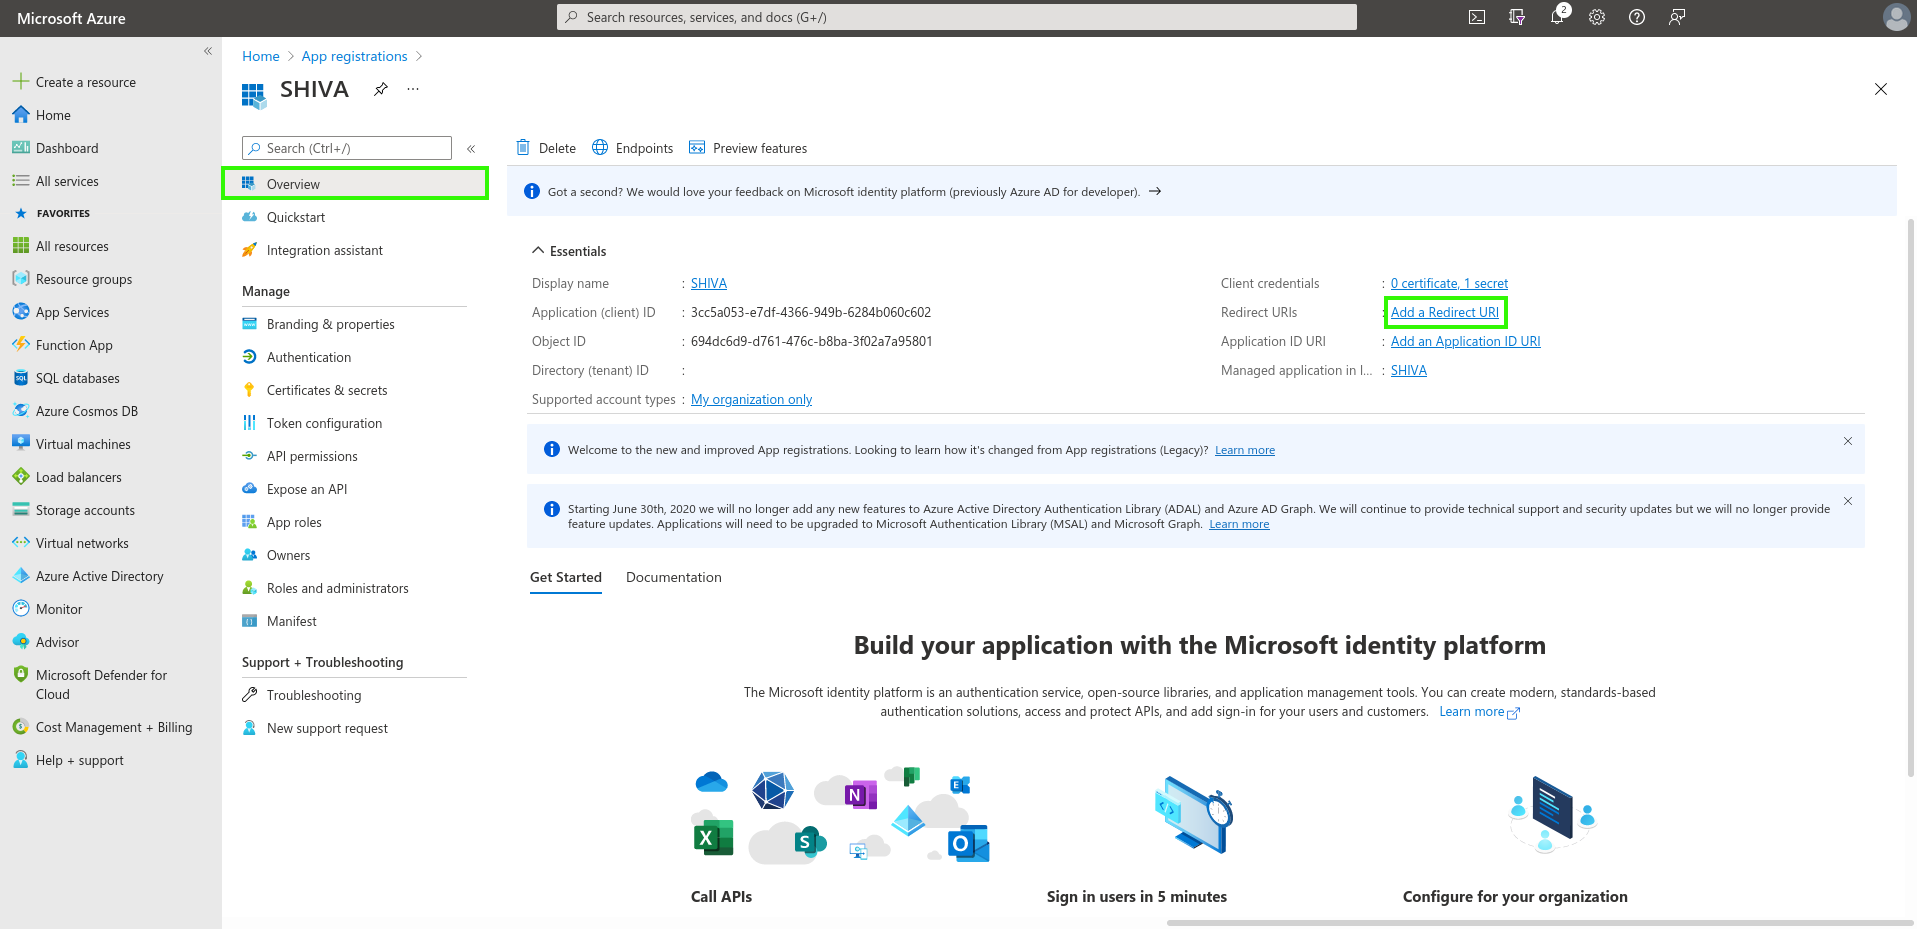
On the App Registration home page, in the Overview menu, click on "Add a Redirect URL".
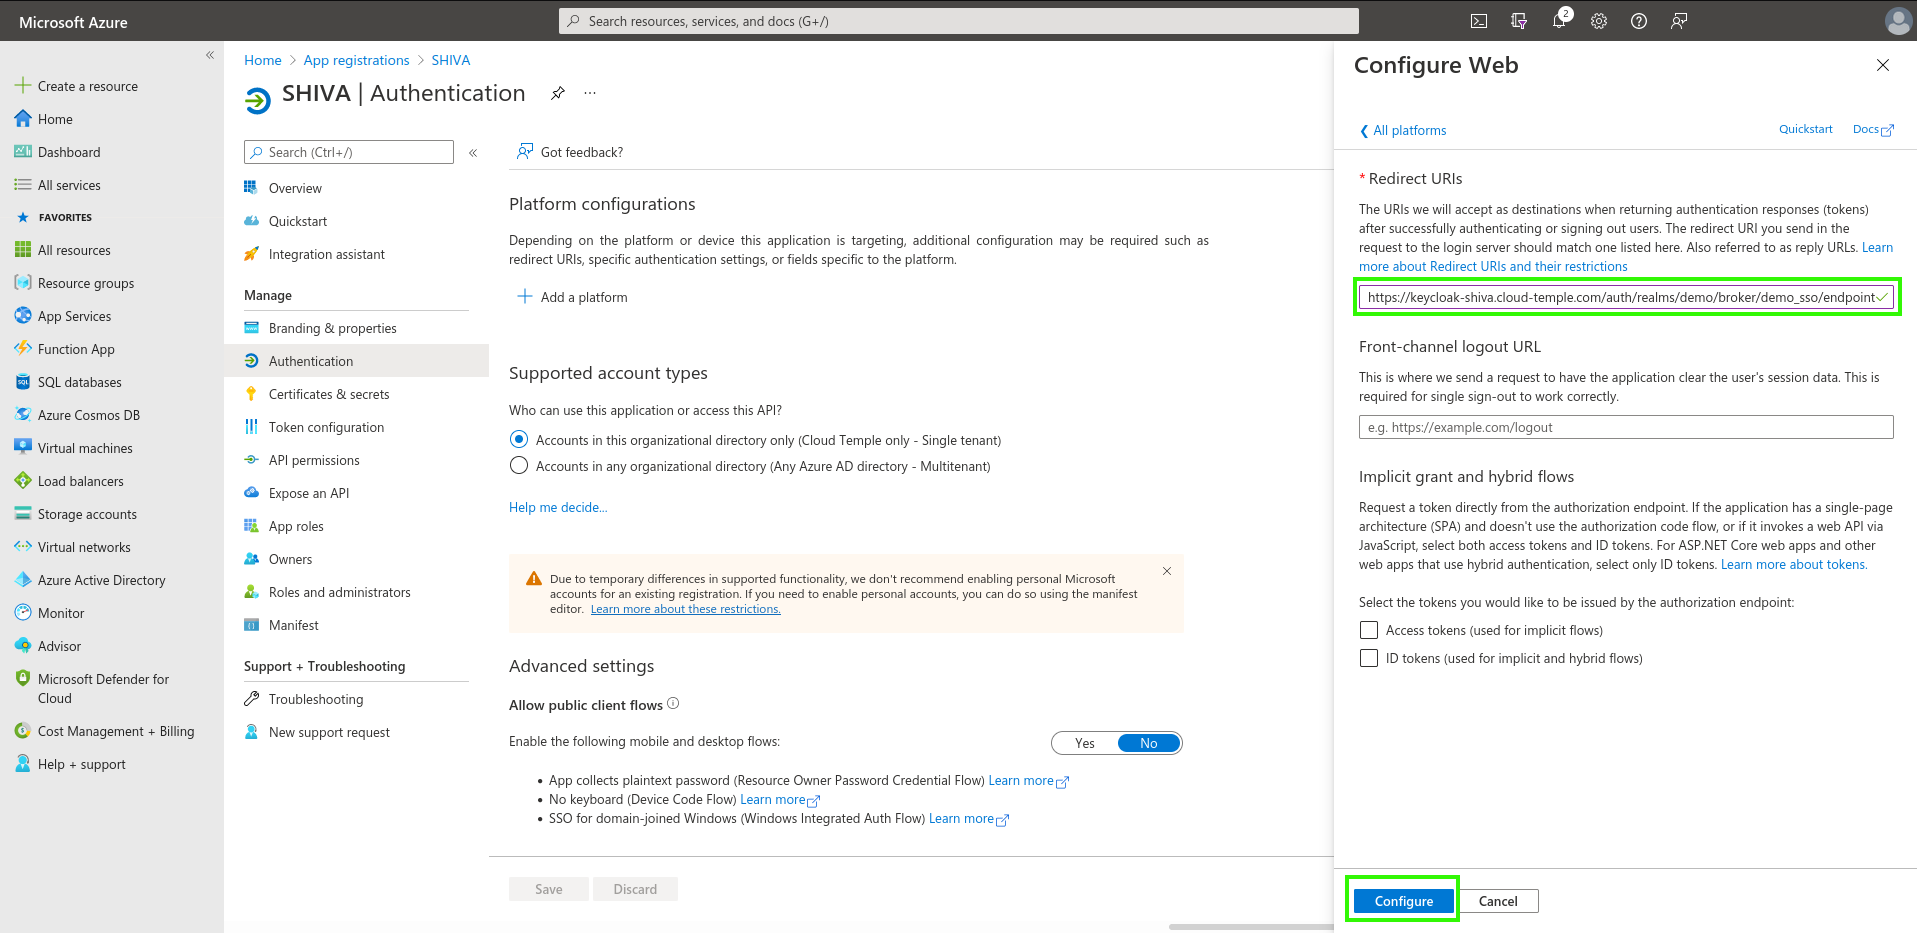
Next, go to "Add a platform" and add one of type Web.

Simply enter the "Redirect URL" provided by the Applications Product Team.
You should see this result once the "Redirect URL" has been added.
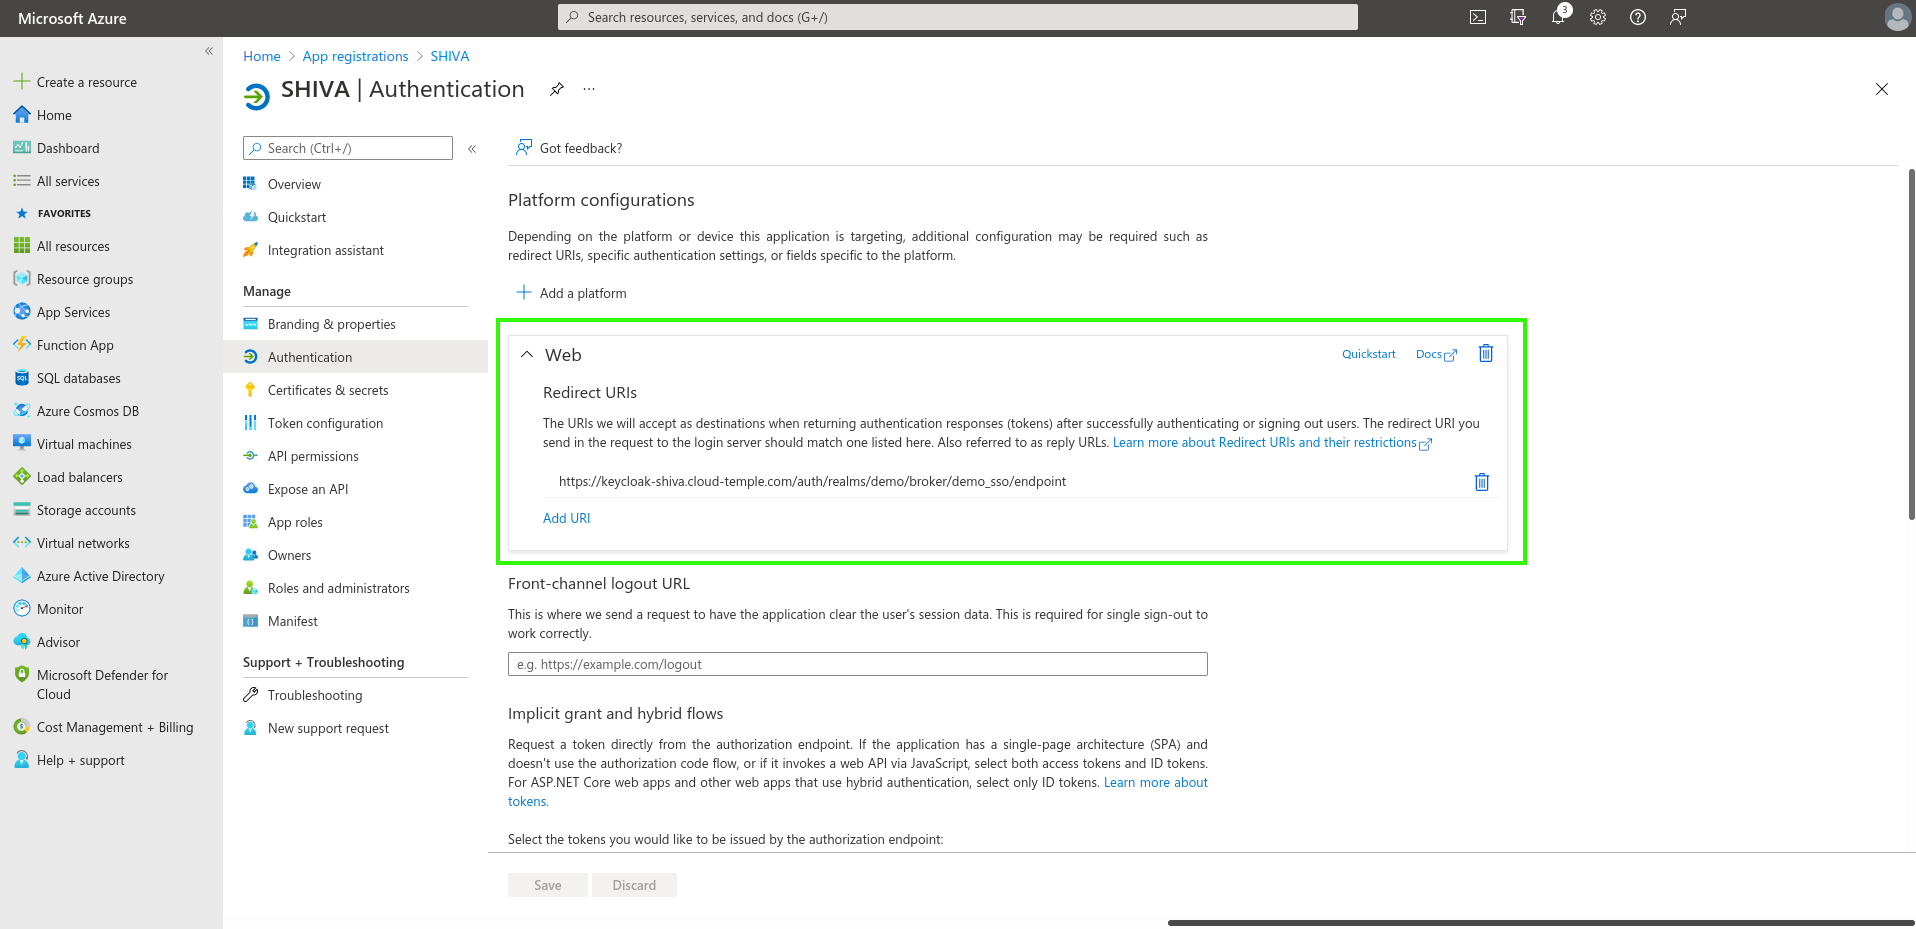
It may take a few minutes for the "Redirect URL" configuration to take effect.
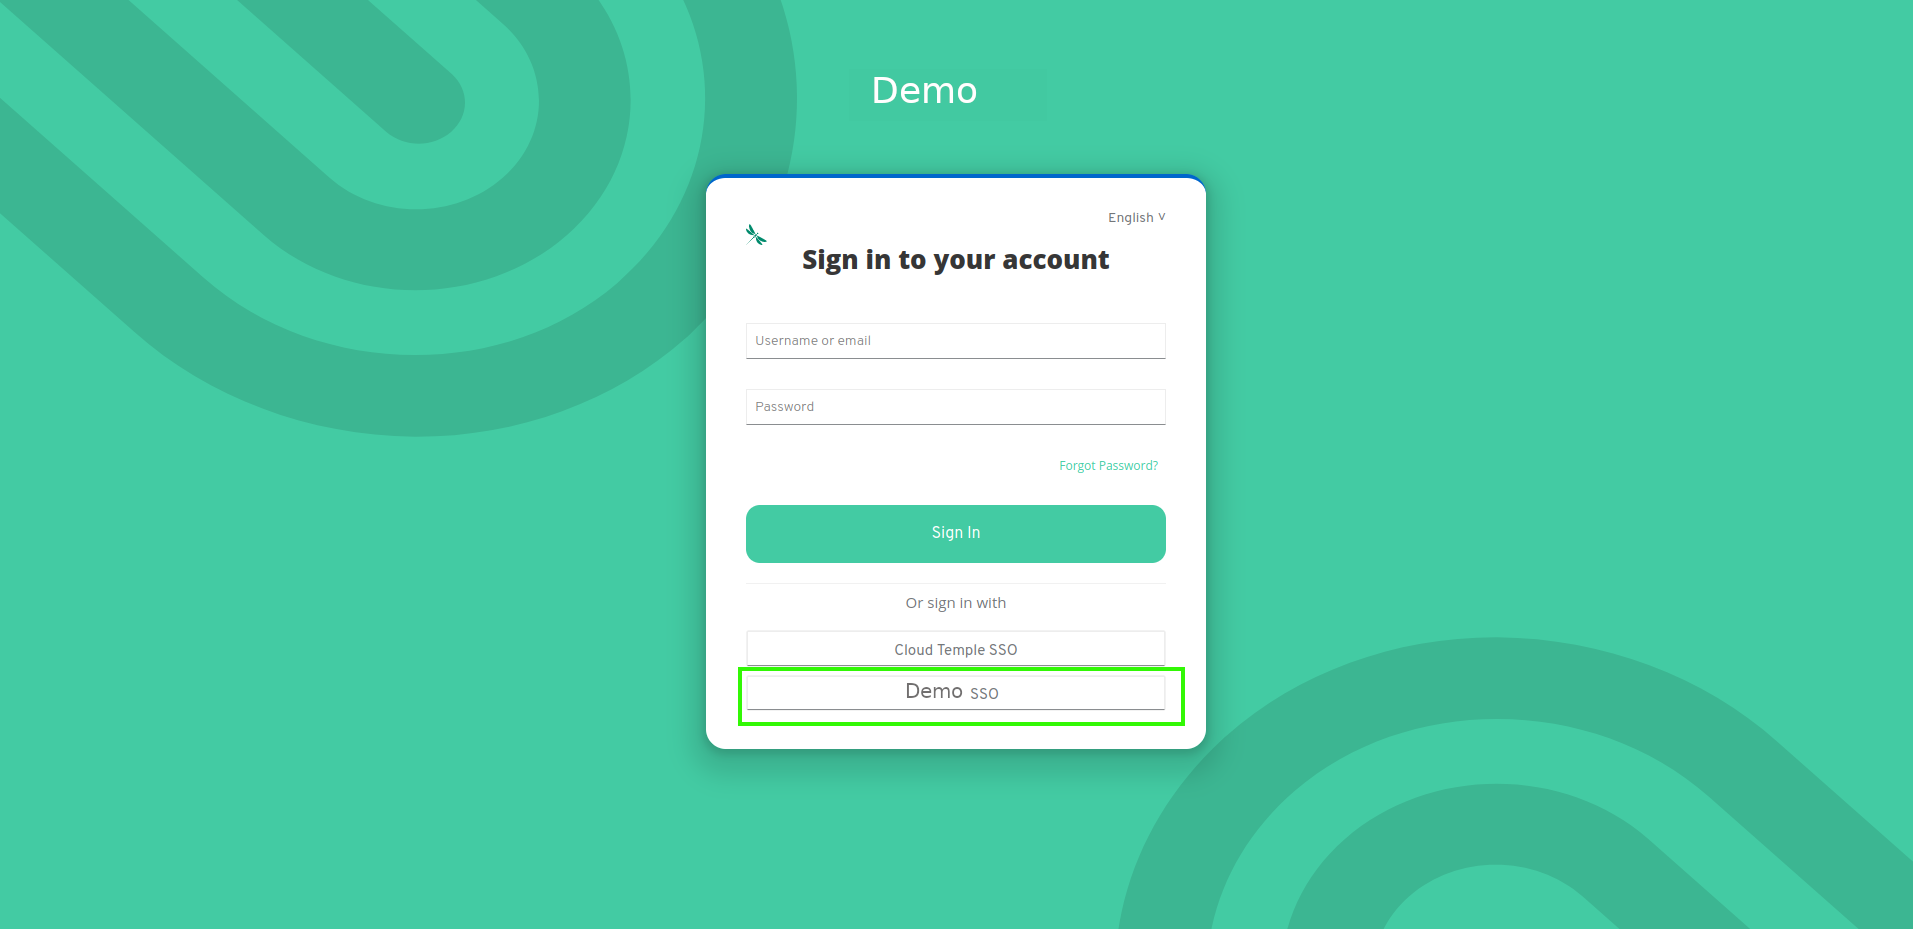
Once all steps are completed, you can authenticate to your Cloud Temple organization using your SSO.