Concepts
Users
Console access accounts are created by the sponsor's master account by invitation (regardless of the authentication repository). Credentials are global to your Organization.
Note: Identity federation is managed at the organization level
Creating a user account in your organization
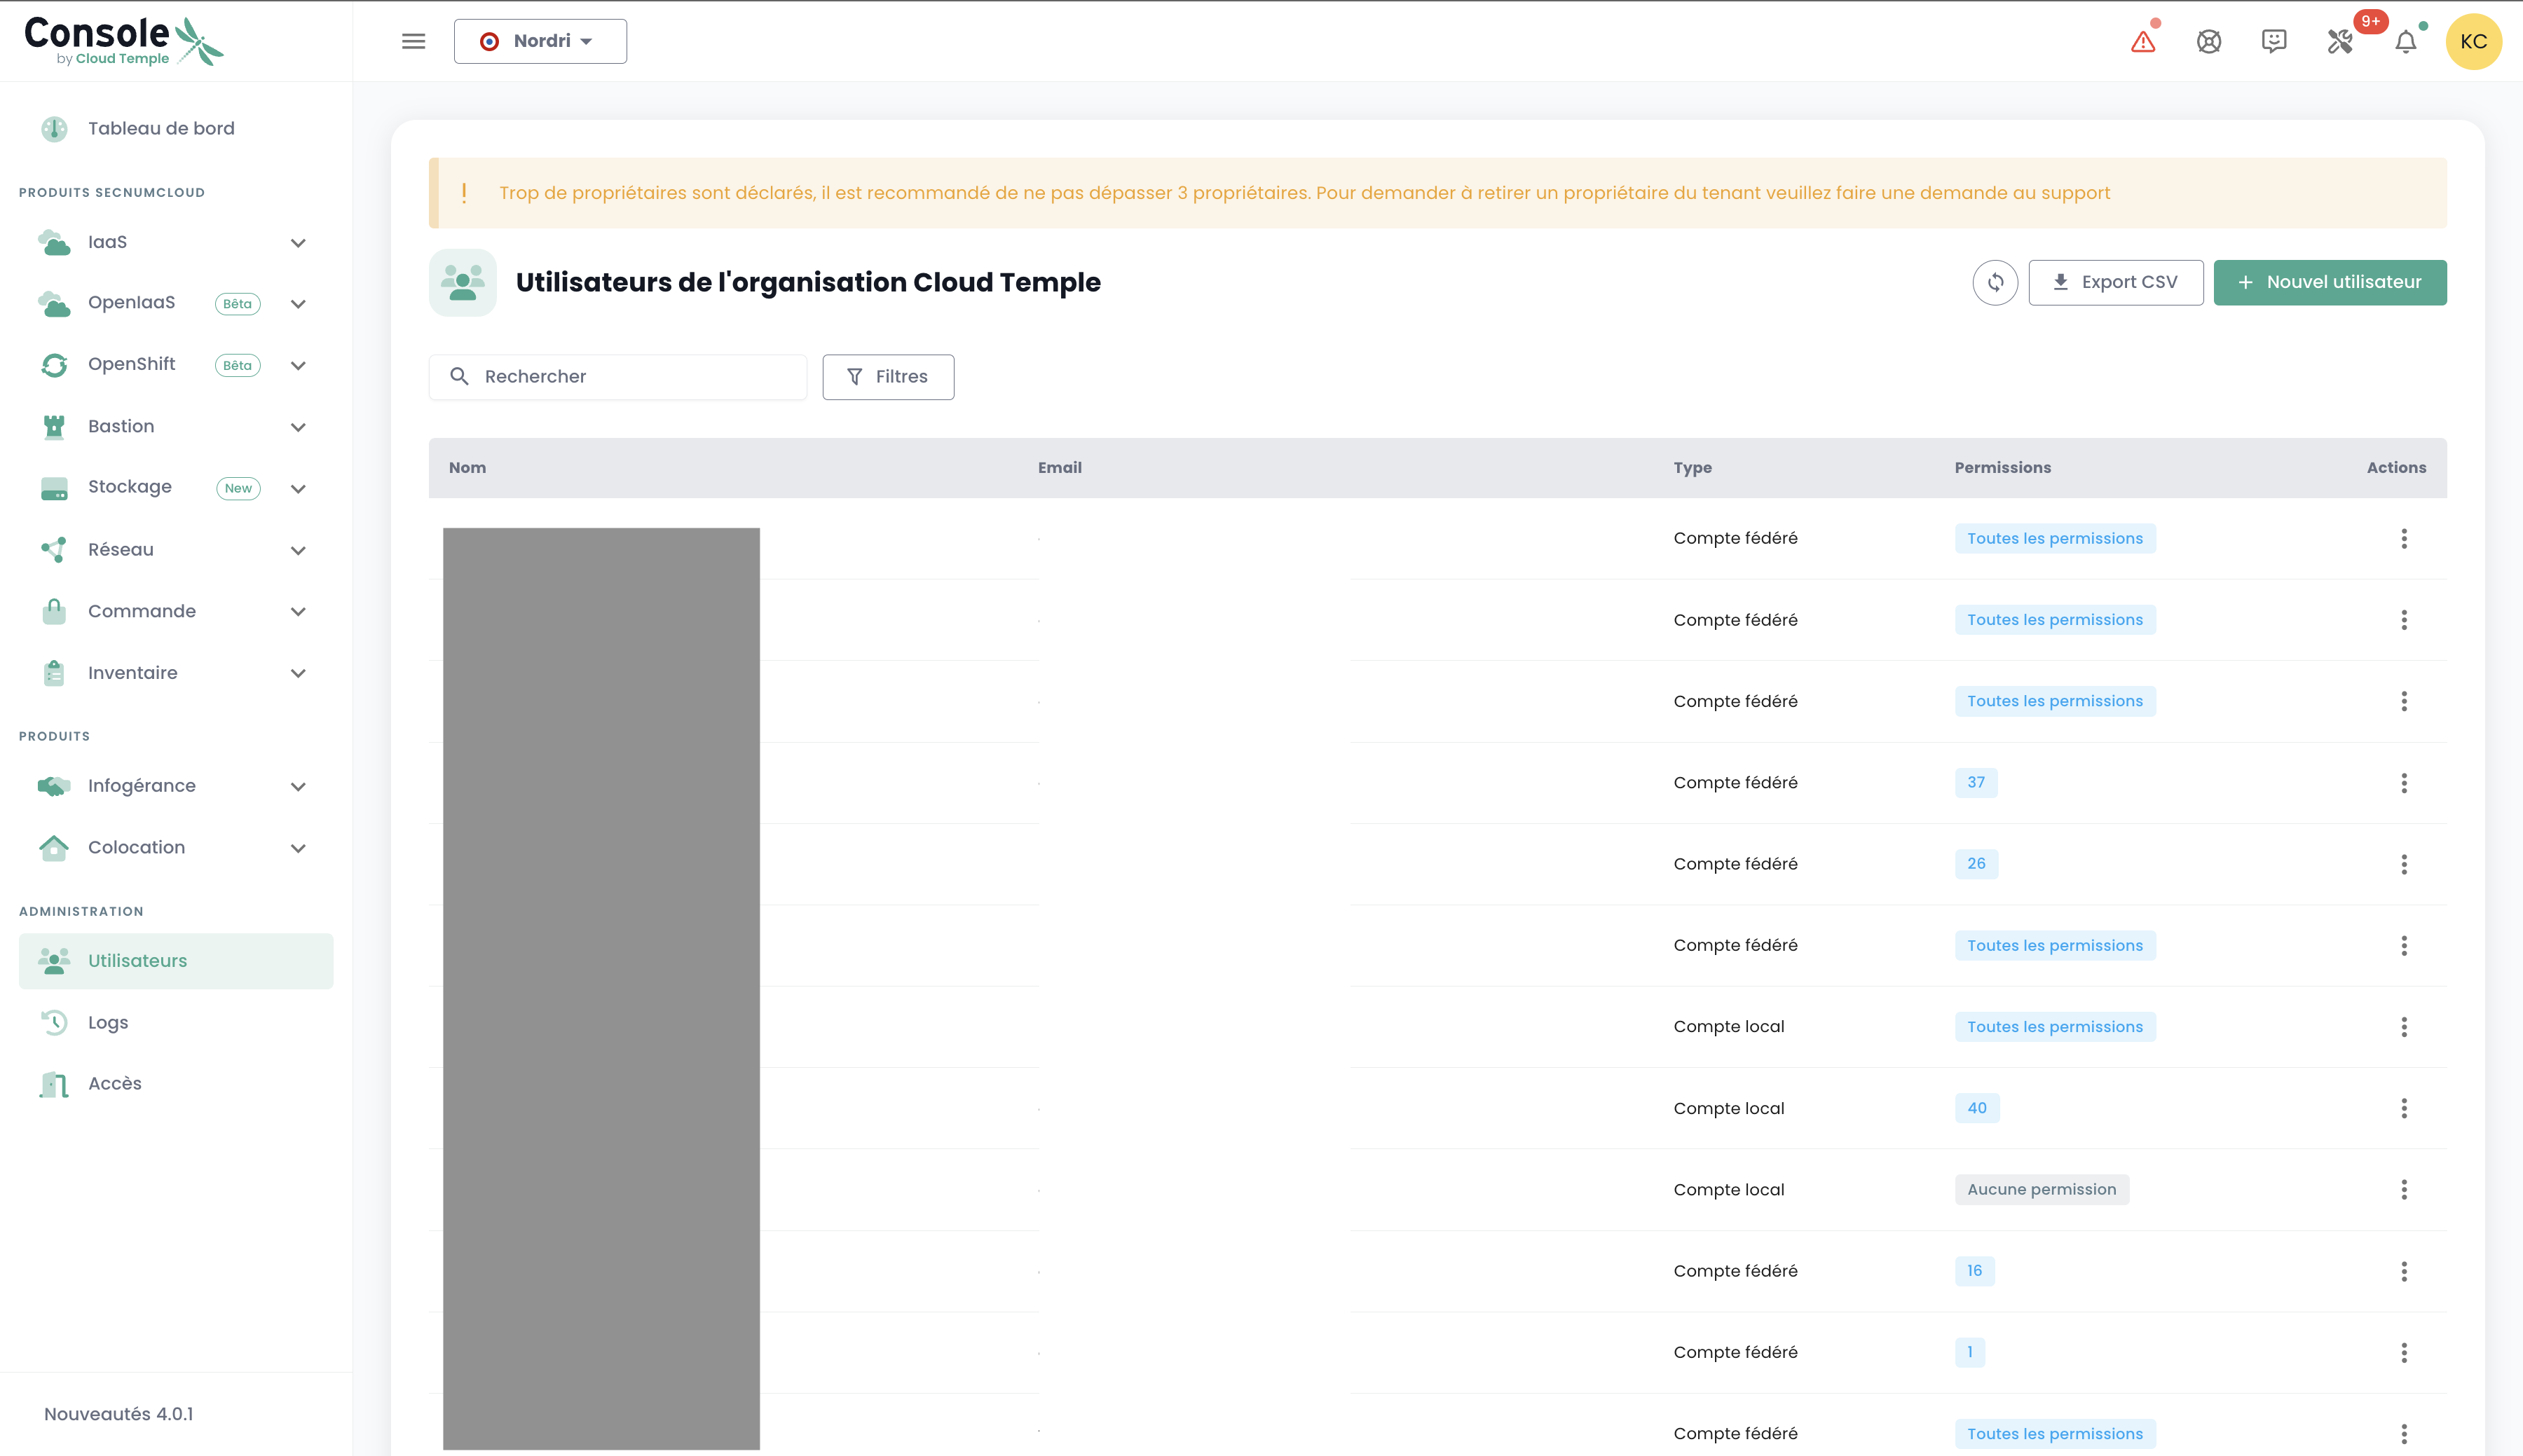
Creating a user account in your organization is done by invitation. To invite a user to an Organization, go to the 'Administration' menu on the left side of your screen on the green banner, then to the 'Users' submenu.
Click the 'New User' button from the users page.
Then enter the user's email address
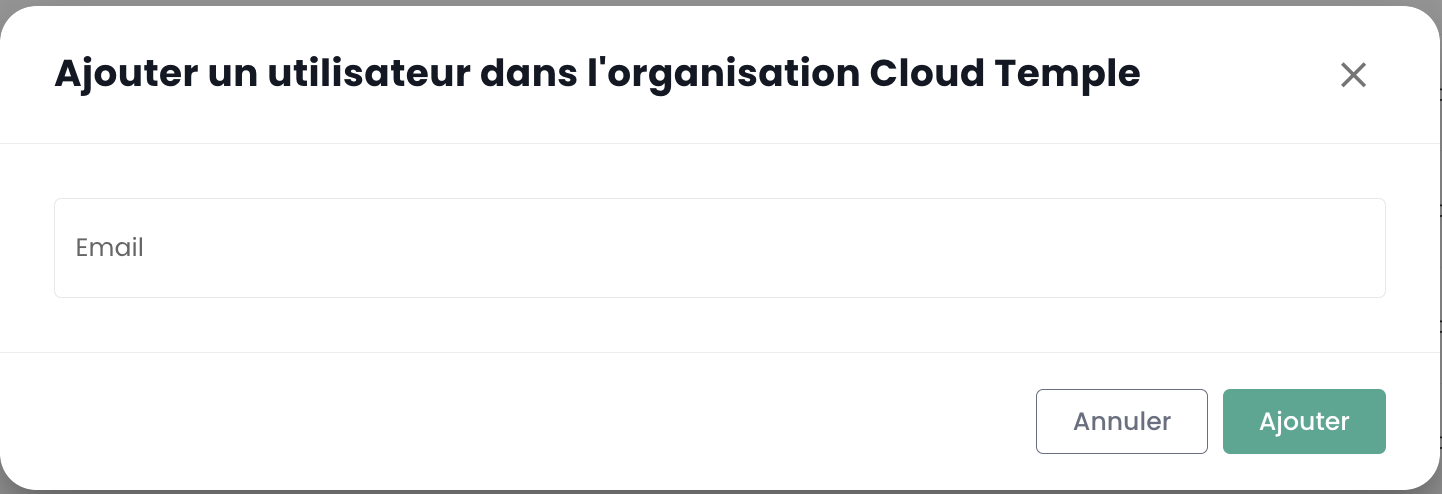
The user will then receive a verification email.
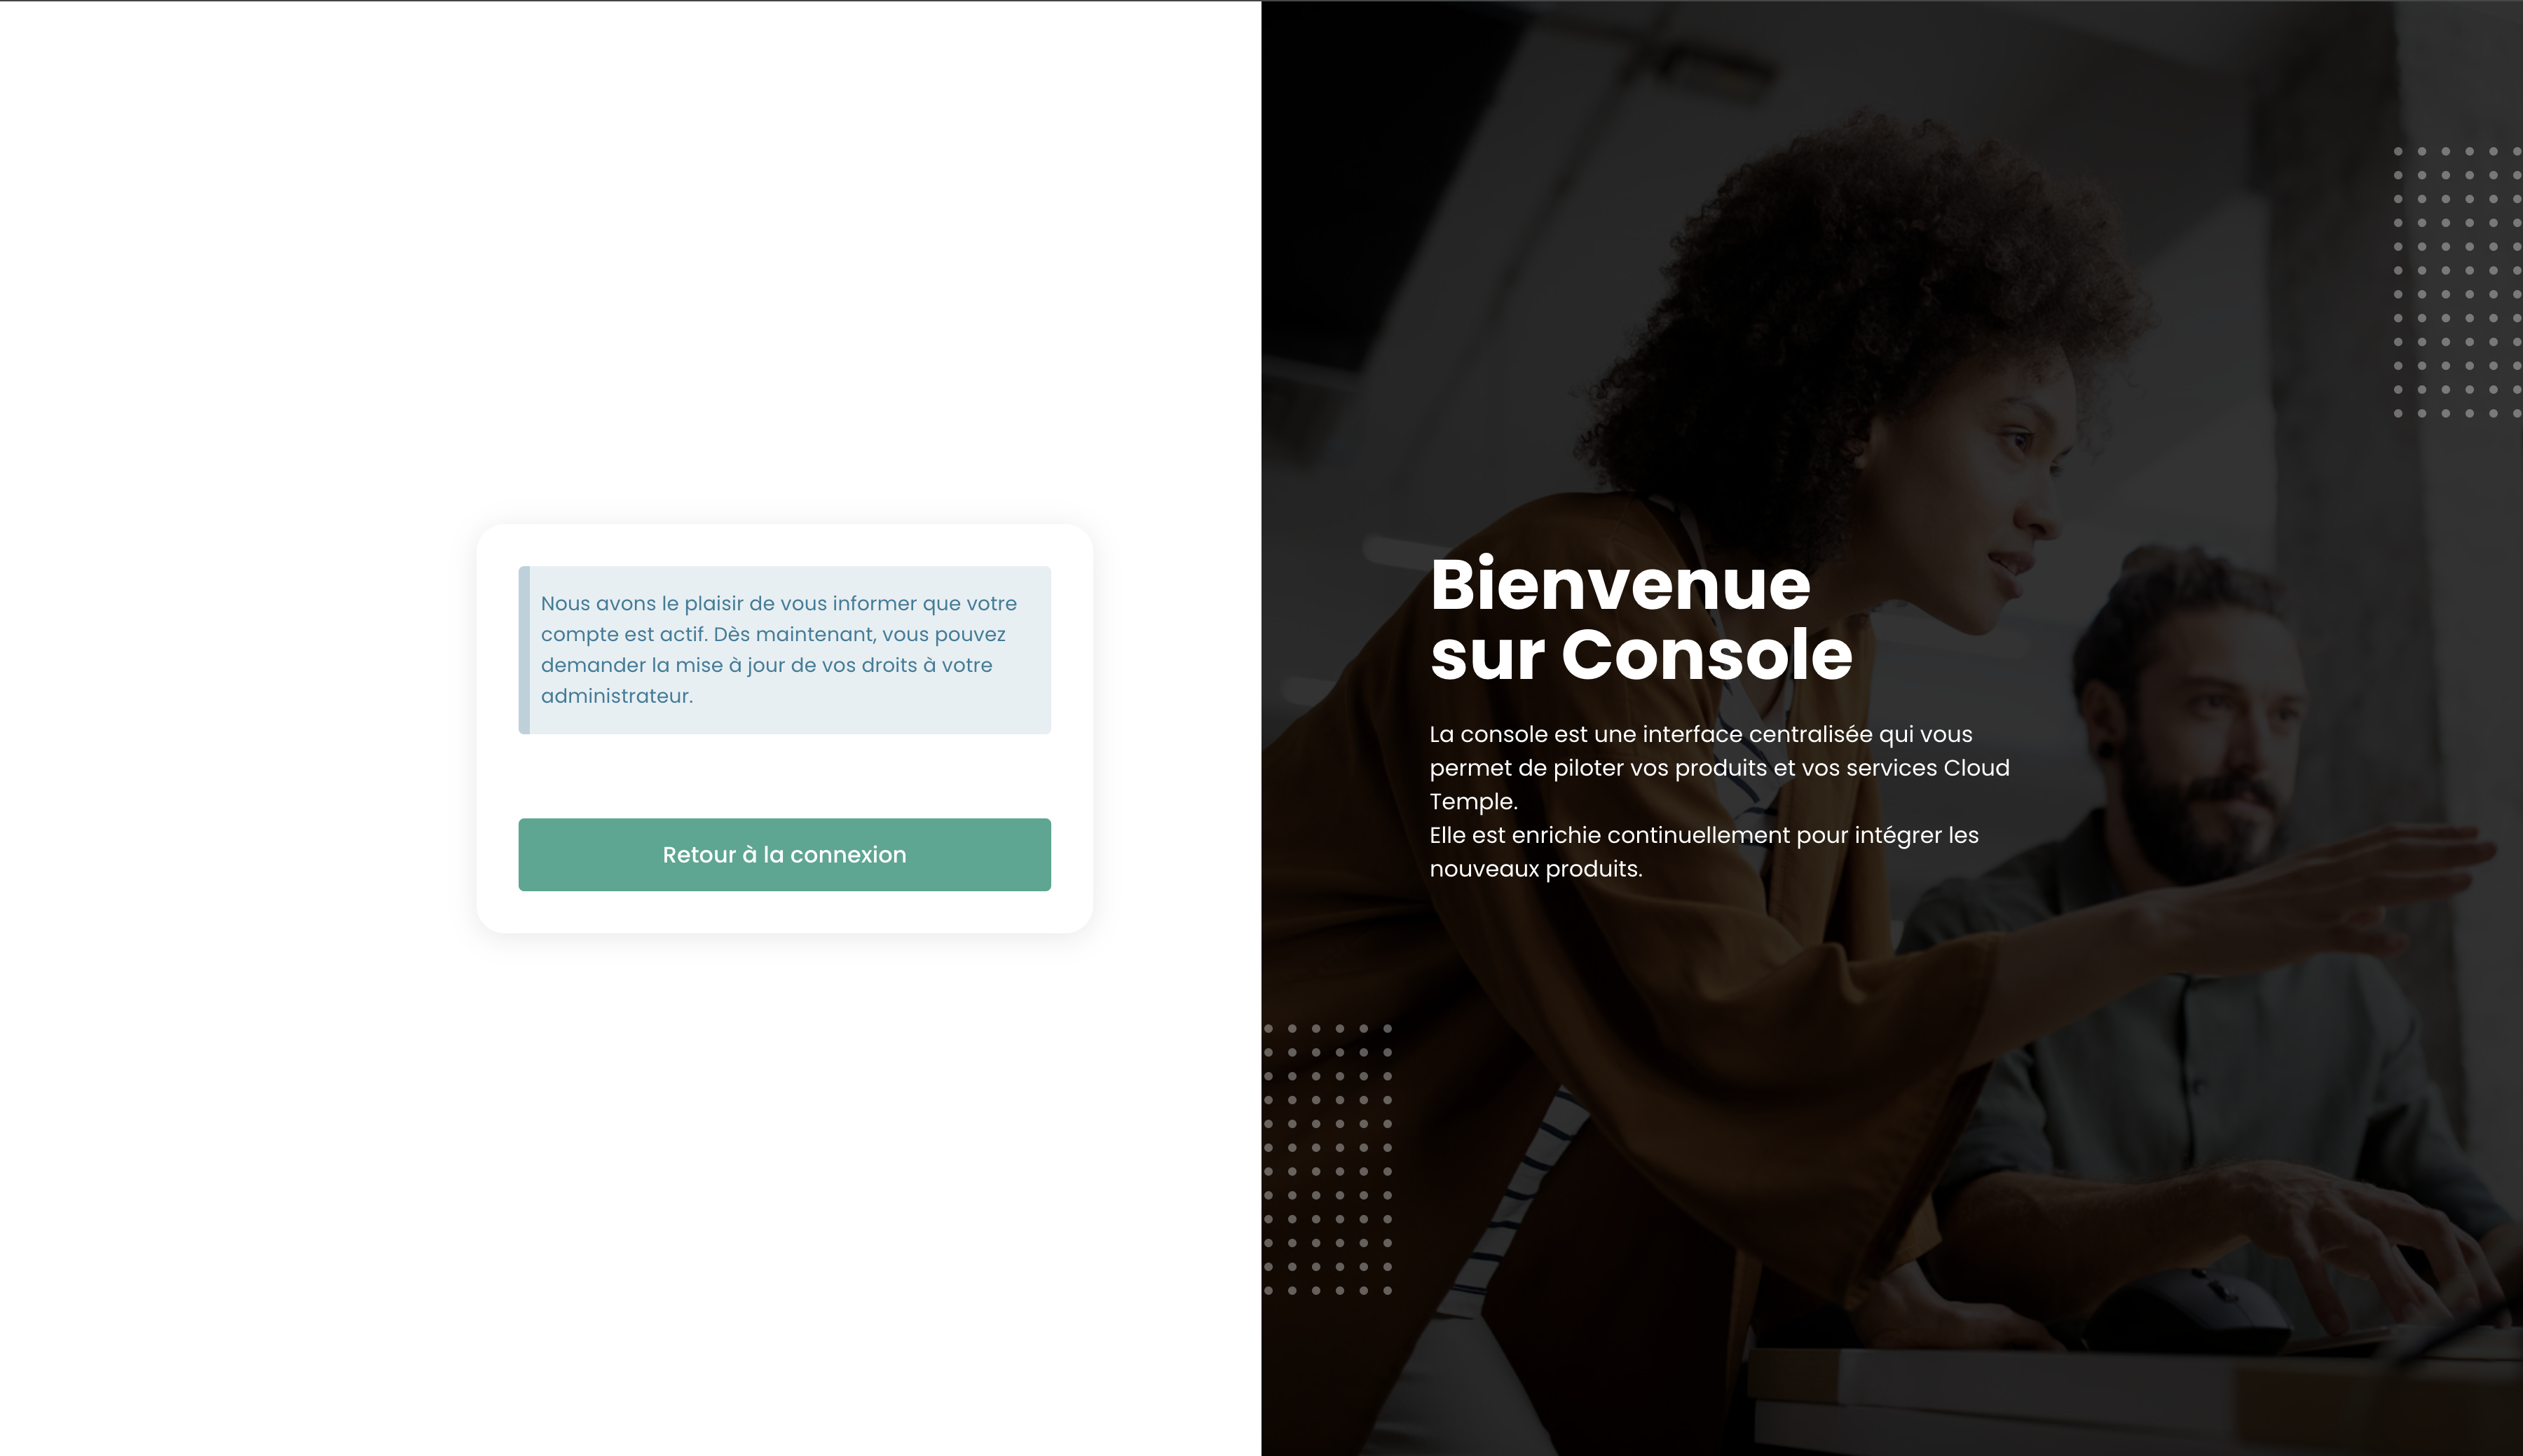
Once verification is complete, the user will be able to log in to the console.
Assigning permissions to a user
User rights management is performed from the user page.
By default, a user has no rights. Therefore, the administrator who sent the invitation must grant them the rights required for their activity. Simply click the user's 'Actions' menu and select the 'Edit' option.
The rights activation menu then appears:

Permissions must be configured for each Tenant of the Organization.
The list of permissions and their definitions is available here.
User Re-registration
When a user has been provisioned but has not validated their registration within the expiration period of the email sent by the Console, they can no longer confirm their registration. It is then possible to send them a link so that they can renew their initial registration.
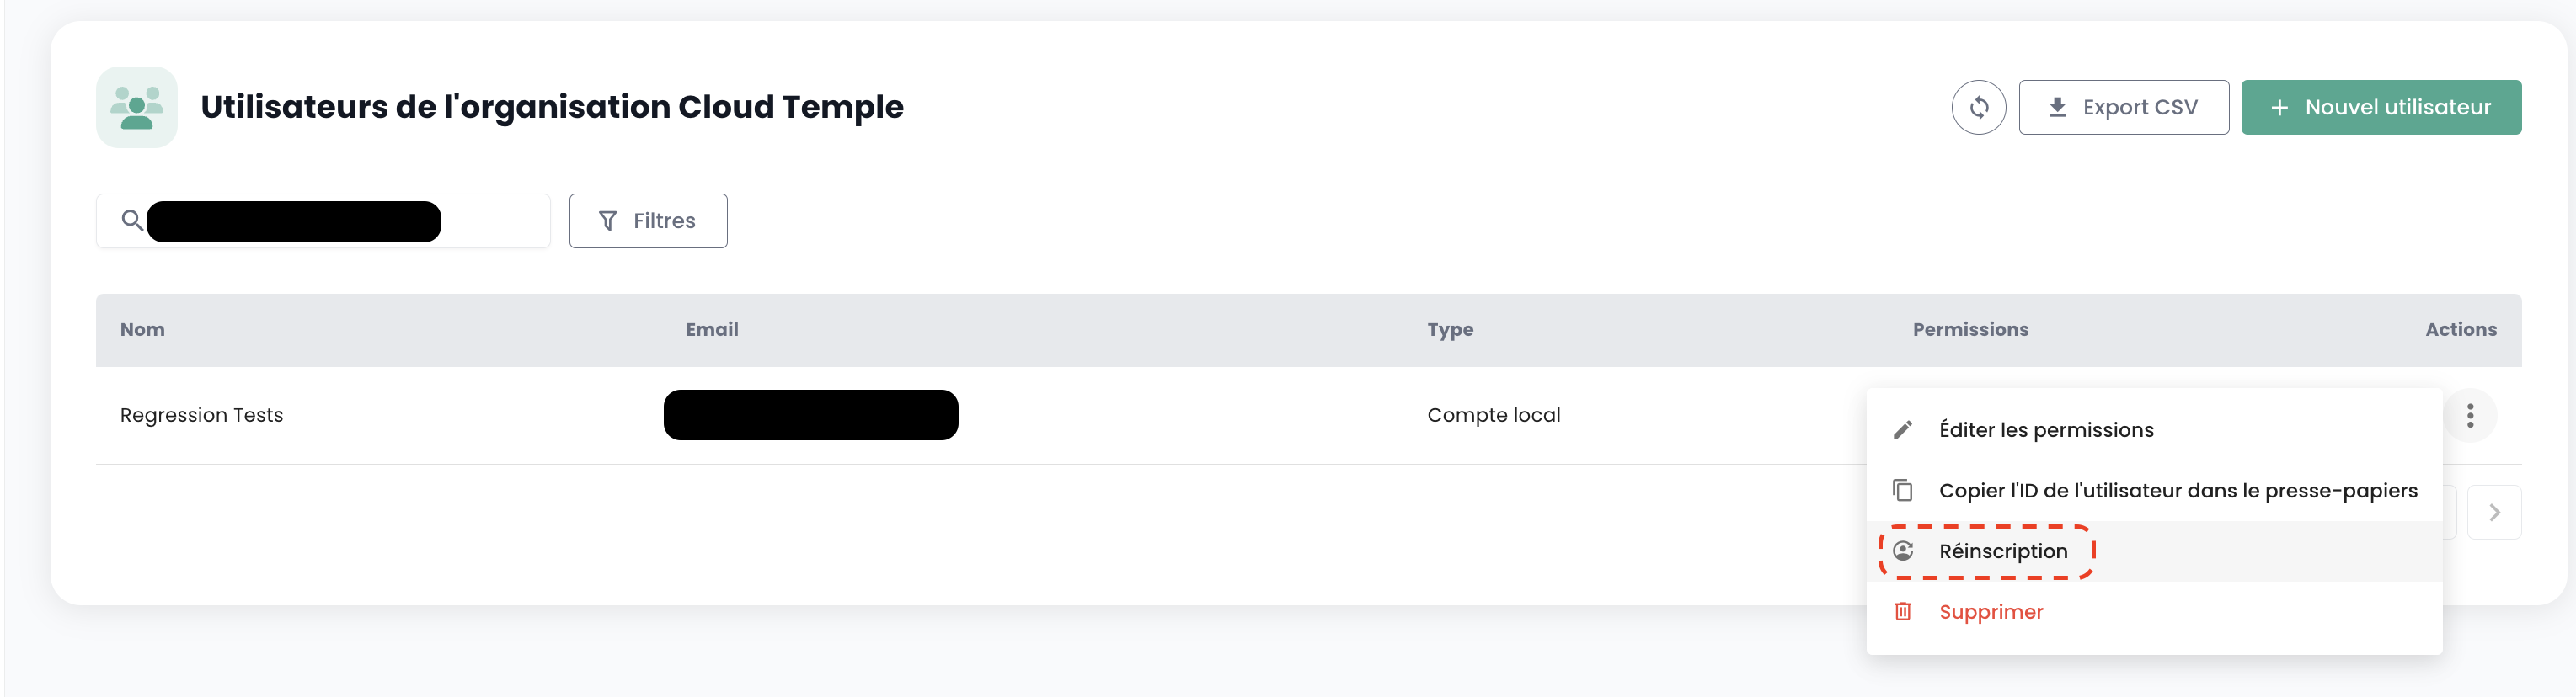
User re-registration must be performed in the 'User' tab of the Administration panel, at the bottom left of the screen.
Select the user you wish to re-register, then click the action button at the end of the row and select 'Re-registration'.
Warning: Ensure that you are the one initiating the re-registration request for your user account. Please report any requests that do not originate from you via a support ticket.
Update your profile
This action is only available for a local account (non-SSO).
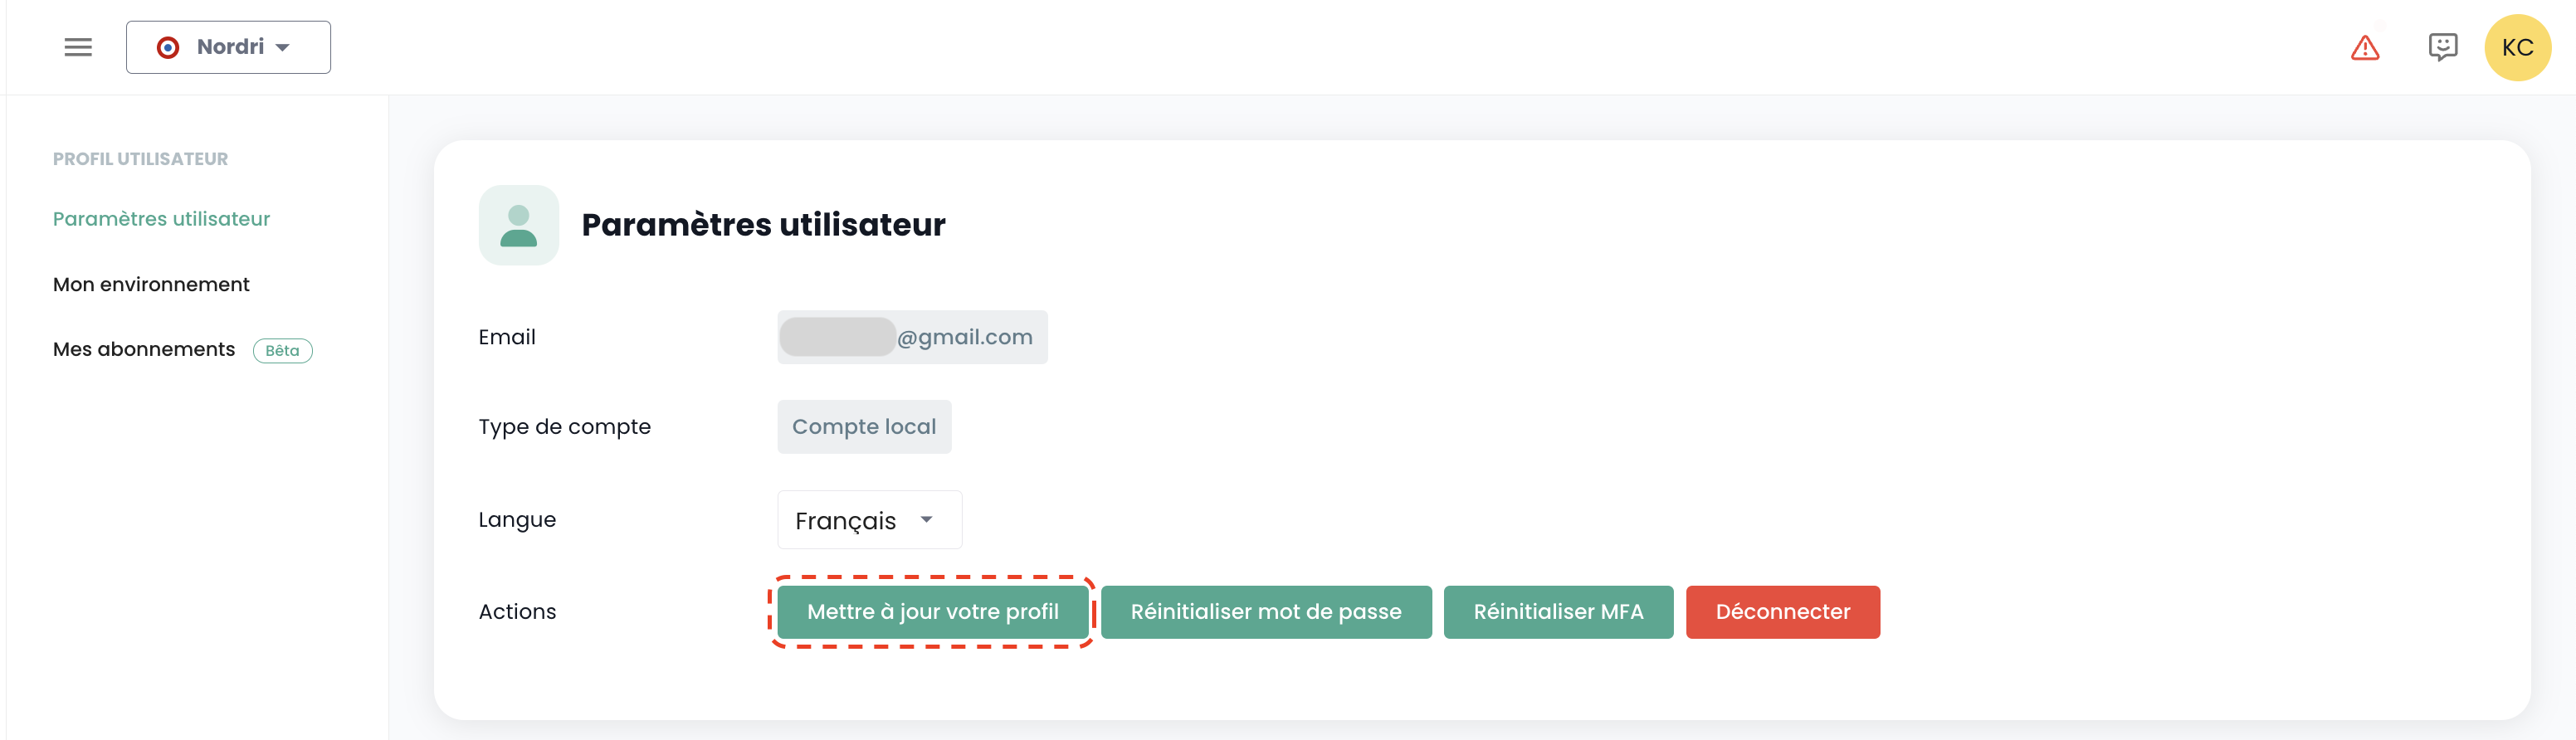
Select 'Profile' in the top right corner of the screen, then 'User Settings', and select the action 'Update your profile'.
Then go to your email inbox and click the link generated by the Console. Simply follow the steps to update your profile.
Warning: Ensure that you are the one who initiated the profile update request. Please report any requests that did not originate from you via a support ticket.
Password Reset
This action is only available for a local account (non SSO).
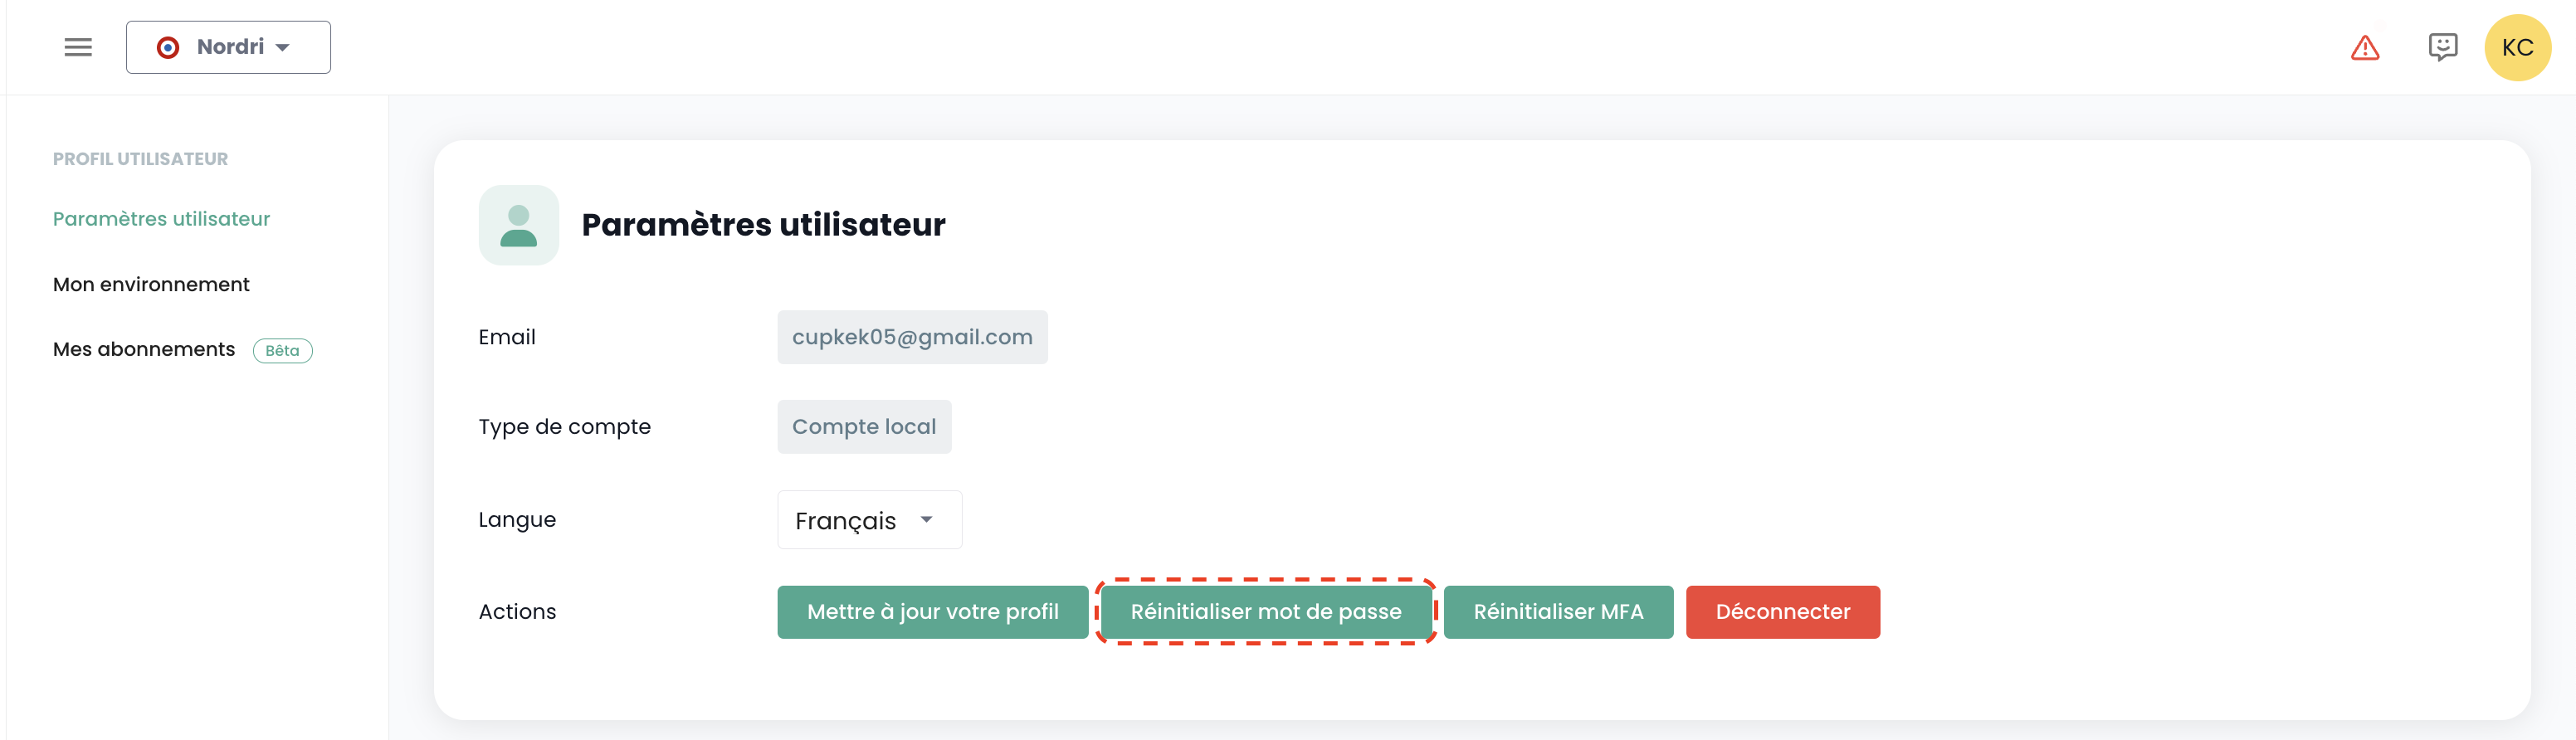
Select 'Profile' in the top right corner of the screen, then 'User Settings' and select the 'Reset Password' action.
Then go to your email inbox and click on the link generated by the Console. Simply follow the steps to update your password.
Warning: Ensure that you are the one requesting the password reset. Please report any requests that did not come from you via a support ticket.
Multi-Factor Authentication Reset
This action is only available for a local account (non SSO).
Select 'Profile' in the top right corner of the screen, then 'User Settings' and select the 'Reset MFA' action.
Then go to your email inbox and click on the link generated by the Console. Simply follow the steps to update your multi-factor authentication.
Warning: Ensure that you are the one who initiated the request to reset your multi-factor authentication. Please report any requests that did not come from you via a support ticket.

Deleting a user
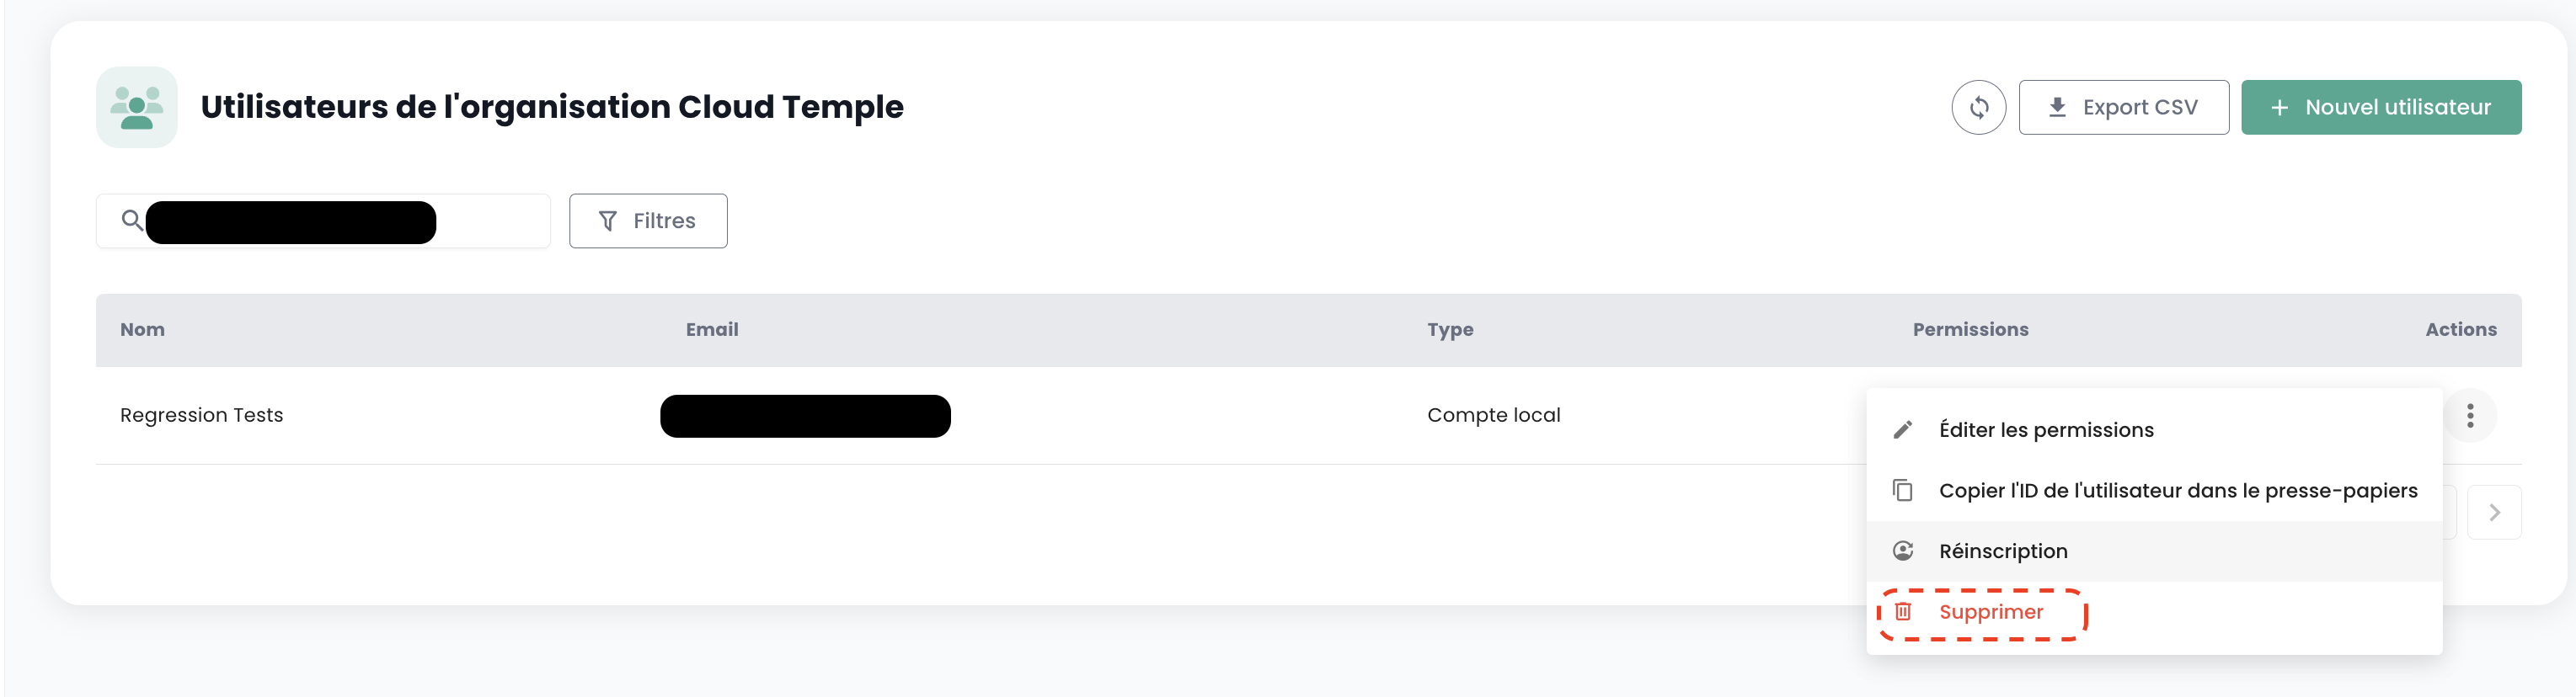
User deletion must be performed in the 'User' tab of the Administration pane, at the bottom left of the screen.
Select the user you wish to delete, then click the action button at the end of the row and 'Delete'.
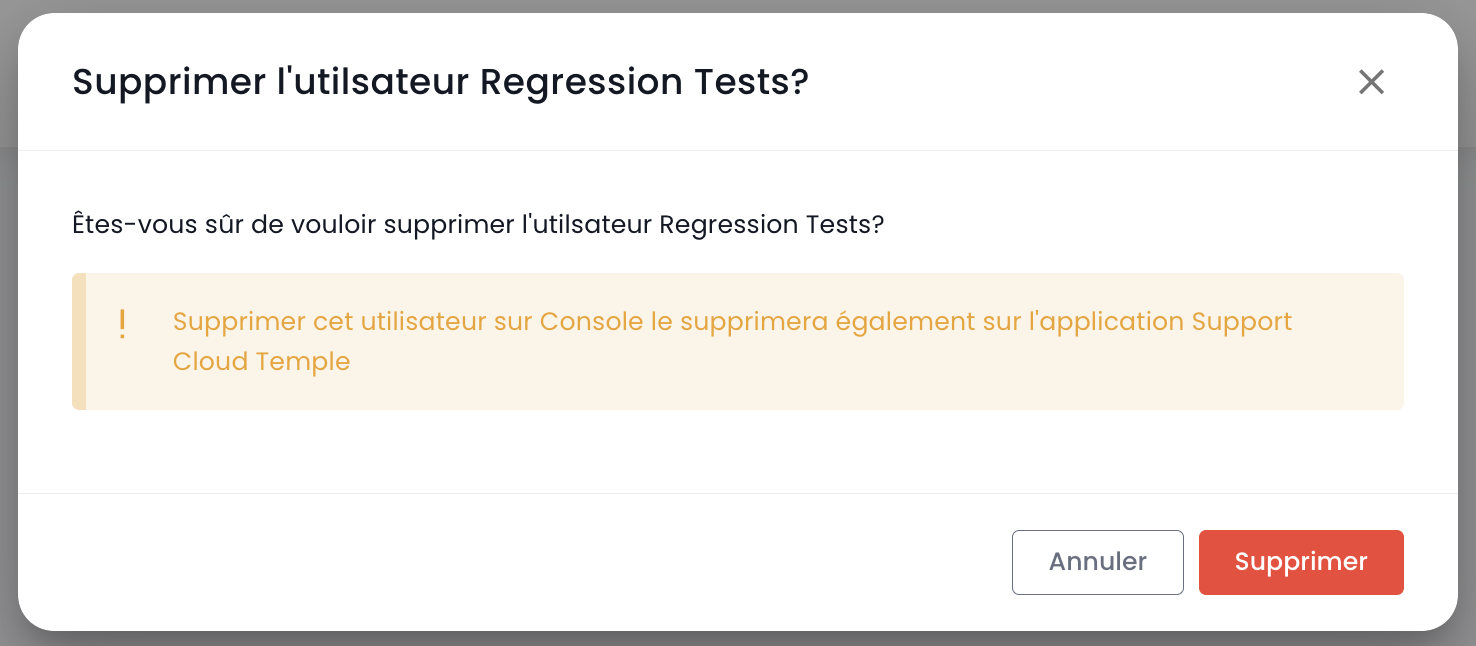
Note: You cannot delete yourself and you cannot delete a 'Owner' user.
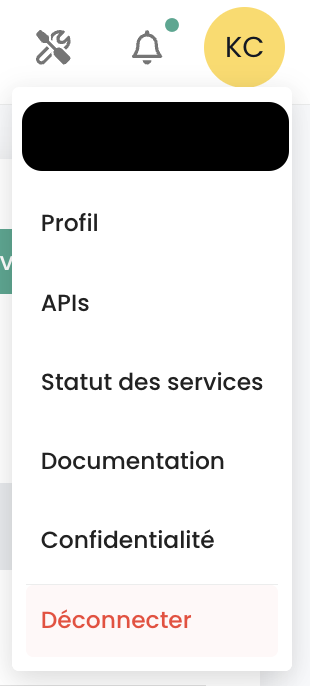
Log out
To log out, navigate to the user's 'Profile' at the top right of the screen, then select 'Log out'.
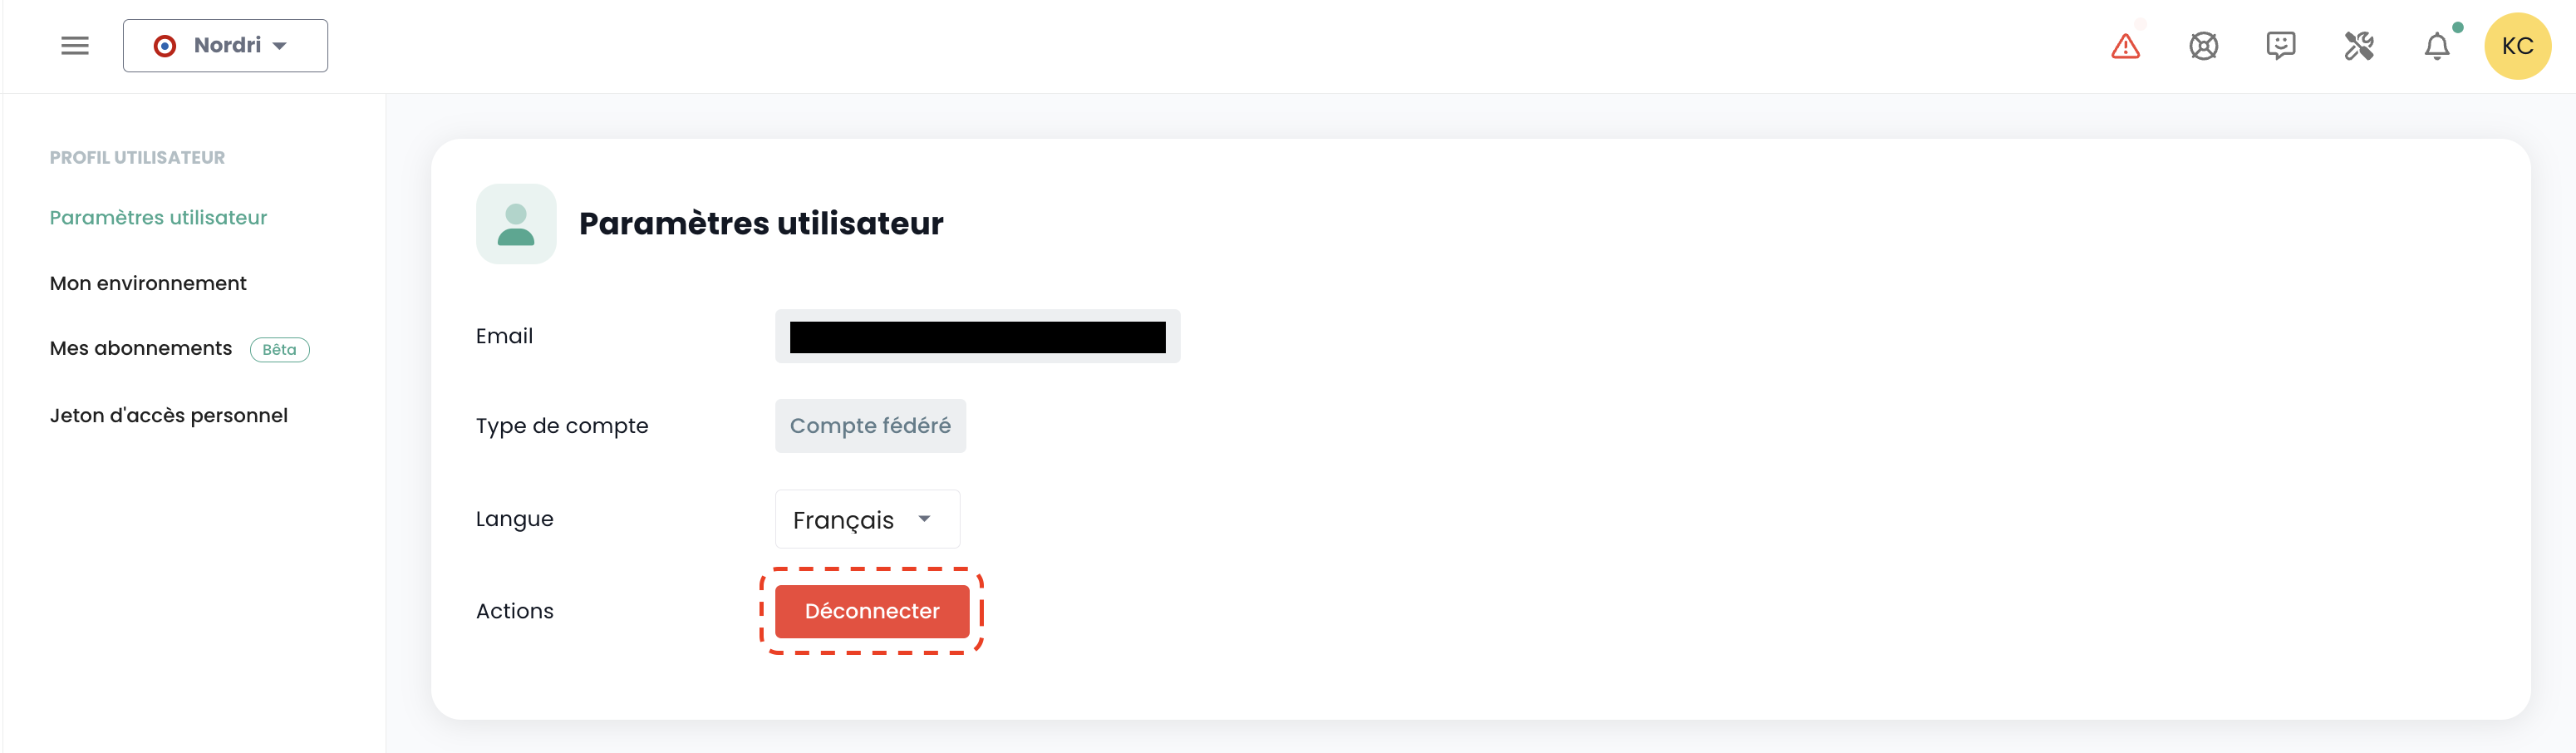
Automatic logout occurs when the session token (JWT Token) expires.
Change a user's language
The language change for a user must be performed in their 'Profile', at the top right of the screen, under 'User Settings'.
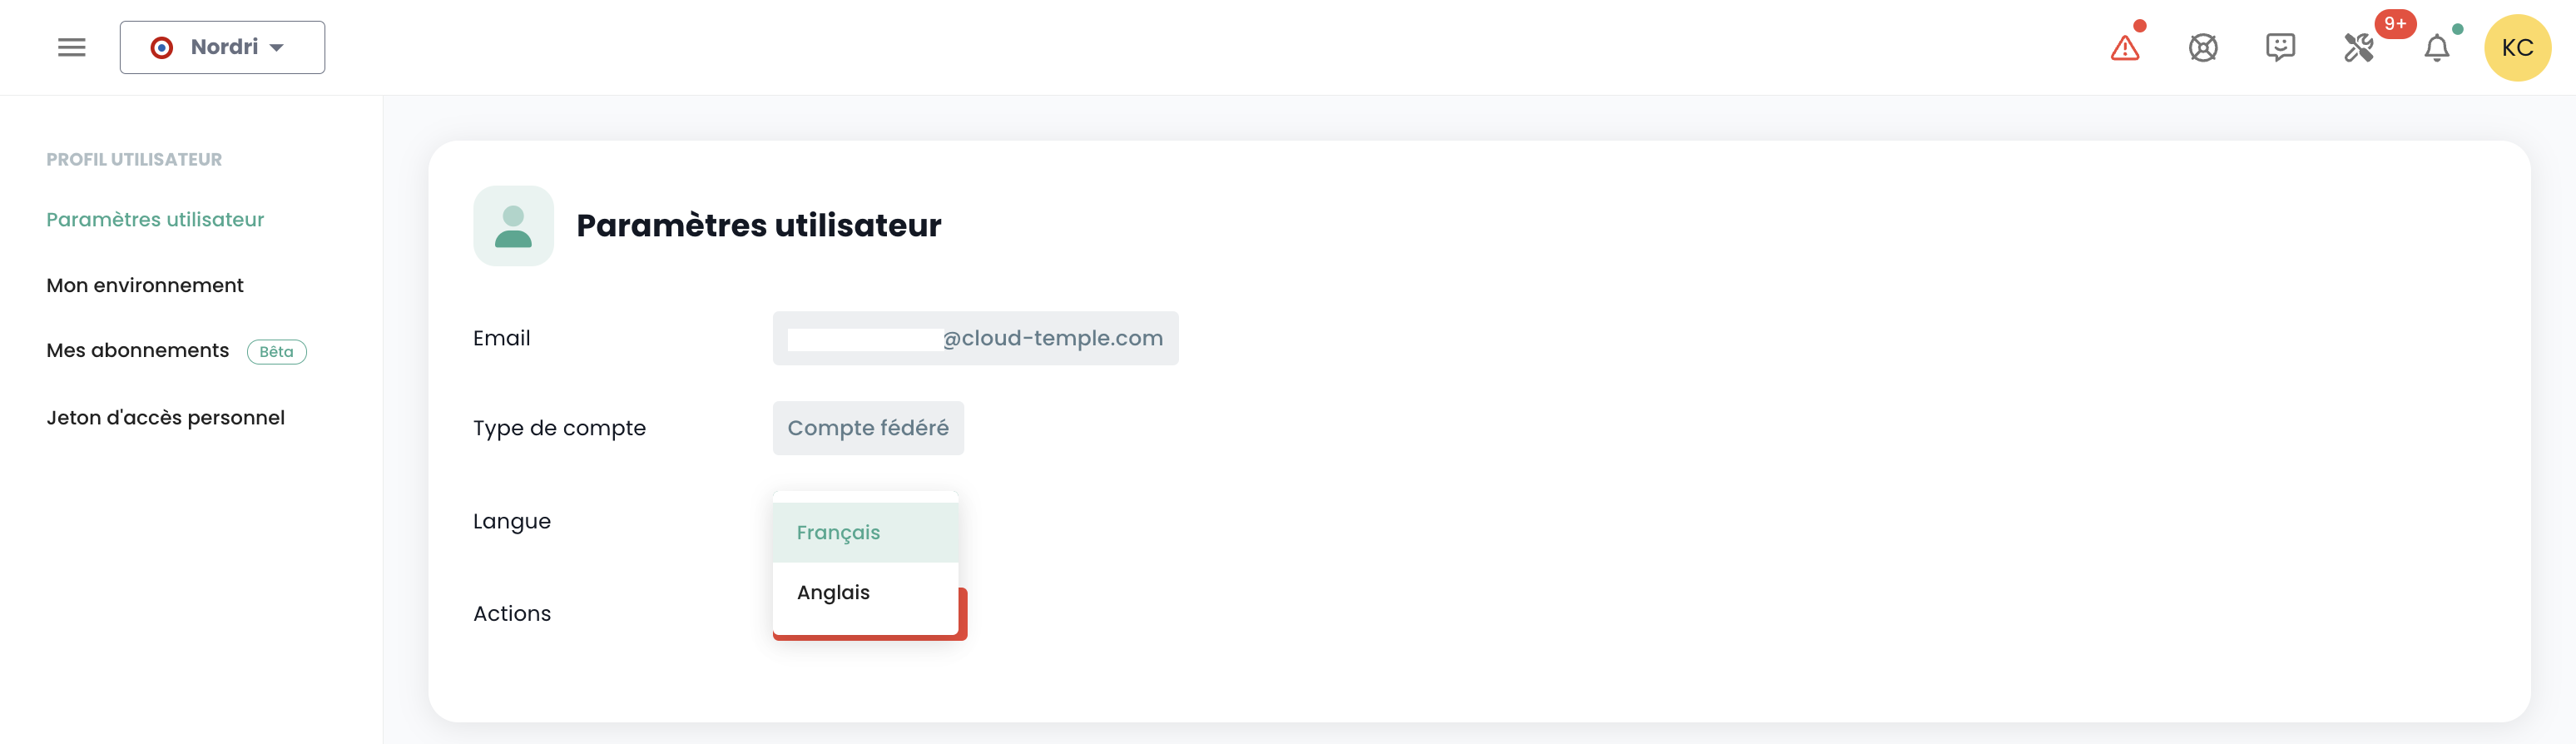
Configuration is applied per tenant Tenant.
Thematic Notification Subscriptions
Subscription management allows you to receive emails related to the enabled themes, which will be automatically sent when corresponding events occur.
It is accessible in the user profile, under the "My Subscriptions" tab:
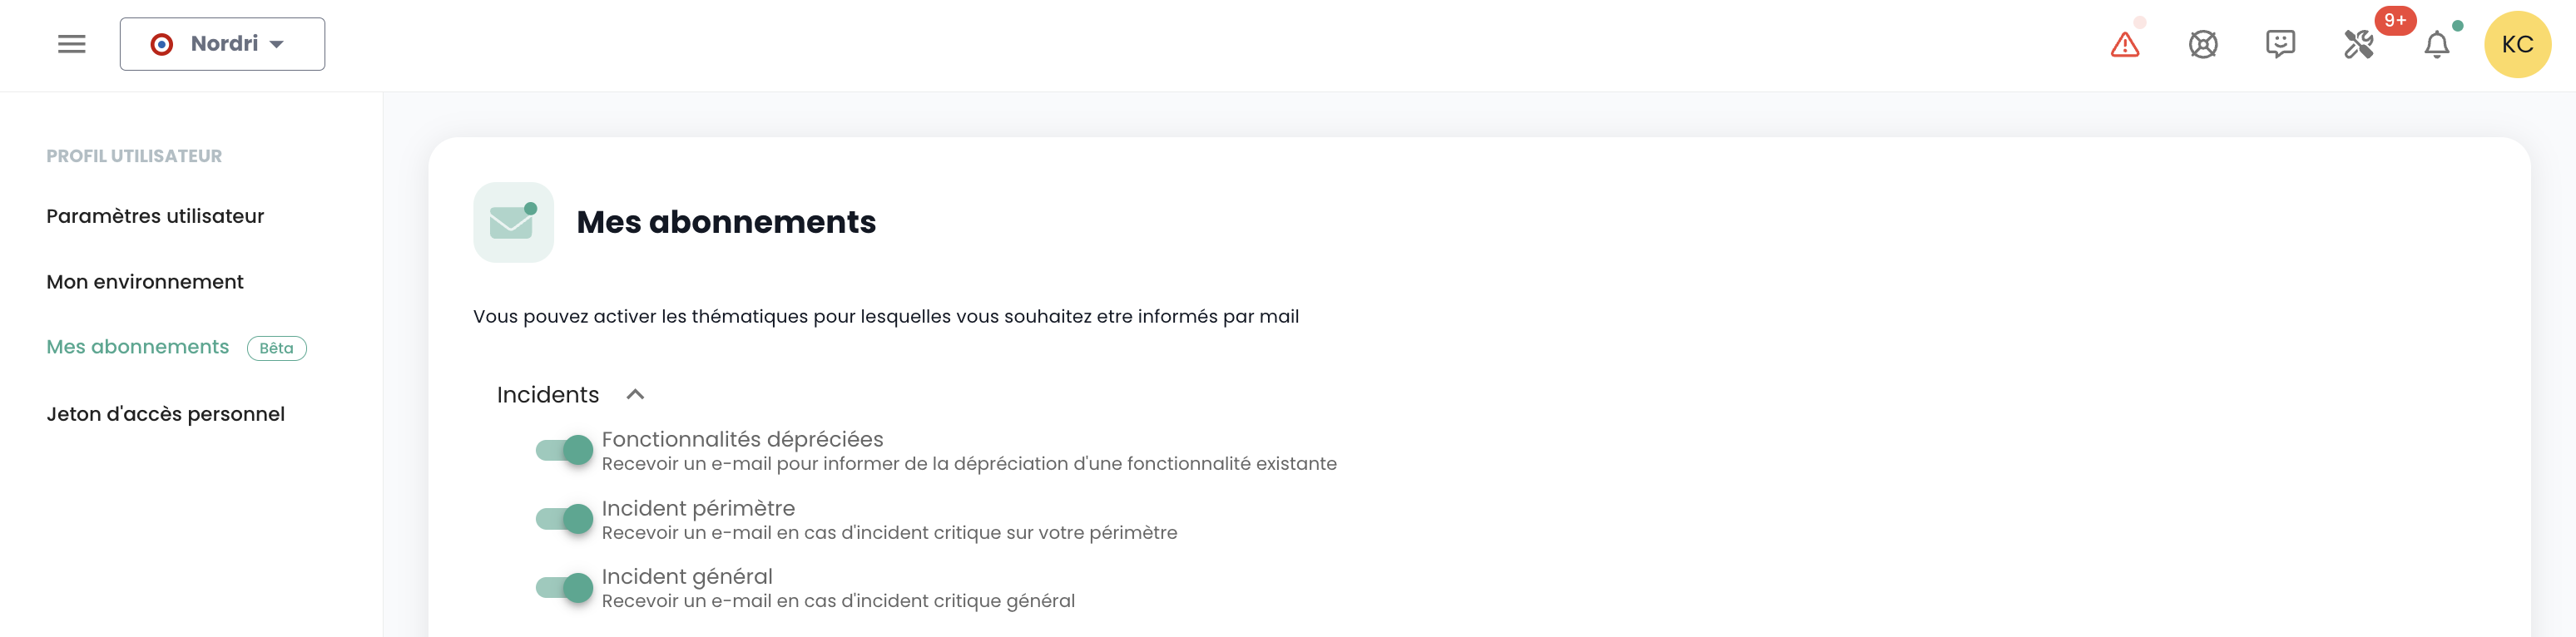
For example, in the event of an incident, email notifications specific to this theme will be generated.
The list of available themes is subject to change and will gradually expand to adapt to the needs and changes in our operational environment.
Permissions
The Console enables fine-grained management of user permissions within an organization, with tenant segregation. Initially, the sponsor's primary account is responsible for the initial configuration of accounts and their associated permissions. Subsequently, the 'iam_write' permission allows an account to manage the permissions of other users.
Permissions available for users in your organization
When a user is created, they have no permissions by default. Each permission is assigned individually and operates independently, without overlapping with other permissions. They apply in conjunction, meaning a user must have all required permissions to perform a specific action.
The following permissions are configurable for each user and for each tenant in your organization:
-
“read” type permissions: allow only resource viewing without modification capabilities.
-
“write” type permissions: allow modification of configurations.
-
“management” type permissions: allow advanced resource management.
-
“console_access” type permissions: allow PMAD-type connections to resources.
-
“virtual_machine_power” type permissions: allow management of a virtual machine's power state.
-
These are permissions, not roles. As such, both READ and WRITE permissions are required to modify a configuration.
Last updated on: 20/04/2026
| Permission Name | Permission Description |
|---|---|
| activity_read | Viewing of logs and activities |
| activity_write | Management of logs and activities |
| backup_iaas_opensource_read | OpenIaaS Offering - Backup resource management - viewing |
| backup_iaas_opensource_write | OpenIaaS Offering - Backup resource management - modification |
| backup_iaas_spp_read | VMware Offering - Backup resource management - viewing |
| backup_iaas_spp_write | VMware Offering - Backup resource management - modification |
| bastion_read | Viewing of bastion resources |
| bastion_write | Management of Bastion resources (appliances, sessions, etc.) |
| bastion_console_access | Authorization to access the console (ssh/rdp) of a resource protected by a Bastion appliance |
| compute_iaas_opensource_console_access | OpenIaaS Offering - Opening the console of a virtual machine |
| compute_iaas_opensource_infrastructure_read | OpenIaaS Offering - Viewing advanced data of Xen Orchestra resources |
| compute_iaas_opensource_infrastructure_write | OpenIaaS Offering - Advanced management of Xen Orchestra resources |
| compute_iaas_opensource_read | OpenIaaS Offering - Viewing of Virtual Machine resources |
| compute_iaas_opensource_management | OpenIaaS Offering - Management of Virtual Machine resources |
| compute_iaas_opensource_virtual_machine_power | OpenIaaS Offering - Management of a virtual machine's power state |
| compute_iaas_opensource_replication_recover | OpenIaaS Offering - Management of replication |
| compute_iaas_vmware_console_access | VMware Offering - Opening the console of a virtual machine |
| compute_iaas_vmware_infrastructure_read | VMware Offering - Viewing advanced data of VMware resources (affinity/anti-affinity rules, drs configuration, etc.) |
| compute_iaas_vmware_infrastructure_write | VMware Offering - Advanced management of VMware resources |
| compute_iaas_vmware_read | VMware Offering - Viewing of Virtual Machine resources |
| compute_iaas_vmware_management | VMware Offering - Management of Virtual Machine resources (allows encryption of a virtual machine) |
| compute_iaas_vmware_virtual_machine_power | VMware Offering - Management of a virtual machine's power state |
| baremetal_management | Bare Metal Offering - Management of Bare Metal resources |
| baremetal_read | Bare Metal Offering - Viewing of Bare Metal resources |
| baremetal_console_access | Bare Metal Offering - Opening the console of a Bare Metal instance |
| console_public_access_read | Viewing of IPs authorized to access the console |
| console_public_access_write | Adding IPs authorized to access the console |
| documentation_read | Viewing of Confluence documentation resources |
| housing_read | Viewing of colocation resources |
| iam_offline_access | Creation and deletion of Personal Access Tokens (PAT) |
| iam_read | Viewing of user permissions |
| iam_write | Management of user permissions |
| intervention_read | Viewing of planned changes and deployments on the platform |
| inventory_read | Viewing of Inventory resources |
| inventory_write | Management of Inventory resources |
| monitoring_read | Viewing of monitoring |
| monitoring_write | Management of monitoring |
| metric_read | Viewing of health data on virtual machines and hosts |
| network_read | Viewing of network resources |
| network_write | Management of network resources |
| order_read | Viewing of infrastructure orders |
| order_write | Creation of infrastructure orders |
| object-storage_iam_management | Allows management of storage accounts on the S3 product |
| object-storage_read | Allows viewing of buckets and bucket configurations |
| object-storage_write | Allows editing of buckets and bucket configurations |
| openshift_management | Allows connection to OpenShift platforms (scoped to tenant) |
| support_management | Viewing of all tenant support tickets |
| support_read | Viewing of own tenant support tickets |
| support_write | Creation of a support ticket on the tenant |
| tag_read | Viewing of tags, except RTMS tags |
| tag_write | Management of tags, except RTMS tags |
| ticket_comment_read | Viewing of comments |
| ticket_comment_write | Management of comments |
| ticket_read | Viewing of tickets |
| ticket_write | Management of tickets |
| incident_management | Management of incidents |
| incident_read | Viewing of incidents |
| billing_read | Viewing of consumption dashboards |
| vpc_read | VPC Offering - Viewing of VPC-type network resources |
| vpc_write | VPC Offering - Management of VPC-type network resources |
| public_cloud_vm_instances_management | VM Instances Offering - Management of virtual machines |
| public_cloud_vm_instances_read | VM Instances Offering - Viewing of virtual machines |
| public_cloud_vm_instances_console_access | VM Instances Offering - Opening the console of virtual machines |
Organizations
The organization is linked to your sponsor account and the associated Cloud Temple contract. It represents your entity (company, department, team, ...) that holds the contractual relationship between Cloud Temple and you.
Principle of an organization
The organization has four main roles:
- It represents the contractual entity for tracking and billing aspects,
- It defines the global configuration of the authentication mechanism: authentication can be local at the Console level or remote via an identity federation service,
- It hosts all user accounts,
- It federates the tenants (Production, Pre-production, Dev, Application 1, Application 2, ...) that you define for your Cloud architecture needs.
User roles (rights/permissions) are configurable for each tenant defined in your organization. For example, an account may be authorized to order resources in one tenant, but not in another.
Authentication Mechanisms
The Console allows configuring the authentication mechanism at the organization level. You can use the Console's local authentication repository, or connect your organization to one of your authentication repositories.
The following external repositories are supported:
- OpenID Connect compatible repositories,
- SAML compatible repositories,
- Microsoft ADFS
- Microsoft EntraID (Microsoft Azure Active Directory)
- Amazon AWS Cognito
- Okta
- Auth0
- Keycloak
An email address is required for all accounts from an identity federation. Accounts created without an email address will not be able to log in and may be automatically deleted.
Tenant
A tenant is a grouping of resources within an organization. An Organization has at least one tenant (called the default tenant, which can be renamed). Generally, multiple tenants are used to segment responsibilities or technical scopes.
For example:
- A Production tenant
- A Pre-production tenant
- A Staging tenant
- A QA tenant
It is also possible to organize things using an application view or by criticality :
- A Application 1 or Criticality 1 tenant
- A Application 2 or Criticality 2 tenant
- ...
Ordered technical resources are assigned to a specific tenant and are not shared with other tenants. For example, a Hypervisor cluster and the associated L2 networks are only available within a single tenant. Regarding networks, it is possible to request 'cross tenant' networks to ensure network continuity between tenants.
User permissions must be defined within each tenant. Therefore, each organization must carefully consider the desired tenants. This point is typically addressed during the initialization workshop, at the time of organization creation.
The architecture can be scaled by adding or removing tenants.
A tenant cannot be empty. It must necessarily be initialized with a minimum set of resources:
- An availability zone (AZ, i.e., a physical datacenter),
- A compute cluster,
- A storage space,
- A network VLAN.
| Order Reference | Unit | SKU |
|---|---|---|
| TENANT - (REGION) - Tenant Activation | 1 tenant | csp:tenant:v1 |
| TENANT - (REGION) - Availability Zone Activation | 1 tenant | csp:(region):iaas:az:v1 |
Managing owners on a tenant
Each tenant has at least one owner, ensuring clear accountability and efficient management of associated resources. Additionally, it is possible to assign multiple owners to the same tenant, enabling collaboration and shared decision-making. Below, you will find important information to consider when managing these owners.
Important information regarding owner management
1. Number of owners
-
There is no technical limit on the number of owners that can be defined on the tenant.
-
The management interface (IHM) issues a warning when there are more than 3 owners, to encourage limiting the number of owners for security and optimal access management reasons.
2. Adding a new owner
-
When adding a new owner, updating their permissions may take up to 60 minutes.
-
This propagation time is normal and ensures that access rights are correctly applied across all associated services and resources.
2. Owner Permissions
-
An owner will be granted all permissions associated with the products enabled on their tenant.
-
It is not possible to modify an owner's permissions.
3. Owner Removal
-
To remove an owner from the tenant, the user must submit a request to support.
-
This procedure ensures that access right modifications are carried out securely and in accordance with access management best practices.
Tenant Access Authorization: Authorized IPs
Access to the cloud management console is strictly limited to previously authorized IP addresses, in compliance with SecNumCloud certification requirements. This restriction ensures an enhanced security level by permitting access only from specified IP ranges, thereby minimizing the risk of unauthorized access and safeguarding the cloud infrastructure in accordance with the highest security standards.
Note: Removing an authorized IP requires submitting a support request via the Cloud Temple console.
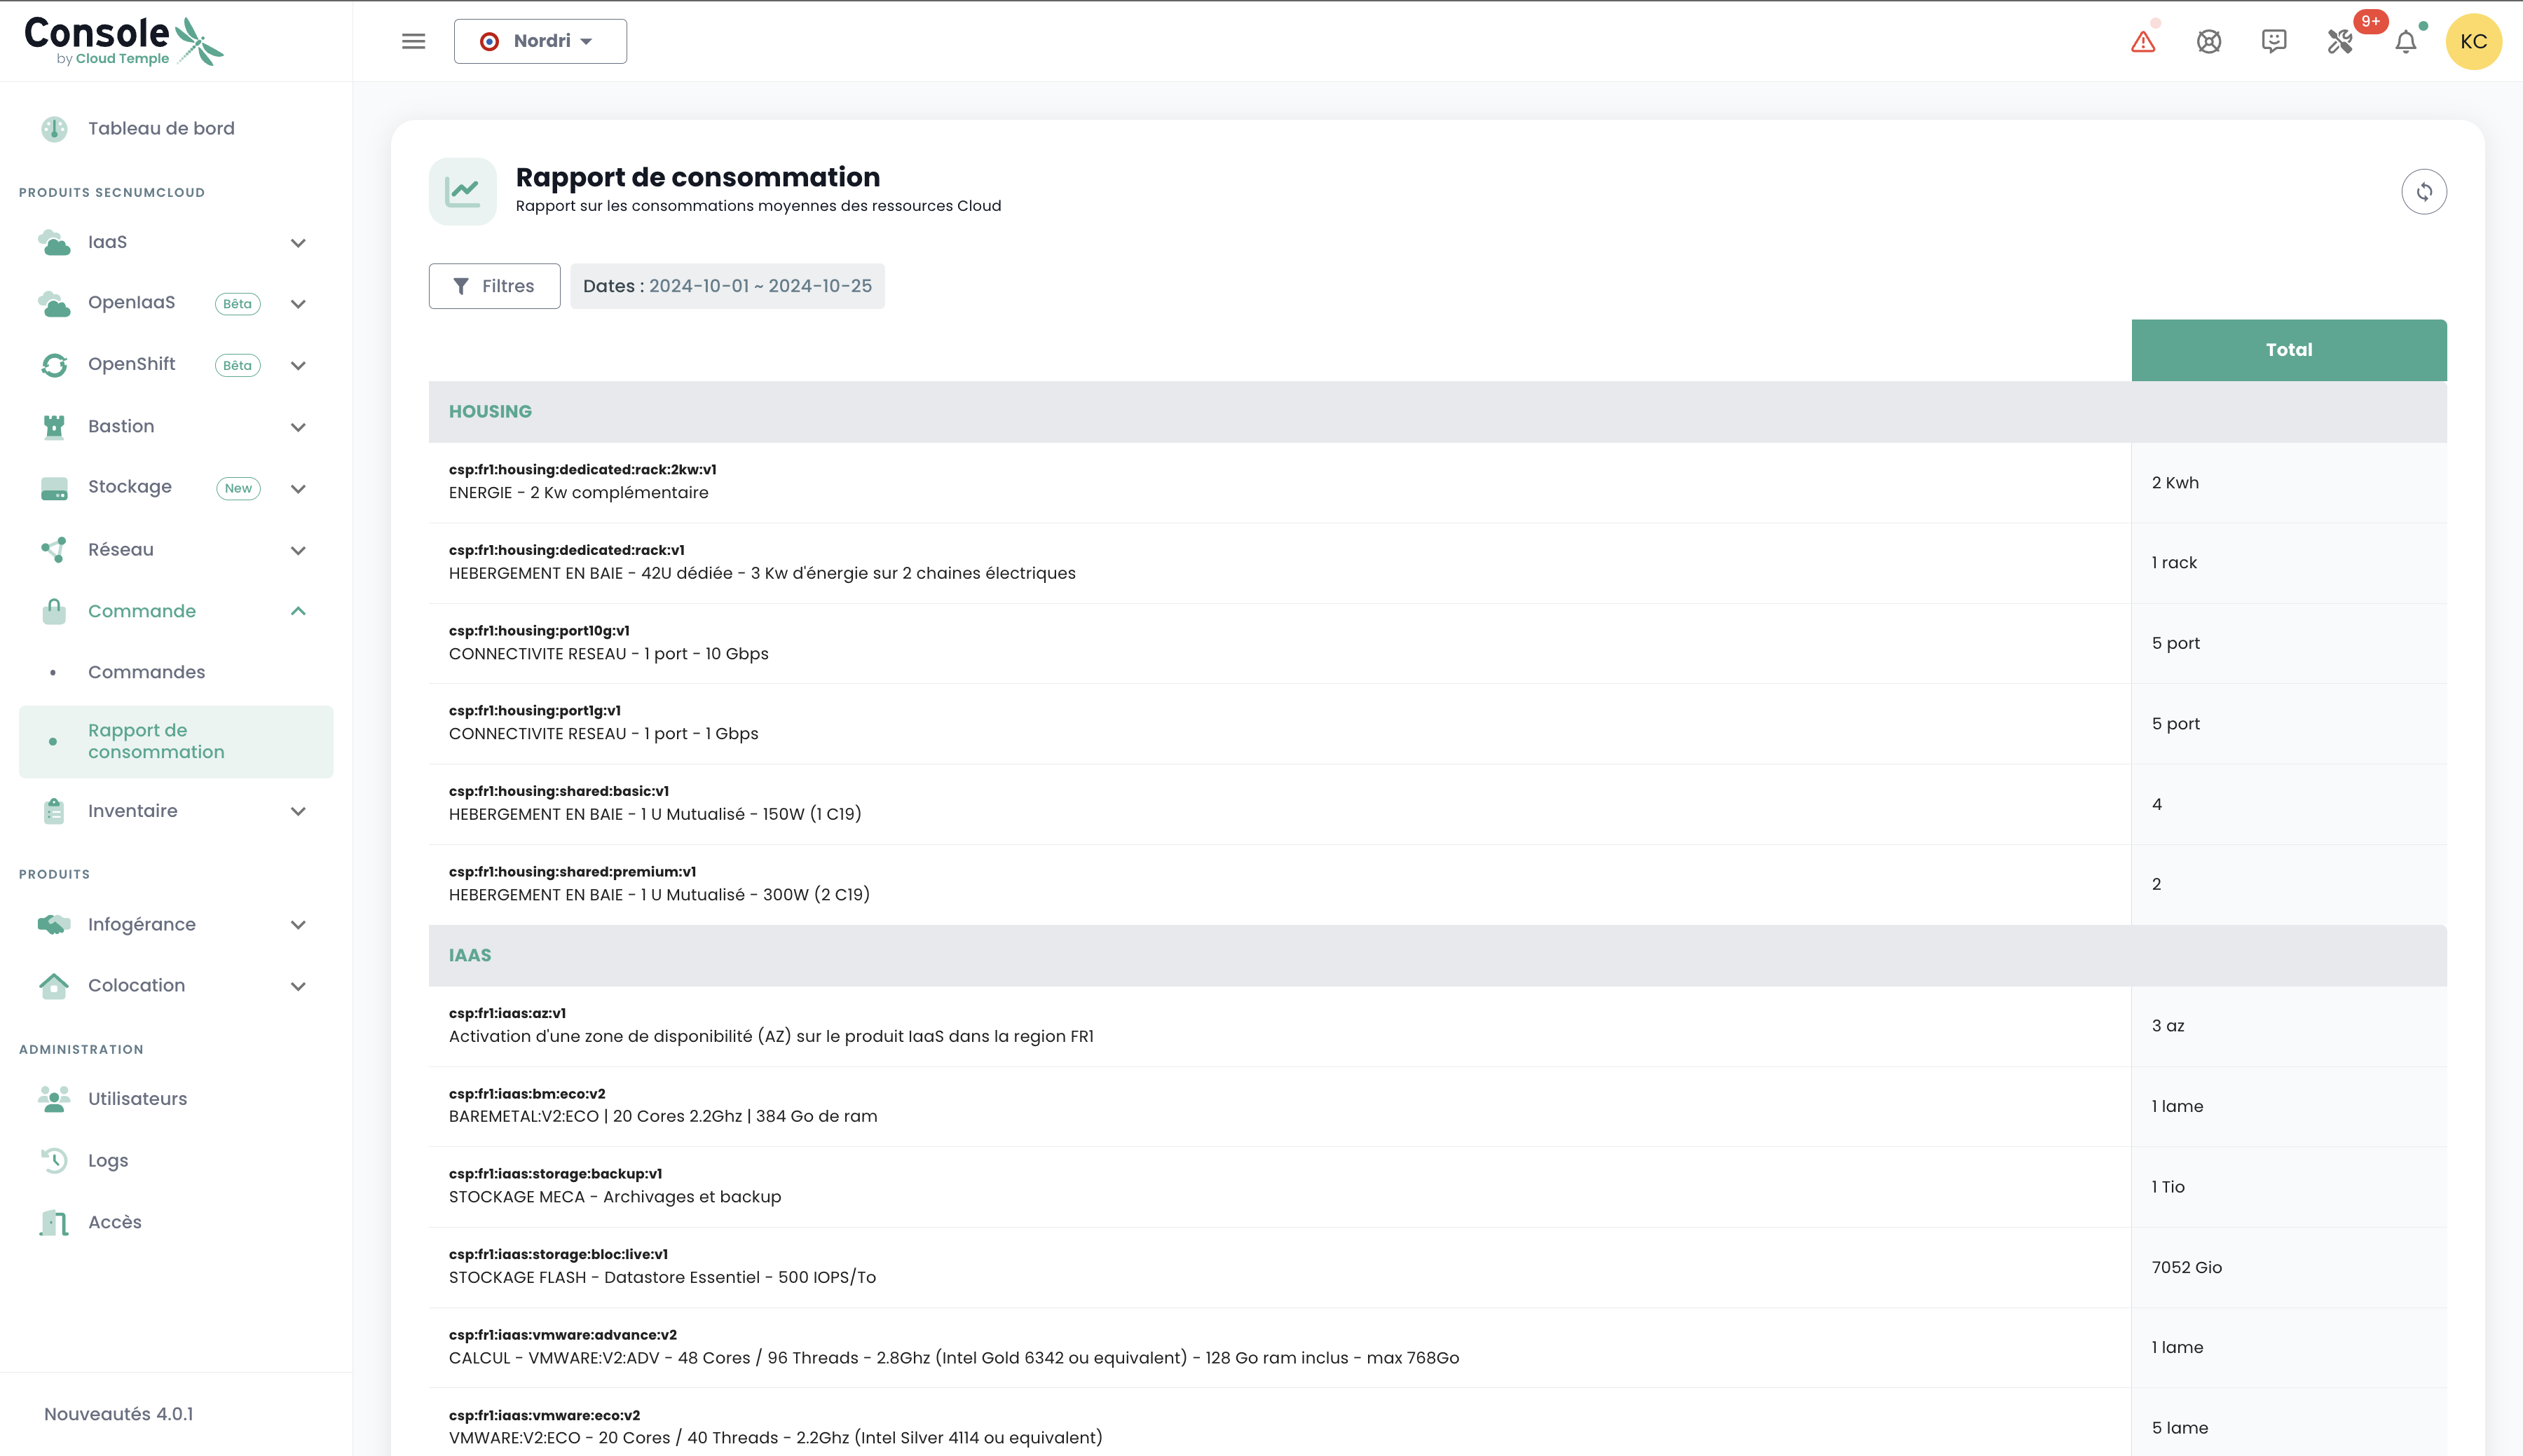
Resource consumption within a tenant
It is possible to view the cloud resources consumed within a tenant, providing a detailed overview of the usage of deployed services. This feature allows users to monitor resource consumption in real time, identify the most heavily used services, and optimize their usage based on requirements.
In the console menu, click on "Consumption Report" and then select the desired time period. You will then be able to view in detail the cloud resource consumption for the selected period, allowing you to analyze service usage and optimize your management accordingly: