API Documentation
Introduction
The Cloud Temple API enables you to create and manage all your cloud resources programmatically. Everything you can do via the Cloud Temple console can also be accomplished via the API, from creating virtual machines to configuring identity and access management.
This documentation guides you through using the Cloud Temple API, covering authentication, best practices, and endpoint lifecycle management.
Quickstart: Your first API request
- 🔑 Generate your PAT from the console
- 🚀 Test with curl on
/iam/v2/roles - ✅ Analyze the JSON response
Prerequisites
Before you begin, you must have a Cloud Temple account with the appropriate permissions to generate API keys.
Steps
-
Generate your API key: Log in to the Cloud Temple console and generate your Personal Access Token (see the API Keys section below).
-
Test your first request: Run the following curl command, replacing
<your-personal-access-token>with your token:
curl -X GET \
  -H "Authorization: Bearer <votre-personal-access-token>" \
  -H "Content-Type: application/json" \
  "https://shiva.cloud-temple.com/api/iam/v2/roles"
- Analyze the response: You will receive the list of IAM roles available in your tenant, allowing you to understand the existing permissions.
Authentication
API Keys (Personal Access Token)
The API key allows you to authenticate when you want to make requests to the API. Generating an API key, also known as a Personal Access Token (PAT), is a secure way to connect to the API Console without using a graphical interface. Each of these tokens is linked to a tenant and the user who created it.
Token creation is performed from your account. You can generate multiple keys and configure permissions for each, within the limits of your assigned privileges.
Create an API key
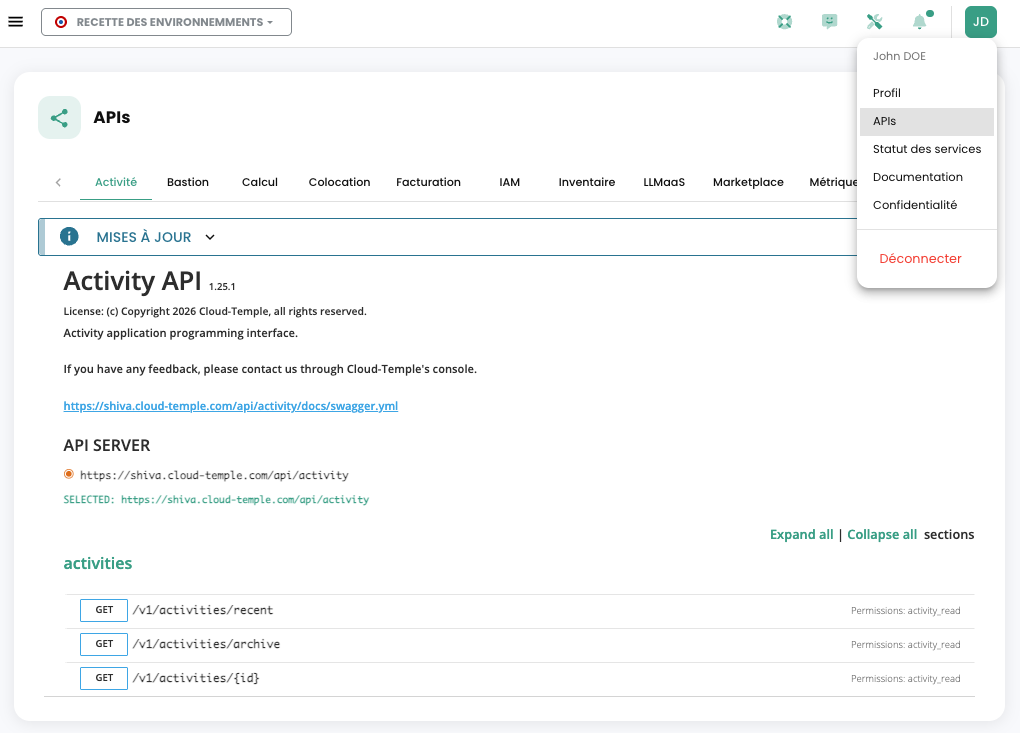
To create an API key, simply click on your profile :
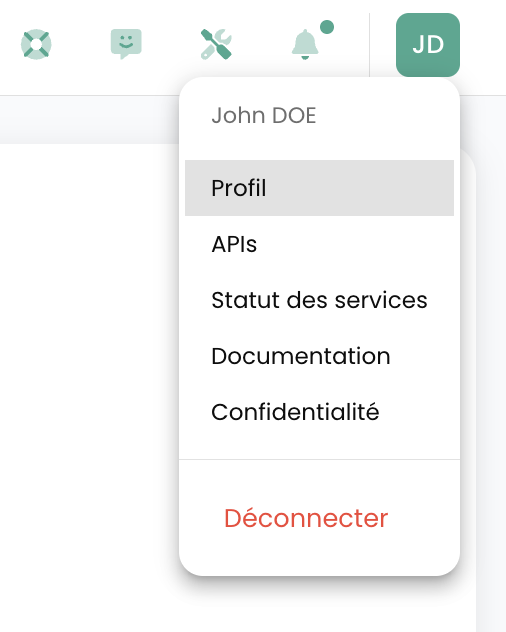
In the profile menu, click on 'Personal Access Token'
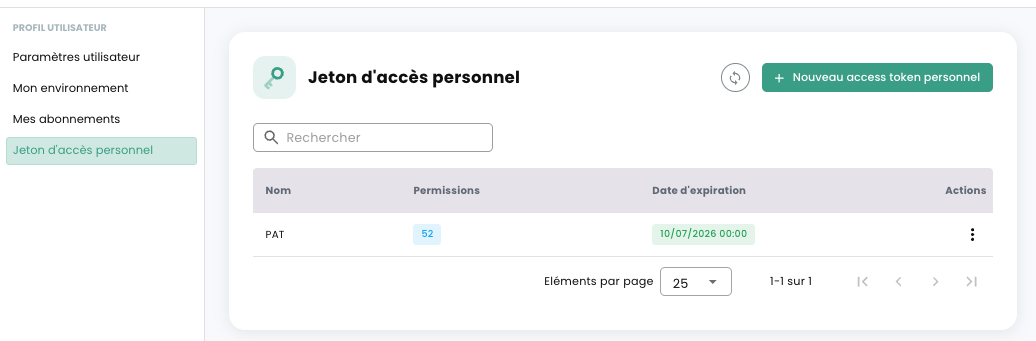
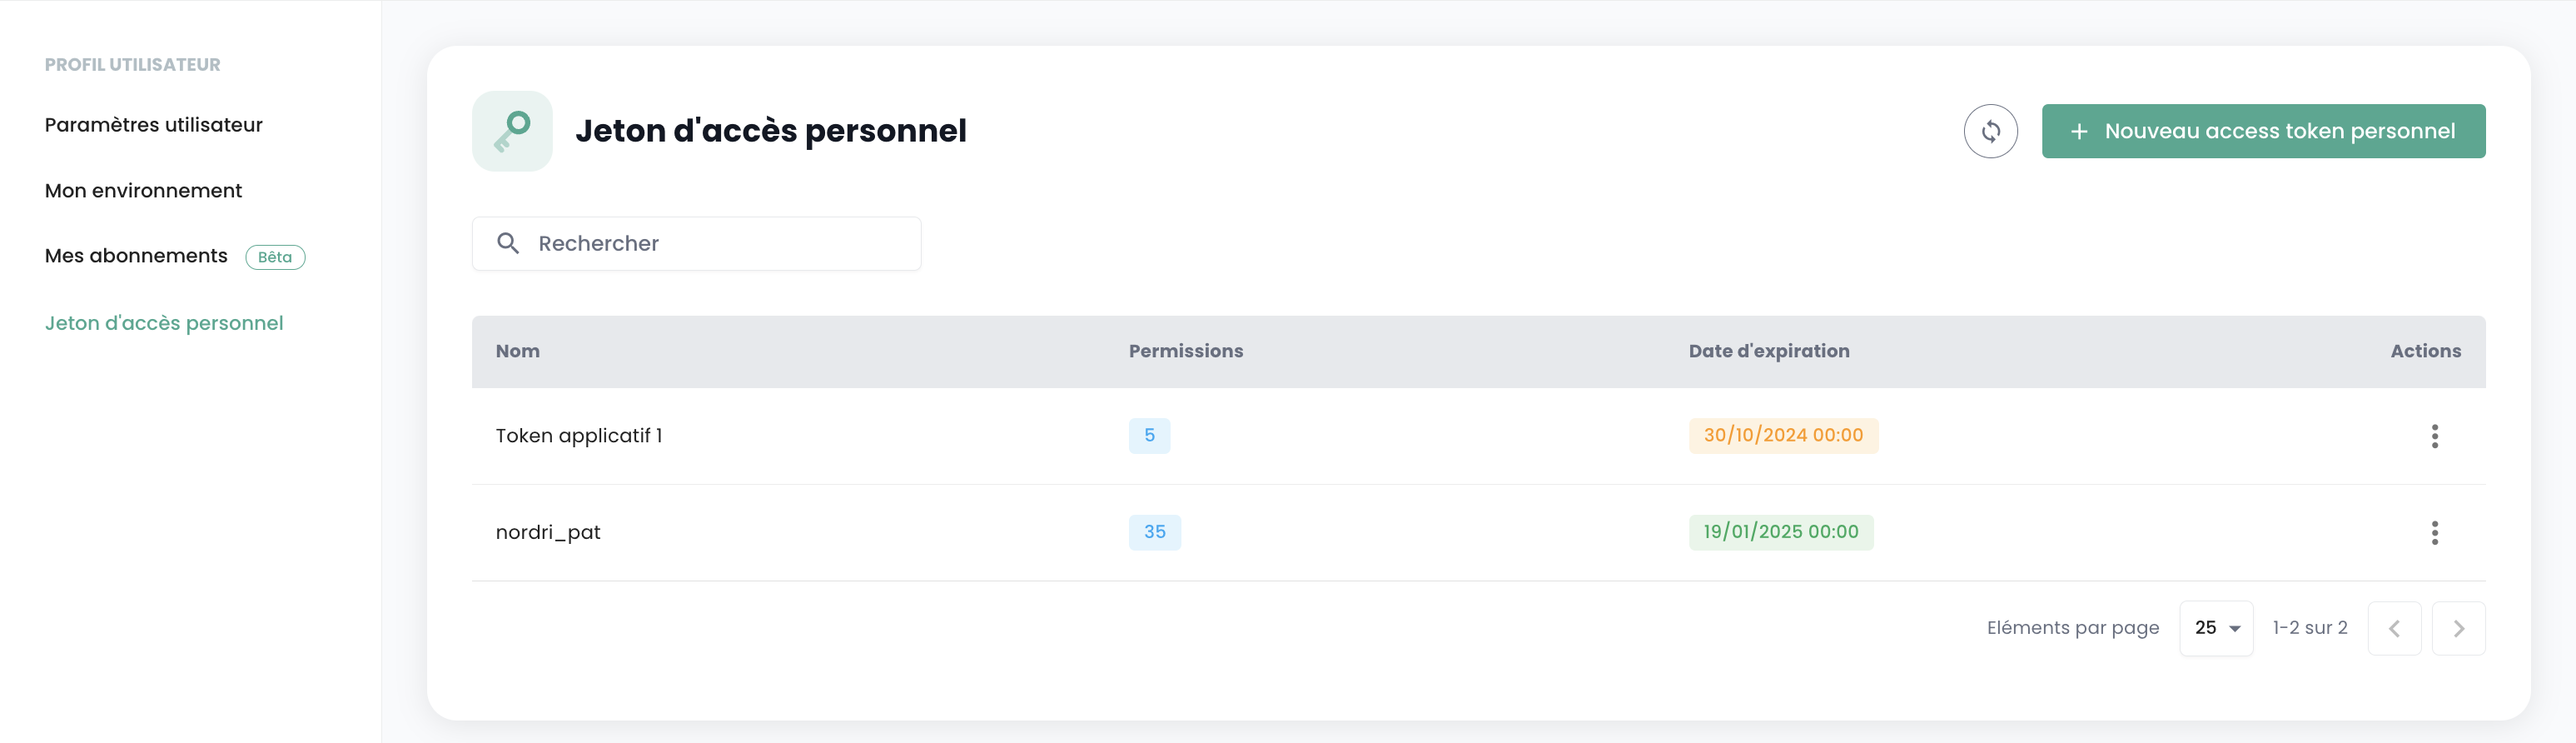
You will then see on screen all the API keys that have been created for this user in this tenant. Click on 'New personal access token'
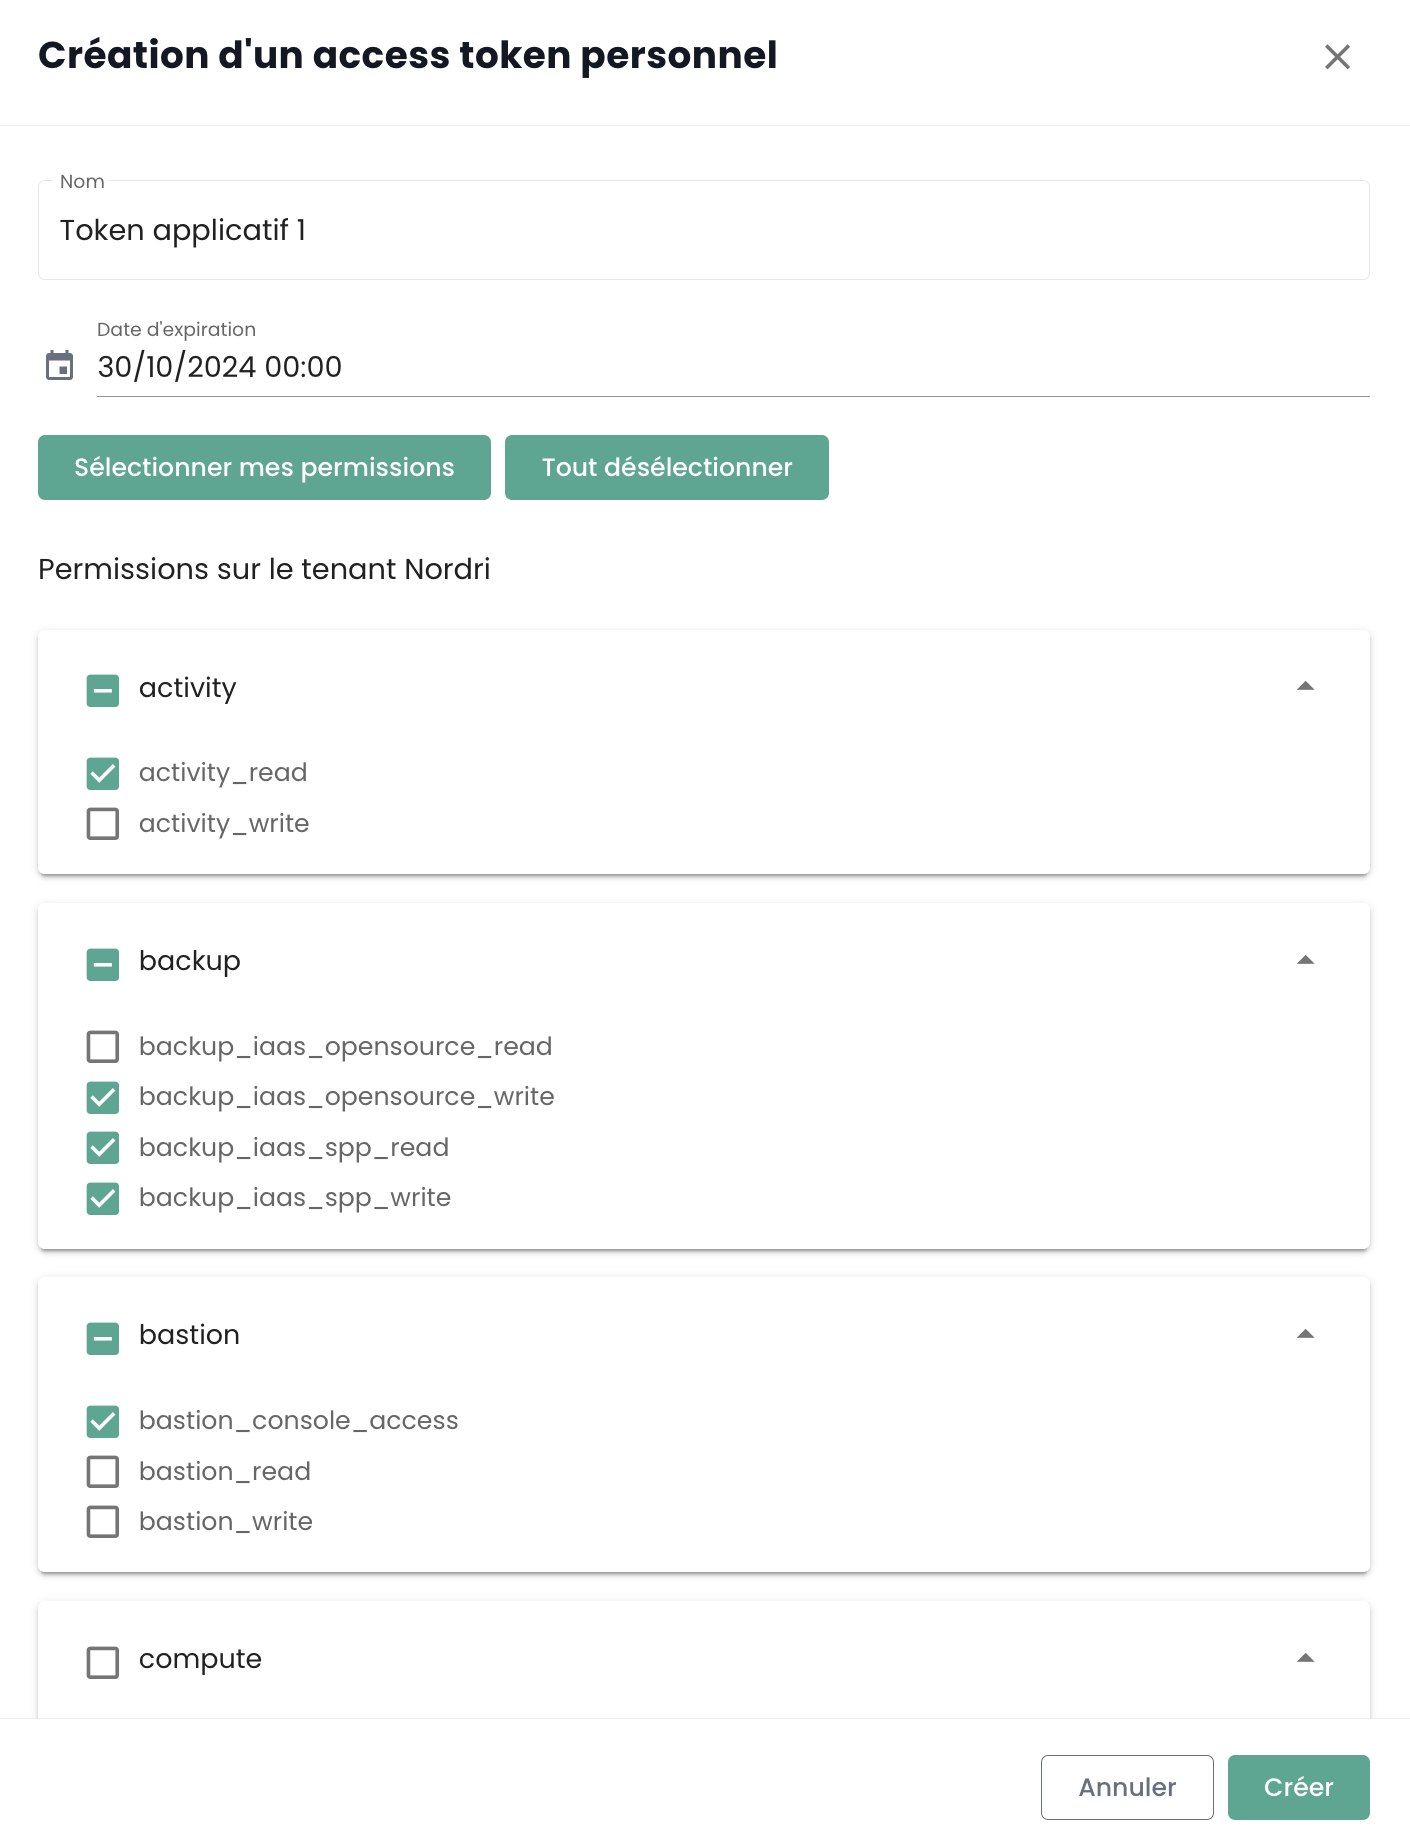
You must then:
- Specify the name of this new token,
- Specify an expiration date (maximum 12 months validity),
- Choose the permissions associated with the token.
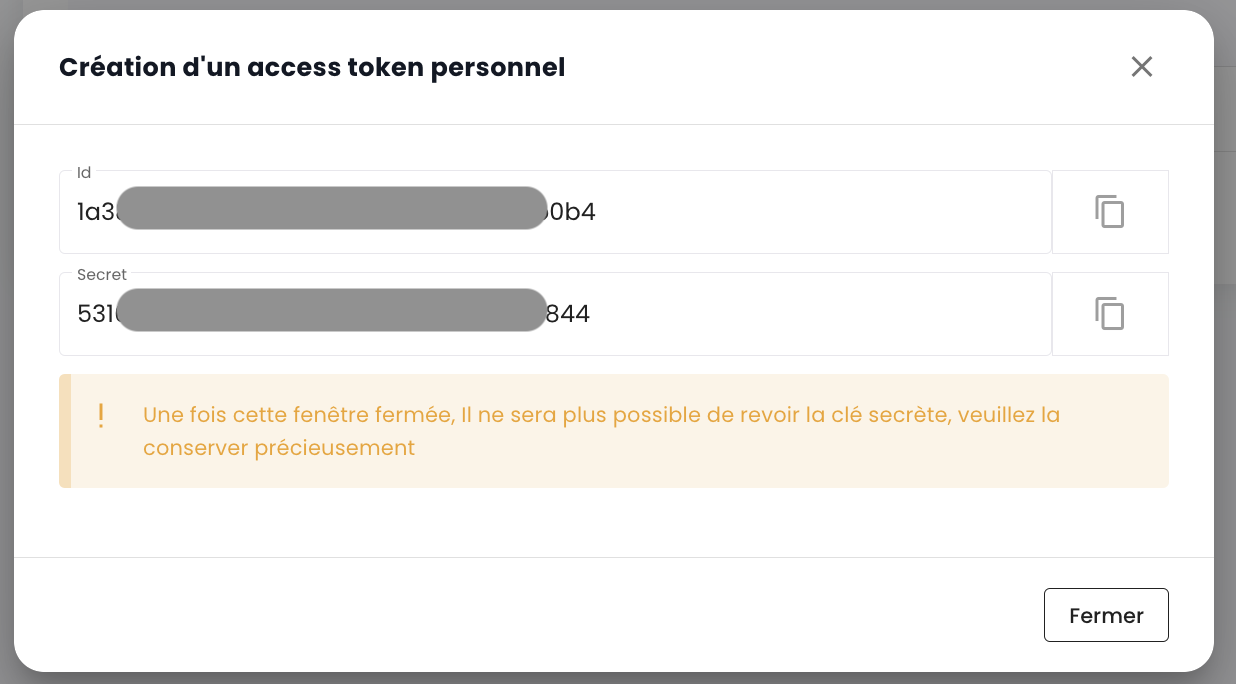
The details regarding your token are then displayed. Warning, it will no longer be possible to access it afterwards.
If you do not record this information, you will need to delete and recreate the token.
For security reasons, it is recommended to create multiple tokens, each with a specific purpose (one token for each application or each business process) rather than creating 1 token with all permissions.
You will then see the newly created token and its expiration date.
When you use your Personal Access Token (PAT) to authenticate with the API, you receive an access token in return. It is important to note that this access token is a JSON Web Token (JWT) with a limited lifespan.
- Lifespan : Each JWT token is valid for a duration of 5 minutes.
- Verification : You can verify the issuance date (
iat) and expiration date (exp) of your token by decoding it. Online tools such as jwt.io allow you to do this easily.
Once the token expires, you will need to re-authenticate with your PAT to obtain a new one. It is therefore recommended to manage this lifecycle in your scripts and applications by planning for automatic token renewal.
API Portal Access
The OpenAPI 3.0 (Swagger) documentation for the Cloud Temple Console APIs is available directly within the application:
Access to the APIs requires authentication. Once authenticated, all operations must include the 'Authorization' header with the bearer access token obtained during the authentication phase.
The URL for the endpoints is directly provided in Swagger (in the "Servers" object on each APIs page).
Explore the interactive documentation
The API portal allows you to:
- View all available endpoints by module
- Test requests directly from the interface
- View data models (schemas) for each resource
- View possible response codes for each endpoint
Endpoints structure
URL Format
Cloud Temple API URLs follow a consistent structure:
https://shiva.cloud-temple.com/api/{module}/v{version}/{ressource}
Where:
{module}: The relevant module (compute, iam, network, backup, etc.){version}: The API version (v1, v2, etc.){ressource}: The resource to manipulate (virtual-machines, users, networks, etc.)
Example Endpoints
# Machines virtuelles (Compute)
GET    https://shiva.cloud-temple.com/api/compute/v1/virtual-machines
POST   https://shiva.cloud-temple.com/api/compute/v1/virtual-machines
GET    https://shiva.cloud-temple.com/api/compute/v1/virtual-machines/{id}
PATCH  https://shiva.cloud-temple.com/api/compute/v1/virtual-machines/{id}
DELETE https://shiva.cloud-temple.com/api/compute/v1/virtual-machines/{id}

# Identité et accès (IAM)
GET    https://shiva.cloud-temple.com/api/iam/v1/users
POST   https://shiva.cloud-temple.com/api/iam/v1/users
GET    https://shiva.cloud-temple.com/api/iam/v1/users/{id}

# Réseaux
GET    https://shiva.cloud-temple.com/api/network/v1/virtual-networks
POST   https://shiva.cloud-temple.com/api/network/v1/virtual-networks
Module Organization
The Cloud Temple API is organized into functional modules:
| Module | Description | Base URL |
|---|---|---|
| Cloud Temple Console | General features | /api/v1/ |
| Identity (IAM) | User and access management | /iam/v1/ |
| VMware IaaS | VMware virtualization resources | /compute/v1/ |
| OpenIaaS | Xen Orchestra resources | /openiaas/v1/ |
| S3 | Object storage | /s3/v1/ |
| OpenShift | PaaS platform | /openshift/v1/ |
| Bastion | SSH/RDP bastion appliances | /bastion/v1/ |
| Network | Layer 2 and 3 network management | /network/v1/ |
| Hosting | Colocation and housing | /housing/v1/ |
| Marketplace | Solutions catalog | /marketplace/v1/ |
| Support | Tickets and assistance | /support/v1/ |
| Notification | Notification system | /notification/v1/ |
| LLMaaS | Artificial intelligence | /llmaas/v1/ |
Activities
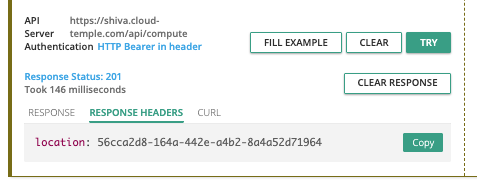
Write requests (POST, PUT, PATCH, DELETE) are tracked via activity management. Each request of this type automatically generates an associated activity. An HTTP 201 status code confirms the successful creation of the activity. The unique identifier of this activity is returned in the response headers, under the 'Location' key.
Once the identifier is retrieved, the activity details can be accessed using the Activity module API:
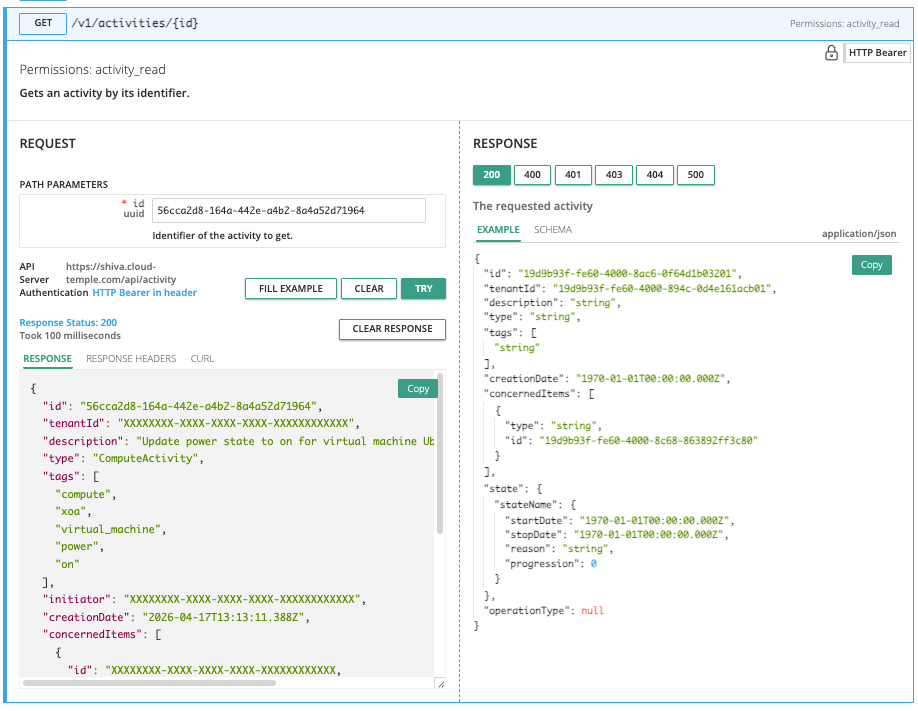
The activity content includes all essential information to identify the operation, its execution date, as well as its progress status. Here is the activity model:
{
  "id": "UUIDV4",
  "tenantId": "UUIDV4",
  "description": "STRING",
  "type": "ComputeActivity" | "BackupActivity" | "IAMActivity" | "TagActivity" | "RTMSActivity" | "BastionActivity" | "SupportActivity",
  "tags": "STRING[]",
  "initiator": "UUIDV4",
  "creationDate": "DATE",
  "concernedItems": [
    {
      "type": "string",
      "id": "string"
    }
  ],
  "state": "CompletedState | RunningState | WaitingState | FailedState",
  "operationType": "read" | "write"
}
Activity States
The state object can take different forms depending on the state of the activity, namely:
waiting
State before the operation has started:
waiting: {}
running
State when the operation is in progress:
running: {
  "status": "string",
  "startDate": "Date",
  "progression": "number"
}
failed
State if the operation failed:
failed: {
  "startDate": "Date",
  "stopDate": "Date",
  "reason": "string"
}
completed
Status if the operation is completed:
completed: {
  "startDate": "Date",
  "stopDate": "Date",
  "result": "string"
}
The Identifier (UUIDv4) of the created resource is available in the activity result once it is completed.
API Limits
Why rate limits?
The Cloud Temple console defines caps on the request volume that a user can send to the API over a specified period. Implementing these rate limits is a common practice in API management, adopted for several key reasons:
- Abuse prevention : These limits help safeguard API integrity by preventing abusive or clumsy usage that could compromise its operation.
- Service quality assurance : By regulating API access, we ensure an equitable distribution of resources, allowing all users to benefit from a stable and high-performing experience.
Consider the example of a poorly designed or inefficient script that attempts repetitive API calls, risking resource saturation and performance degradation. By establishing request thresholds, we prevent these scenarios and ensure the maintenance of a smooth and uninterrupted service for our entire customer base.
What are the rate limits for the Cloud Temple Console API?
We apply quantitative restrictions on user interactions with the console for each product.
Limits are defined in requests per second (r/s) per source IP. Beyond the threshold, the system will respond with an HTTP 429 error code, indicating that the allowed request limit has been exceeded.
Here are the defined limits:
| Product | Limit Threshold |
|---|---|
| Cloud Temple Console | 25 r/s |
| Identity (IAM) | 25 r/s |
| IaaS VMware | 25 r/s |
| OpenIaaS | 25 r/s |
| S3 | 25 r/s |
| OpenShift | 25 r/s |
| Bastion | 25 r/s |
| Network | 25 r/s |
| Hosting | 25 r/s |
| Marketplace | 25 r/s |
| Support | 25 r/s |
| Notification | 25 r/s |
| LLMaaS | 25 r/s |
Specific Routes
Certain specific API endpoints, particularly those related to authentication or sensitive actions, have more restrictive limits to enhance security and ensure stability.
| Route | Rate Limit Threshold |
|---|---|
| Authentication (IAM) | 5 r/s |
| IaaS - Storage (Datastores) | 20 r/s |
| Marketplace (Contact) | 1 r/min - 5 r/h |
How do rate limits work?
If the number of requests sent to an API endpoint exceeds the allowed limit, the endpoint will respond by returning an HTTP 429 response code. This code indicates that the user has exceeded the permitted number of requests. When this occurs, the endpoint will also provide a JSON object as a response, which will contain detailed information about the applied rate limit:
{
  "error": {
    "status": "429 Too Many Requests",
    "message": "Too Many Requests"
  }
}
How to avoid making too many requests?
It is recommended to limit the number of API calls made by your automation to stay below the rate limit set for the endpoint.
This situation often occurs when multiple requests are executed in parallel, using multiple processes or threads.
There are several ways to improve the efficiency of your automation, including using caching mechanisms and implementing a retry system with exponential backoff. This method involves taking a short pause when a rate limit error is encountered, then retrying the request. If the request fails again, the pause duration is gradually increased until the request succeeds or a maximum number of retries is reached.
This approach offers several benefits:
- Exponential backoff ensures that initial attempts are executed quickly, while allowing for longer delays in case of repeated failures.
- Adding jitter to the pause helps prevent all attempts from occurring simultaneously.
It is important to note that failed requests do not count against your rate limit. However, continuously retrying a request may not be a viable long-term solution, as this behavior could change in the future. Therefore, we recommend not relying exclusively on this mechanism.
The Python libraries Backoff and Tenacity are good starting points for implementing backoff strategies.
Lifecycle and deprecation of endpoints
Deprecation Policy
Cloud Temple is committed to maintaining the compatibility of its API over time. However, when it is necessary to evolve the API (new features, optimizations, security fixes), certain endpoints may be deprecated and subsequently removed.
3-Month Minimum Rule
When an endpoint is marked as deprecated:
- Official Announcement: The deprecation is announced in the console release notes
- Transition Period: The endpoint remains accessible and functional for at least 3 months after the announcement
- Removal Date: A specific permanent removal date is communicated at the time of the announcement
- Documented Alternative: The replacement endpoint is documented and available
This 3-month rule gives you the necessary time to adapt your code and migrate to the new endpoints.
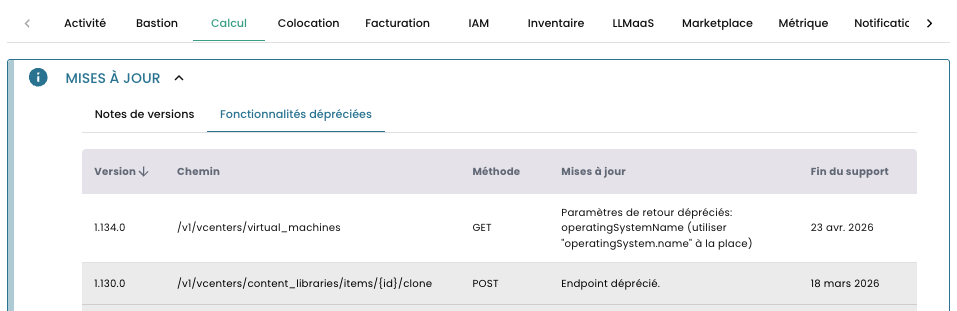
How to identify a deprecated endpoint?
In the API portal (Swagger)
Deprecated endpoints appear struck through in the Swagger documentation:
POST /v1/ancien/endpoint
The endpoint description includes:
- The deprecation announcement date
- The scheduled removal date
- The recommended replacement endpoint
Best Practices for Managing Deprecations
-
Monitor deprecated features: Regularly check the console for deprecated features to stay informed about upcoming deprecations.
-
Plan your migrations: As soon as a deprecation is announced, plan to migrate your code to the new endpoint within 3 months.
-
Test new endpoints: Test new endpoints as soon as they are available, even during the transition period.
-
Document your dependencies: Maintain a list of the endpoints your application uses to facilitate future migrations.
Best practices
Token Security
- 🚫 Never expose your tokens in versioned code (Git, etc.)
- 🔐 Use environment variables to store tokens
- 🎯 Create tokens with minimal permissions (principle of least privilege)
- 🔄 Regularly renew your tokens (maximum 12 months)
- ⚠️ Immediately revoke any compromised token
Error Handling
Always handle HTTP errors in your code. Pay special attention to the following codes:
| Code | Description | Recommended Action |
|---|---|---|
| 401 Unauthorized | Expired or invalid token | Re-authenticate with your PAT |
| 403 Forbidden | Insufficient permissions | Check token permissions |
| 429 Too Many Requests | Rate limit reached | Wait before retrying (backoff) |
| 500/503 Server Error | Temporary server error | Retry later |
API Call Optimization
- Use pagination for large lists
- Cache data that changes infrequently
- Use filters to limit returned data
- Group operations when possible
- Track the status of asynchronous activities instead of intensive polling
Retry with exponential backoff
To handle temporary errors or rate limiting (HTTP 429), implement a retry strategy with exponential backoff: