Identity Federation Example with Microsoft EntraID
Here is an example configuration of the identity provider for a Cloud Temple organization using Microsoft EntraID (Azure Active Directory).
Configuring your Microsoft identity provider at the Cloud Temple organization level simplifies user authentication on the Console. This helps avoid the proliferation of authentication factors and reduces the attack surface.
If your users are already authenticated to their Microsoft accounts, logging into the Console services will be seamless and transparent.
Below are the steps to complete this configuration:
Step 1: SSO Configuration on Microsoft Azure Side
Register a new Azure application (Azure portal)
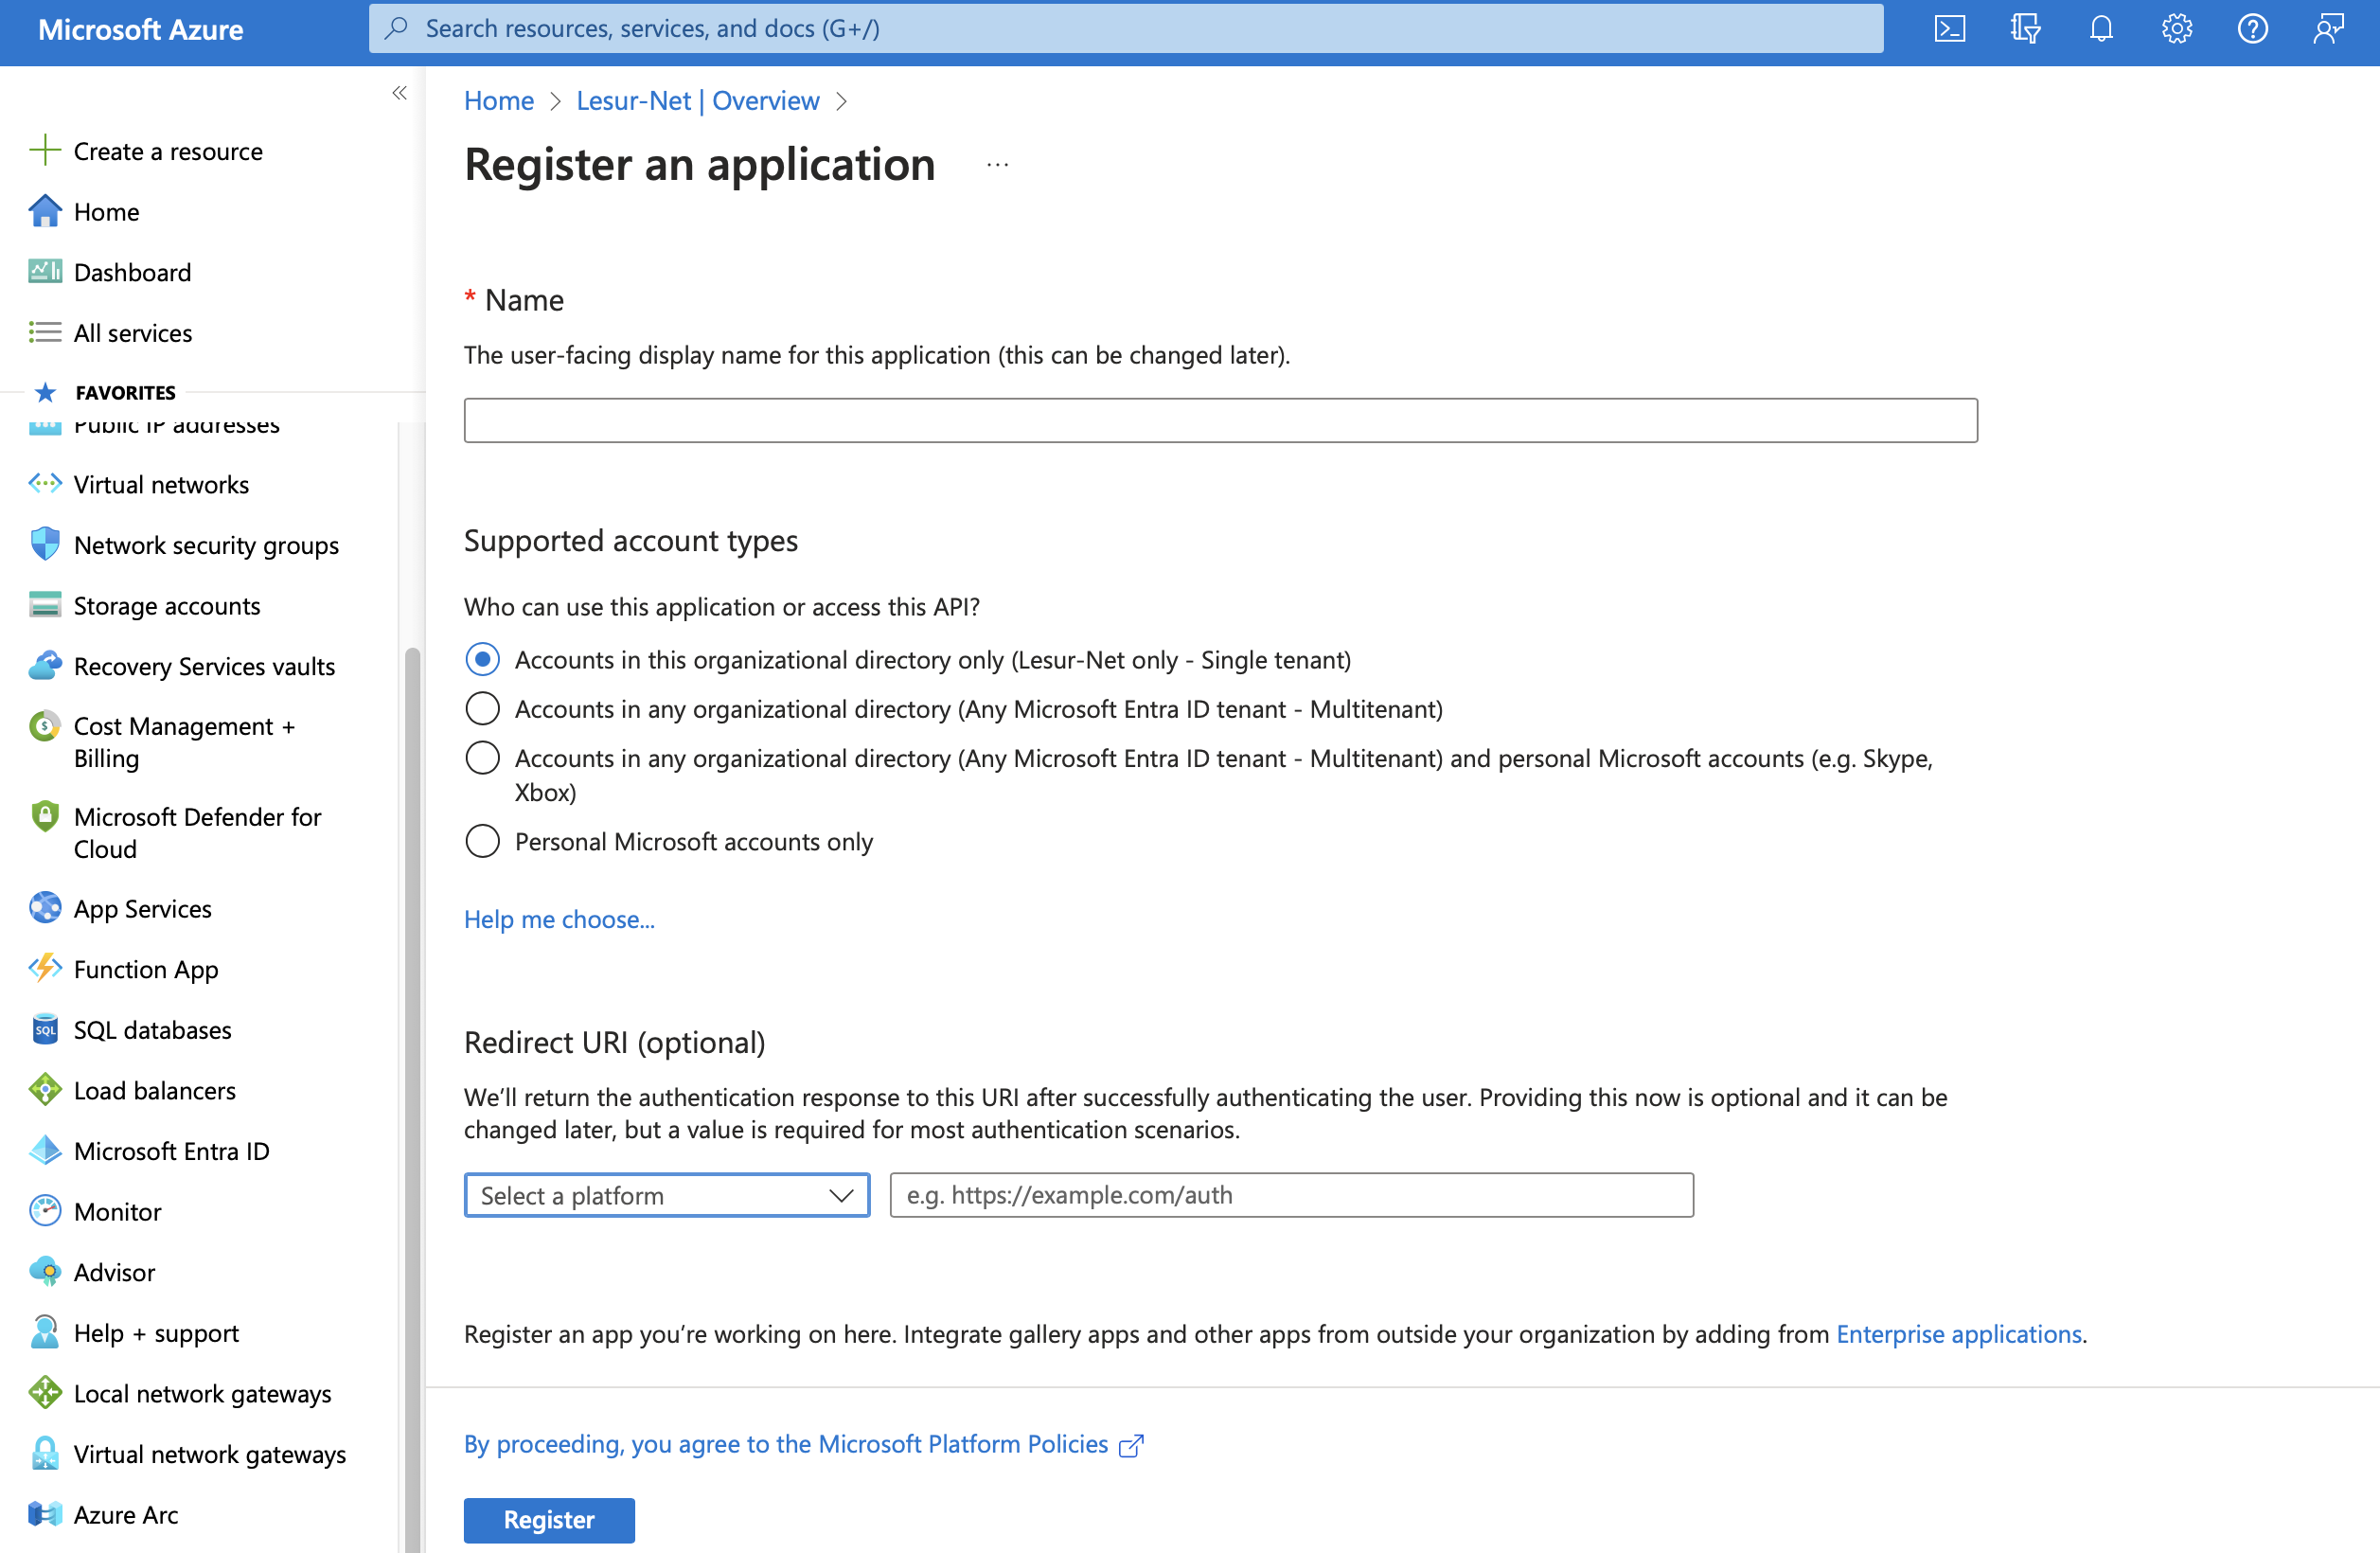
To create the app registration, go to the Microsoft Azure portal, then navigate to Microsoft Entra ID, and select "Add > App Registration".
On the "Register an application" page, please specify:
- __Name__ : Enter "__SHIVA__"
- __Supported account types__ : __Accounts in this organizational directory only__ (__<Your Azure Tenant>__ only - Single tenant)
- __Redirect URL__ : Do not configure this field at this time. The URL will be provided by Cloud Temple support and should be added to this field later.
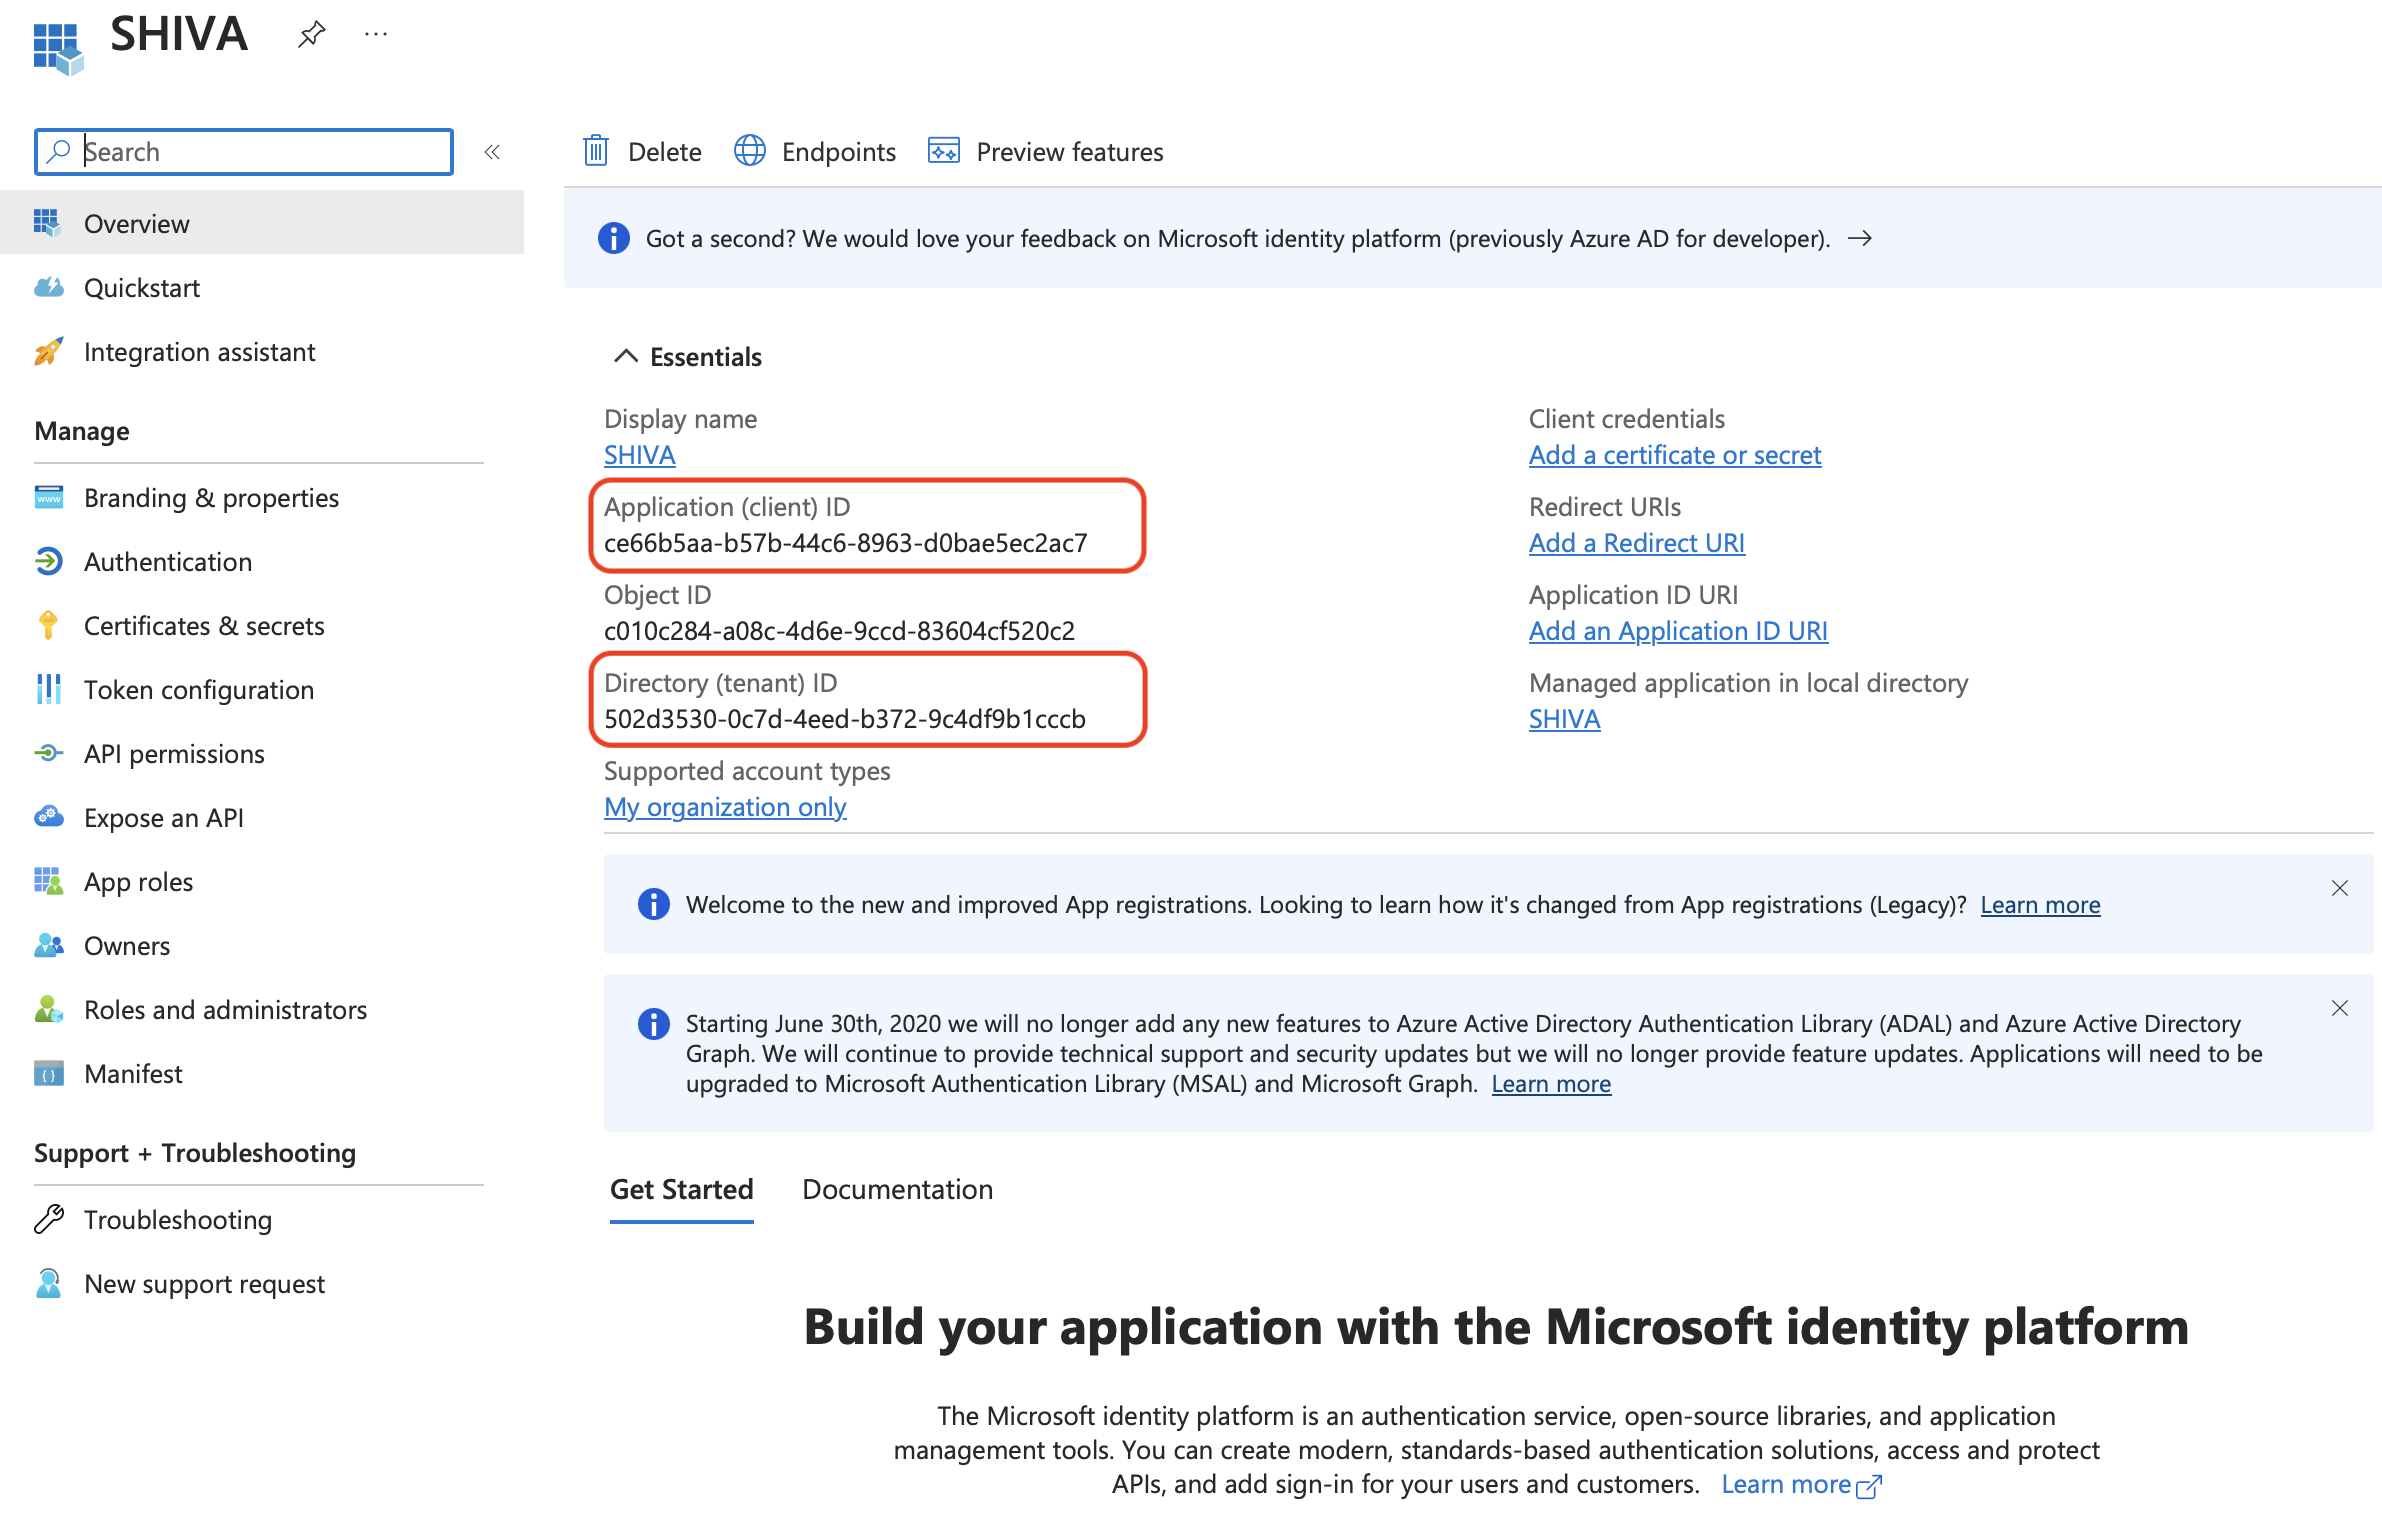
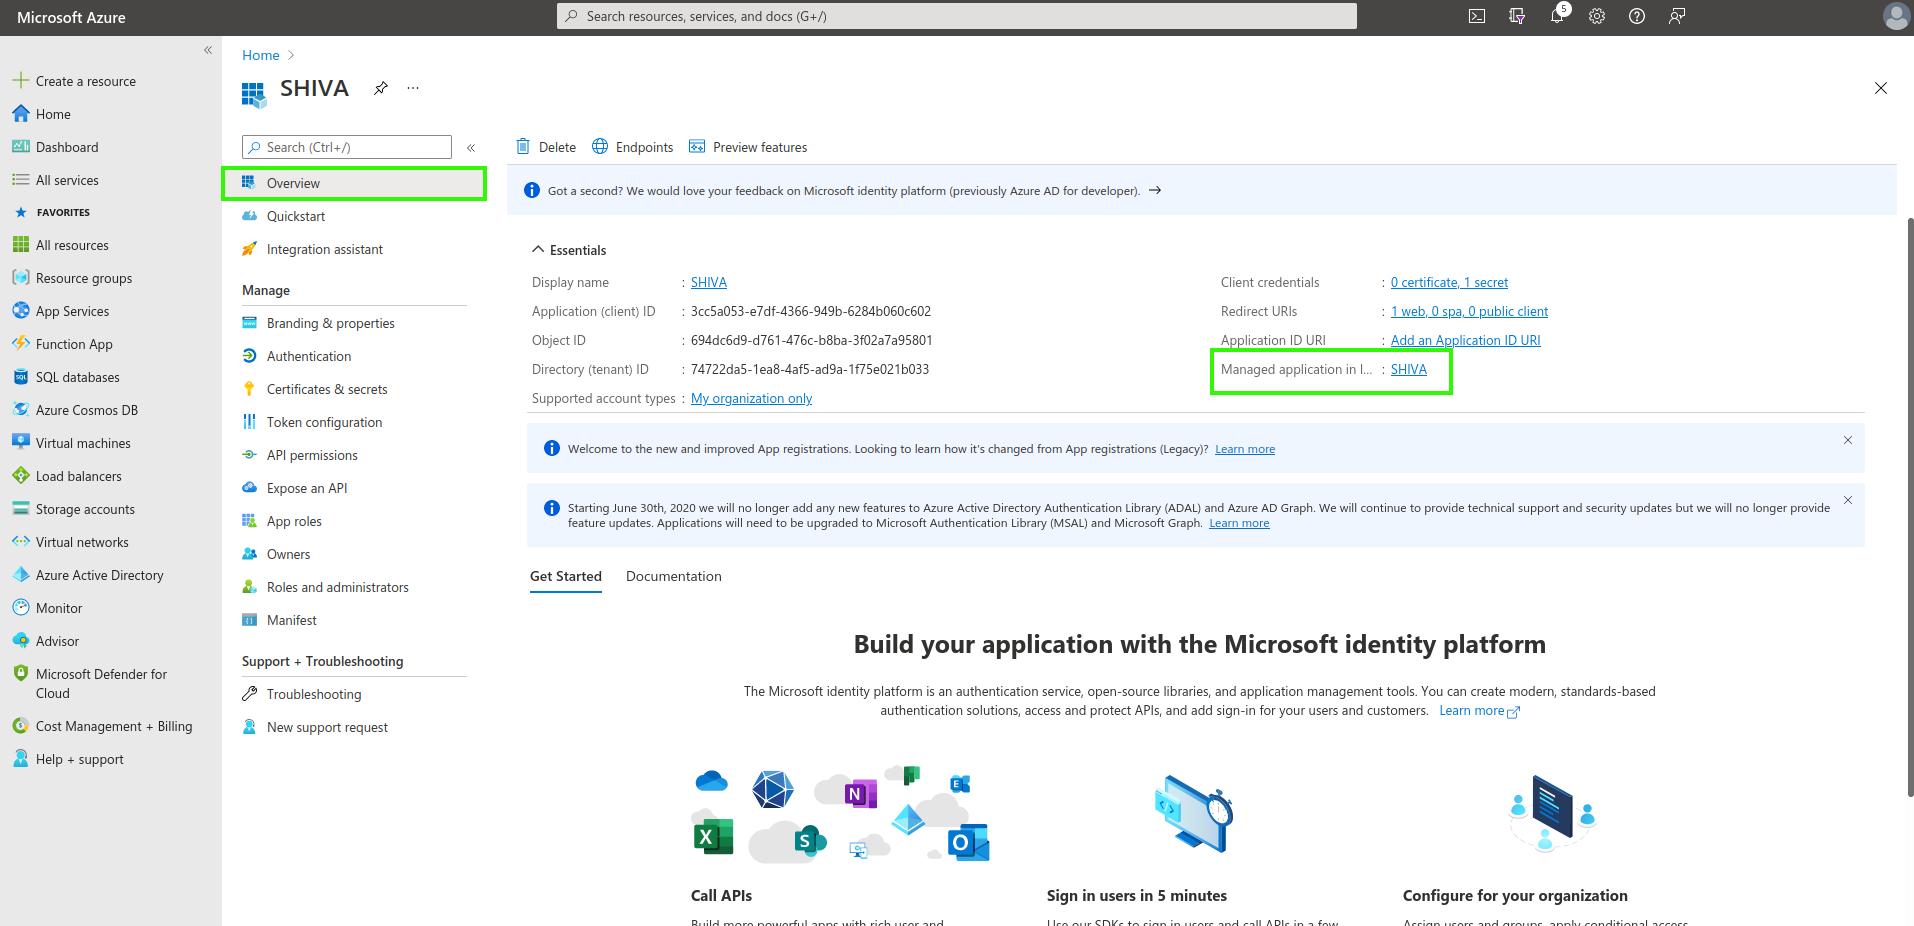
The Application (client) ID and Directory (tenant) ID are the key details that must be provided in your support request to the Cloud Temple team to enable Microsoft Entra ID authentication for your organization.
Definition of a secret
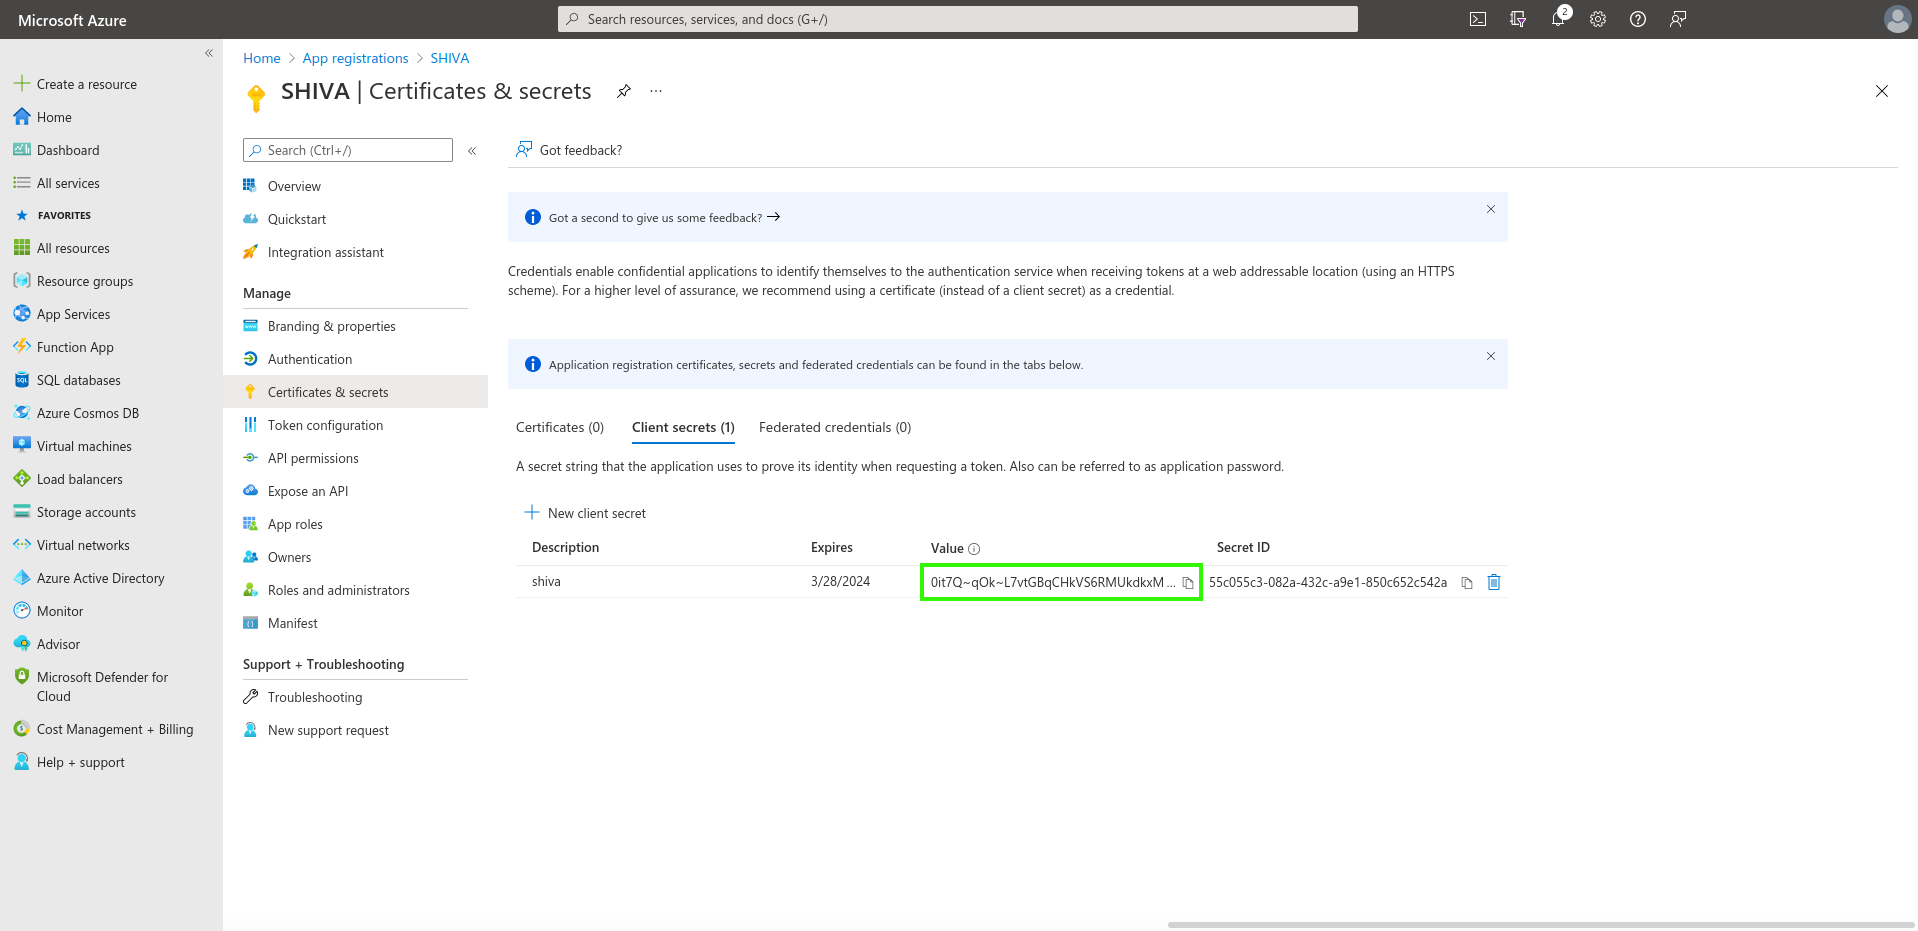
In the "Certificates & secrets" tab, create a new secret.
Note: The expiration date of the secret cannot exceed 24 months, even with a custom expiration date.
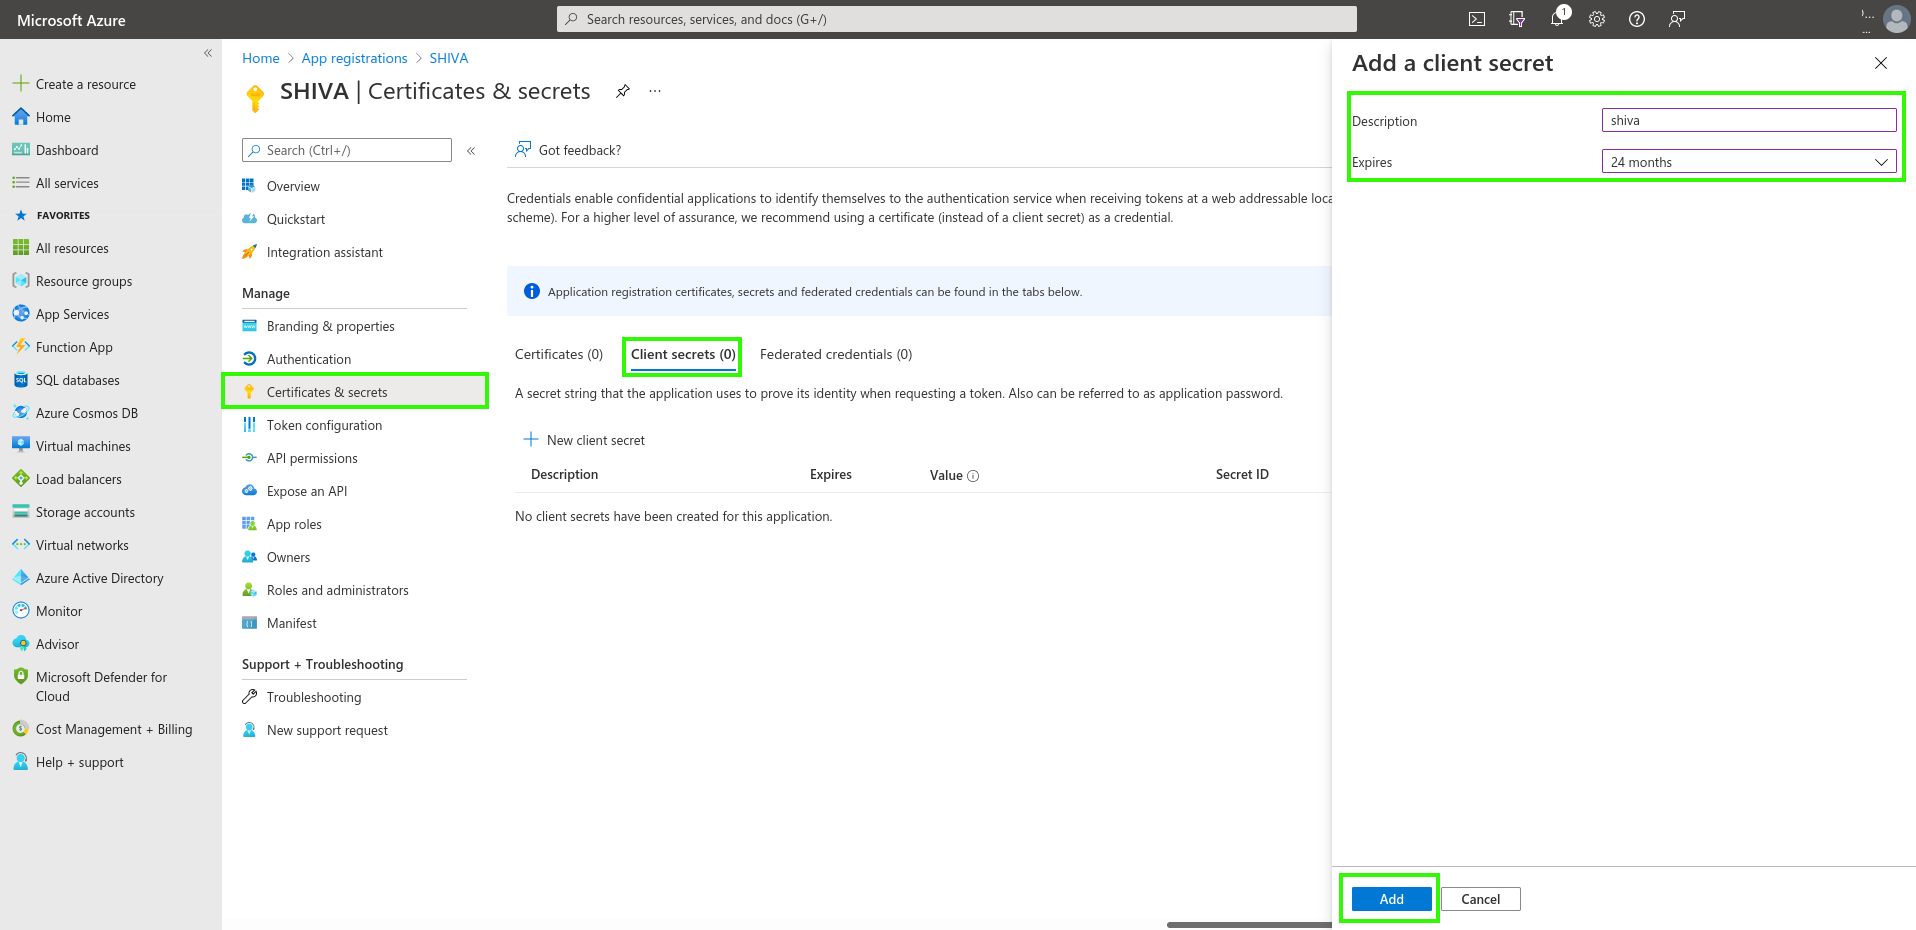
The generated secret must be provided in the support request:
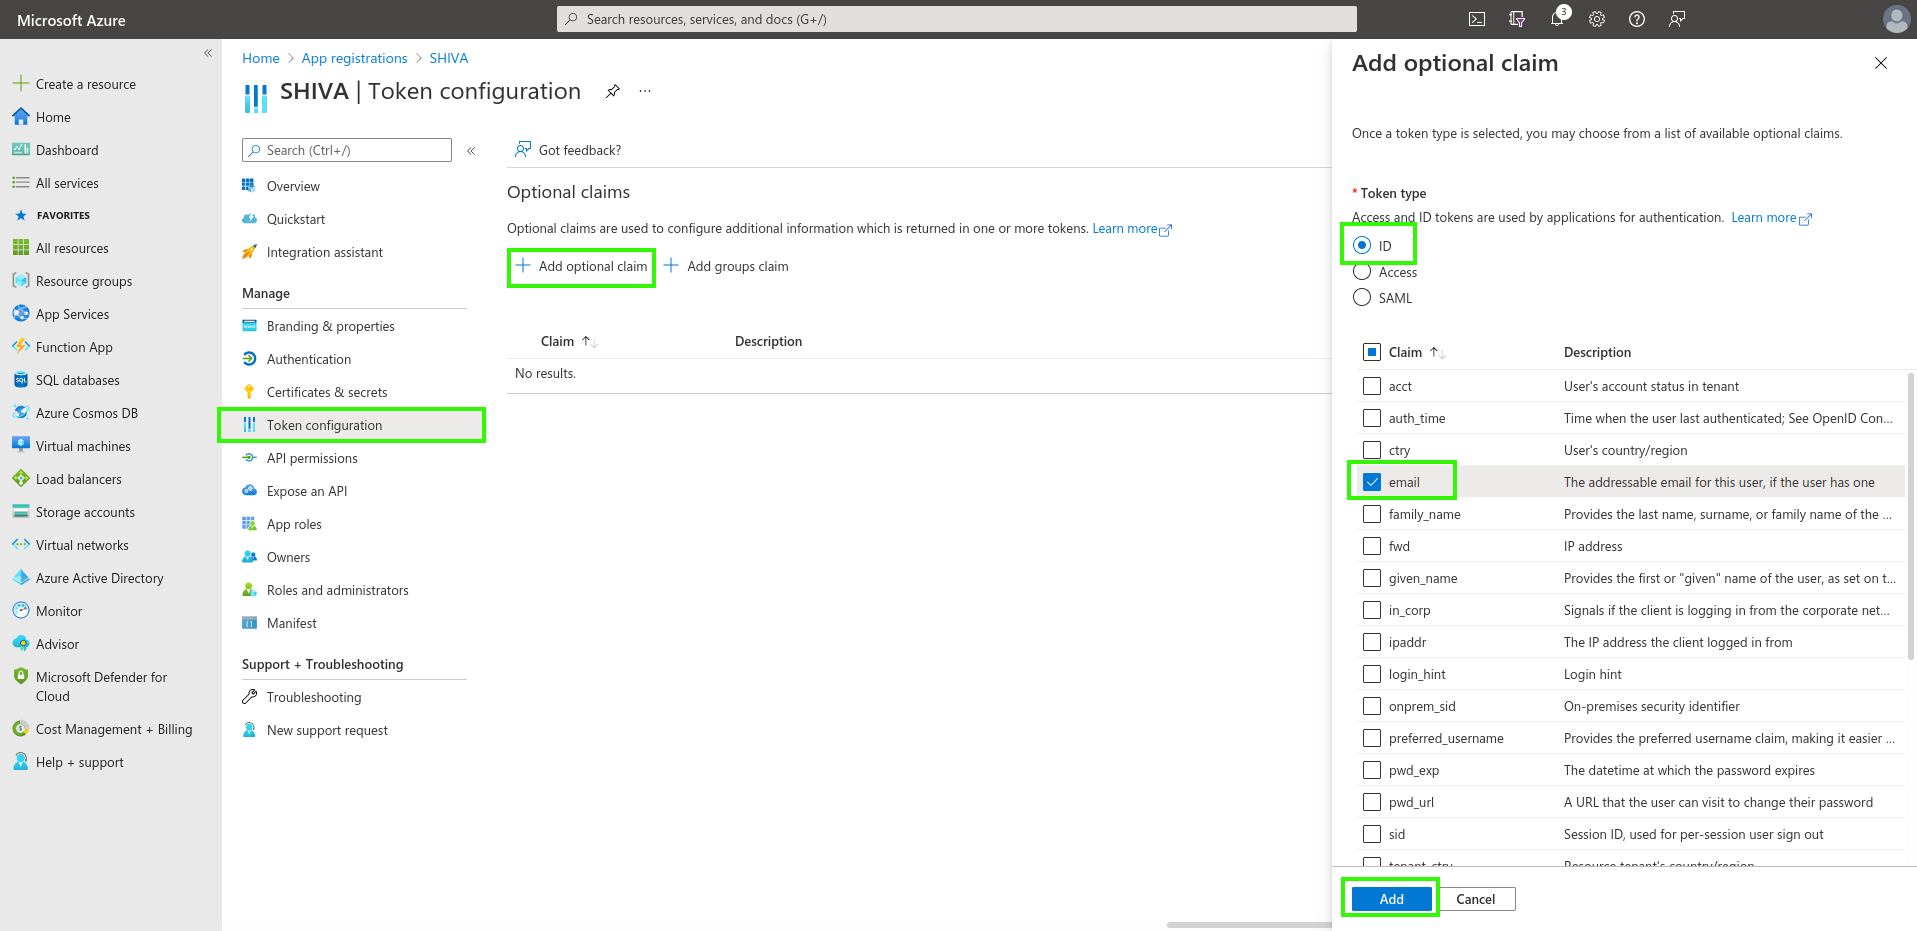
Definition des EntraID-Tokens
Der EntraID-Token ist für die Konfiguration der Authentifizierung erforderlich.
Klicken Sie im Menü "Token Configuration" auf "Add optional claim". Wählen Sie als Token-Typ "ID" aus und aktivieren Sie die Option "email".
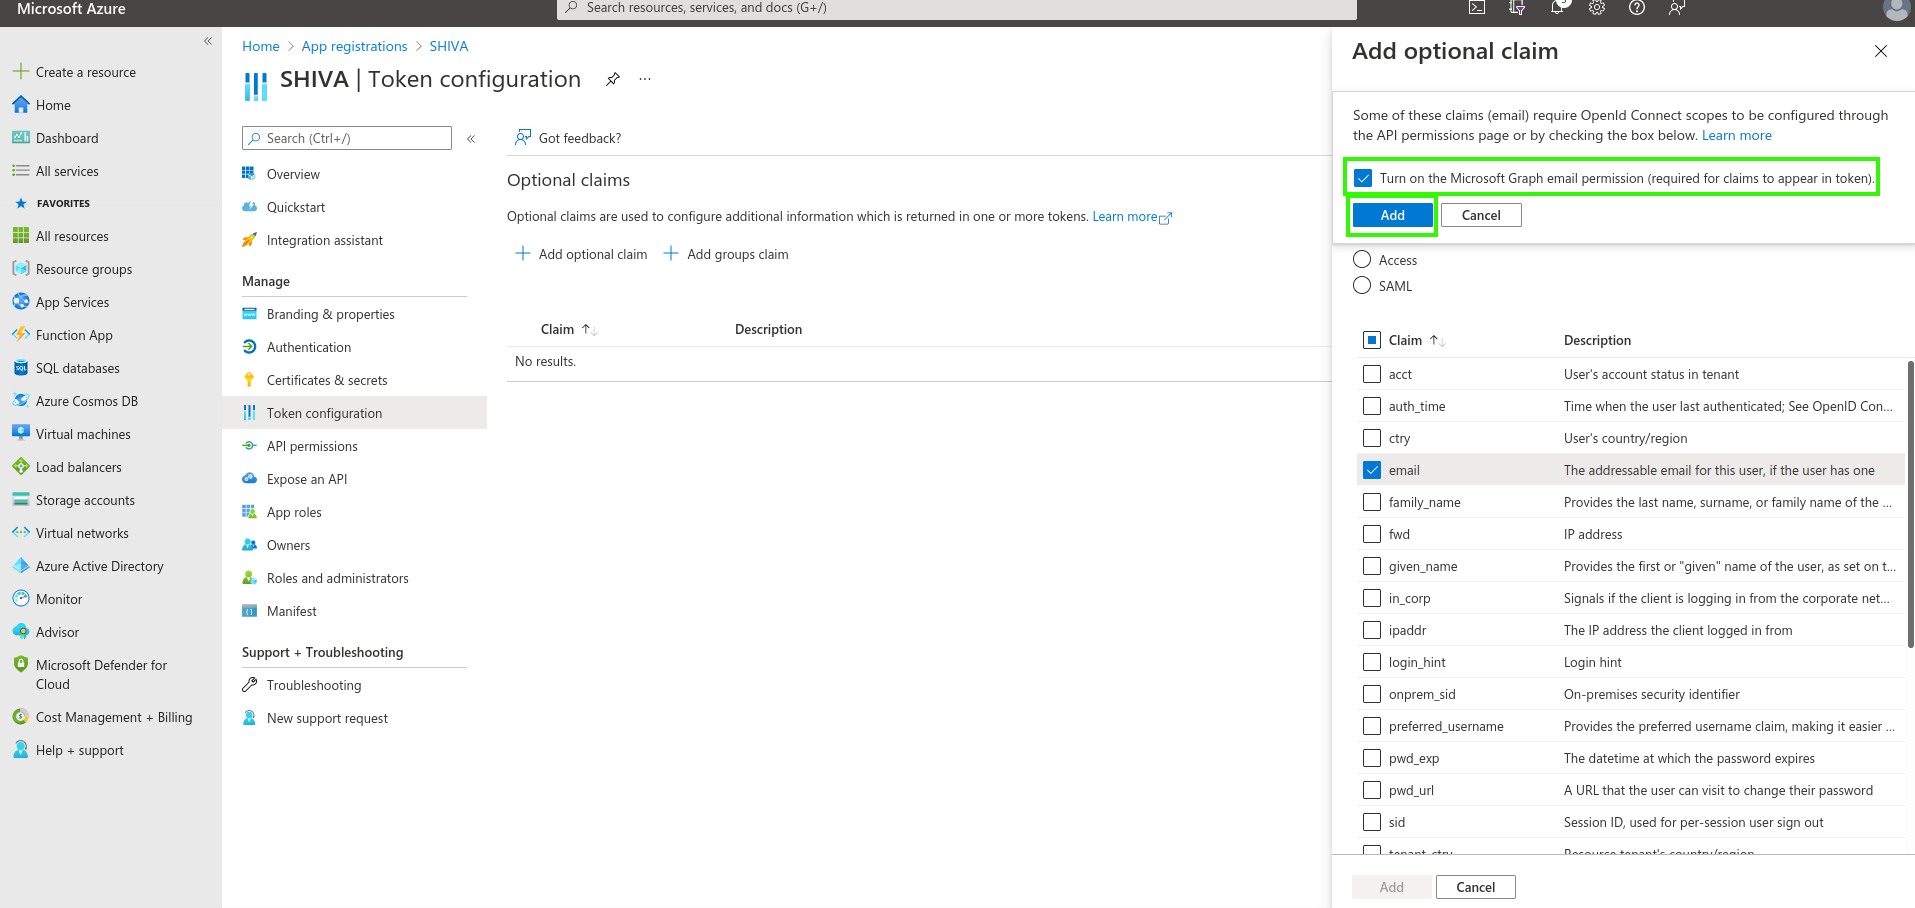
Die Azure-Oberfläche fragt Sie daraufhin, ob Sie eine Berechtigung hinzufügen möchten, die Ihnen das Lesen der E-Mail-Adresse eines Benutzers (Microsoft Graph email) ermöglicht. Aktivieren Sie das Kontrollkästchen und bestätigen Sie.
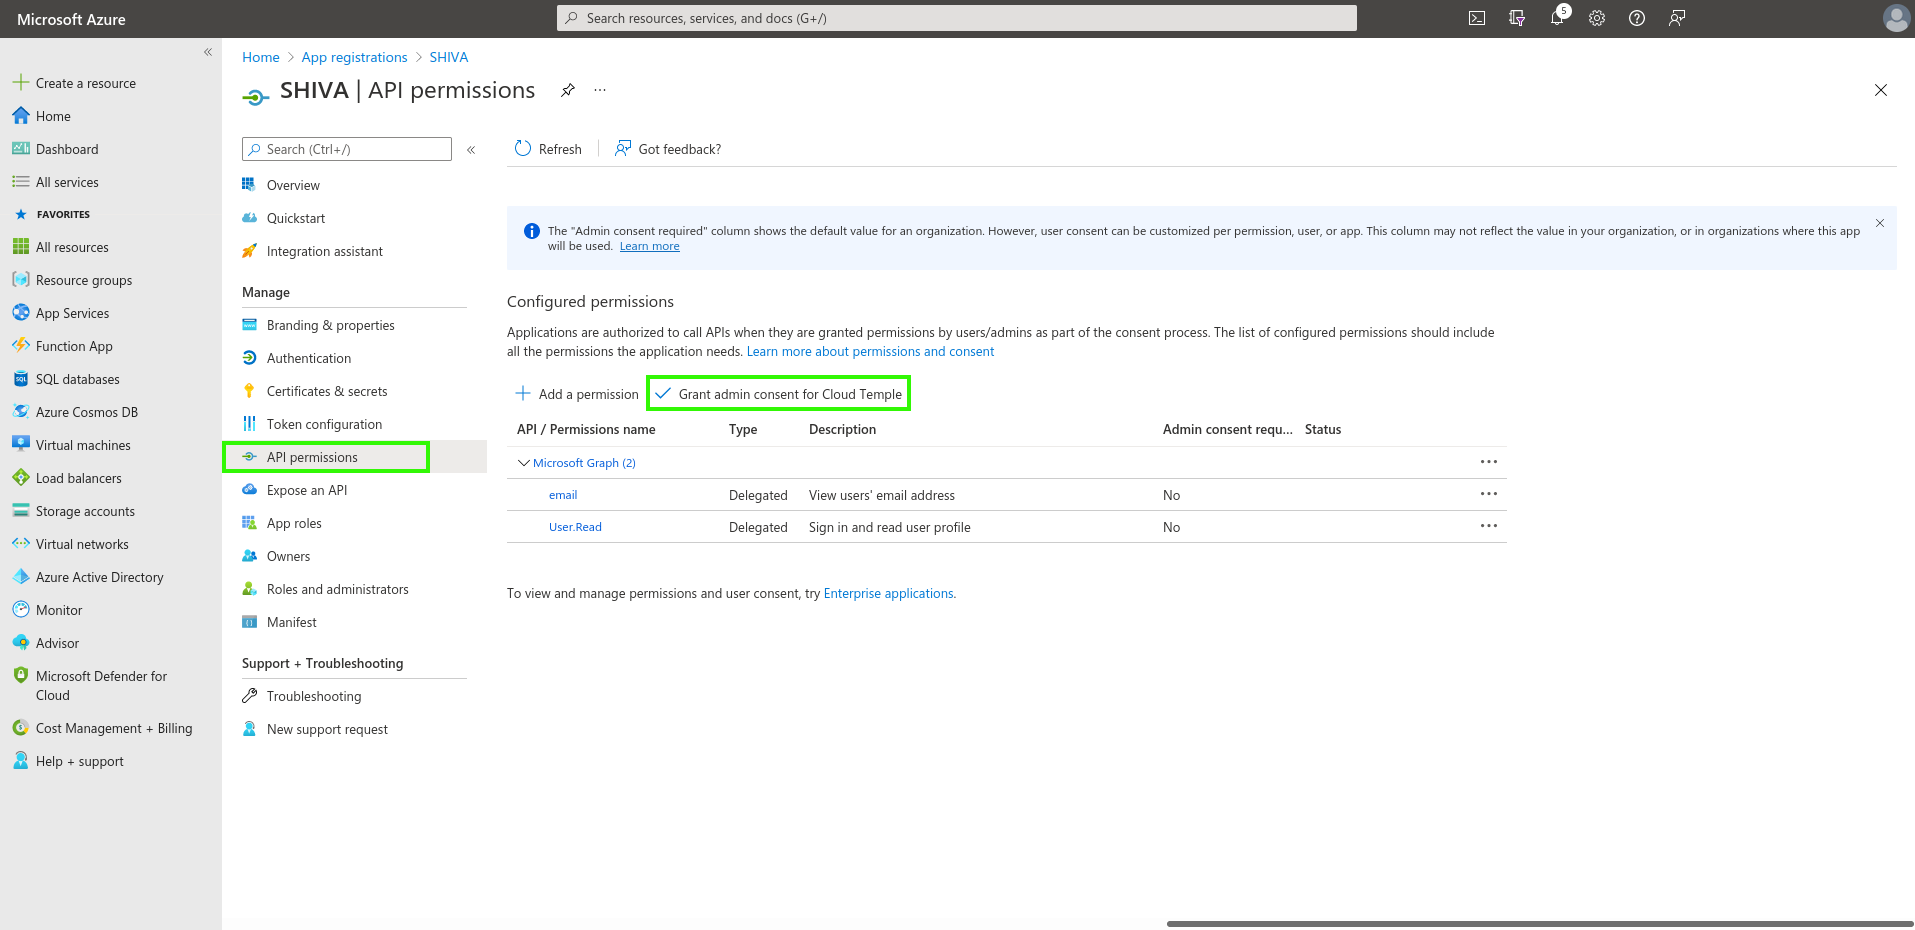
Wechseln Sie anschließend zu "API-Berechtigungen" und klicken Sie auf "Grant admin consent for Cloud Temple".
Additional Security Configurations (optional but recommended)
By default, Microsoft Entra ID, as configured, will allow any user in your Azure tenant to sign in to your Cloud Temple organization.
It is possible to restrict access at the "App Registration" level to allow only a specific list of users or groups to sign in to your Cloud Temple organization.
Follow these steps:
Access additional "App Registration" settings
Option 1
Gehen Sie zum Register „Übersicht“ und klicken Sie auf den Anwendungsnamen (den Link hinter „Verwaltete Anwendung“).
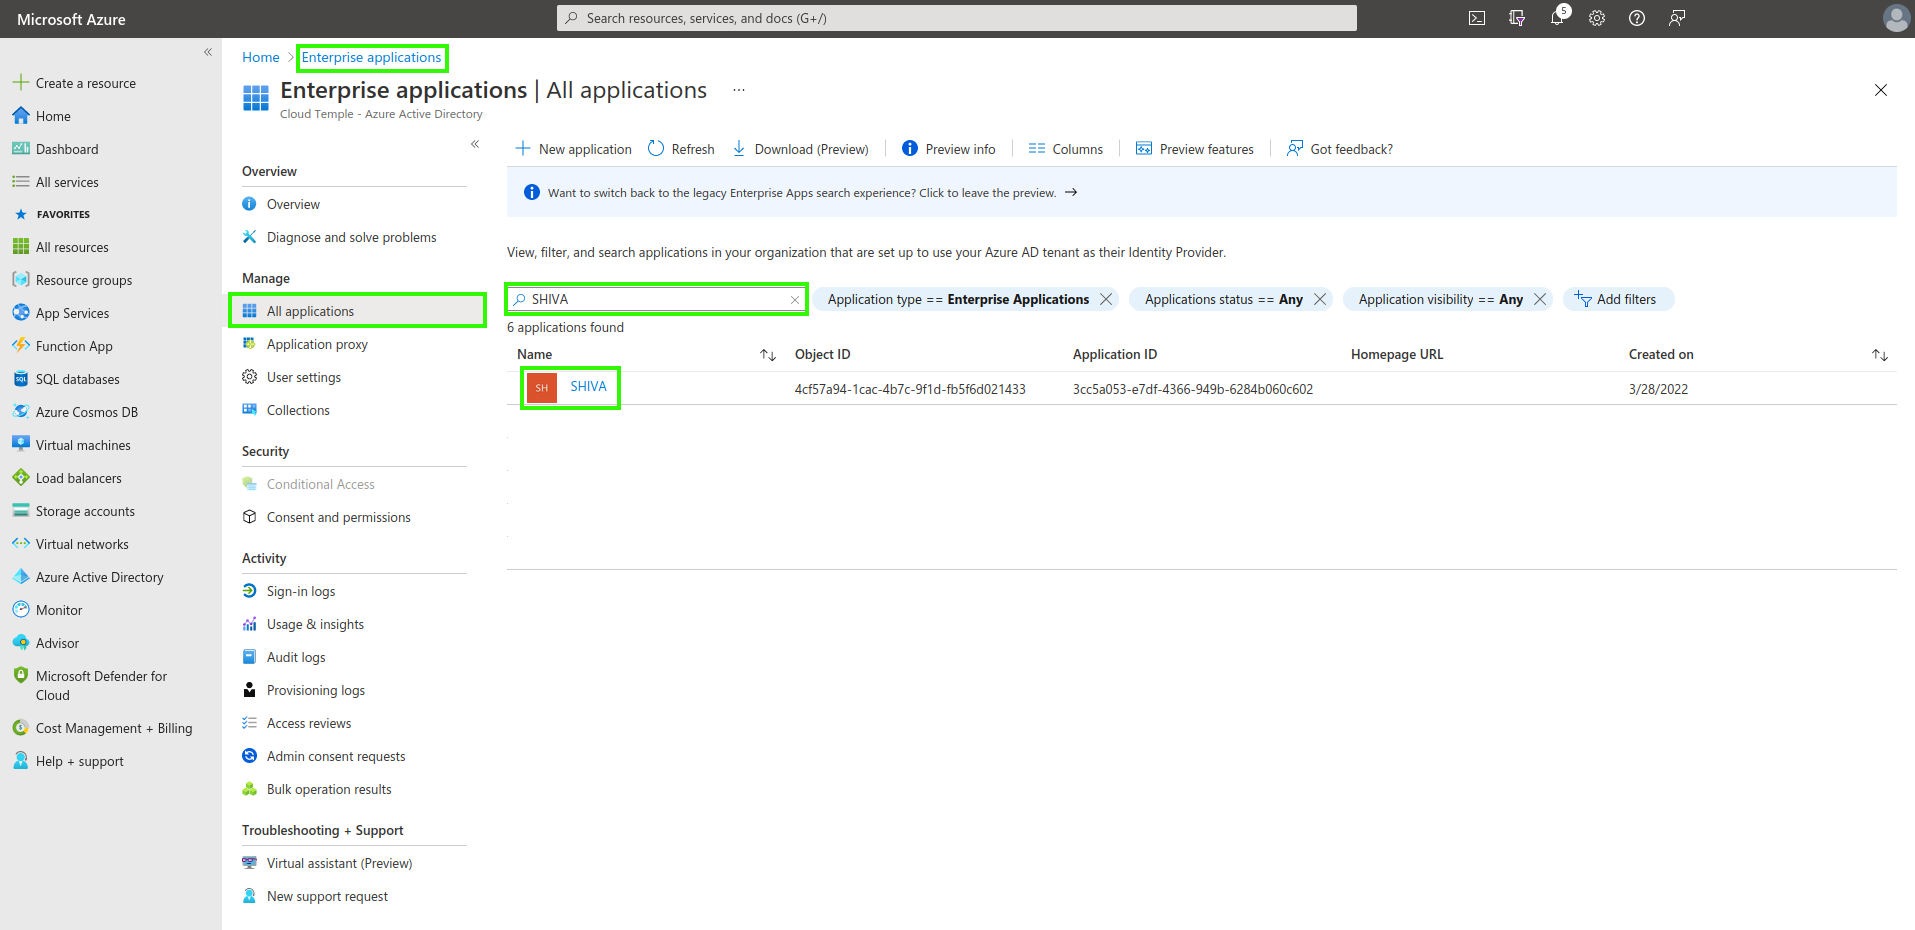
Option 2
Gehe zu den „Enterprise-Anwendungen“ und suche mithilfe des zuvor erstellten Anwendungsnamens.
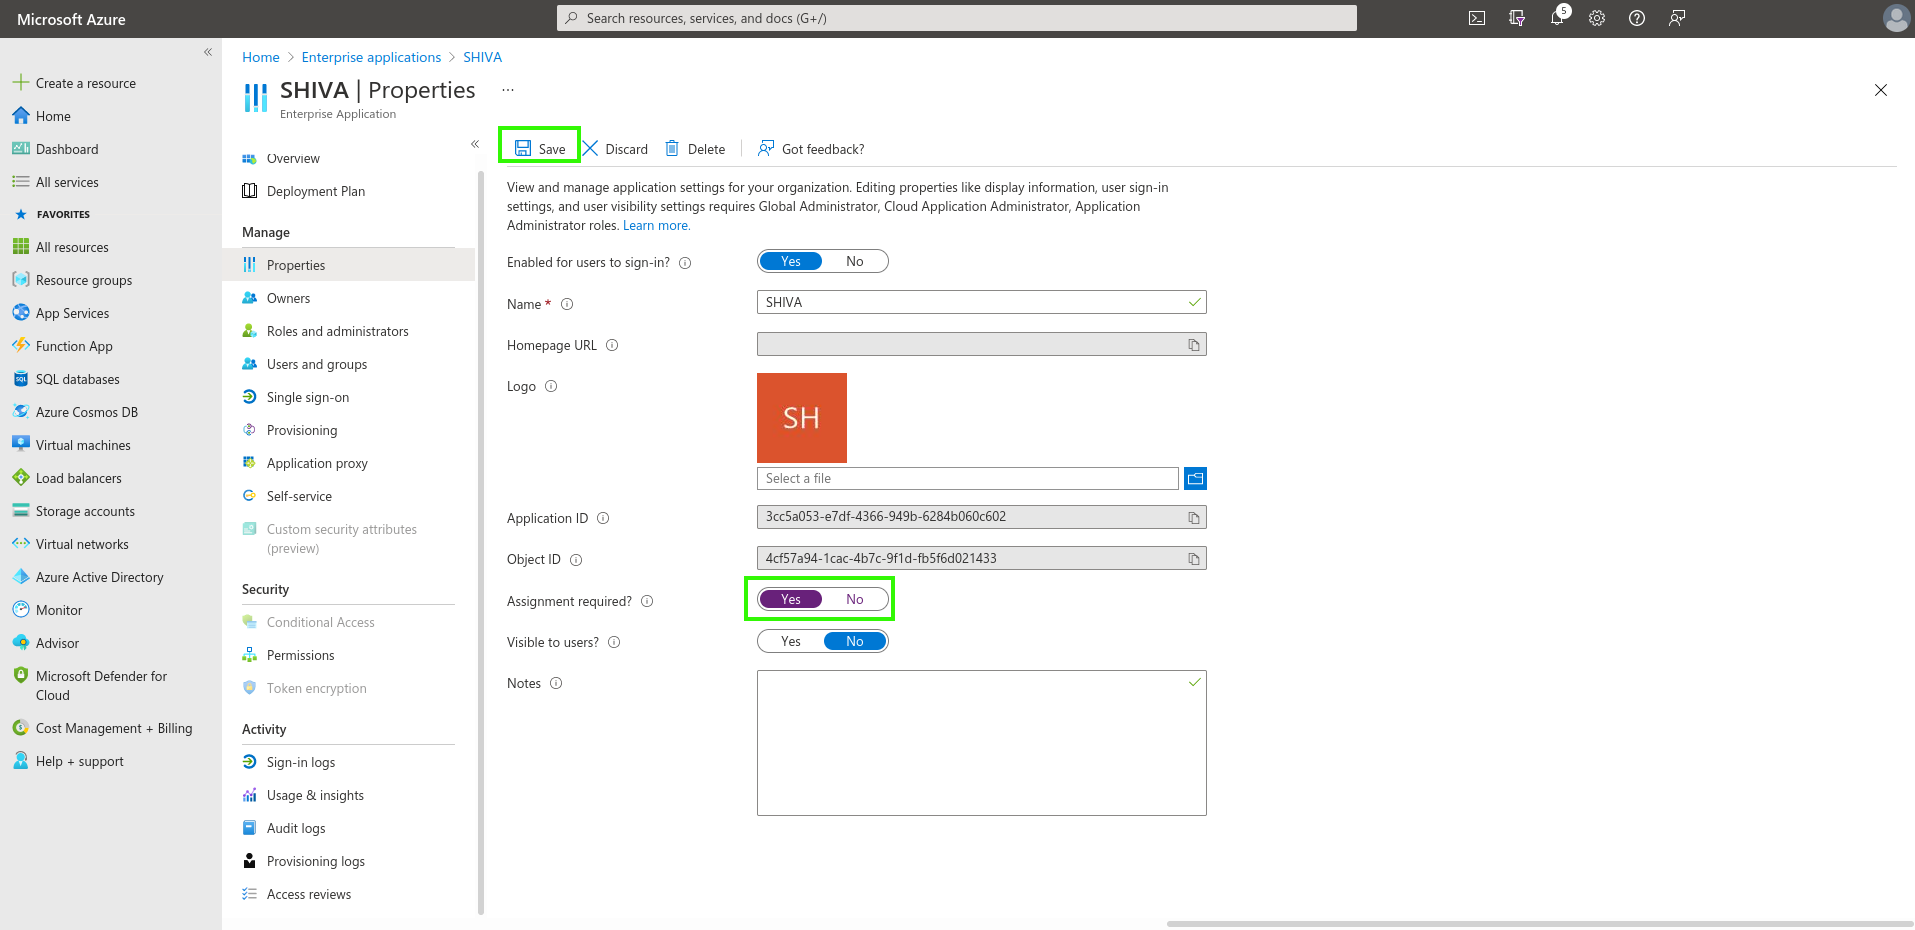
Authentication restriction to users assigned to the application
Indicate here the requirement for user assignment to the application to allow authentication:
Assigning Users and Groups to the Application
Only users and groups assigned to the application will be able to sign in to your Cloud Temple organization via the app registration.
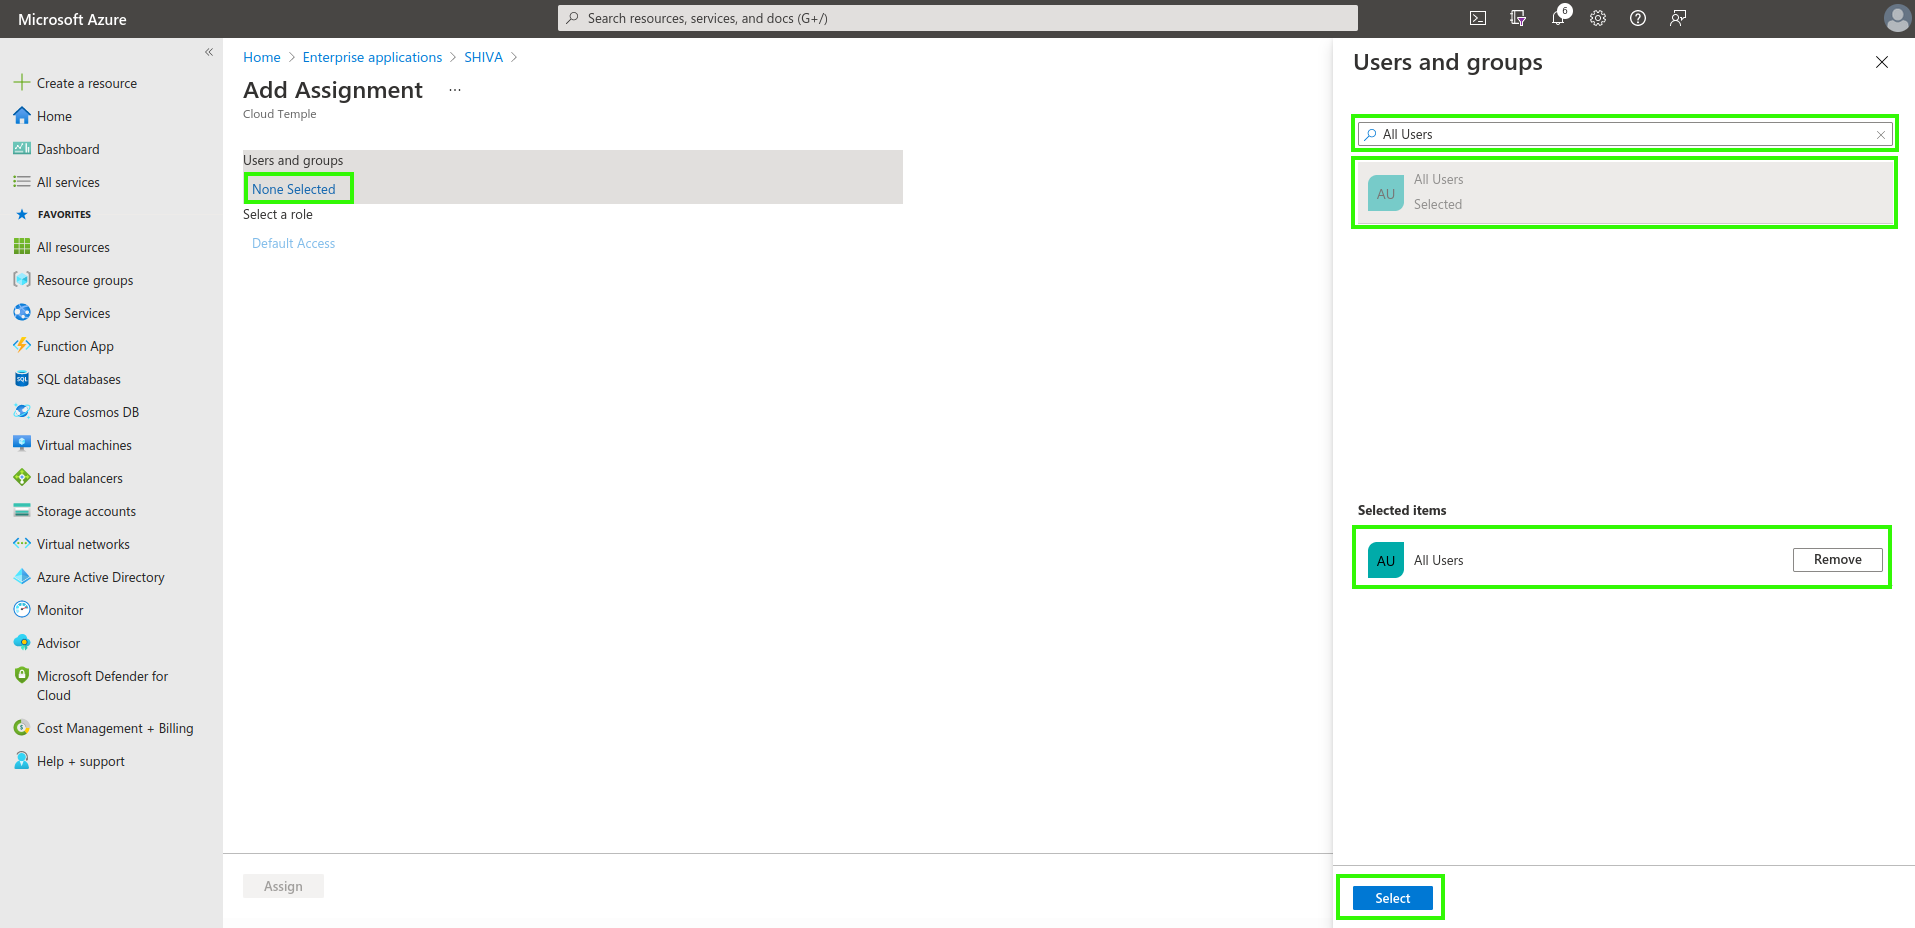
Finally, simply apply the assignment by clicking "Assign".
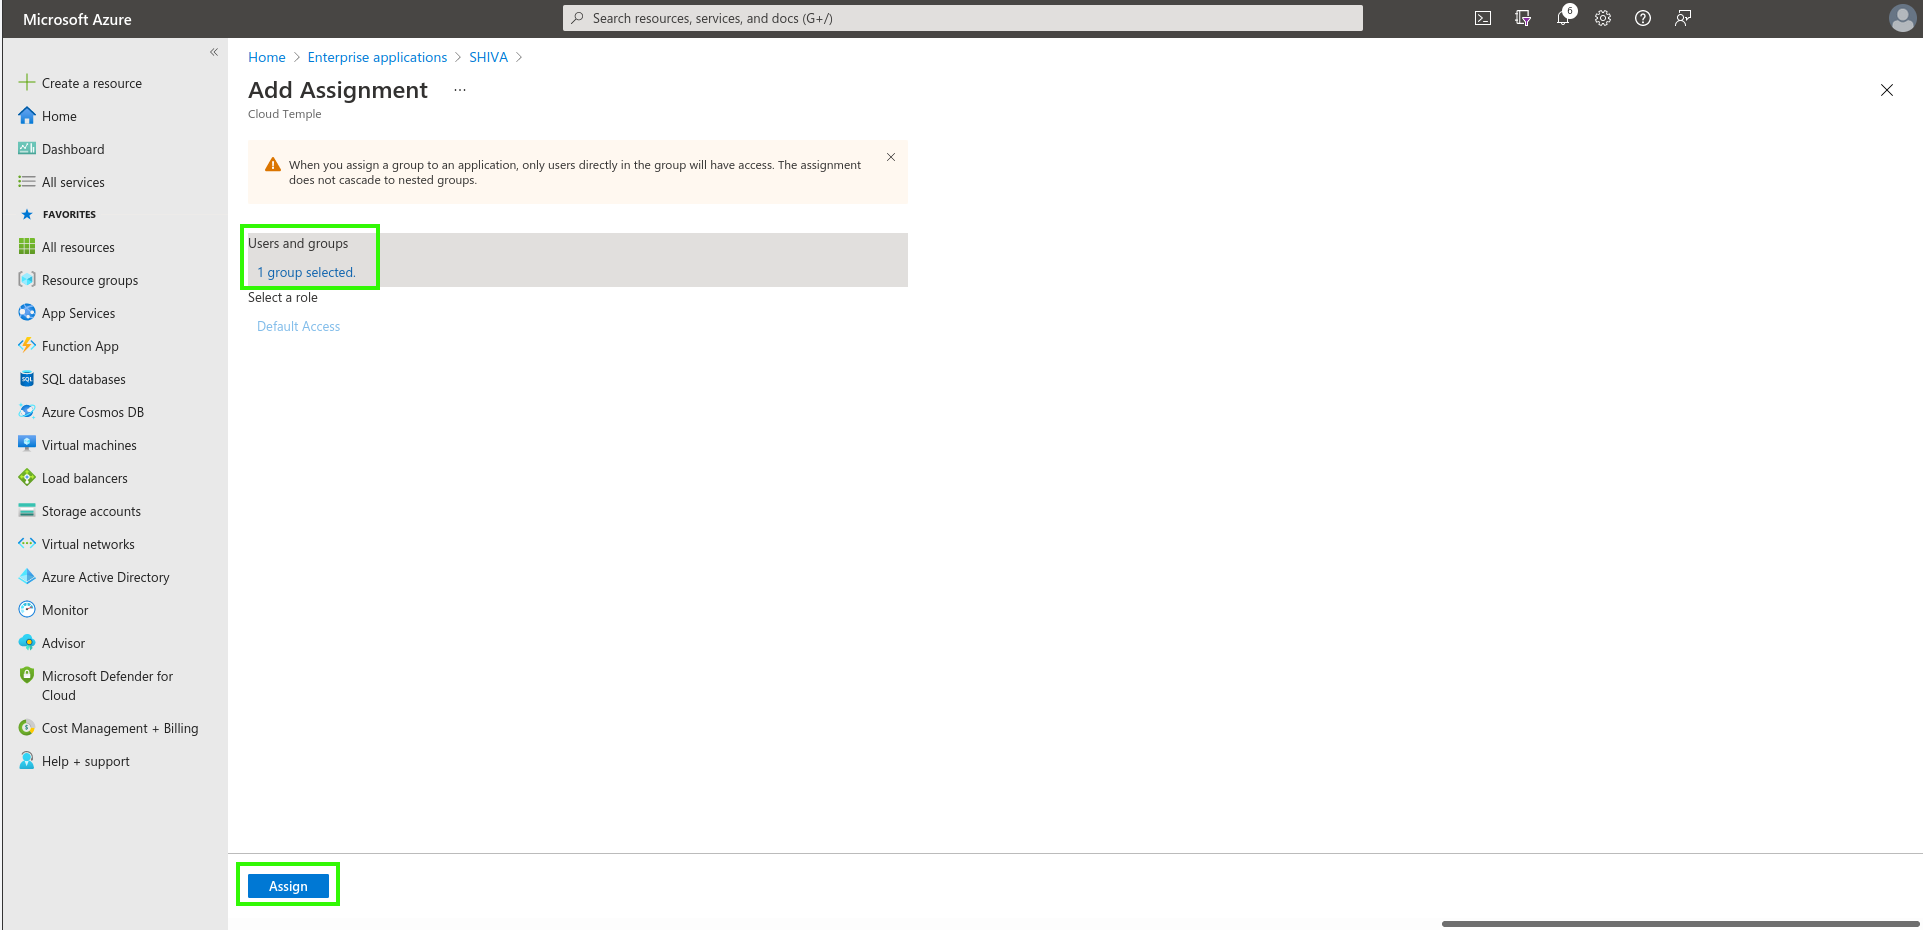
From now on, users assigned to the application will be able to sign in to your Cloud Temple organization via the created application.
Step 2: Request SSO (Single Sign-On) Configuration for Your Organization
This configuration step is performed at the organization level by the Cloud Temple team.
To proceed, please submit a support request in the console indicating your intention to set up Microsoft Entra ID SSO.
Please provide the following information in your support request:
- Name of your Organization
- Name of a contact person, including their email address and phone number, to finalize the configuration
- Application ID (unique identifier associated with the previously created application)
- Directory ID (corresponds to the Azure AD tenant ID of your Azure environment)
- Secret (secret associated with the previously created application)
Once the configuration is completed on the Console side, the designated contact will be notified.
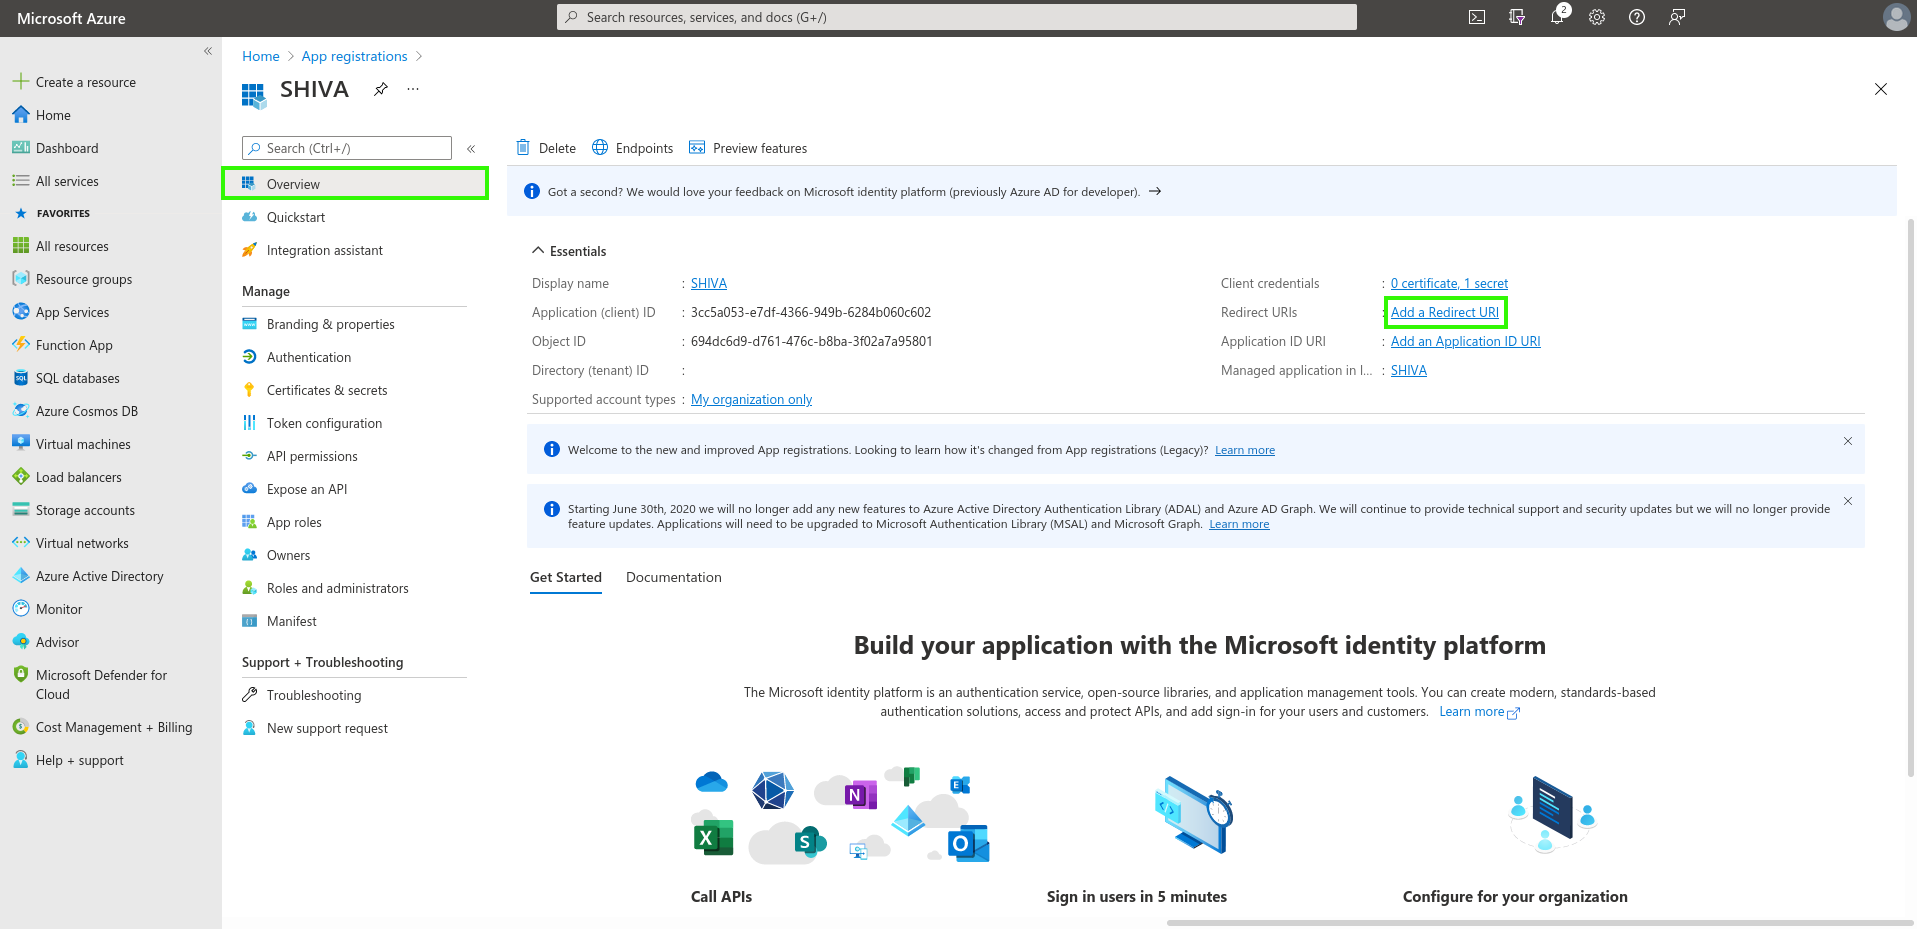
Schritt 3: Abschluss der Konfiguration
Auf der Startseite der App-Registrierung klicken Sie im Menü „Übersicht“ auf „Redirect-URL hinzufügen“.
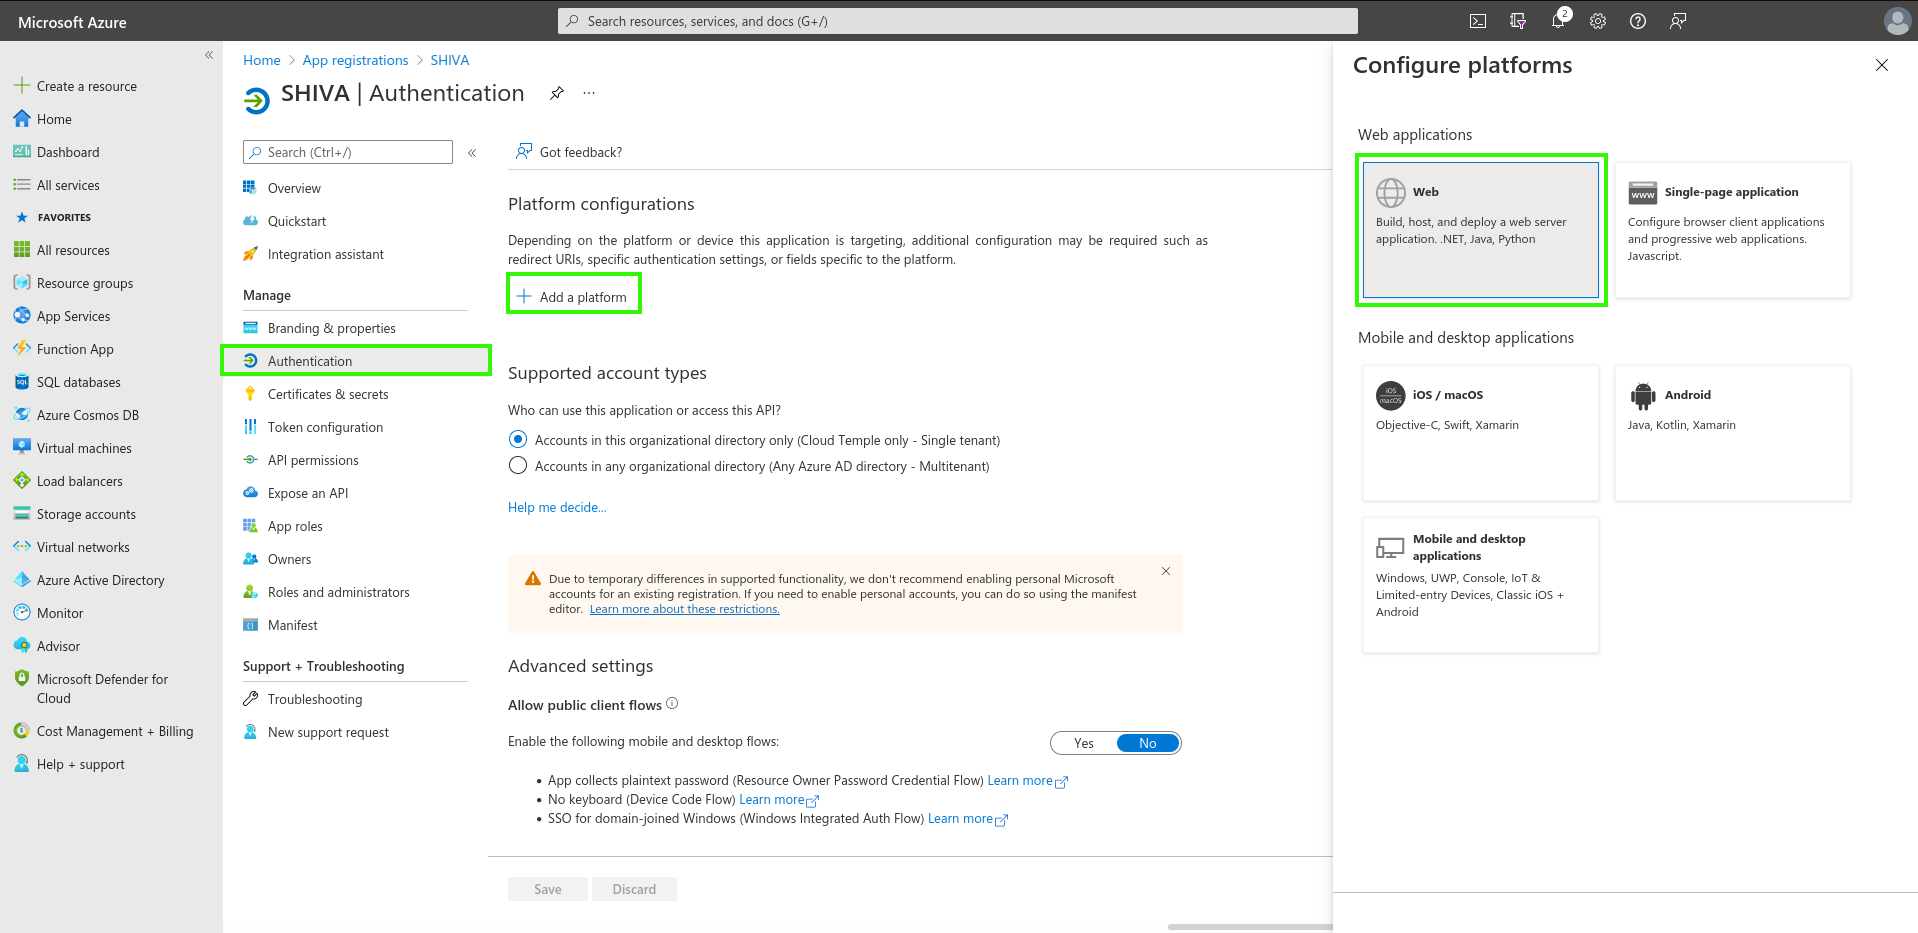
Wechseln Sie anschließend zum Abschnitt „Plattform hinzufügen“ und fügen Sie eine Plattform des Typs „Web“ hinzu.
Geben Sie einfach die von der Produkt-Team Anwendungen bereitgestellte „Redirect-URL“ ein.

Nachdem die „Redirect-URL“ hinzugefügt wurde, sollte das folgende Ergebnis angezeigt werden.
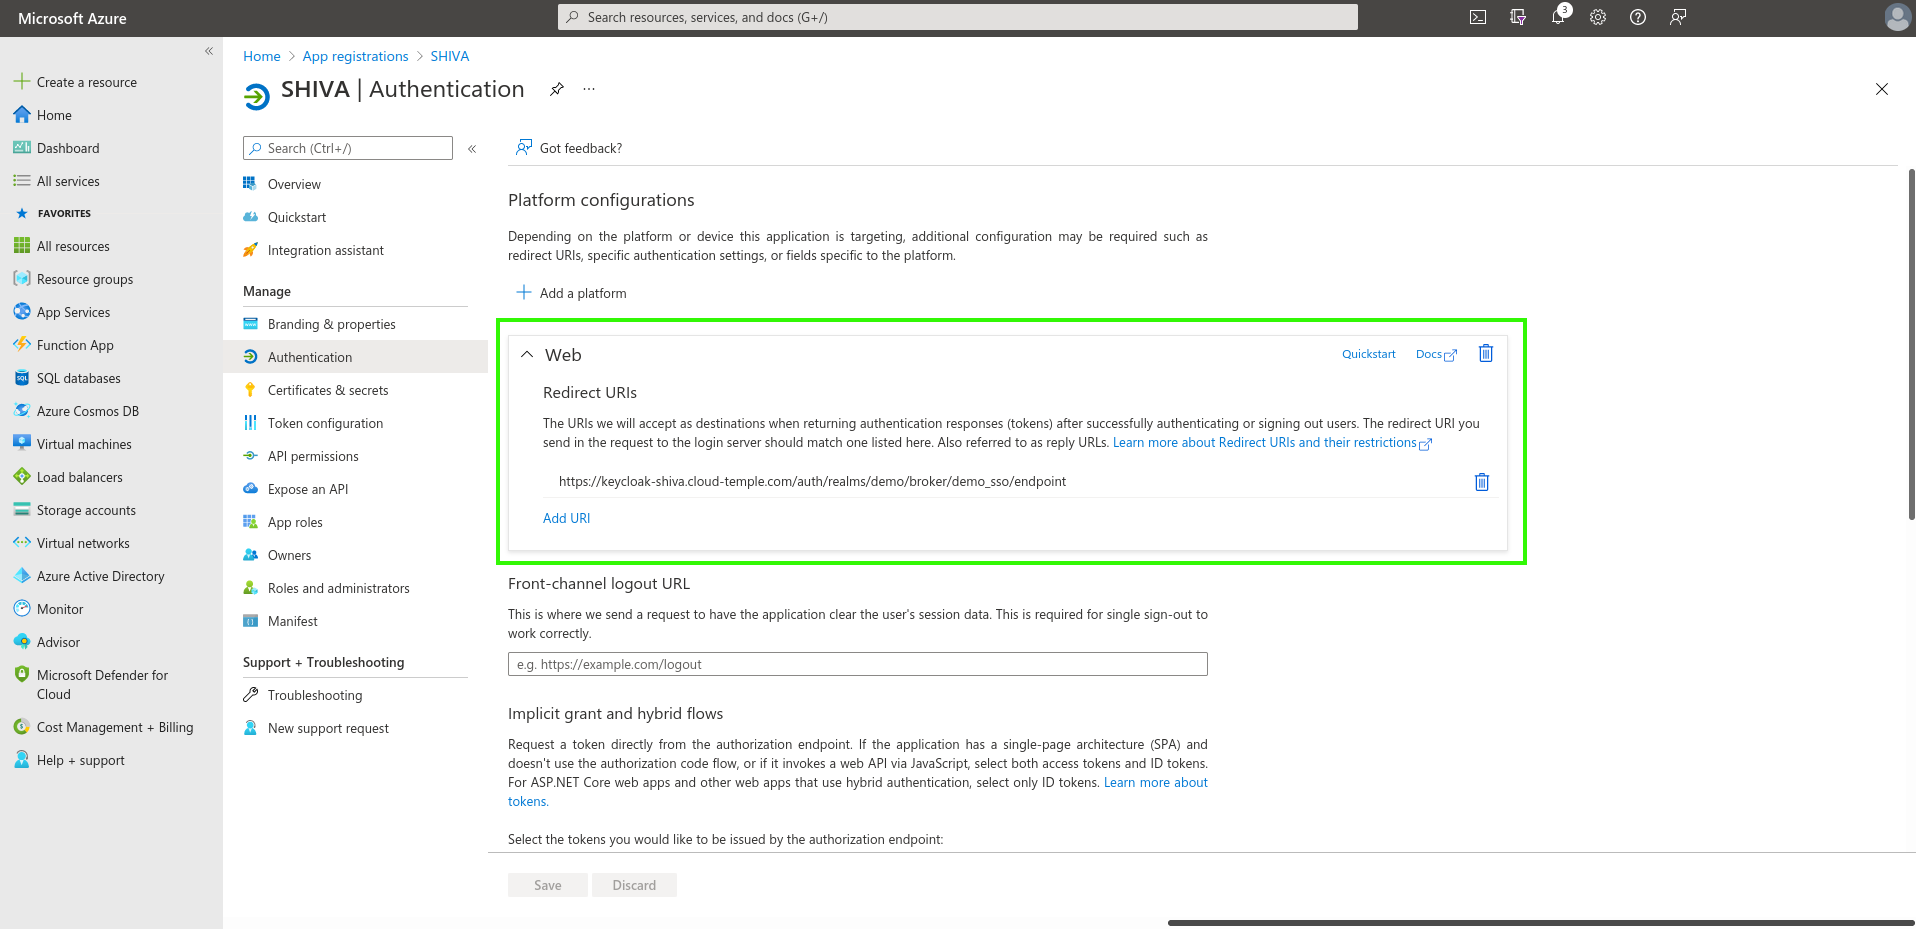
Die Konfiguration der „Redirect-URL“ kann einige Minuten in Anspruch nehmen, bis sie wirksam ist.
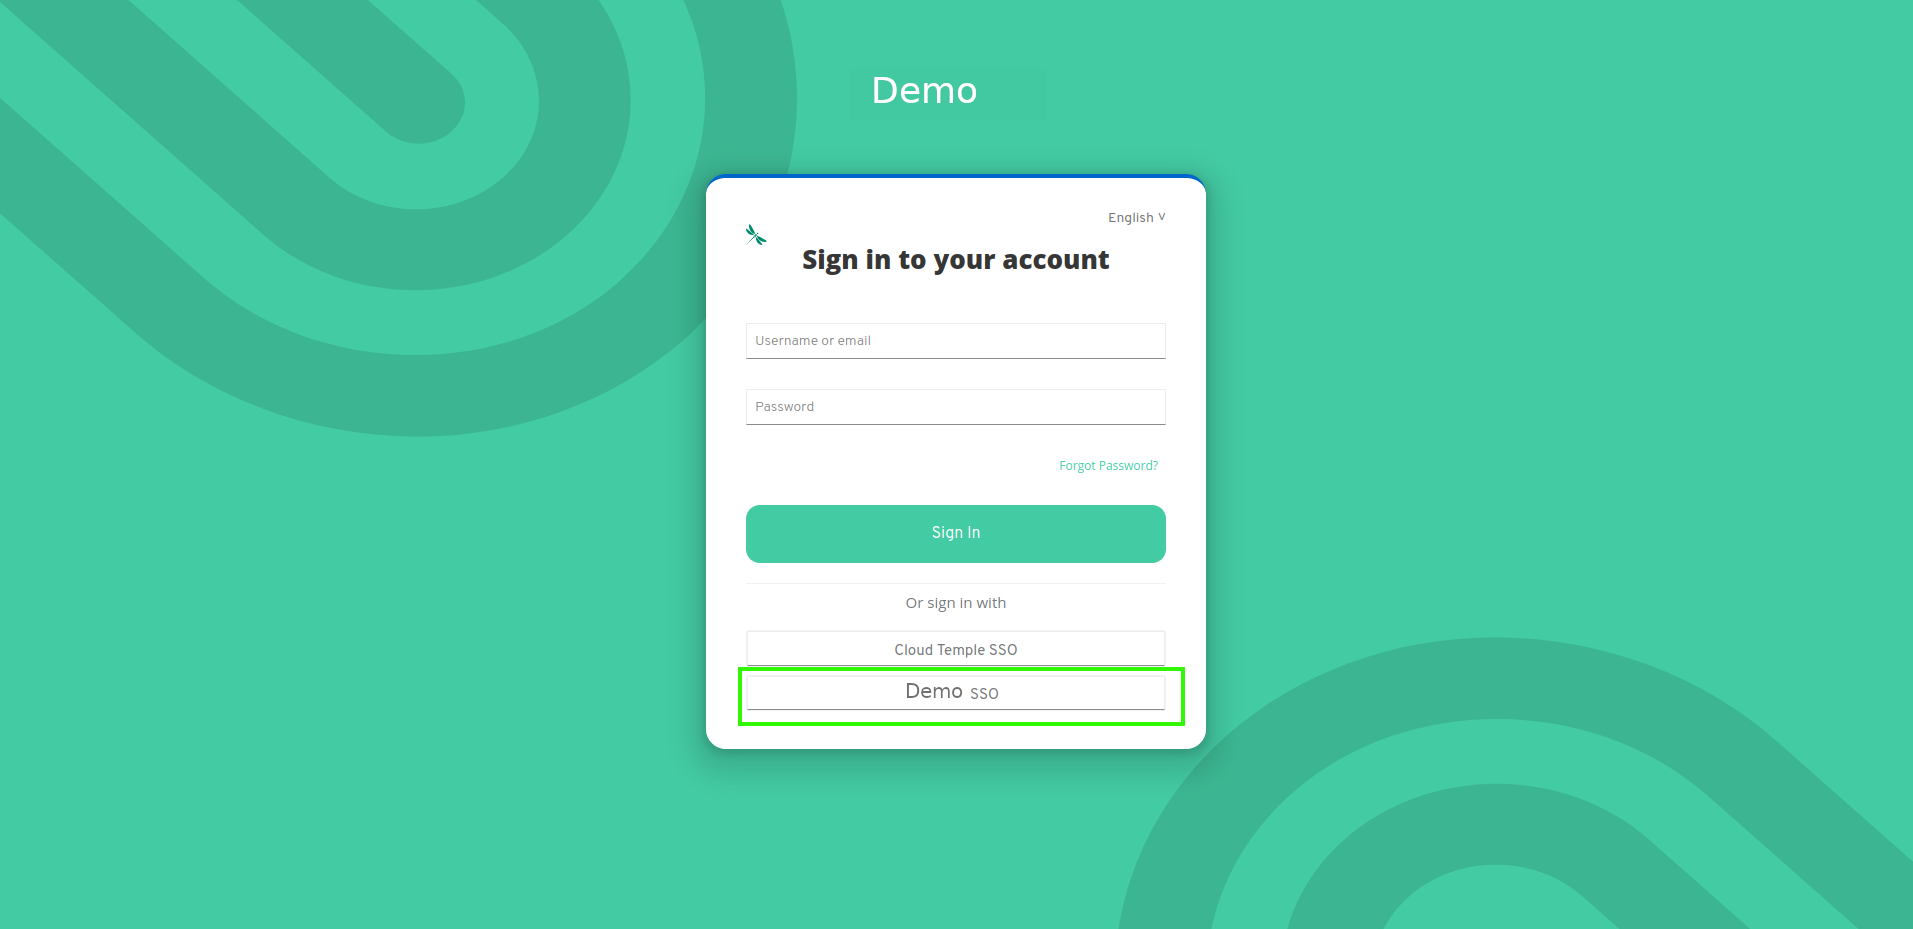
Nach Abschluss aller Schritte können Sie sich über Ihren SSO bei Ihrer Cloud Temple-Organisation authentifizieren.