Example of Identity Federation with Microsoft ADFS
Here is an example configuration of an organization's identity repository with Microsoft ADFS.
Configuring your Microsoft identity repository at the Cloud Temple organization level simplifies user authentication on the Console.
This helps avoid the proliferation of authentication factors and reduces the attack surface.
If your users are already authenticated to their Microsoft accounts, authentication to the Console services will be seamless.
Below are the steps to complete this configuration:
Voraussetzungen
Ihr Microsoft ADFS-Server muss auf die Cloud Temple-URL zugreifen können.
ADFS muss von den Netzwerken von Cloud Temple aus erreichbar sein und ein TLS-Zertifikat einer öffentlichen Zertifizierungsstelle bereitstellen.
Die Benutzer, die sich auf dem Portal anmelden möchten, müssen ihre E-Mail-Adresse, ihren Namen und Vornamen in der Active Directory angegeben haben.
Step 2: Request SSO (Single Sign-On) Configuration for Your Organization
This configuration step is performed at the organization level by the Cloud Temple team.
To proceed, please submit a support request in the console indicating your intention to set up your Microsoft ADFS authentication repository.
Please provide the following information in your support request:
    Name of your Organization
    Name of a contact person, including their email address and phone number, to finalize the configuration
    Public URL of the ADFS federation metadata (<ADFS domain name>/FederationMetadata/2007-06/FederationMetadata.xml)
    (Example: https://adfs.test.local/FederationMetadata/2007-06/FederationMetadata.xml)
Once the configuration is completed on the Console side, the designated contact will be notified.
The Cloud Temple support team will send you a URL that will look like this: https://keycloak-shiva.cloud-temple.com/auth/realms/companytest/broker/adfs_test/endpoint/descriptor
You can paste the URL into a browser to test it. If it works correctly, you should see an XML document displayed.
Step 3: Configuration of ADFS
Authentication Federation Configuration
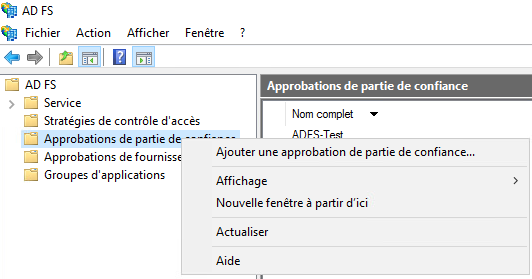
Adding a trusted party approval
On your ADFS server, go to "Add a trusted party approval".
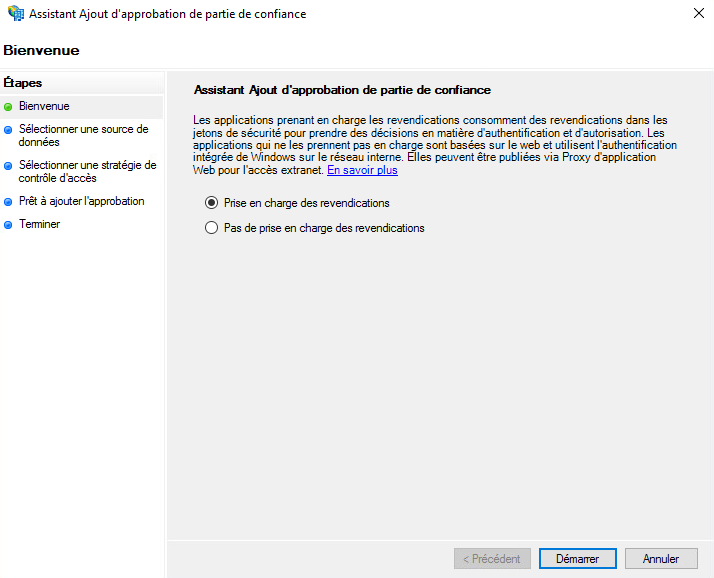
Konfigurieren der „Claims“
Claims ermöglichen die Bereitstellung von Informationen im Token, der an die Cloud Temple-Konsole übermittelt wird.
Sie übertragen die Benutzerinformationen des angemeldeten Benutzers, die für die ordnungsgemäße Funktionsweise der verschiedenen Dienste erforderlich sind, wie beispielsweise E-Mail-Adresse, Vor- und Nachname.
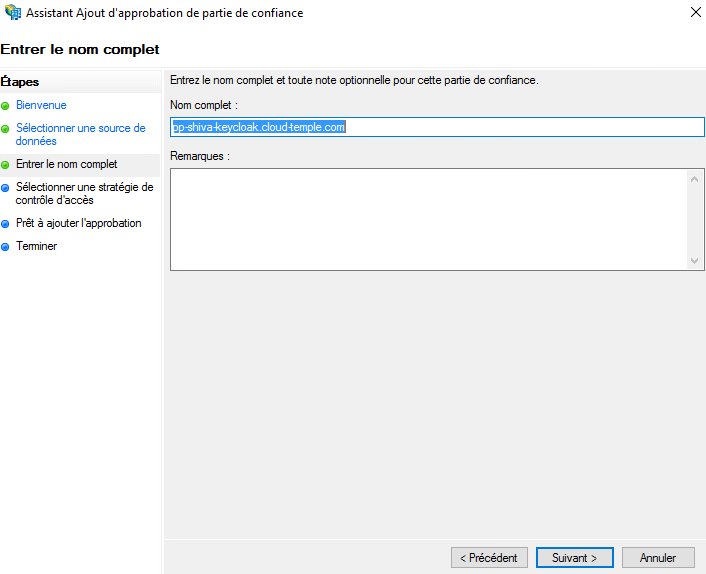
Wählen Sie „Daten importieren, die online oder im lokalen Netzwerk verfügbar sind, bezüglich der vertrauenswürdigen Partei“ aus und geben Sie die von Cloud Temple-Support bereitgestellte URL ein.
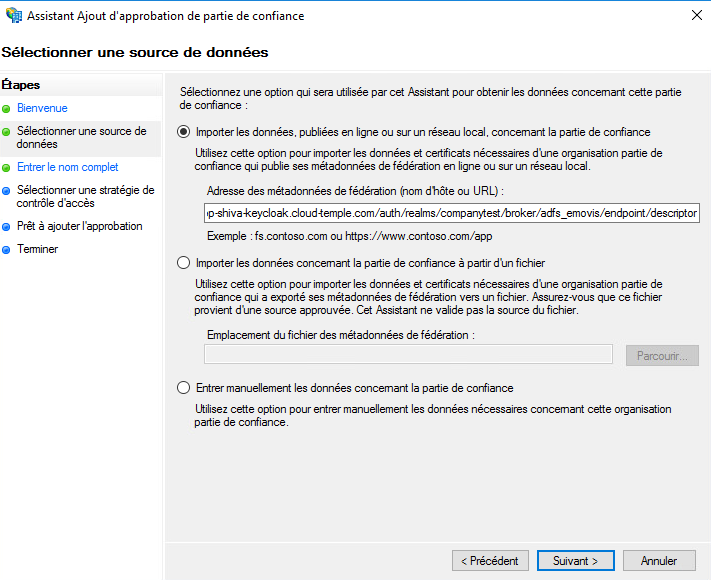
Sie können optional einen Namen und eine Beschreibung für die vertrauenswürdige Partei angeben.
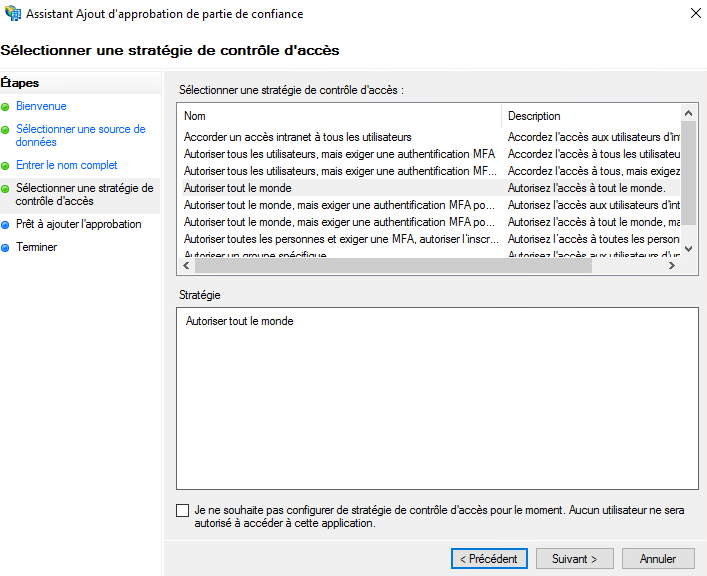
Standardmäßig erlauben wir allen Zugriff, es ist jedoch möglich, „Nur bestimmte Gruppen zulassen“ auszuwählen, um die Gruppe(n) auszuwählen, die Zugriff auf die Dienste der Konsole über ADFS erhalten.
Nach Abschluss dieser Schritte ist die Konfiguration der vertrauenswürdigen Partei abgeschlossen.
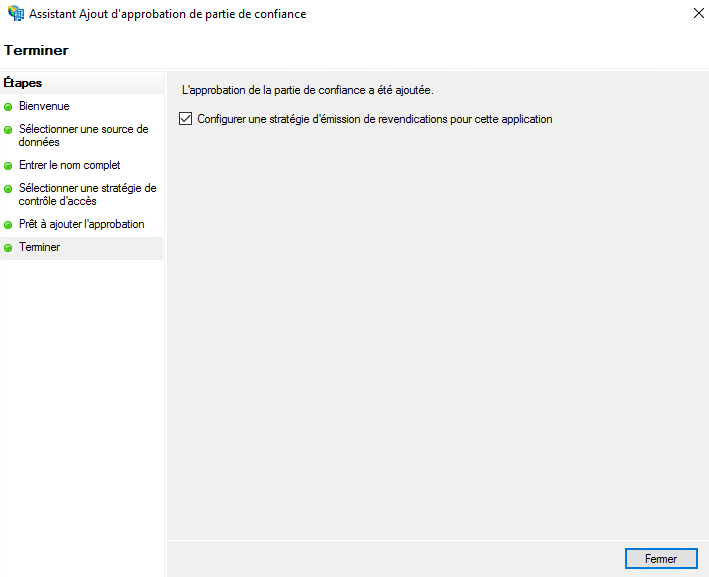
Anschließend müssen Sie die Ausstellungsrichtlinie für die Claims dieser neuen vertrauenswürdigen Partei bearbeiten.
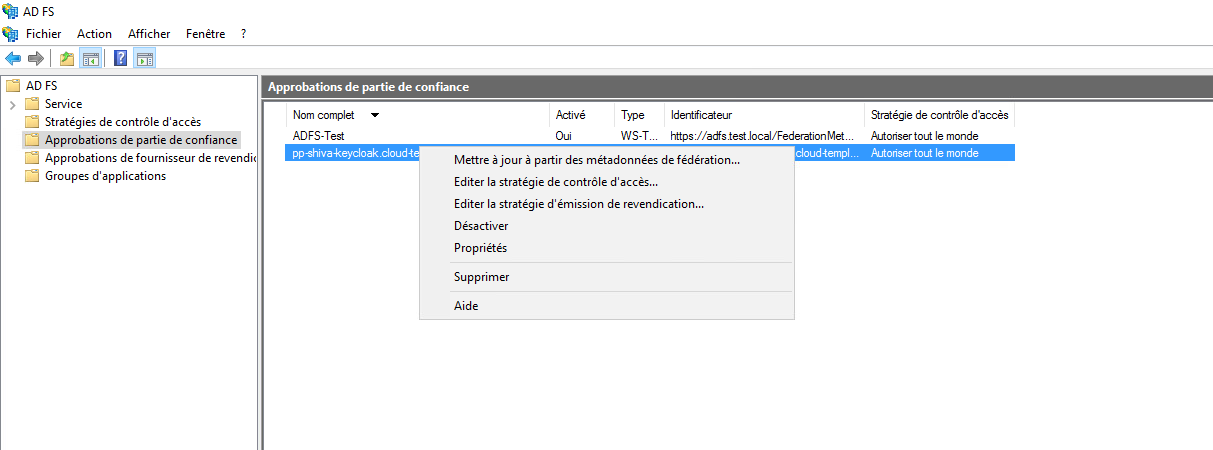
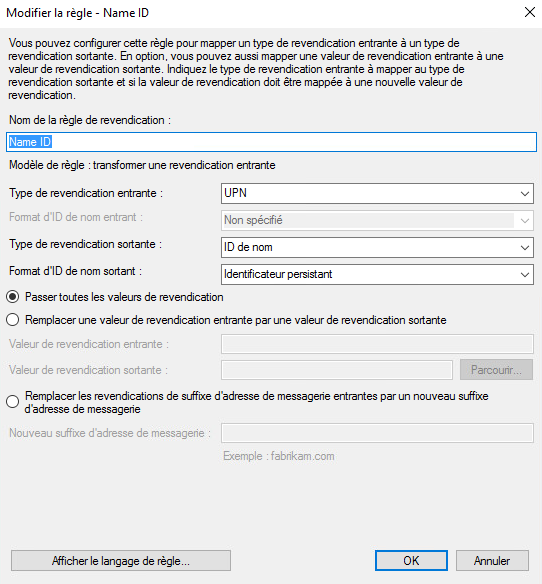
Klicken Sie auf „Regel hinzufügen“ und wählen Sie den Vorlagentyp „Eingehende Claim transformieren“ aus.
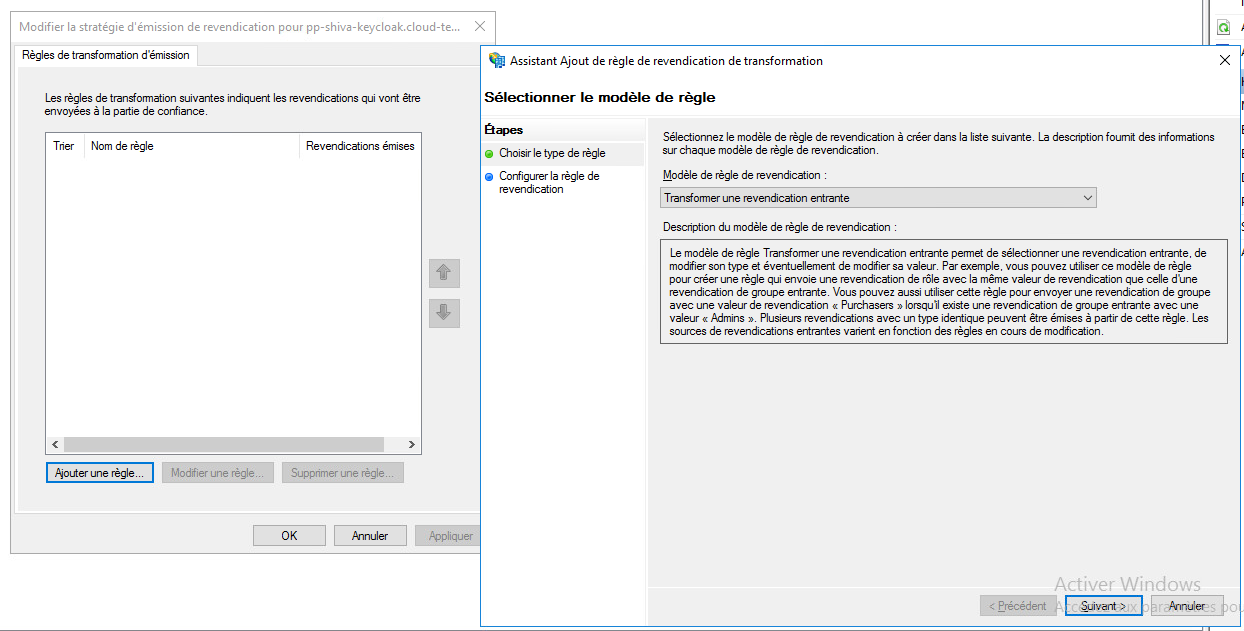
Geben Sie nun die Informationen wie in der folgenden Abbildung angegeben ein.
Add claims
Add a second rule, this time using the template "Send LDAP attributes as claims".
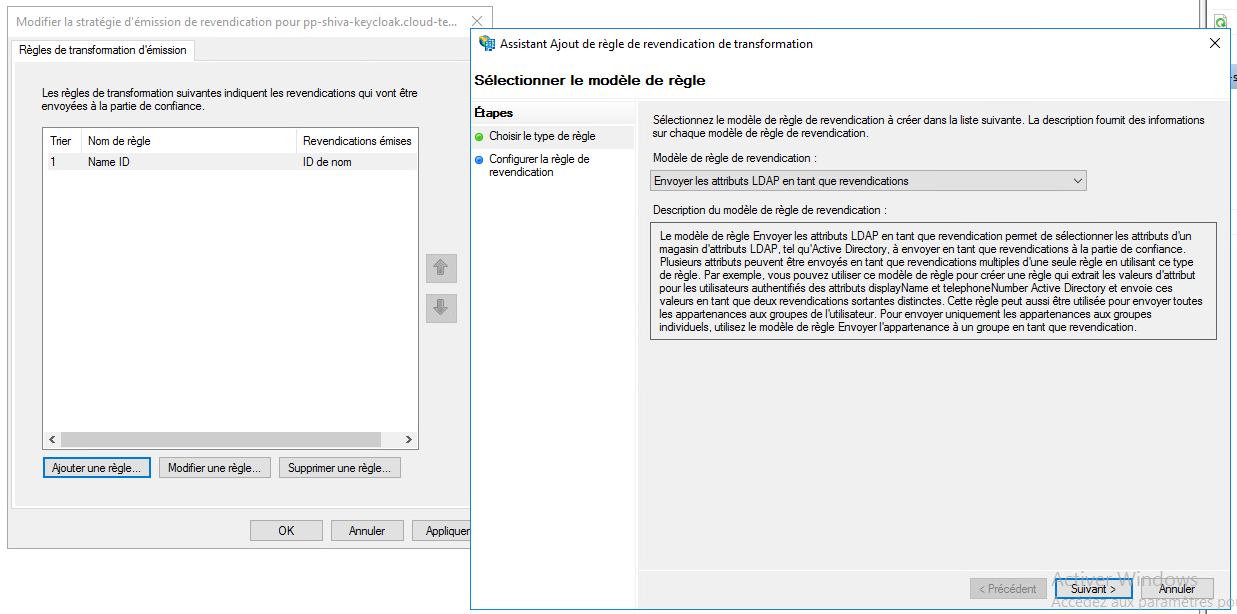
Select the attribute store and add the attributes "E-Mail Addresses, Given-Name, Surname, and SAM-Account-Name" as shown in the screenshot below.
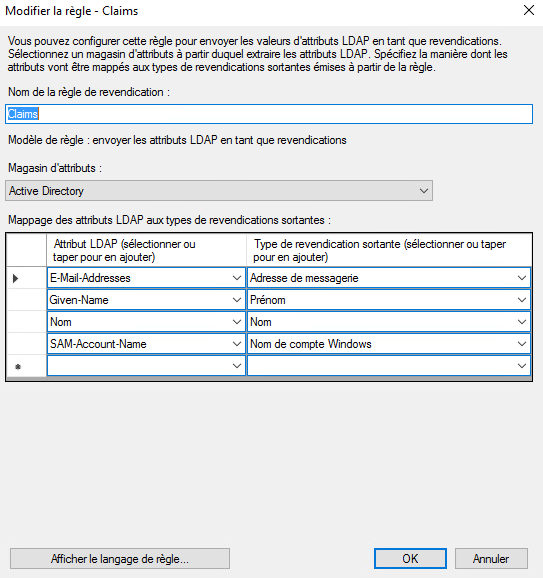
Simply apply the changes.
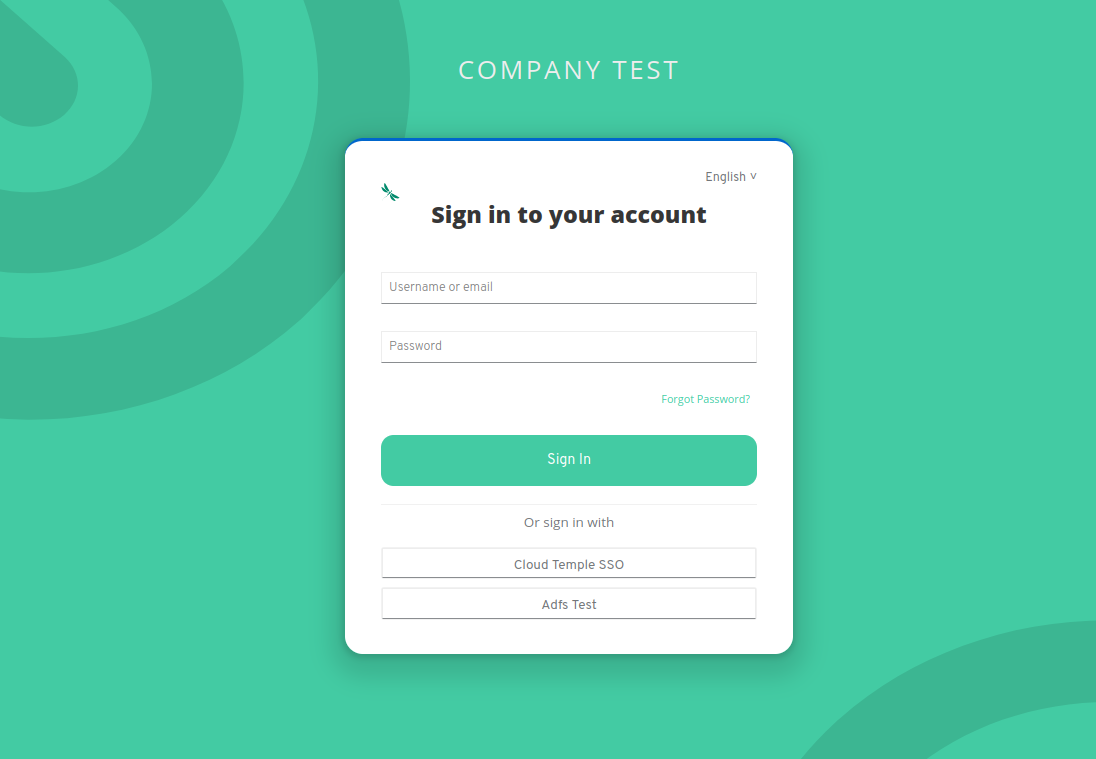
Step 3: Finalization
You can now test by going to the Console and clicking the button corresponding to the ADFS client authentication; in this example, it is "ADFS Test".