Konzepte
Benutzer
Die Zugriffskonten für die Konsole werden vom Masterkonto des Auftraggebers auf Einladung erstellt (unabhängig vom Authentifizierungsspeicher). Die Anmeldeinformationen sind für Ihre Organisation global.
Hinweis : Die Identitätsföderierung wird auf Organisationsebene verwaltet
Erstellen eines Benutzerkontos in Ihrer Organisation
Die Erstellung eines Benutzerkontos in Ihrer Organisation erfolgt per Einladung. Um einen Benutzer in eine Organisation einzuladen, navigieren Sie im Menü 'Verwaltung' links auf Ihrem Bildschirm in der grünen Leiste und anschließend im Untermenü 'Benutzer'.
Klicken Sie auf der Benutzerseite auf die Schaltfläche 'Neuer Benutzer'.
Geben Sie anschließend die E-Mail-Adresse des Benutzers ein
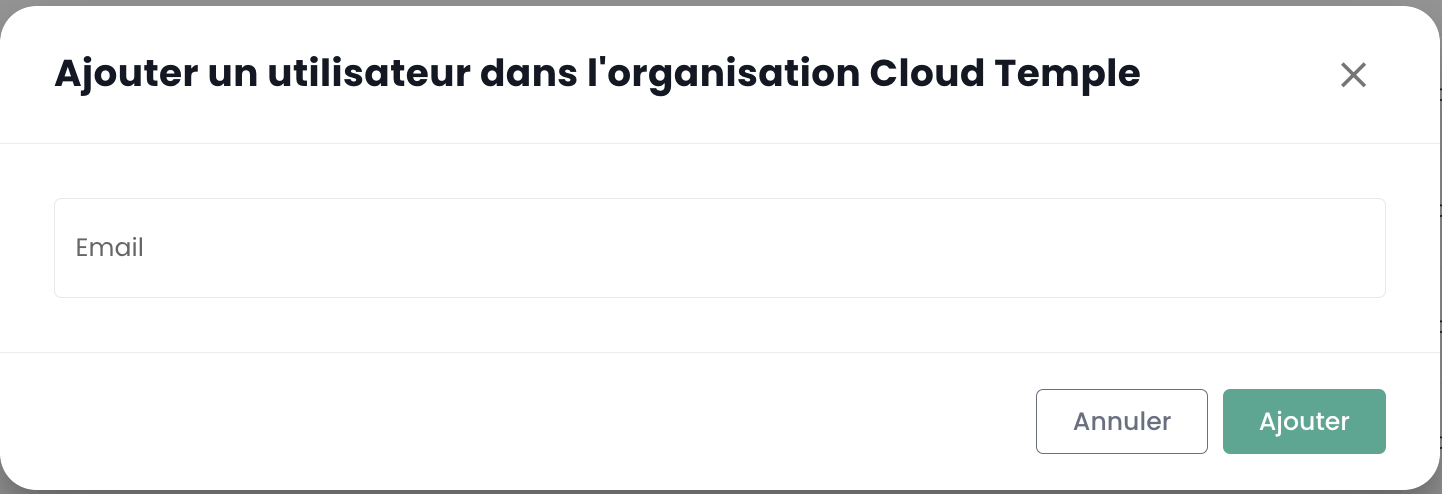
Der Benutzer erhält daraufhin eine Bestätigungs-E-Mail.
Nach Abschluss der Bestätigung kann sich der Benutzer bei der Konsole anmelden.
Zuweisung von Berechtigungen an einen Benutzer
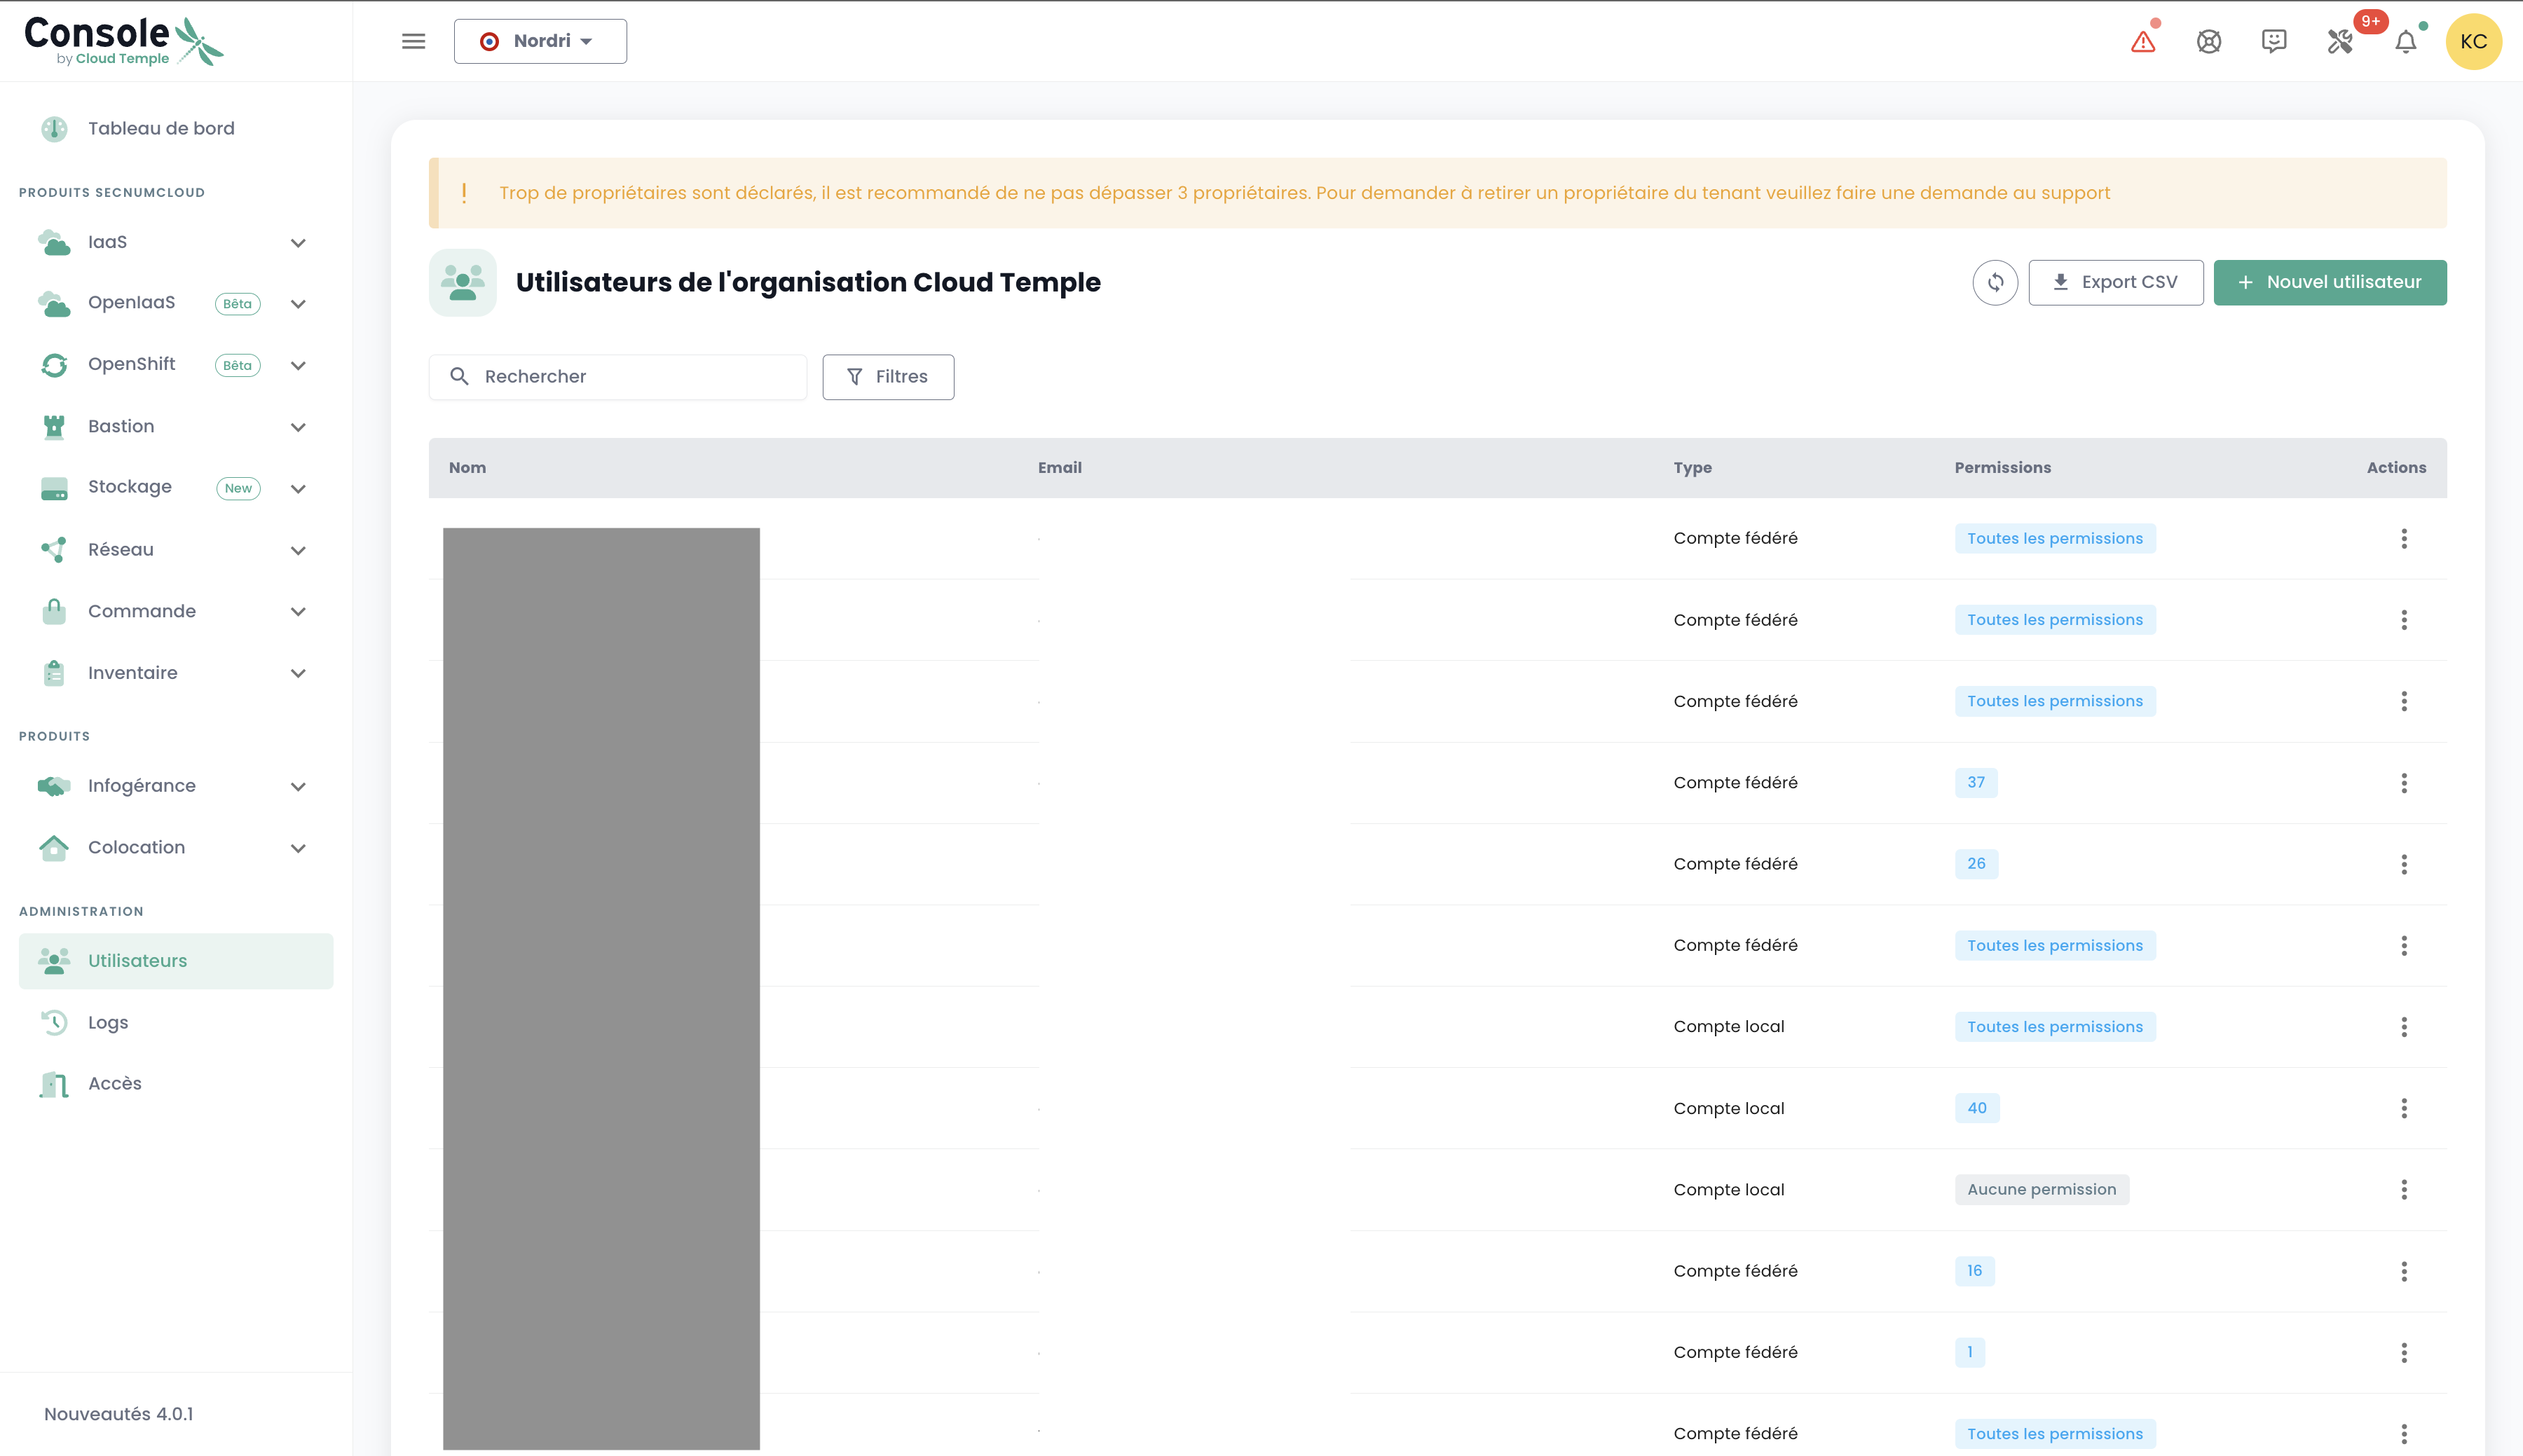
Die Verwaltung der Benutzerrechte erfolgt über die Benutzerseite.
Standardmäßig hat ein Benutzer keine Rechte. Daher muss der Administrator, der die Einladung gesendet hat, ihm die für seine Tätigkeit erforderlichen Rechte erteilen. Klicken Sie einfach auf das Menü 'Aktionen' des Benutzers und wählen Sie die Option 'Bearbeiten'.
Das Menü zur Aktivierung der Rechte erscheint dann:
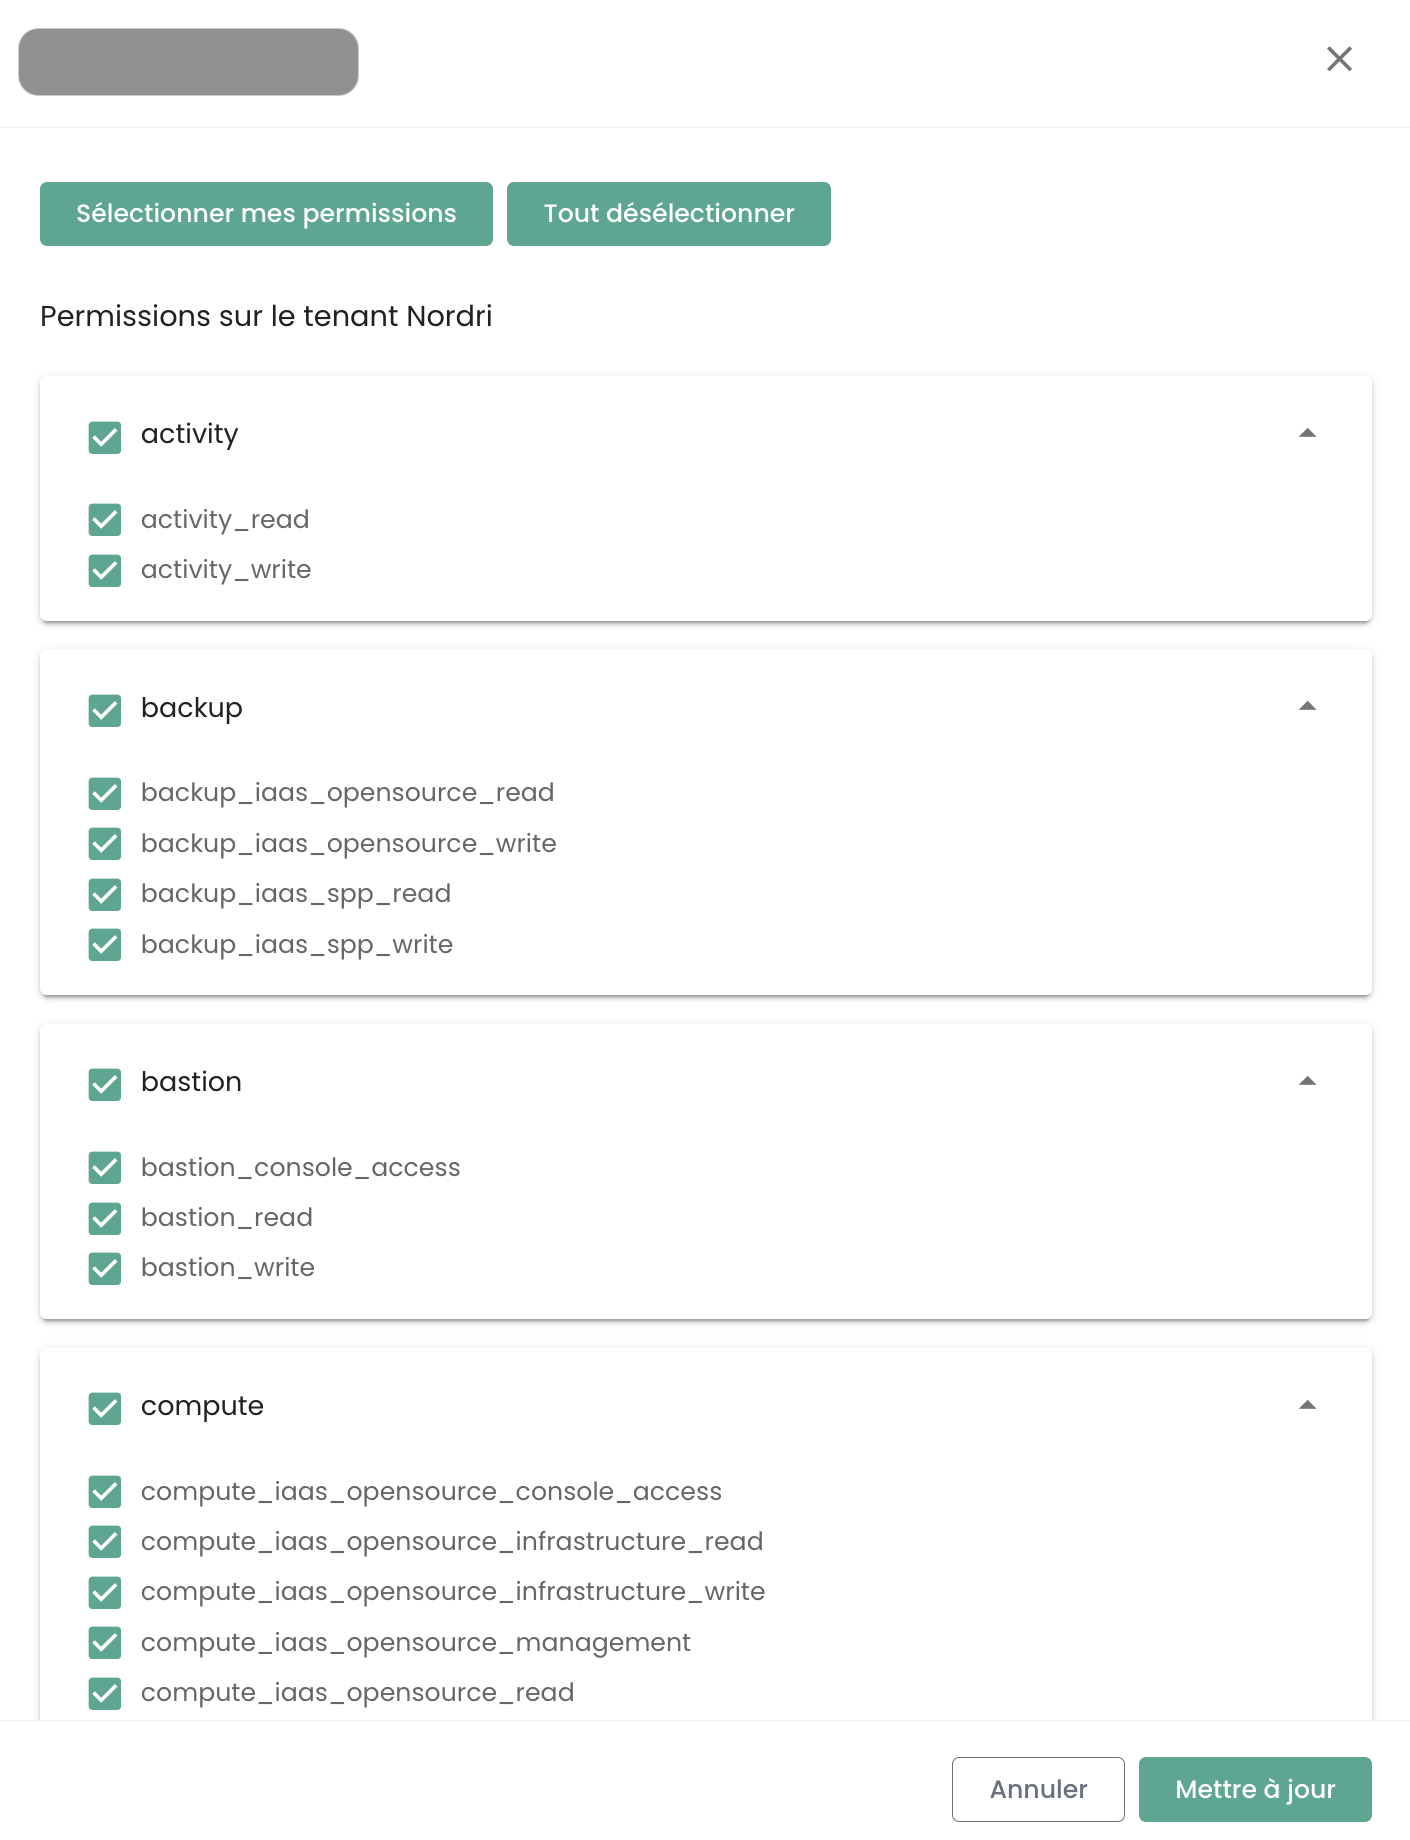
Die Konfiguration der Berechtigungen muss für jeden Tenant der Organisation erfolgen.
Die Liste der Berechtigungen und deren Definitionen ist hier verfügbar.
Neuanmeldung eines Benutzers
Wenn ein Benutzer provisioniert wurde, seine Registrierung jedoch nicht innerhalb der in der von der Konsole gesendeten E-Mail angegebenen Ablaufzeit bestätigt hat, kann er seine Registrierung nicht mehr bestätigen. In diesem Fall kann ihm ein Link erneut zugesendet werden, damit er seine Erstregistrierung wiederholt.
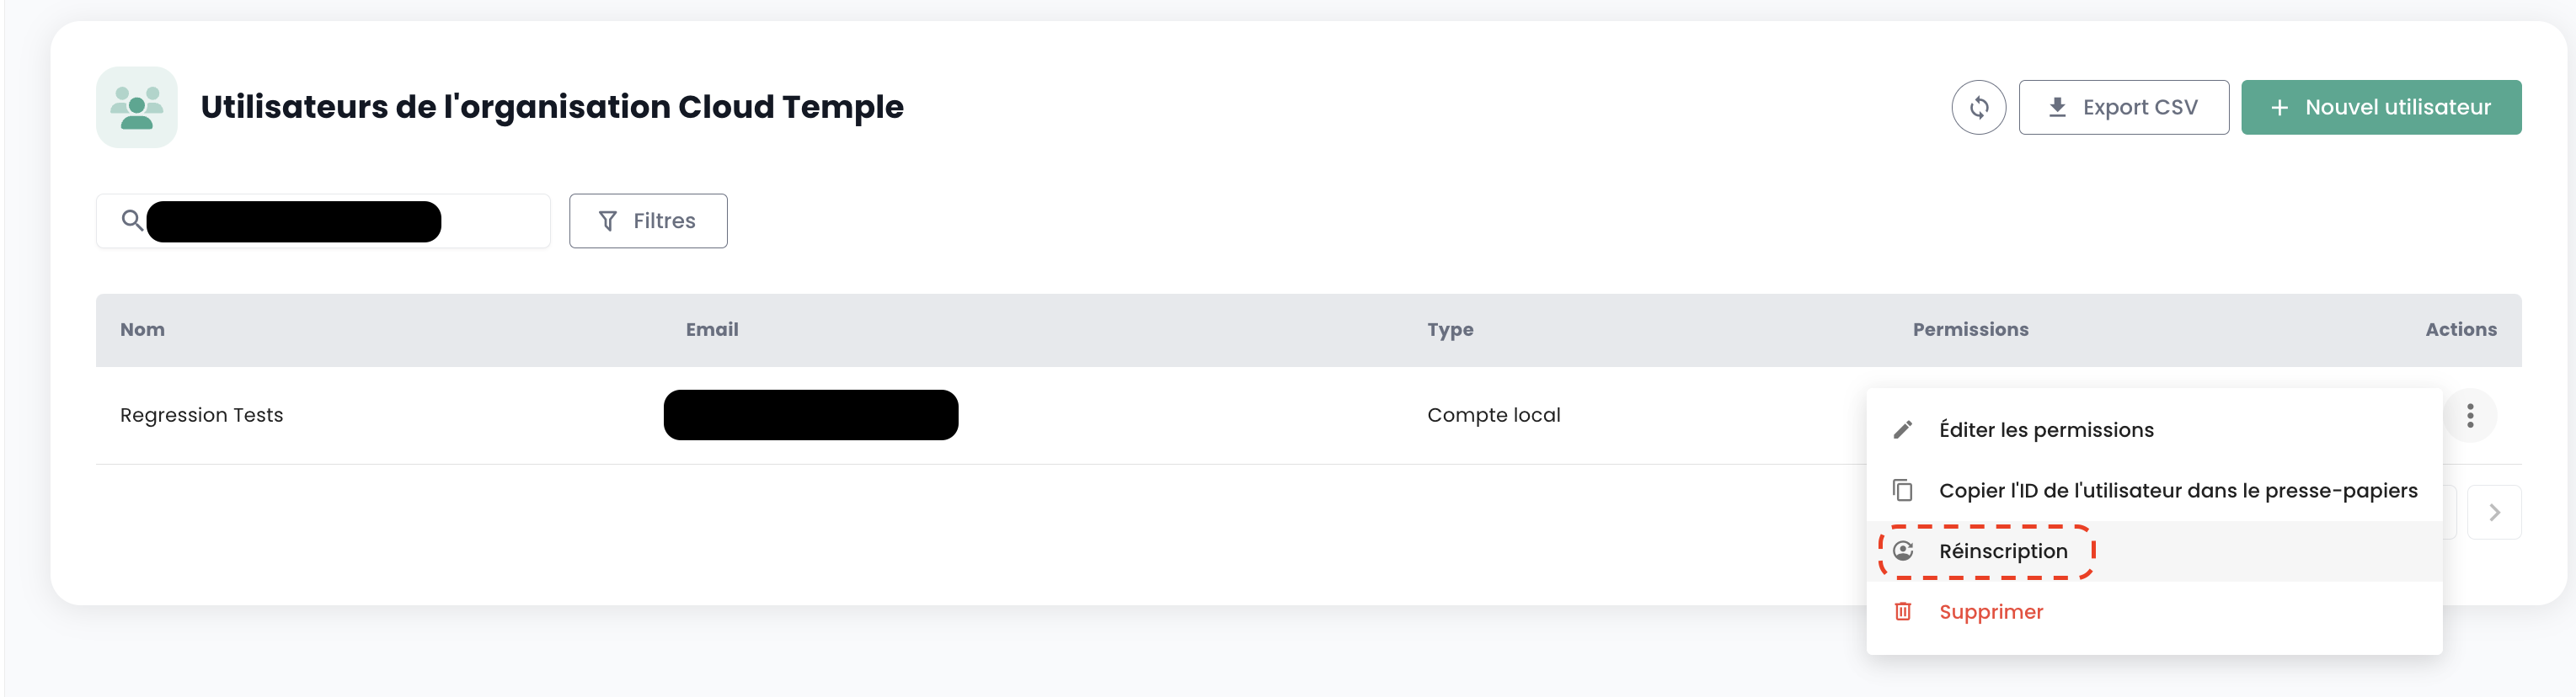
Die Neuanmeldung eines Benutzers erfolgt im Reiter 'Benutzer' im Verwaltungsbereich unten links auf dem Bildschirm.
Wählen Sie den Benutzer aus, den Sie erneut anmelden möchten, und klicken Sie dann auf die Aktionsschaltfläche am Ende der Zeile und anschließend auf 'Neuanmeldung'.
Warnung: Stellen Sie sicher, dass Sie selbst der Auslöser der Neuanmeldungsanfrage für Ihr Benutzerkonto sind. Bitte melden Sie alle Anfragen, die nicht von Ihnen stammen, über ein Support-Ticket.
Profil aktualisieren
Diese Aktion ist nur für lokale Konten (kein SSO) verfügbar.
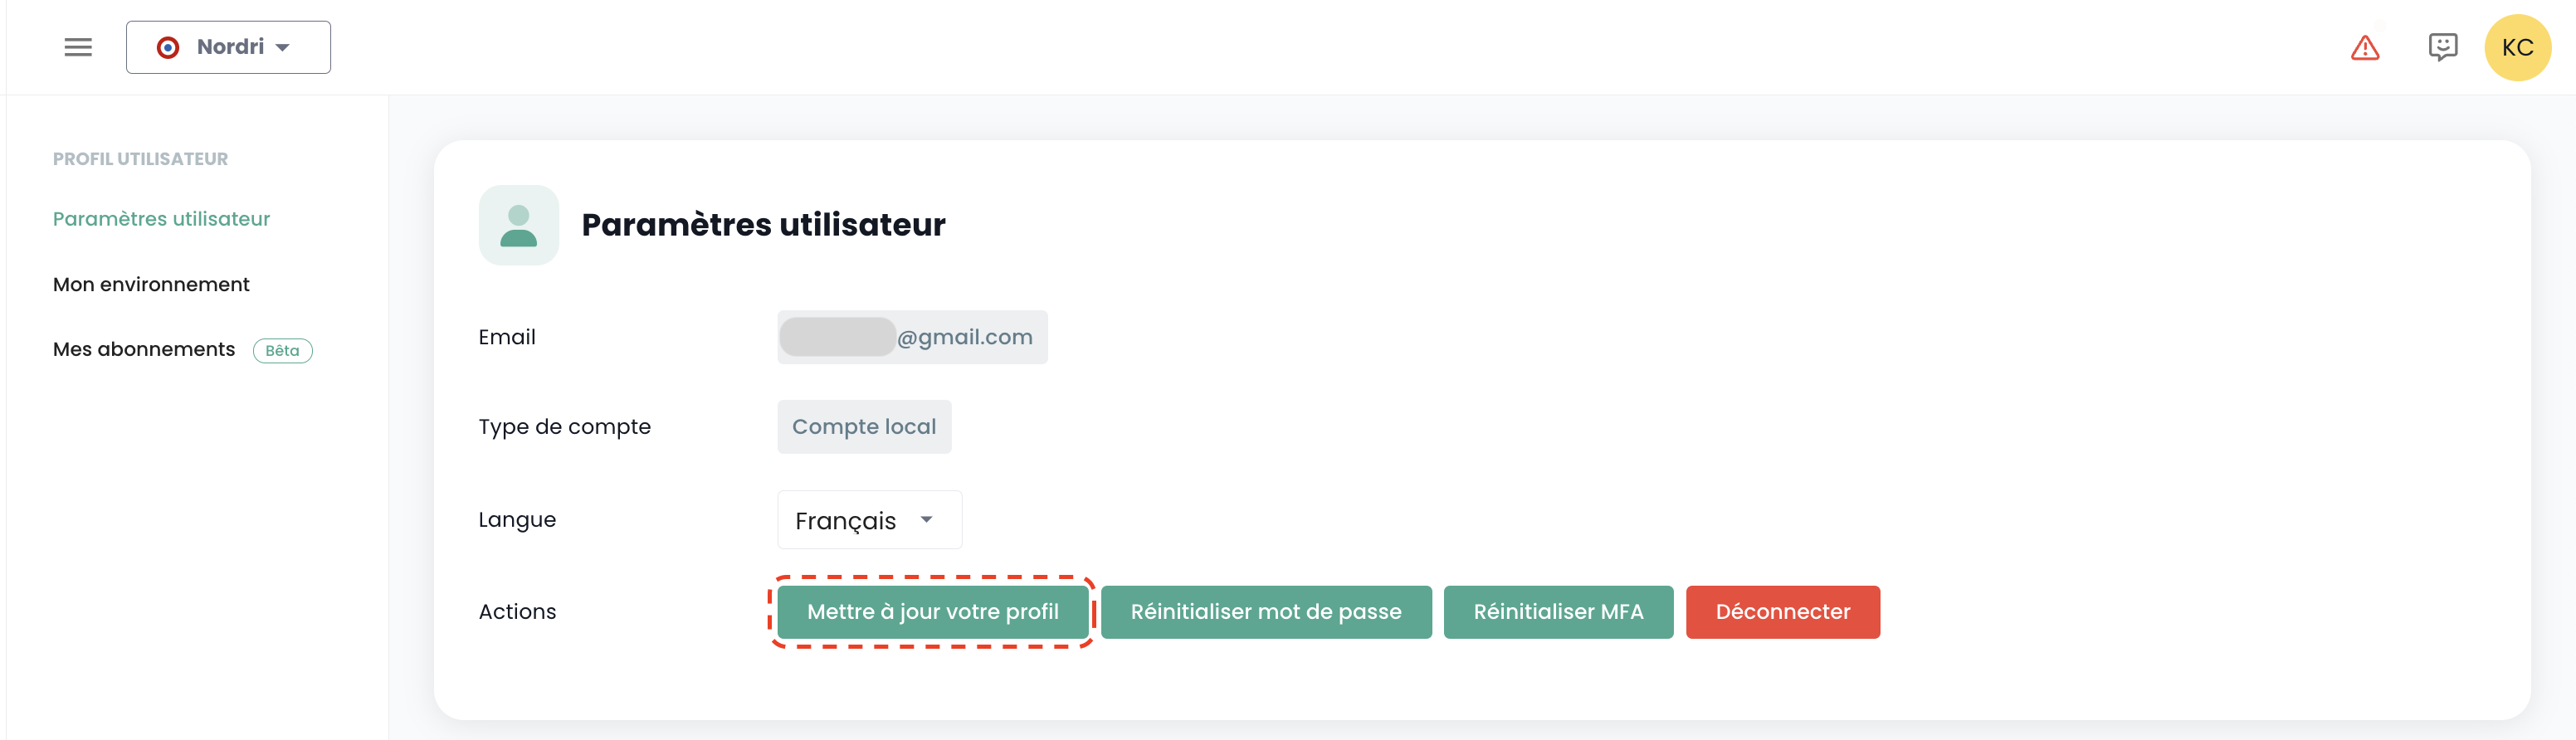
Wählen Sie oben rechts auf dem Bildschirm in Ihrem 'Profil' die Option 'Benutzereinstellungen' und wählen Sie die Aktion 'Profil aktualisieren' aus.
Rufen Sie anschließend Ihr Postfach auf und klicken Sie auf den von der Konsole generierten Link. Folgen Sie einfach den Schritten, um Ihr Profil zu aktualisieren.
Warnung: Stellen Sie sicher, dass Sie die Anfrage zur Profilaktualisierung selbst gestellt haben. Bitte melden Sie alle Anfragen, die nicht von Ihnen stammen, über ein Support-Ticket.
Passwort zurücksetzen
Diese Aktion ist nur für ein lokales Konto (kein SSO) verfügbar.
Wählen Sie in Ihrem 'Profil' oben rechts auf dem Bildschirm und dann 'Benutzereinstellungen' aus, und wählen Sie die Aktion 'Passwort zurücksetzen' aus.
Rufen Sie anschließend Ihre E-Mail-Box auf und klicken Sie auf den von der Konsole generierten Link. Folgen Sie einfach den Schritten, um Ihr Passwort zu aktualisieren.
Warnung: Stellen Sie sicher, dass Sie selbst der Auslöser der Anfrage zum Zurücksetzen Ihres Passworts sind. Bitte melden Sie alle Anfragen, die nicht von Ihnen stammen, über ein Support-Ticket.

Zurücksetzen der Multi-Faktor-Authentifizierung
Diese Aktion ist nur für einen lokalen Benutzeraccount (kein SSO) verfügbar.
Wählen Sie oben rechts auf dem Bildschirm in Ihrem 'Profil' und anschließend 'Benutzereinstellungen' aus, und wählen Sie die Aktion 'MFA zurücksetzen' aus.
Rufen Sie anschließend Ihr E-Mail-Postfach auf und klicken Sie auf den von der Konsole generierten Link. Folgen Sie einfach den Schritten, um Ihre Multi-Faktor-Authentifizierung zu aktualisieren.
Warnung: Stellen Sie sicher, dass Sie die Zurücksetzungsanfrage für Ihre Multi-Faktor-Authentifizierung selbst initiiert haben. Bitte melden Sie alle Anfragen, die nicht von Ihnen stammen, über ein Support-Ticket.

Löschen eines Benutzers
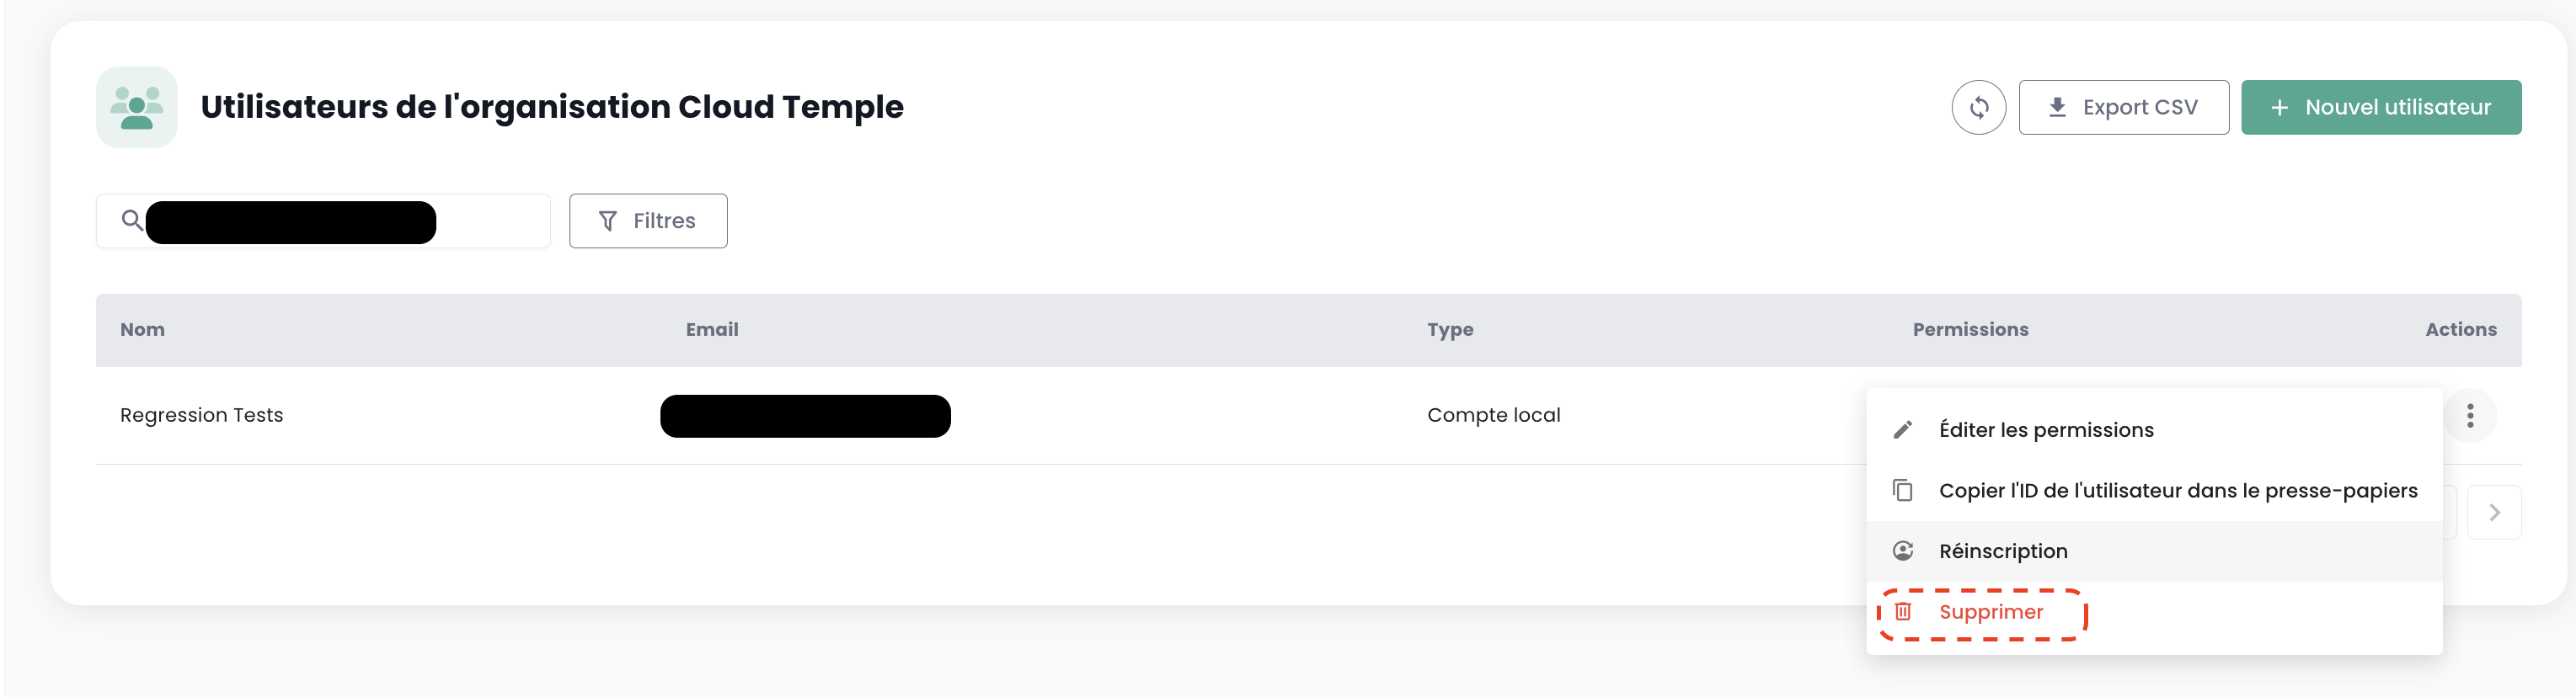
Das Löschen eines Benutzers erfolgt im Reiter 'Benutzer' im Verwaltungsbereich unten links auf dem Bildschirm.
Wählen Sie den zu löschenden Benutzer aus, klicken Sie dann auf die Aktionsschaltfläche am Ende der Zeile und anschließend auf 'Löschen'.
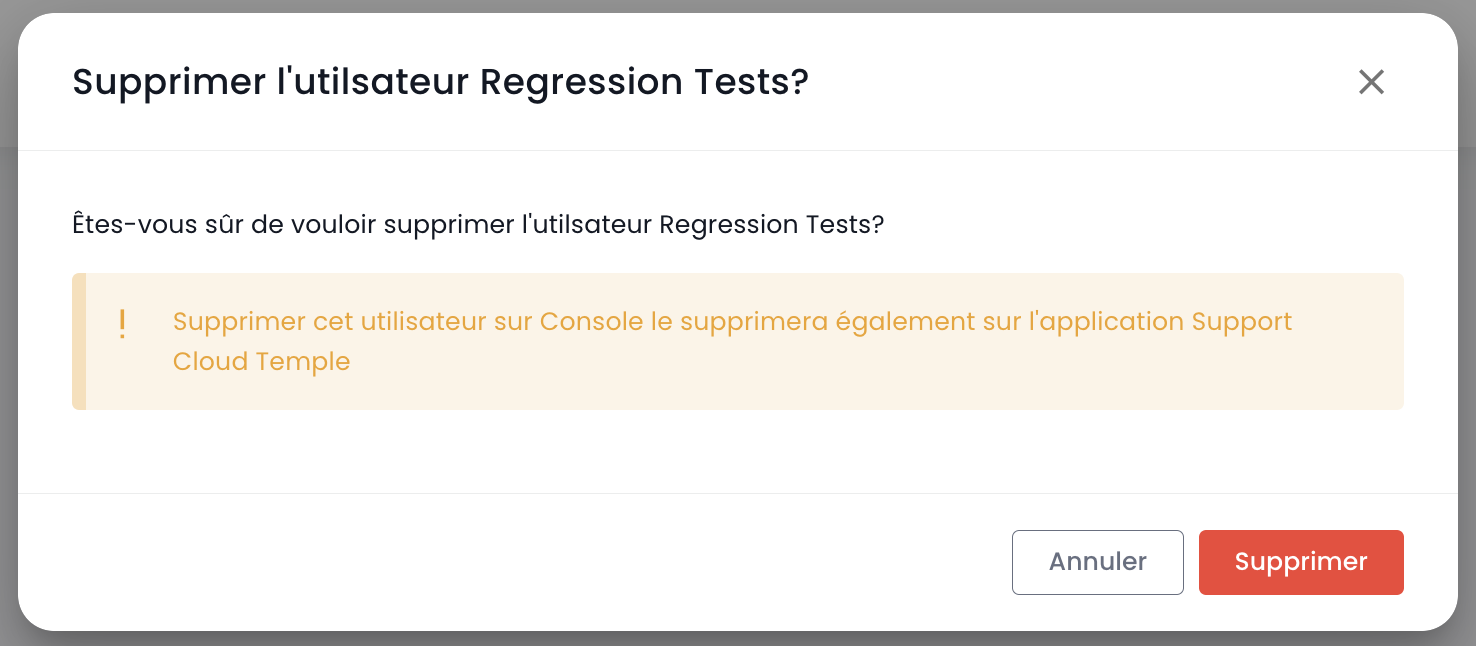
Hinweis: Sie können sich nicht selbst löschen und keinen Benutzer vom Typ 'Besitzer' löschen.
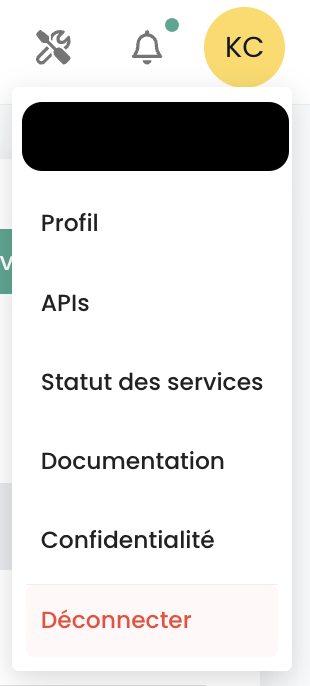
Abmelden
Die Abmeldung eines Benutzers erfolgt in seinem 'Profil' oben rechts auf dem Bildschirm, gefolgt von 'Abmelden'.
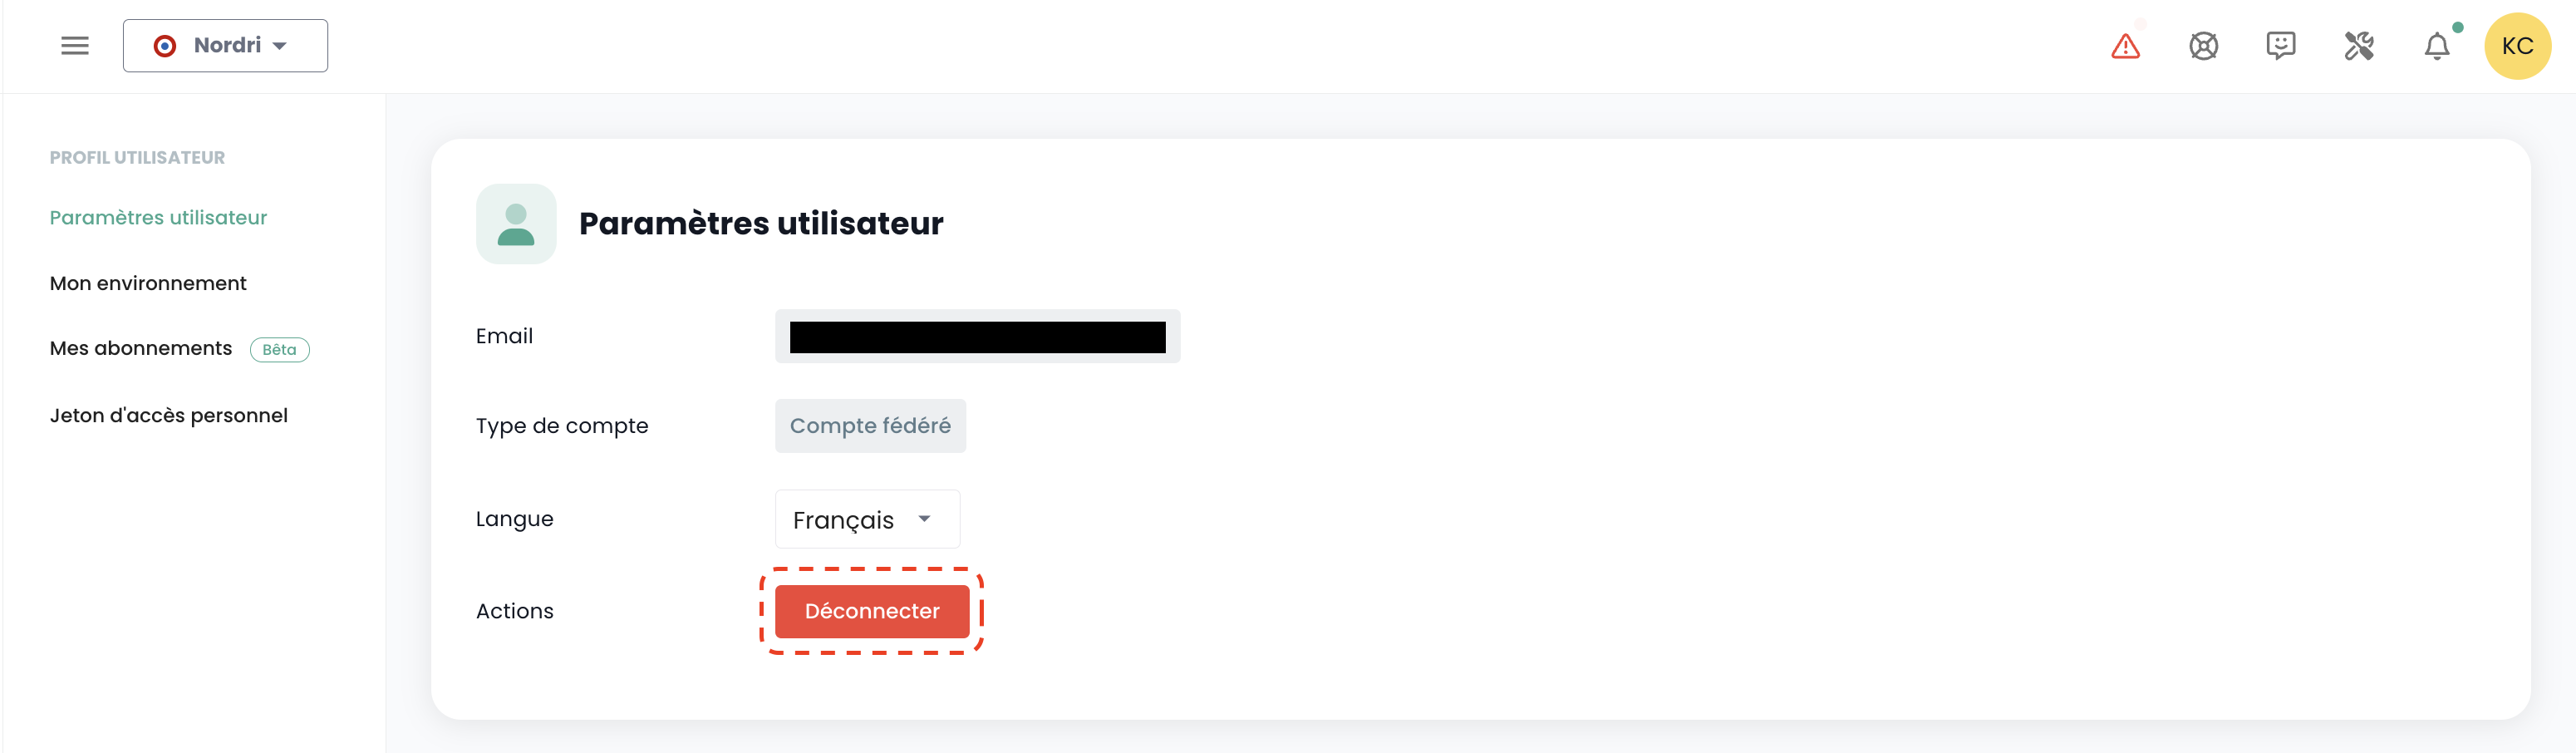
Eine automatische Abmeldung erfolgt bei Ablauf des Sitzungs-JWT-Tokens (JWT Token).
Sprache eines Benutzers ändern
Die Änderung der Sprache eines Benutzers erfolgt in seinem 'Profil', oben rechts auf dem Bildschirm, in den 'Benutzereinstellungen'.
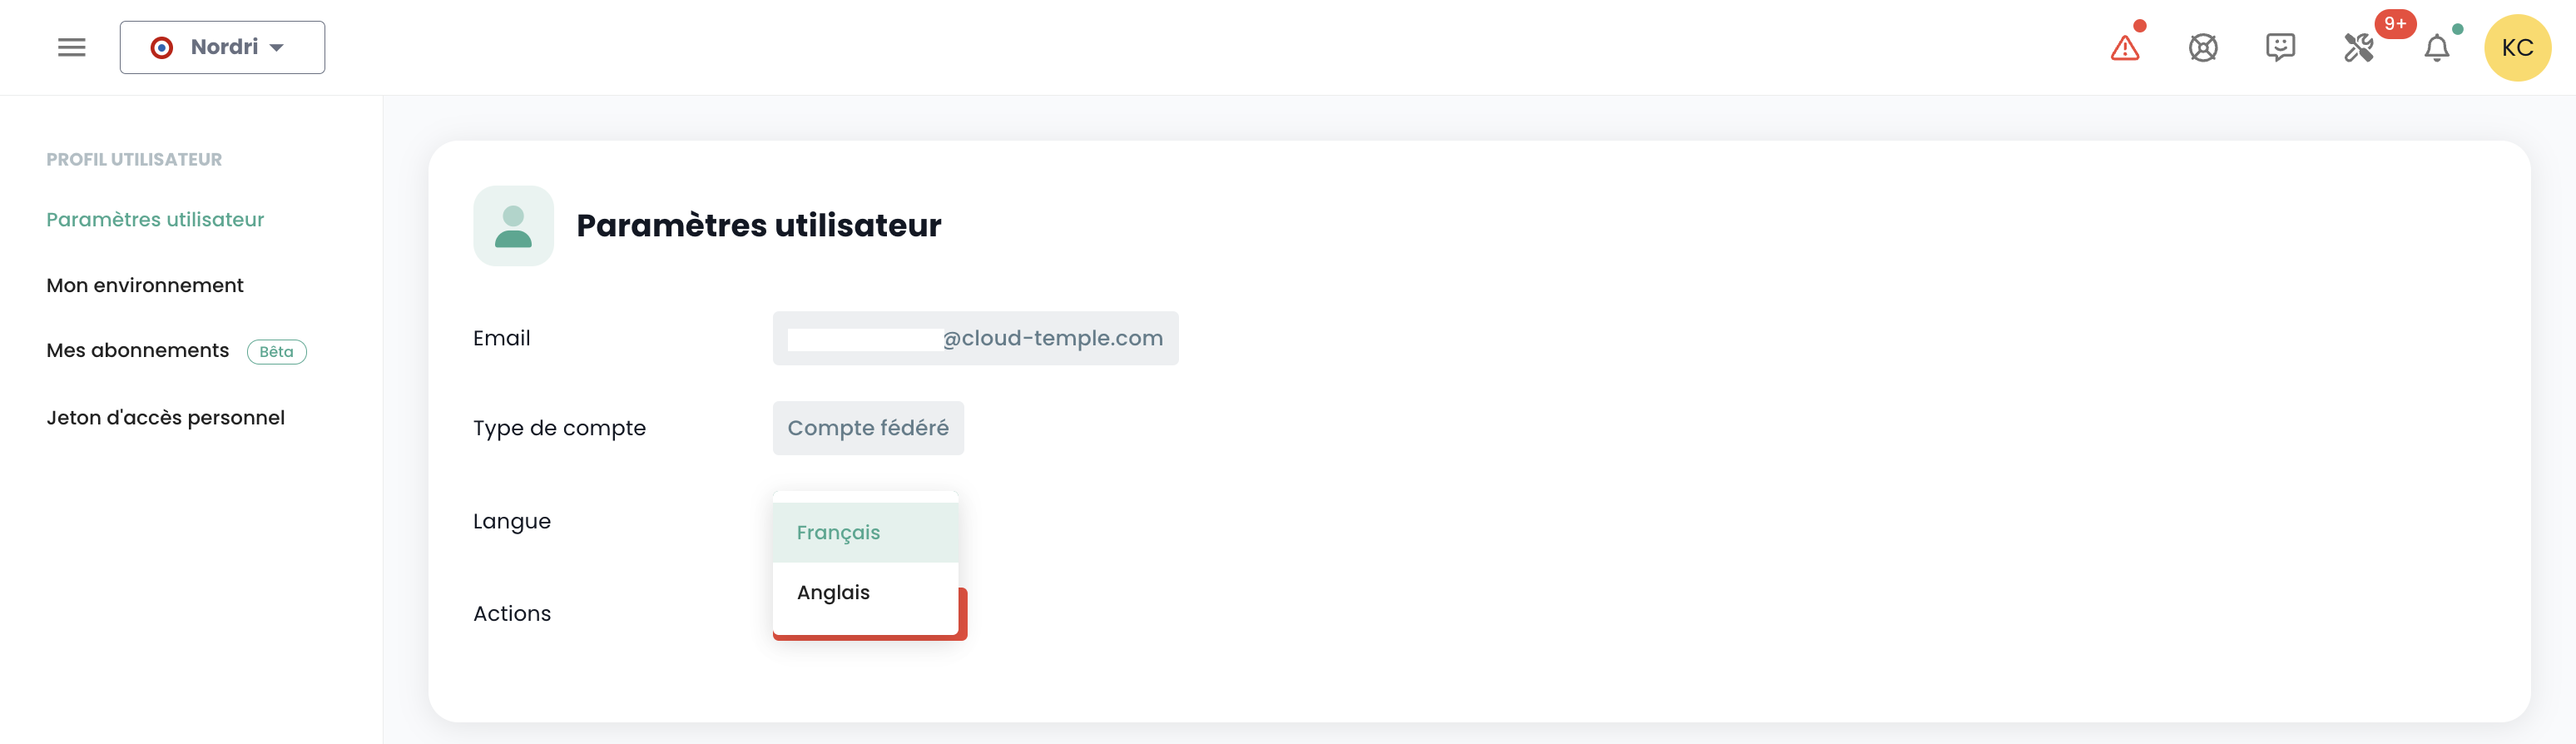
Die Konfiguration erfolgt für jeden Tenant Tenant.
Abonnement für themenspezifische Benachrichtigungen
Die Verwaltung der Abonnements ermöglicht den Empfang von E-Mails zu den aktivierten Themen, die automatisch bei Auftreten entsprechender Ereignisse versendet werden.
Sie ist im Benutzerprofil unter der Registerkarte "Meine Abonnements" verfügbar:
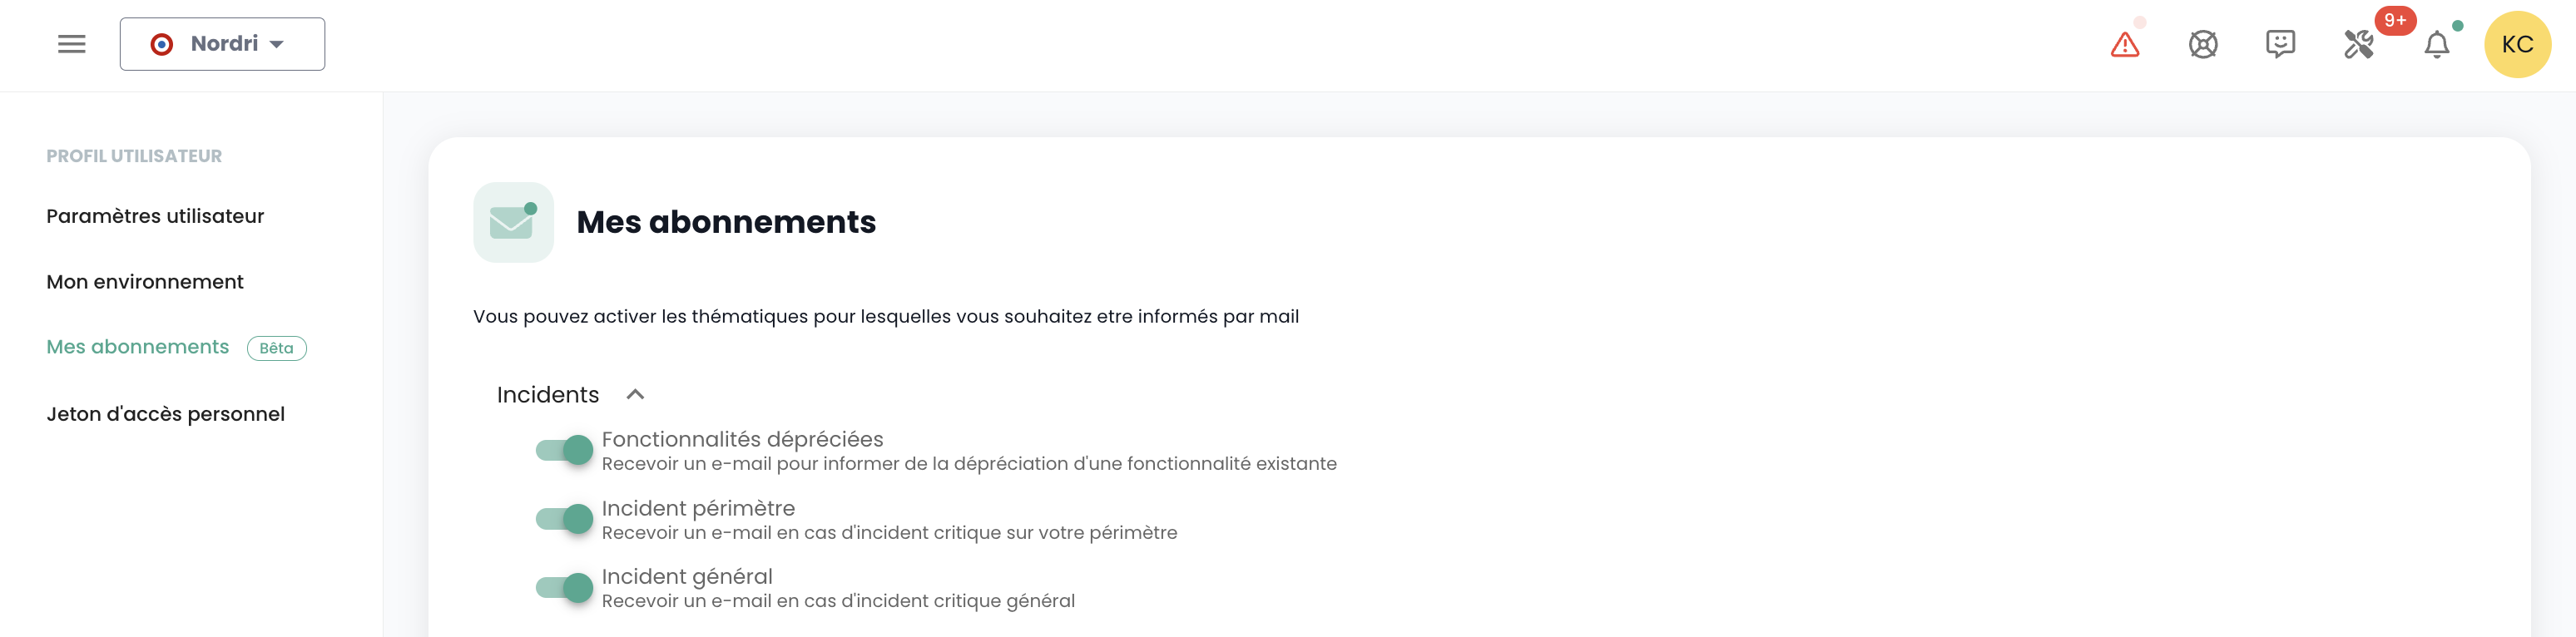
Beispielsweise werden im Falle eines Vorfalls E-Mail-Benachrichtigungen, die diesem Thema zugeordnet sind, generiert.
Die Liste der verfügbaren Themen kann sich entwickeln und schrittweise erweitert werden, um sich an die Anforderungen und Veränderungen in unserem Betriebsumfeld anzupassen.
Berechtigungen
Die Konsole ermöglicht eine feingranulare Rechteverwaltung für die Benutzer einer Organisation mit einer Tenant-Trennung. Anfangs ermöglicht das Hauptkonto des Sponsors die Erstkonfiguration der Konten und der zugehörigen Berechtigungen. Im weiteren Verlauf ermöglicht die Berechtigung 'iam_write' einem Konto, die Berechtigungen anderer Benutzer zu verwalten.
Verfügbare Berechtigungen für Benutzer Ihrer Organisation
Wenn ein Benutzer erstellt wird, hat er standardmäßig keine Berechtigungen. Jede Berechtigung wird einzeln zugewiesen und funktioniert isoliert, ohne Überschneidungen mit anderen Berechtigungen. Sie werden kombiniert angewendet, was bedeutet, dass ein Benutzer über alle erforderlichen Berechtigungen verfügen muss, um eine bestimmte Aktion auszuführen.
Die folgenden Berechtigungen können für jeden Benutzer und für jeden Tenant Ihrer Organisation konfiguriert werden:
-
Berechtigungen vom Typ „read“: Ermöglichen ausschließlich die Anzeige von Ressourcen ohne Änderungsmöglichkeit.
-
Berechtigungen vom Typ „write“: Ermöglichen die Änderung von Konfigurationen.
-
Berechtigungen vom Typ „management“: Ermöglichen das erweiterte Ressourcenmanagement.
-
Berechtigungen vom Typ „console_access“: Ermöglichen PMAD-ähnliche Verbindungen zu Ressourcen.
-
Berechtigungen vom Typ „virtual_machine_power“: Ermöglichen die Stromverwaltung einer virtuellen Maschine.
-
Dies sind Berechtigungen, keine Rollen. In diesem Zusammenhang ist es erforderlich, sowohl die READ- als auch die WRITE-Berechtigung zu besitzen, um eine Konfiguration zu ändern.
Zuletzt aktualisiert am: 20.04.2026
| Berechtigungsname | Beschreibung der Berechtigung |
|---|---|
| activity_read | Anzeige von Protokollen und Aktivitäten |
| activity_write | Verwaltung von Protokollen und Aktivitäten |
| backup_iaas_opensource_read | OpenIaaS-Angebot - Verwaltung von Backup-Ressourcen - consultation |
| backup_iaas_opensource_write | OpenIaaS-Angebot - Verwaltung von Backup-Ressourcen - Änderung |
| backup_iaas_spp_read | VMware-Angebot - Verwaltung von Backup-Ressourcen - Anzeige |
| backup_iaas_spp_write | VMware-Angebot - Verwaltung von Backup-Ressourcen - Änderung |
| bastion_read | Anzeige von Bastion-Ressourcen |
| bastion_write | Verwaltung von Bastion-Ressourcen (Appliances, Sitzungen, ...) de type Bastion |
| bastion_console_access | Berechtigung zum Zugriff auf die Konsole (SSH/RDP) einer durch eine Bastion-Appliance geschützten Ressource |
| compute_iaas_opensource_console_access | OpenIaaS-Angebot - Öffnen der Konsole einer virtuellen Maschine |
| compute_iaas_opensource_infrastructure_read | OpenIaaS-Angebot - Anzeige erweiterter Daten der Xen Orchestra-Ressourcen |
| compute_iaas_opensource_infrastructure_write | OpenIaaS-Angebot - Erweitertes Management der Xen Orchestra-Ressourcen |
| compute_iaas_opensource_read | OpenIaaS-Angebot - Anzeige von Ressourcen vom Typ Virtuelle Maschinen |
| compute_iaas_opensource_management | OpenIaaS-Angebot - Verwaltung von Ressourcen vom Typ Virtuelle Maschinen |
| compute_iaas_opensource_virtual_machine_power | OpenIaaS-Angebot - Stromverwaltung einer virtuellen Maschine |
| compute_iaas_opensource_replication_recover | OpenIaaS-Angebot - Verwaltung der Replikation |
| compute_iaas_vmware_console_access | VMware-Angebot - Öffnen der Konsole einer virtuellen Maschine |
| compute_iaas_vmware_infrastructure_read | VMware-Angebot - Anzeige erweiterter Daten der VMware-Ressourcen (Affinitäts-/Anti-Affinitätsregeln, DRS-Konfiguration, usw.) |
| compute_iaas_vmware_infrastructure_write | VMware-Angebot - Erweitertes Management der VMware-Ressourcen |
| compute_iaas_vmware_read | VMware-Angebot - Anzeige von Ressourcen vom Typ Virtuelle Maschinen |
| compute_iaas_vmware_management | VMware-Angebot - Verwaltung von Ressourcen vom Typ Virtuelle Maschinen (ermöglicht die Verschlüsselung einer virtuellen Maschine) |
| compute_iaas_vmware_virtual_machine_power | VMware-Angebot - Stromverwaltung einer virtuellen Maschine |
| baremetal_management | Bare-Metal-Angebot - Verwaltung von Bare-Metal-Ressourcen |
| baremetal_read | Bare-Metal-Angebot - Anzeige von Bare-Metal-Ressourcen |
| baremetal_console_access | Bare-Metal-Angebot - Öffnen der Konsole eines Bare-Metal-Systems |
| console_public_access_read | Anzeige der für den Konsolenzugriff zugelassenen IPs |
| console_public_access_write | Hinzufügen von IPs für den Konsolenzugriff |
| documentation_read | Anzeige von Confluence-Dokumentationsressourcen |
| housing_read | Anzeige von Colocation-Ressourcen |
| iam_offline_access | Erstellung und Löschung persönlicher Zugriffstoken (PAT) |
| iam_read | Anzeige von Benutzerrechten |
| iam_write | Verwaltung von Benutzerrechten |
| intervention_read | Anzeige von geplanten Änderungen und Produktivsetzungen auf der Plattform |
| inventory_read | Anzeige von Inventar-Ressourcen |
| inventory_write | Verwaltung von Inventar-Ressourcen |
| monitoring_read | Anzeige des Monitorings |
| monitoring_write | Verwaltung des Monitorings |
| metric_read | Anzeige von Gesundheitsdaten zu virtuellen Maschinen und Hosts |
| network_read | Anzeige von Netzwerkressourcen |
| network_write | Verwaltung von Netzwerkressourcen |
| order_read | Anzeige von Infrastrukturbestellungen |
| order_write | Erstellung von Infrastrukturbestellungen |
| object-storage_iam_management | Ermöglicht die Verwaltung von Speicherkonten im S3-Produkt |
| object-storage_read | Ermöglicht das Anzeigen von Buckets und deren Konfigurationen |
| object-storage_write | Ermöglicht das Bearbeiten von Buckets und deren Konfigurationen |
| openshift_management | Ermöglicht die Anmeldung auf OpenShift-Plattformen (auf den Tenant beschränkt) |
| support_management | Anzeige aller Support-Tickets des Tenants |
| support_read | Anzeige der eigenen Support-Tickets des Tenants |
| support_write | Erstellung eines Support-Tickets für den Tenant |
| tag_read | Anzeige von Tags, außer RTMS-Tags |
| tag_write | Verwaltung von Tags, außer RTMS-Tags |
| ticket_comment_read | Anzeige von Kommentaren |
| ticket_comment_write | Verwaltung von Kommentaren |
| ticket_read | Anzeige von Tickets |
| ticket_write | Verwaltung von Tickets |
| incident_management | Verwaltung von Incidents |
| incident_read | Anzeige von Incidents |
| billing_read | Anzeige von Verbrauchsdashboards |
| vpc_read | VPC-Angebot - Anzeige von Netzwerkressourcen vom Typ VPC |
| vpc_write | VPC-Angebot - Verwaltung von Netzwerkressourcen vom Typ VPC |
| public_cloud_vm_instances_management | VM-Instances-Angebot - Verwaltung von virtuellen Maschinen |
| public_cloud_vm_instances_read | VM-Instances-Angebot - Anzeige von virtuellen Maschinen |
| public_cloud_vm_instances_console_access | VM-Instances-Angebot - Öffnen der Konsole von virtuellen Maschinen |
Organisationen
Die Organisation ist mit Ihrem Sponsorkonto und dem zugehörigen Cloud-Temple-Vertrag verknüpft. Sie repräsentiert Ihre Entität (Unternehmen, Abteilung, Team, ...), die die Vertragsbeziehung zwischen Cloud Temple und Ihnen vertritt.
Prinzip einer Organisation
Die Organisation erfüllt vier zentrale Rollen:
- Sie fungiert als vertragliche Entität für die Aspekte der Nachverfolgung und Abrechnung,
- Sie definiert die globale Konfiguration des Authentifizierungsmechanismus: Die Authentifizierung kann lokal auf Konsolenebene oder remote über einen Identitätsföderationsdienst erfolgen,
- Sie verwaltet alle Benutzerkonten,
- Sie bündelt die Tenants (Production, Préproduction, Dev, Application 1, Application 2, ...), die Sie für die Anforderungen Ihrer Cloud-Architektur definieren.
Die Rollen (droits/permissions) der Benutzer sind für jeden in Ihrer Organisation definierten Tenant konfigurierbar. Ein Konto kann beispielsweise autorisiert sein, Ressourcen in einem Tenant zu bestellen, in einem anderen jedoch nicht.
Authentifizierungsmechanismen
Auf Organisationsebene ermöglicht die Konsole die Konfiguration des Authentifizierungsmechanismus. Sie können das lokale Authentifizierungs-Repository der Konsole verwenden oder Ihre Organisation mit einem Ihrer Authentifizierungs-Repositories anbinden.
Folgende externe Repositories werden unterstützt:
- OpenID Connect-kompatible Repositories,
- SAML-kompatible Repositories,
- Microsoft ADFS
- Microsoft EntraID (Microsoft Azure Active Directory)
- Amazon AWS Cognito
- Okta
- Auth0
- KeyCloak
Für alle Konten aus einer Identitätsföderation ist eine E-Mail-Adresse erforderlich. Konten, die ohne E-Mail-Adresse erstellt wurden, können sich nicht anmelden und werden möglicherweise automatisch gelöscht.
Tenant
Der Tenant ist eine Gruppierung von Ressourcen innerhalb einer Organisation. Eine Organisation verfügt über mindestens einen Tenant (als Standardtenant bezeichnet, der umbenannt werden kann). In der Regel werden mehrere Tenants verwendet, um Zuständigkeiten oder technische Umfangsbereiche zu segmentieren.
Beispiel:
- Ein Tenant Produktion
- Ein Tenant Vorproduktion
- Ein Tenant Test
- Ein Tenant Qualifikation
Es ist jedoch auch möglich, die Struktur nach einer Anwendungssicht oder nach Kritizität zu organisieren:
- Ein Tenant Anwendung 1 oder Kritizität 1
- Ein Tenant Anwendung 2 oder Kritizität 2
- ...
Die bestellten technischen Ressourcen werden einem bestimmten Tenant zugewiesen und nicht mit anderen Tenants geteilt. Ein Hypervisor-Cluster und die zugehörigen L2-Netzwerke sind beispielsweise nur in einem Tenant verfügbar. Bei Netzwerken ist es möglich, 'tenantübergreifende' Netzwerke anzufordern, um die Netzwerkkontinuität zwischen den Tenants sicherzustellen.
Die Berechtigungen der Benutzer sind in jedem Tenant festzulegen. Daher muss jede Organisation die gewünschten Tenants sorgfältig planen. Dieser Punkt wird in der Regel im Initialisierungsworkshop zum Zeitpunkt der Erstellung der Organisation behandelt.
Die Architektur kann durch Hinzufügen oder Entfernen von Tenants erweitert werden.
Ein Tenant darf nicht leer sein. Er muss zwingend mit mindestens einer Ressource initialisiert werden:
- Eine Verfügbarkeitszone (AZ, soit un datacenter physique),
- Ein Rechencluster,
- Ein Speicherbereich,
- Ein VLAN-Netzwerk.
| Bestellreferenz | Einheit | SKU |
|---|---|---|
| TENANT - (REGION) - Aktivierung eines Tenants | 1 Tenant | csp:tenant:v1 |
| TENANT - (REGION) - Aktivierung einer Verfügbarkeitszone | 1 Tenant | csp:(region):iaas:az:v1 |
Verwaltung der Eigentümer auf einem Tenant
Jeder Tenant verfügt über mindestens einen Eigentümer, um so eine klare Verantwortung und ein effizientes Ressourcenmanagement zu gewährleisten. Darüber hinaus können mehrere Eigentümer für denselben Tenant angegeben werden, was eine Zusammenarbeit und eine gemeinsame Entscheidungsfindung ermöglicht. Nachfolgend finden Sie wichtige Informationen, die bei der Verwaltung dieser Eigentümer zu beachten sind.
Wichtige Informationen zur Verwaltung der Eigentümer
1. Anzahl der Eigentümer
-
Es besteht keine technische Begrenzung für die Anzahl der Eigentümer, die auf dem Tenant definiert werden können.
-
Die Verwaltungsoberfläche (IHM) zeigt eine Warnung an, wenn mehr als 3 Eigentümer vorhanden sind, um dazu anzuregen, die Anzahl der Eigentümer aus Sicherheitsgründen und für ein optimales Zugriffsmanagement zu begrenzen.
2. Hinzufügen eines neuen Besitzers
-
Beim Hinzufügen eines neuen Besitzers kann die Aktualisierung seiner Berechtigungen eine Verzögerung von bis zu 60 Minuten erfordern.
-
Diese Propagationszeit ist normal und stellt sicher, dass die Zugriffsrechte auf alle zugehörigen Dienste und Ressourcen korrekt angewendet werden.
2. Berechtigungen eines Besitzers
-
Einem Besitzer werden alle Berechtigungen zugewiesen, die mit den auf seinem Tenant aktivierten Produkten verknüpft sind.
-
Es ist nicht möglich, die Berechtigungen eines Besitzers zu ändern.
3. Entfernen eines Eigentümers
-
Um einen Eigentümer aus dem Tenant zu entfernen, muss der Benutzer eine Anfrage an den Support stellen.
-
Dieses Verfahren stellt sicher, dass Änderungen an den Zugriffsrechten auf sichere Weise und gemäß den bewährten Verfahren für das Zugriffsmanagement durchgeführt werden.
Zugriffsberechtigung für einen Tenant: Zugelassene IPs
Der Zugriff auf die Cloud-Management-Konsole ist streng auf zuvor autorisierte IP-Adressen beschränkt, um den Anforderungen der SecNumCloud-Zertifizierung zu entsprechen. Diese Einschränkung gewährleistet ein erhöhtes Sicherheitsniveau, indem der Zugriff nur auf Benutzer aus angegebenen IP-Bereichen ermöglicht wird, wodurch das Risiko unbefugten Zugriffs minimiert und die Cloud-Infrastruktur nach den höchsten Sicherheitsstandards geschützt wird.
Hinweis: Das Entfernen einer zugelassenen IP-Adresse erfolgt über eine Supportanfrage in der Cloud-Temple-Konsole.
Ressourcenverbrauch innerhalb eines Tenants
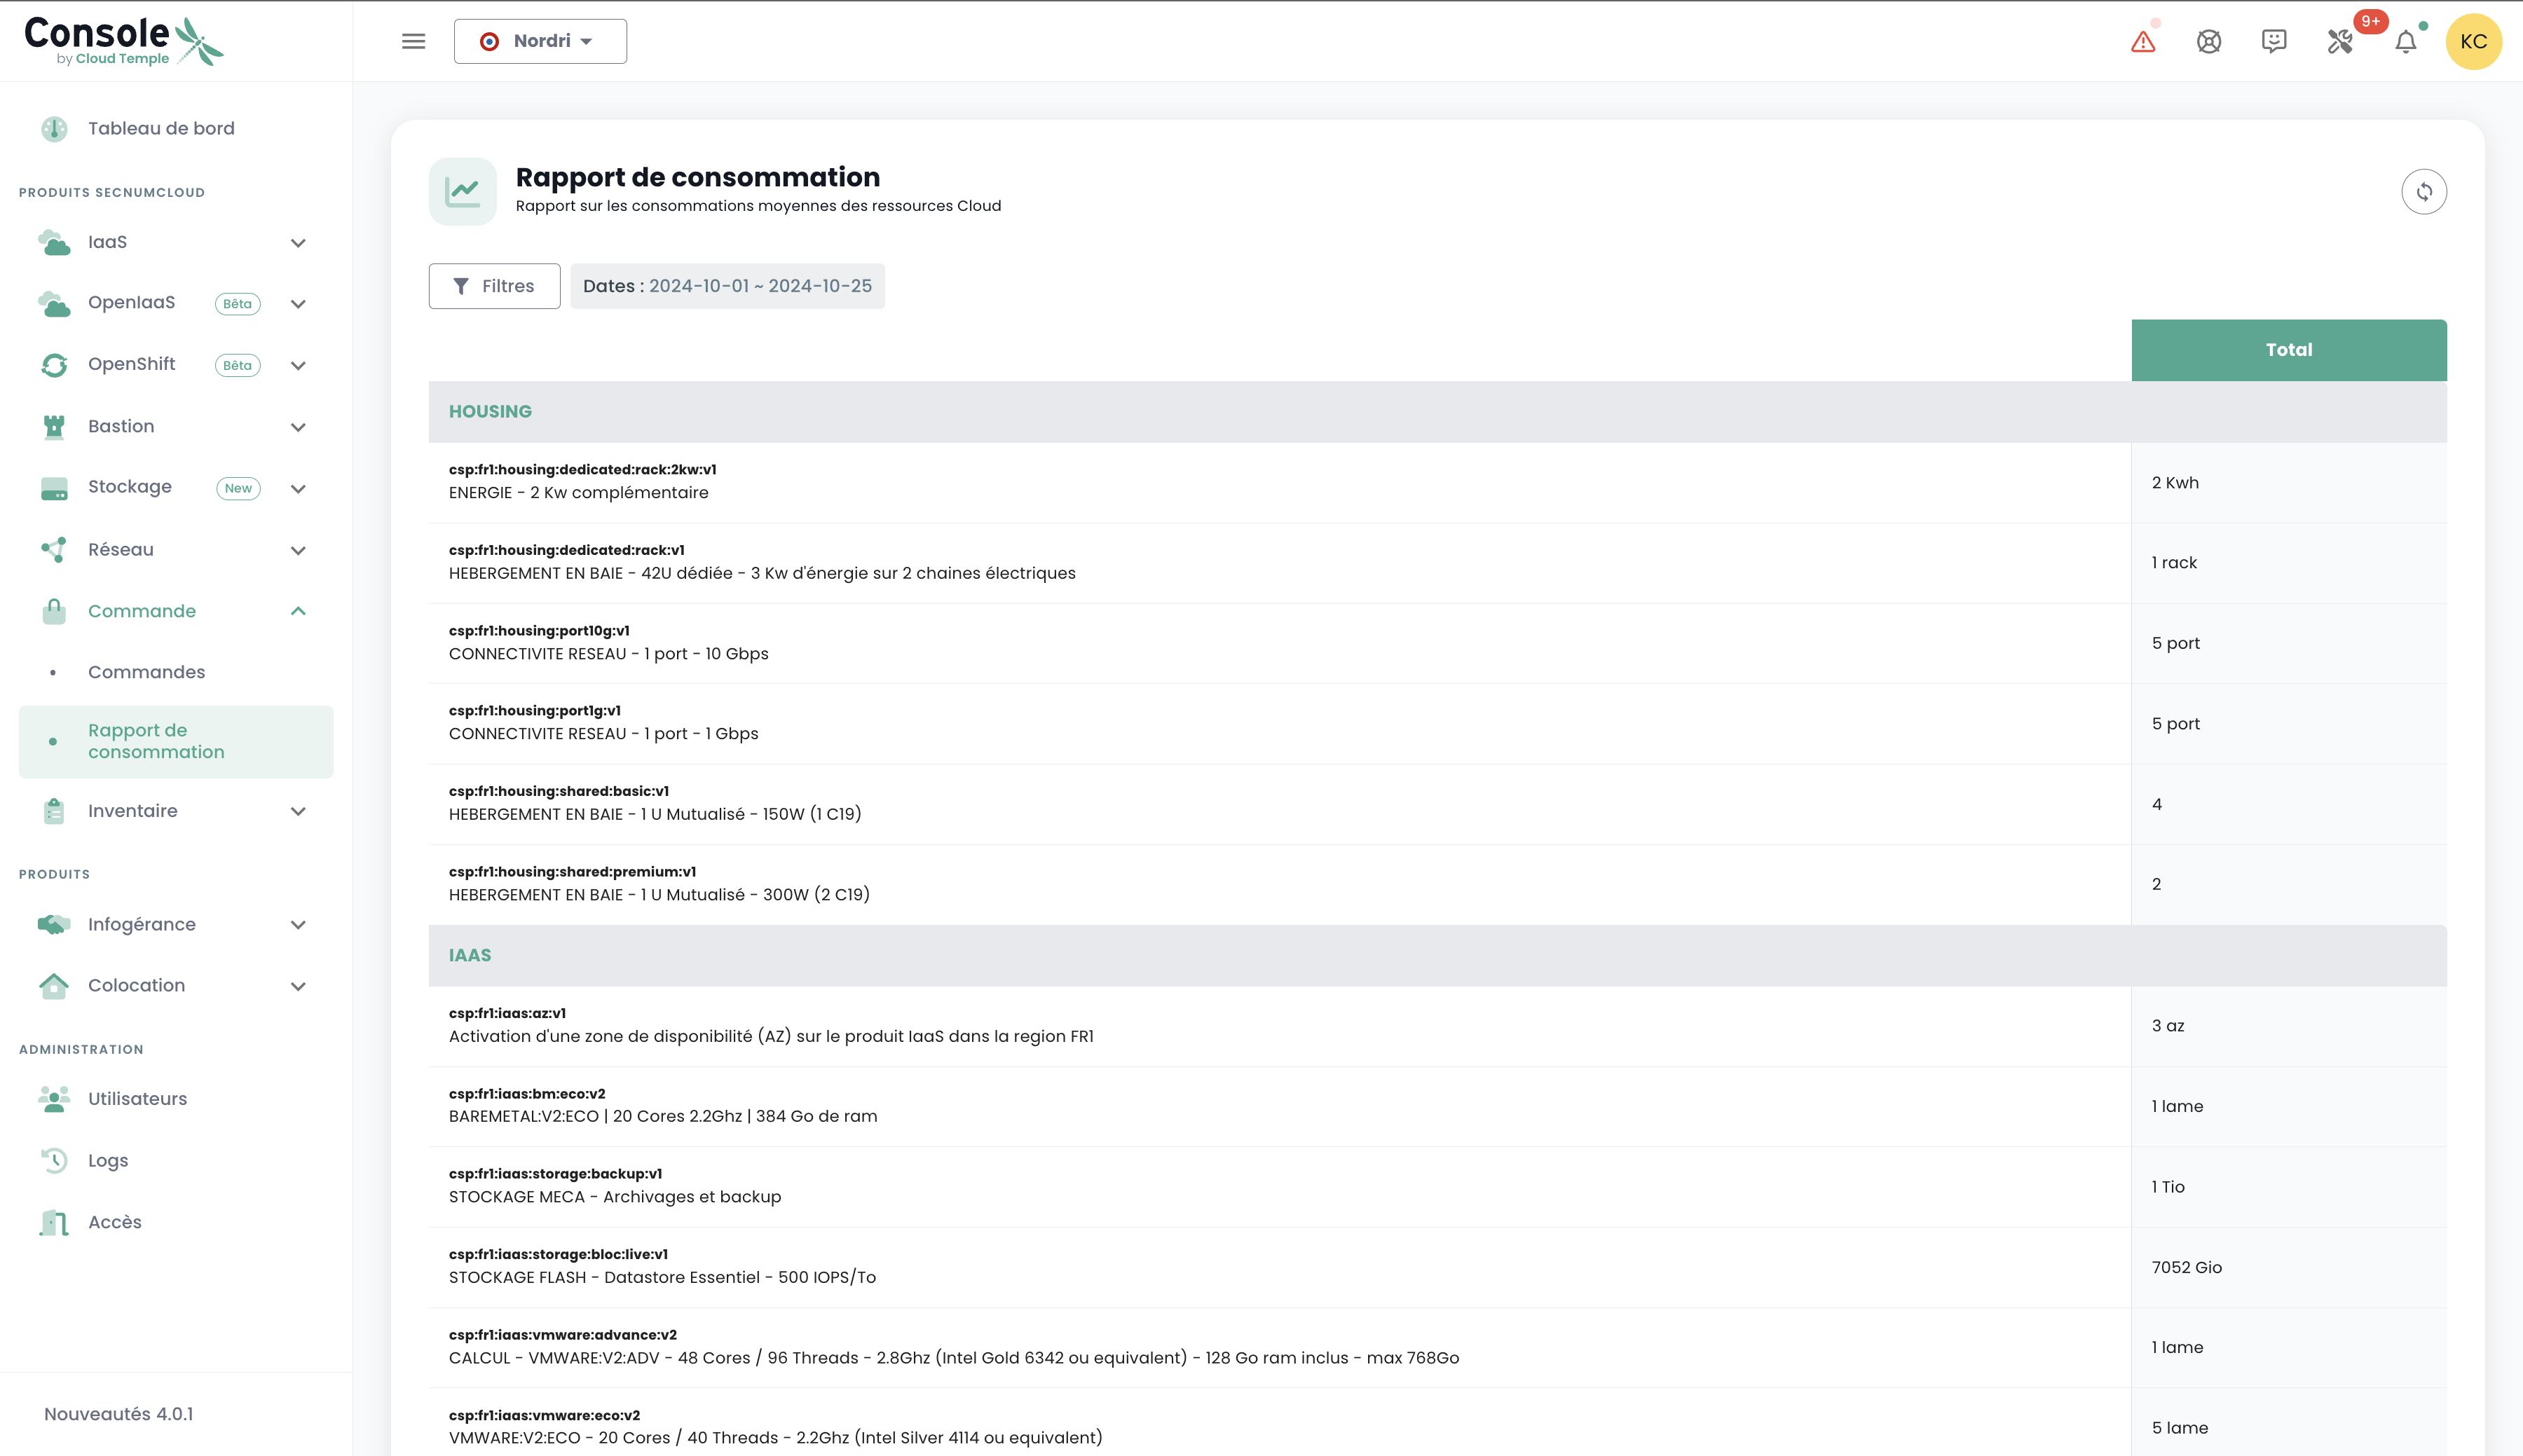
Es können die innerhalb eines Tenants verbrauchten Cloud-Ressourcen eingesehen werden, was eine detaillierte Übersicht über die Nutzung der bereitgestellten Dienste bietet. Diese Funktion ermöglicht es Benutzern, den Ressourcenverbrauch in Echtzeit zu verfolgen, die am stärksten ausgelasteten Dienste zu identifizieren und die Nutzung bedarfsgerecht zu optimieren.
Klicken Sie im Konsolenmenü auf "Verbrauchsbericht" und wählen Sie den gewünschten Zeitraum aus. Sie können so den Verbrauch der Cloud-Ressourcen im festgelegten Zeitraum detailliert einsehen, was Ihnen die Analyse der Dienstnutzung und die daraus folgende Optimierung Ihrer Verwaltung ermöglicht: